How to Crochet a Granny Square Bucket Hat with an Easy Pattern
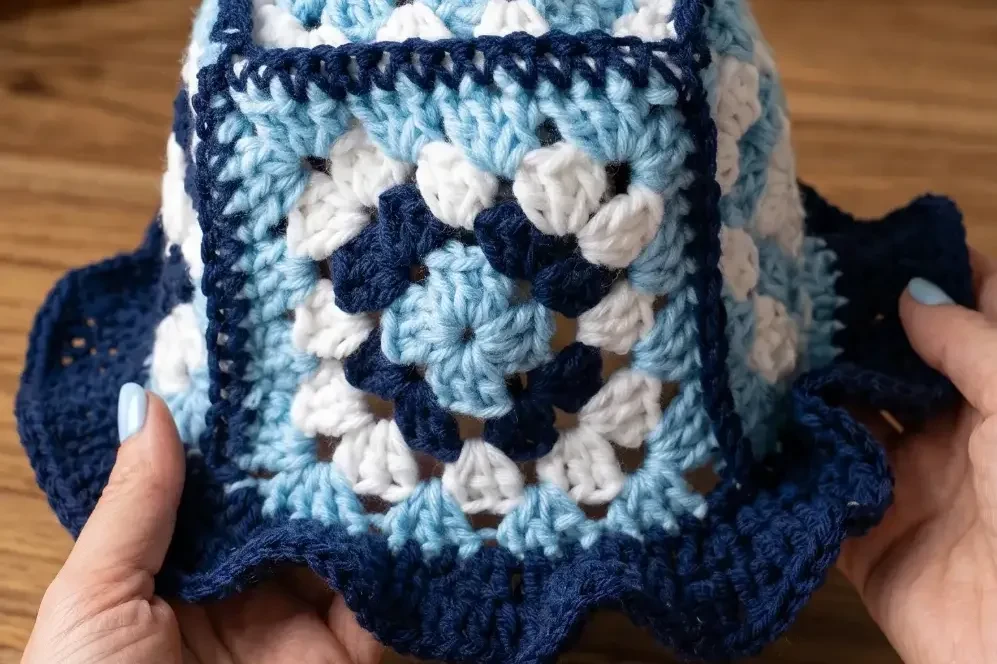
If you’ve ever wanted to turn a few simple granny squares into a wearable, eye-catching accessory, this tutorial is for you. This crochet granny square bucket hat is beginner-friendly, endlessly customizable, and comes together faster than you might expect.
The finished hat features four granny squares forming the sides, one square on top, and a gorgeous swirly dimensional brim worked in half double crochet. The result is a fun, textured bucket hat that looks great in any color combination you choose.
Let’s get into it.
What You’ll Need
Before you start crocheting, gather everything you need so the process flows smoothly.
Hook and Yarn
You’ll need a 5.5 mm crochet hook and acrylic yarn in three colors. The tutorial uses dark blue, light blue, and white, but feel free to use any palette that suits your style. Acrylic is a great choice here because it holds its shape well and comes in a huge range of colors.
Other Supplies
Keep a pair of scissors and a tapestry needle nearby for weaving in ends as you go.
How to Make the Granny Squares
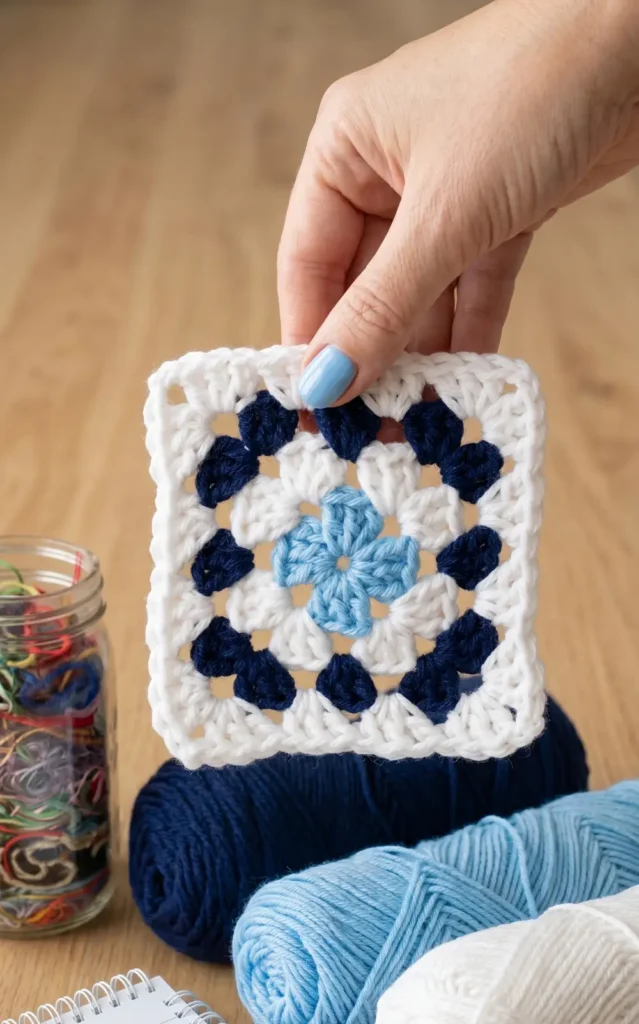
The entire hat is built from five granny squares. Four of them form the sides of the hat, and the fifth becomes the top. Each square is worked in four rows.
Take your time with the squares. Consistent tension across all five will make assembling the hat much easier.
Row 1: Building the Foundation
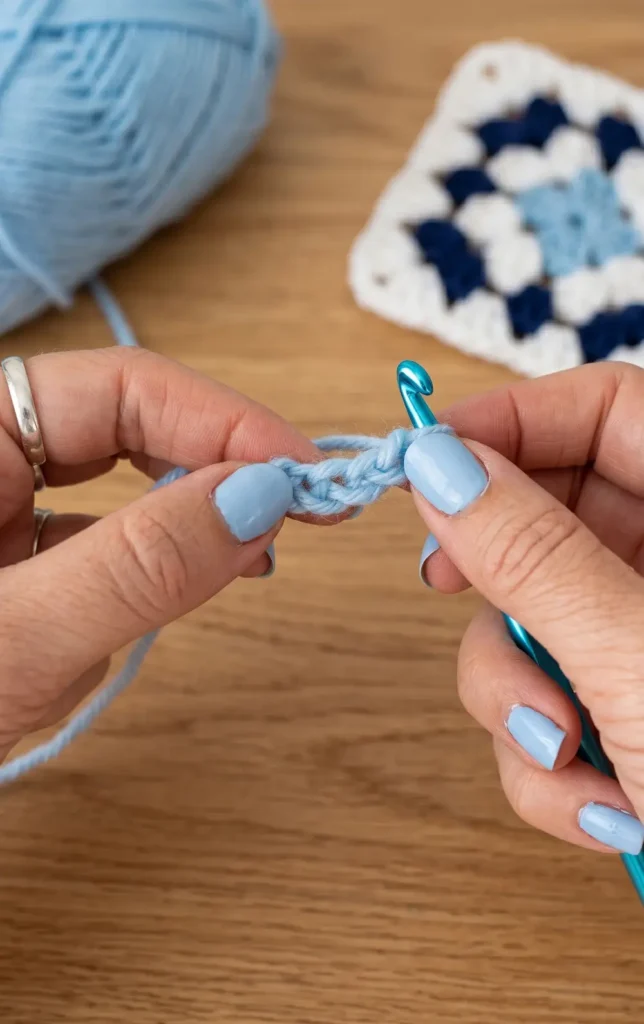
Start with a slip knot and chain four. Slip stitch into the first chain to form a small ring. This ring is the center of your granny square.
Chain two. This counts as your first double crochet. Work two more double crochets into the center of the ring to complete the first cluster. Chain two, then work three more double crochets into the ring. Continue repeating this pattern until you have four clusters of three double crochets, each separated by a chain-two space.
Slip stitch to the first chain space, chain one, then cut your yarn and fasten off.
Row 2: Adding the Second Color
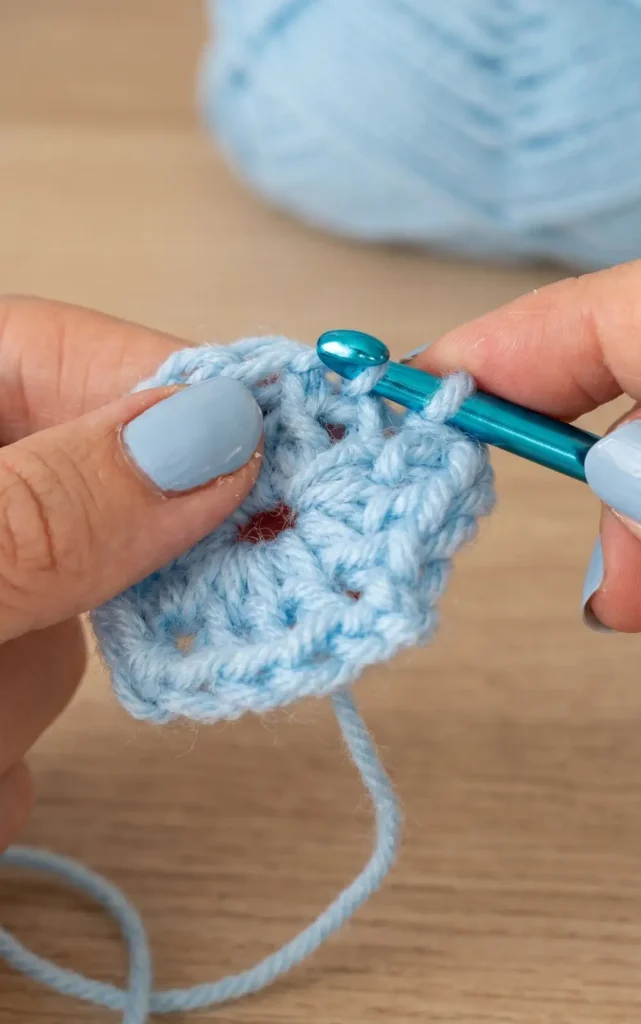
Join your second color into any chain-two corner space. Chain two and work two double crochets into that same space. Then chain two and work three more double crochets into the same corner. This creates the classic granny square corner.
For every remaining corner, work three double crochets, chain two, and three more double crochets. Do not add any chains when transitioning between corners.
Finish the round with a slip stitch and fasten off.
Row 3: Growing the Square
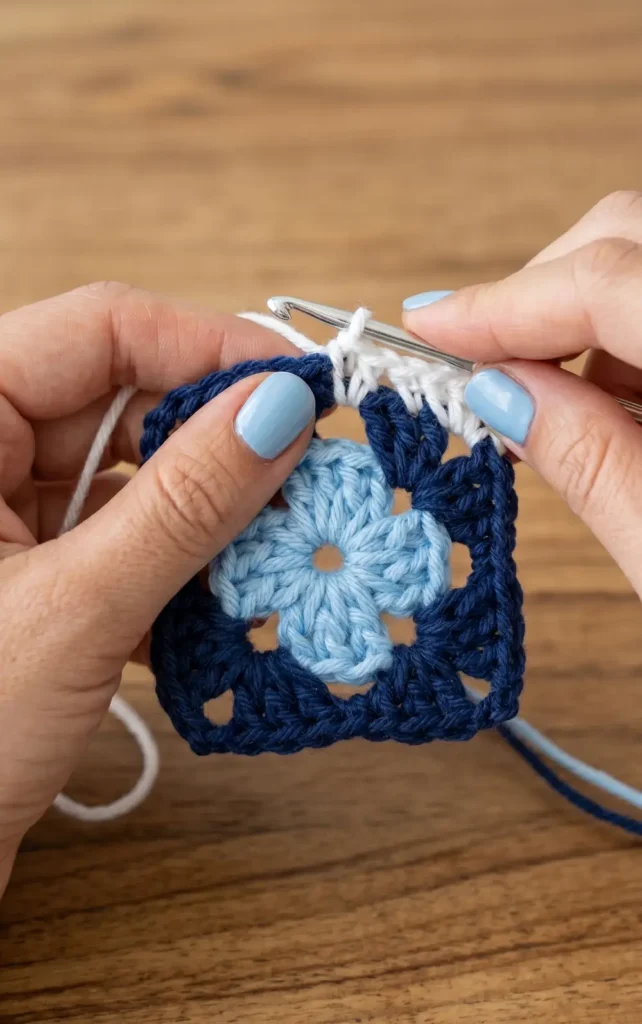
Join your third color in a corner space. Repeat the corner pattern: chain two (for the first cluster only), three double crochets, chain two, three double crochets.
In the side spaces between corners, work a cluster of three double crochets with no chains before or after it.
Continue this all the way around, slip stitch to close, and fasten off.
Row 4: Finishing the Square
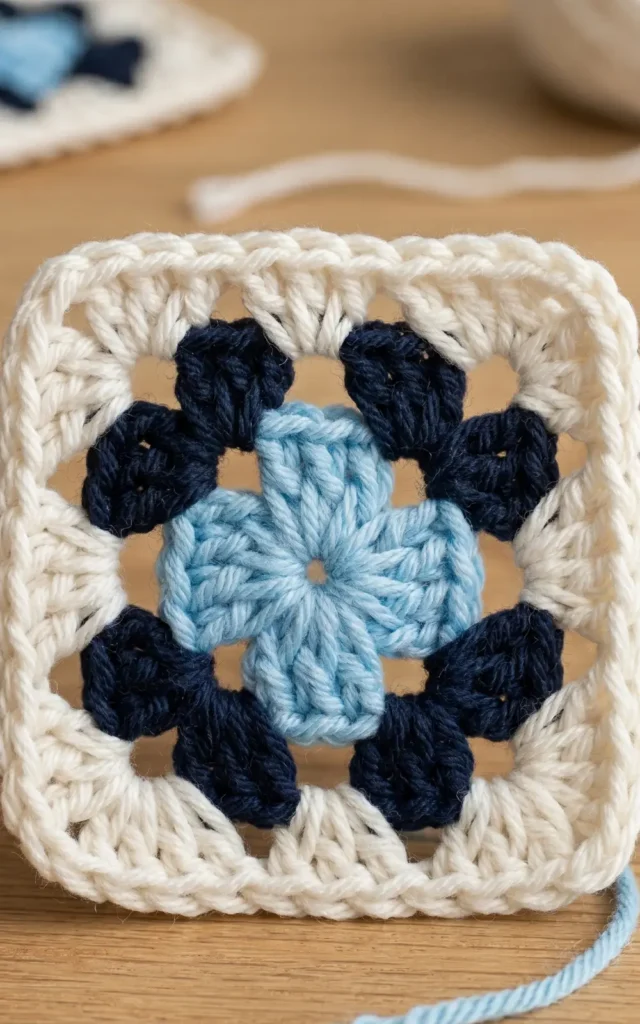
Using your preferred color, repeat the same process from Row 3. Because the square is now larger, you’ll have two middle spaces on each side. Fill each of those spaces with a cluster of three double crochets.
Once you finish the round, weave in all your ends neatly. This will save you time during assembly and give your finished hat a clean look.
Repeat this entire process four more times until you have five completed squares total.
Assembling the Hat
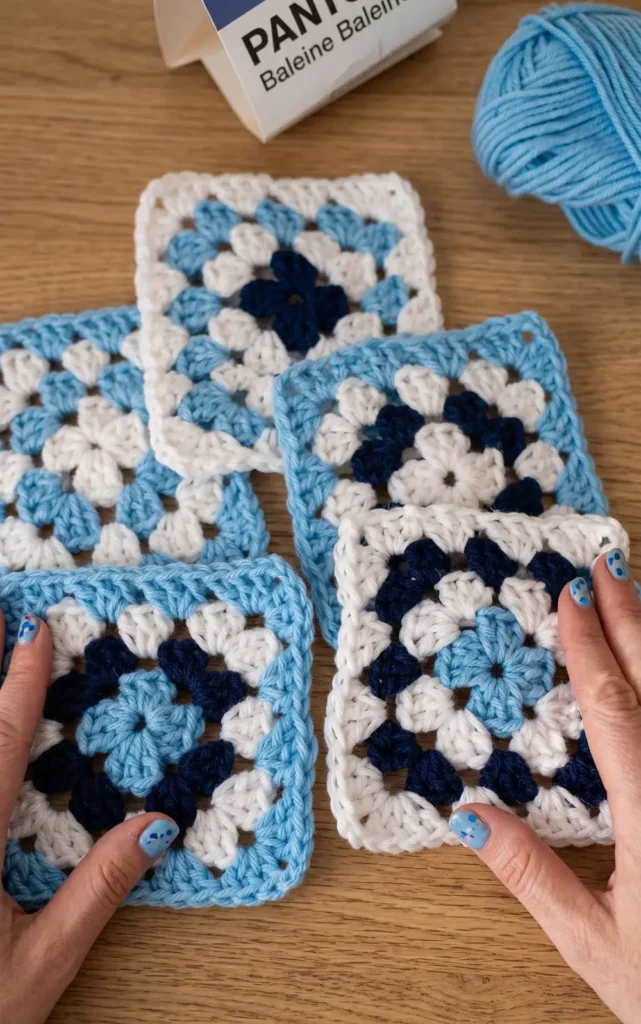
Once all five squares are finished, it’s time to join them together into a hat shape.
Step 1: Join the Side Squares
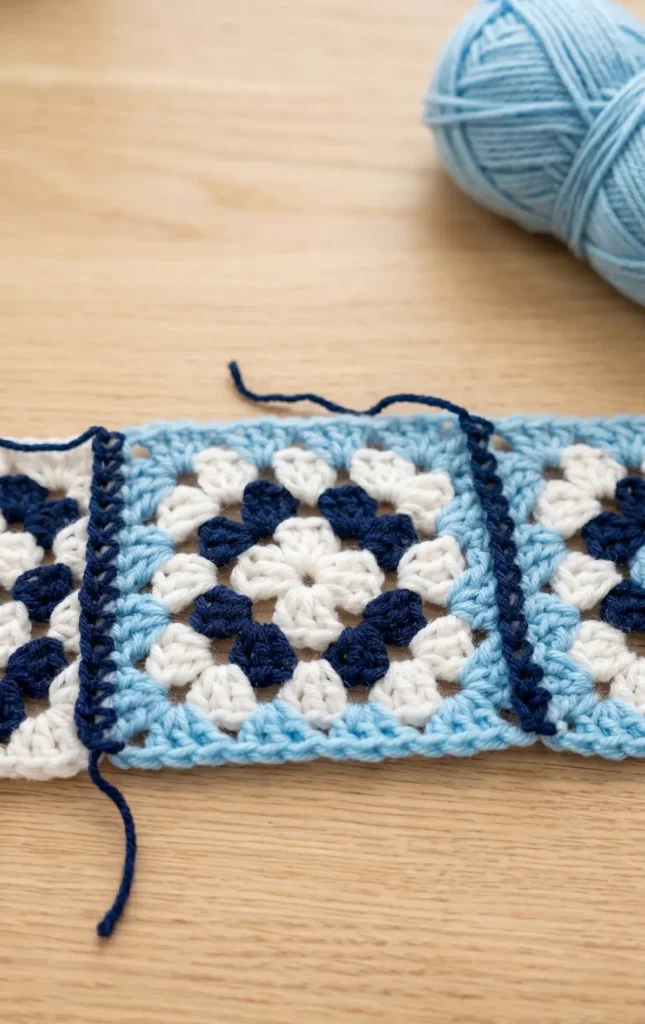
Take two squares and hold them with their right sides facing outward. Using single crochet, join the edges together along one side. Work your stitches tight and neat because this seam will be visible on the outside of the hat.
Continue joining the remaining side squares in the same way until all four are connected in a circular headband shape. Make sure the seams align and the squares sit flat against each other before moving on.
Step 2: Attach the Top Square
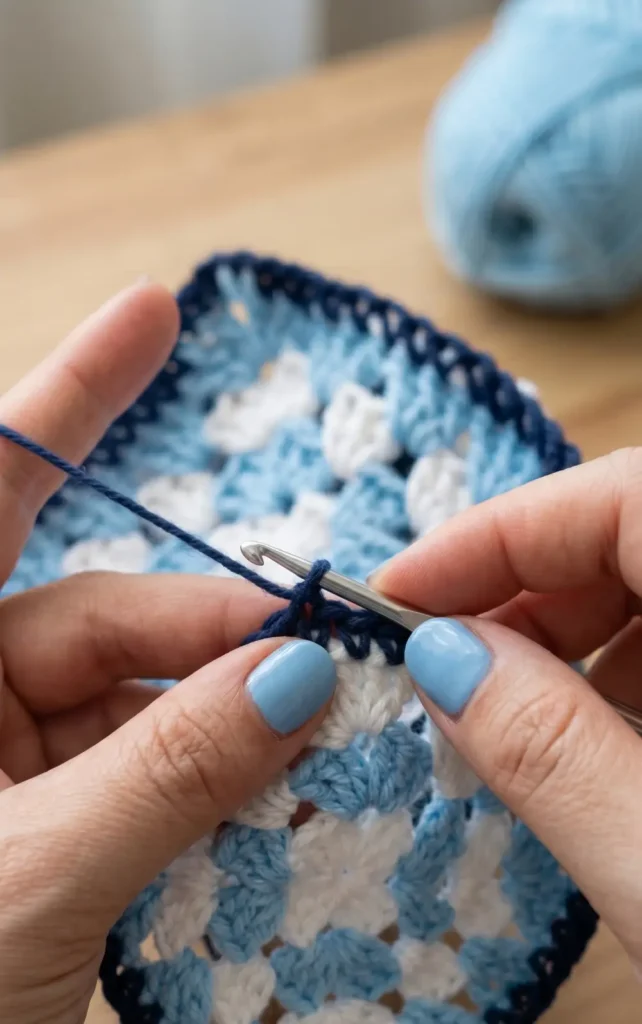
Position the fifth square at the top of the joined side panels. Line up the corners carefully so everything sits even.
Single crochet all the way around the four sides of the top square to secure it to the sides. Once finished, fasten off and tuck any loose yarn tails to the inside of the hat so they’re completely hidden.
How to Crochet the Dimensional Brim
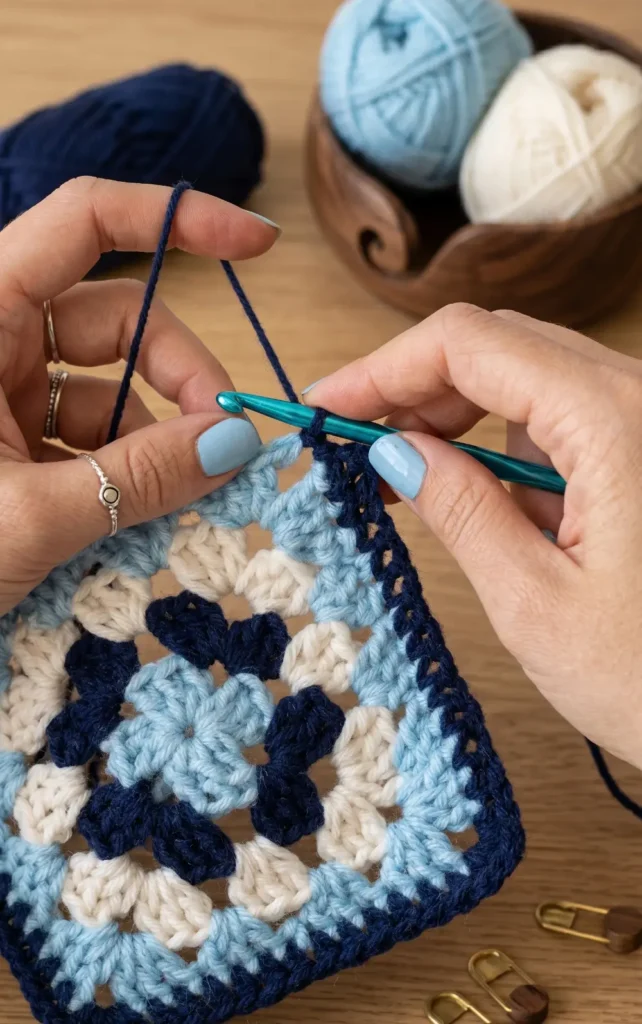
The brim is what makes this bucket hat stand out. It’s worked in half double crochets using an increase pattern that creates a beautiful swirly, ruffled effect. Three rows are all you need.
Brim Row 1
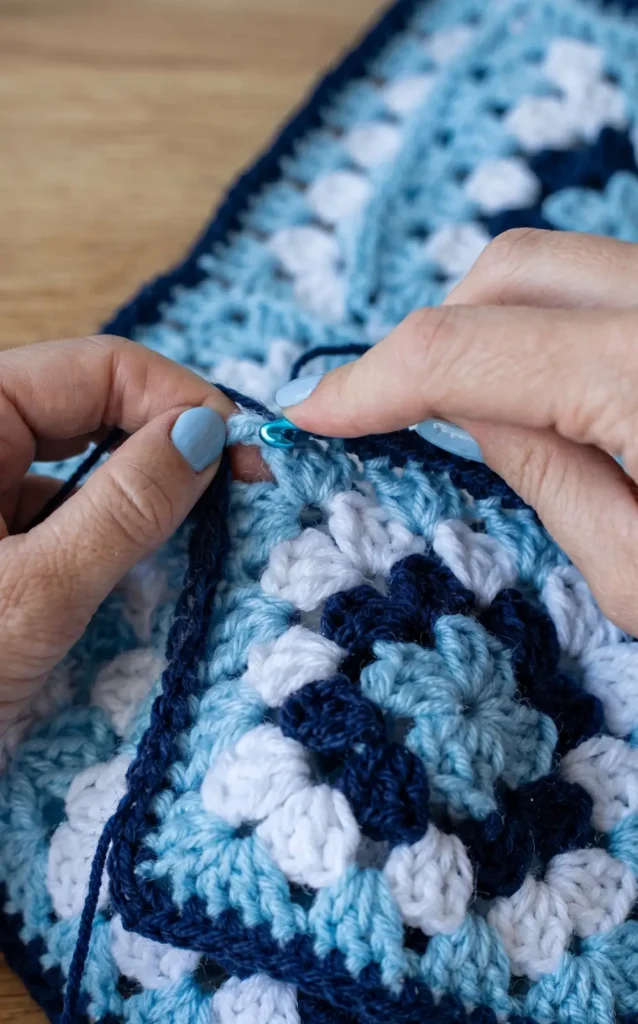
Attach your yarn to the bottom edge of the hat. Chain two and work a half double crochet into that same space. This is your starting point.
Work one half double crochet into each of the next two spaces. In the third space, work two half double crochets to create an increase. Repeat this pattern all the way around: two single stitches, then one increase every third space.
Brim Rows 2 and 3
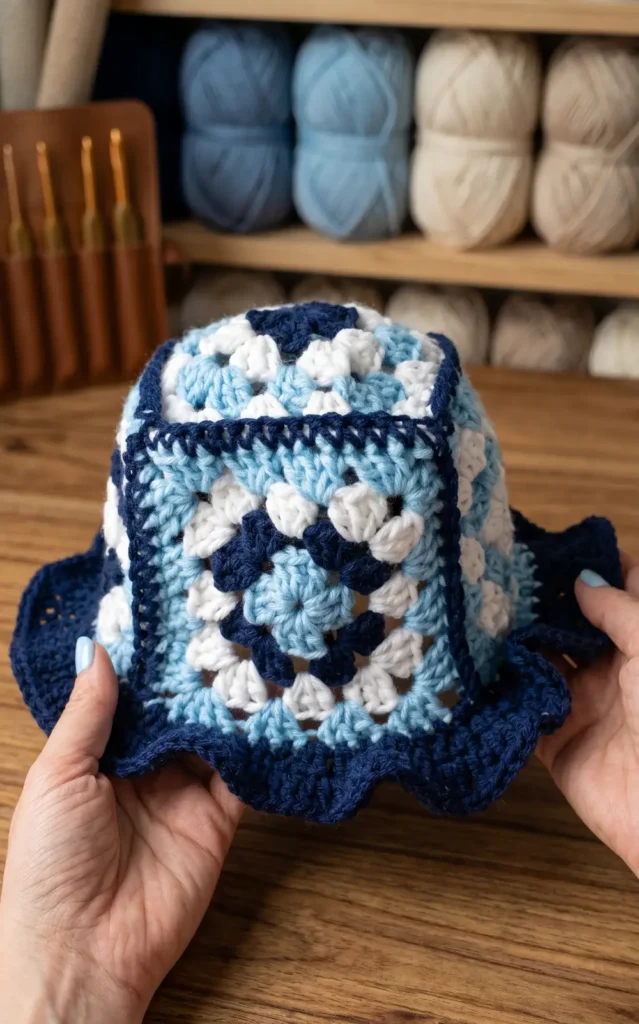
Slip stitch to the first chain space at the end of each row, then chain two to begin the next. Continue the same increase pattern: two half double crochets, then one increase cluster of two half double crochets.
After three rows of this, the brim will begin to ruffle and curl outward, giving the hat that fun, dimensional swirl effect.
Tips for a Great Finish
Keep your tension consistent. Loose or tight squares will affect how the hat sits and how the seams look. Aim for even, uniform stitches throughout.
Weave in ends as you go. Each square has several color changes, and dealing with all the ends at the end of the project can be tedious. Weaving as you go keeps things manageable.
Check your seams before attaching the top. Once the four side squares are joined, hold the band up and look at the seams from the outside. If anything looks uneven, it’s much easier to adjust now than after the top is attached.
Customize your color palette freely. The three-color granny square works with virtually any combination. Try pastels for a soft look, neutrals for something classic, or go bold with bright contrasting colors.
Video Credits: Stitch & Flick Crochet
Frequently Asked Questions
Can I use a different yarn weight for this bucket hat?
Yes, but keep in mind that changing your yarn weight will affect the final size of the hat. If you go up in weight, use a larger hook and expect a bigger hat. If you go down, the hat will come out smaller. Swatching a single granny square first is the best way to check your sizing before committing to all five.
What if my granny squares aren’t all the same size?
Minor size differences between squares can be blocked out before assembly. Wet blocking acrylic yarn works with light steam. If the difference is significant, go back and check your tension. Inconsistent tension from square to square is usually the cause.
Can I make this hat larger or smaller?
The easiest way to adjust the size is to change the number of rows on each granny square. Adding a fifth row to each square will create a larger hat, while stopping at three rows will give you something smaller. You can also adjust hook and yarn weight together to scale the hat up or down.
Is this pattern suitable for beginners?
Yes. If you know how to make a basic granny square, you have all the skills you need for this hat. The assembly uses simple single crochet joins, and the brim is worked in a straightforward increase pattern. The only thing that takes a little practice is keeping your join stitches even.
What type of yarn works best for a bucket hat?
Acrylic yarn is a great choice for wearable items like this because it’s durable, easy to care for, and widely available. Cotton yarn also works well and gives a slightly stiffer structure, which is great if you want the brim to hold its shape more firmly. Avoid very fluffy or textured yarns for this pattern, as the stitch definition is part of what makes the granny squares look sharp.
Do I need to block the finished hat?
Blocking isn’t required, but it can help the squares lie flat and give the finished hat a polished look. Light steam blocking works well for acrylic. For cotton yarn, wet blocking will give you the most control over the final shape.