6 Crochet Cardigan Patterns Free for Cozy Everyday Wear
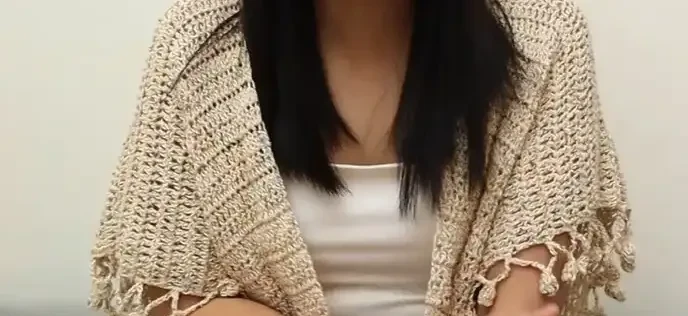
Six free cardigan patterns wait for you below, and every single one skips the boring stuff. No endless swatching. No confusing shaping math. Just real, wearable cardigans built from squares, hexagons, and simple rectangles you already know how to make.
Whether you want a quick weekend project or something to work on for weeks, this roundup has you covered. Beginners will love the vertical rectangle method and the waddle stitch panels. More adventurous crocheters can dive into patchwork squares or a striped boxy silhouette with pom-pom trim. Grab your hook and pick your favorite. Cozy season starts now.
1. Free Crochet Cardigan Pattern for Beginners

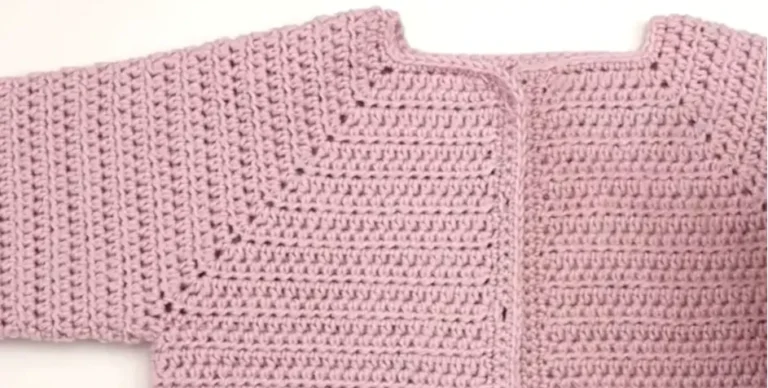
The Comfy Cozy Cardigan is a beginner friendly project constructed from three modified rectangles. Unlike traditional sweaters, this pattern is worked vertically, meaning the rows run up and down rather than side to side. This design covers all standard women’s sizes from extra small to 5X.
Essential Materials
Before beginning, gather the following supplies:
- Worsted weight yarn: The tutorial uses Lion Brand Heartland for its soft and drapey feel.
- Crochet hook: Size I or 5.5 mm.
- Tools: A yarn needle for seaming, a pair of scissors, and a measuring tape.
Step 1: Crochet the Main Body Panel
The body is worked as a single piece that starts at one side and moves across to the other. You begin with a row of foundation half double crochet, which provides a stretchy edge for the garment. Each row features a specific “ribbed half double crochet” at the ends, created by working into the horizontal strand on the back of the stitch, to form the front and back hems. After completing the first front panel, you will work partial rows to create the width for the back of the neck. Finally, you will extend the rows again using foundation stitches to complete the second front panel.
Step 2: Construct the Sleeves
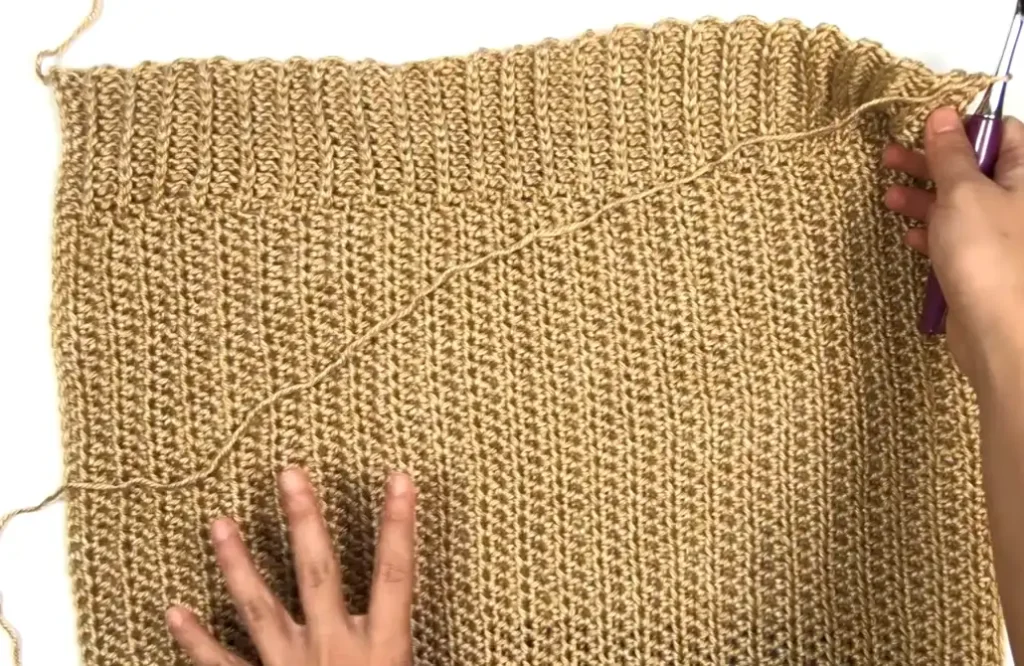
The sleeves are also worked side to side as rectangles. Tapering is achieved without increases or decreases by using stitches of different heights. Double crochet stitches are worked at the top of the sleeve to provide more width at the shoulder, while half double crochet stitches are used toward the bottom to make the sleeve narrower at the ribbed cuff. You will need to repeat this process to create two identical sleeves.
Step 3: Assemble and Seam the Garment
Once the pieces are blocked, you can begin assembly. Fold the sleeve to find its centre point and align it with the shoulder of the body panel. Use a long yarn tail and a whip stitch to attach the sleeve to the armhole. After the sleeve is attached, sew the sleeve seam and the side seam of the body. For the ribbed sections, use a special technique of sewing around the ribbing columns to ensure the seam is invisible and the texture remains consistent.
Step 4: Add the Wide Edging
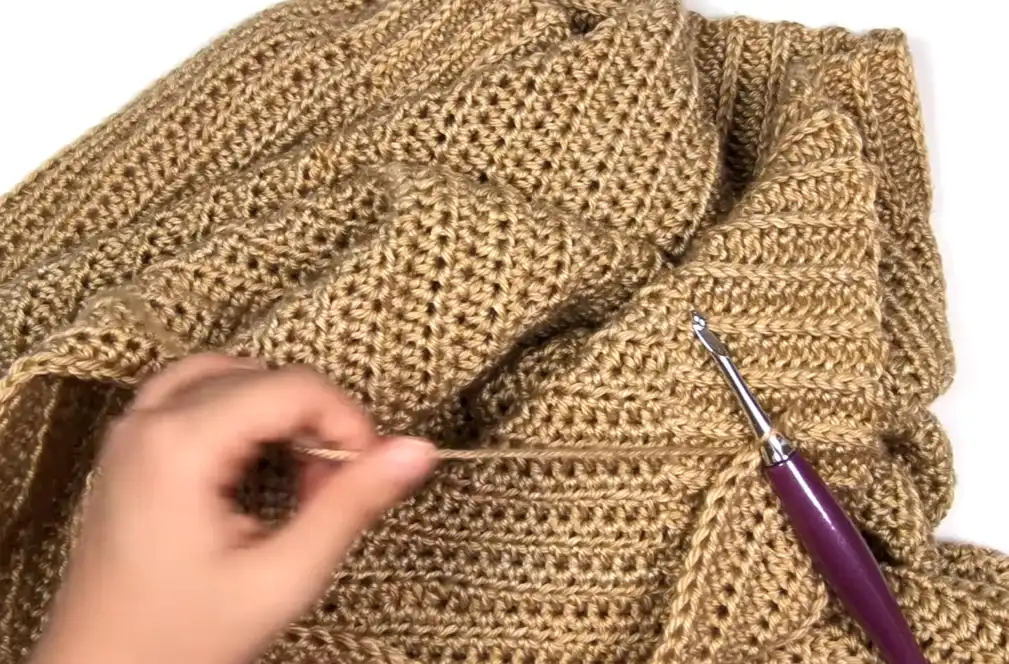
The final step is to work a wide border along the front openings and the back of the neck. Attach your yarn at the bottom corner and work rows of half double crochet, maintaining the ribbing pattern at the hems. To ensure the edging sits flat around the neckline, use a “double crochet three together” (dc3tog) decrease at the corners. Finish the cardigan with several rows of plain half double crochet before cutting the yarn and weaving in your tails.
Video Credits: Yay For Yarn
2. Crochet Easy Cardigan Pattern
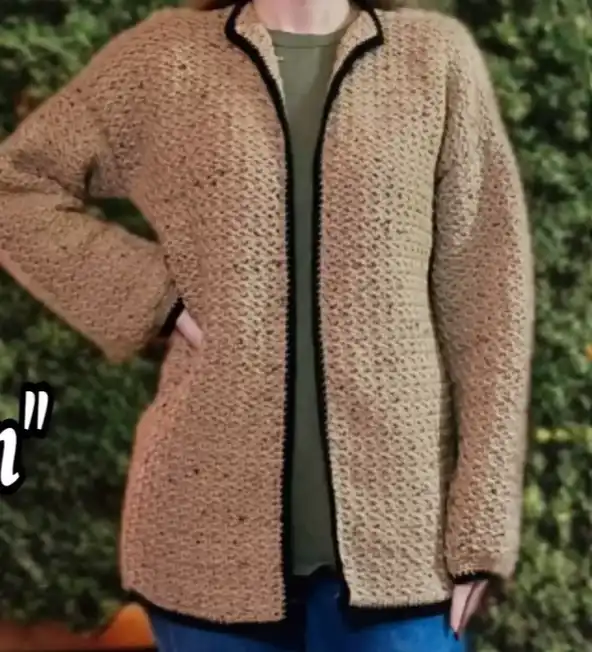
This tutorial provides a guide for creating a simple, customizable cardigan using the waddle stitch. This project is constructed from five separate panels that are sewn together to create a durable, oversized garment with approximately 6 to 8 inches of positive ease.
Required Materials
To begin this project, you will need the following items:
- Yarn: A DK or category 3 lightweight yarn. The example uses an acrylic and Merino blend, such as Loops and Threads Marina Lux Tweed.
- Hook: A 5 mm (H) crochet hook.
- Tools: A tape measure, yarn needle for sewing, and stitch markers.
- Optional: A secondary contrasting colour for the edging and cuffs.
Step 1: Crocheting the Waddle Stitch Panels
The cardigan is composed of five panels: one back panel, two front panels, and two sleeves. Every panel is worked using the waddle stitch, which is a simple one-row repeat.
To start, create a foundation chain in a multiple of three. For Row 1, work one single crochet into the second chain from the hook and in every stitch across. Row 2 establishes the pattern: work a single crochet into the first stitch, then in the next stitch work a “single crochet, chain 1, and double crochet” all into that same stitch. Skip two stitches and repeat this sequence across the row, ending with a single crochet in the final stitch.
Row 3 is the repeat row. Work a single crochet into the first stitch, then work the “single crochet, chain 1, double crochet” sequence into every chain-1 space from the previous row. Continue repeating Row 3 until your panels reach the desired length, typically around 26 inches for the body panels.
Step 2: Sewing the Shoulders and Neck Opening
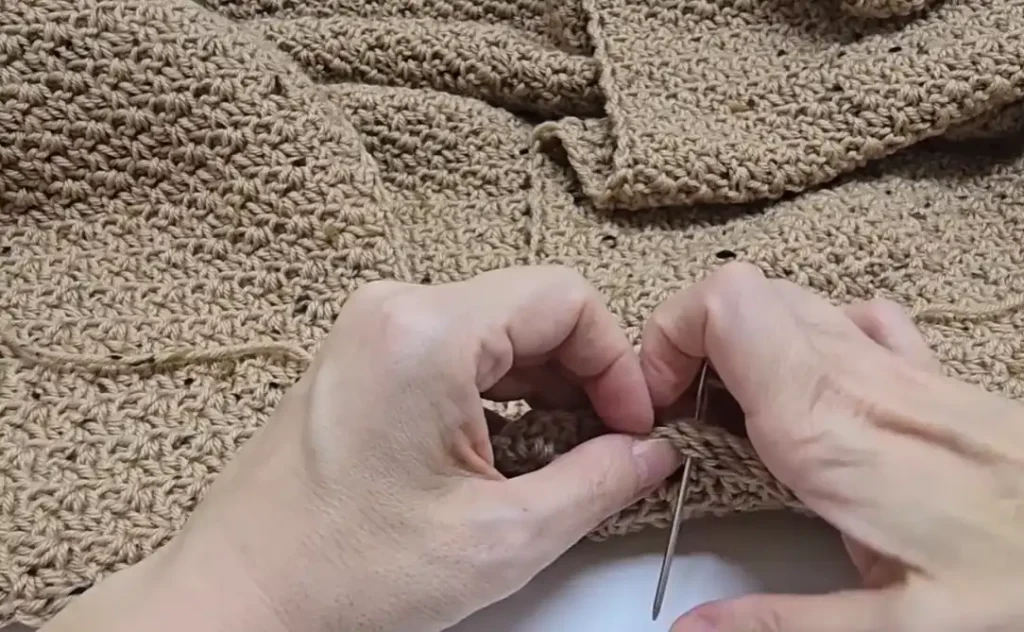
Once your five panels are complete, prepare for assembly by placing the pieces with their right sides facing each other. You will sew the seams on the wrong side so that they remain hidden once the garment is flipped right side out.
Align the two front panels on top of the back panel. Use a yarn needle and matching yarn to sew the top shoulder seams together. It is essential to leave an opening for the neck. While an 8-inch opening is standard, you can customize this to be smaller, such as 5 inches, depending on your preference for how the neckline sits. Measure carefully and use stitch markers to ensure the opening is centred before you begin sewing.
Step 3: Integrating Sleeves and Side Seams
With the shoulder seams joined, you can now attach the sleeves. Find the centre of your sleeve panel and align it with the shoulder seam you just created. Secure it with a stitch marker and sew the sleeve across the top of the body panels, ensuring the wrong sides are still facing out.
After both sleeves are attached, you will sew the side seams. Start at the bottom of the cardigan and sew upwards along the side of the body. When you reach the armpit area, continue sewing directly into the sleeve seam all the way down to the cuff. Reinforce the armpit area with a few extra stitches to ensure the join is strong.
Step 4: Finishing with Edging and Cuffs
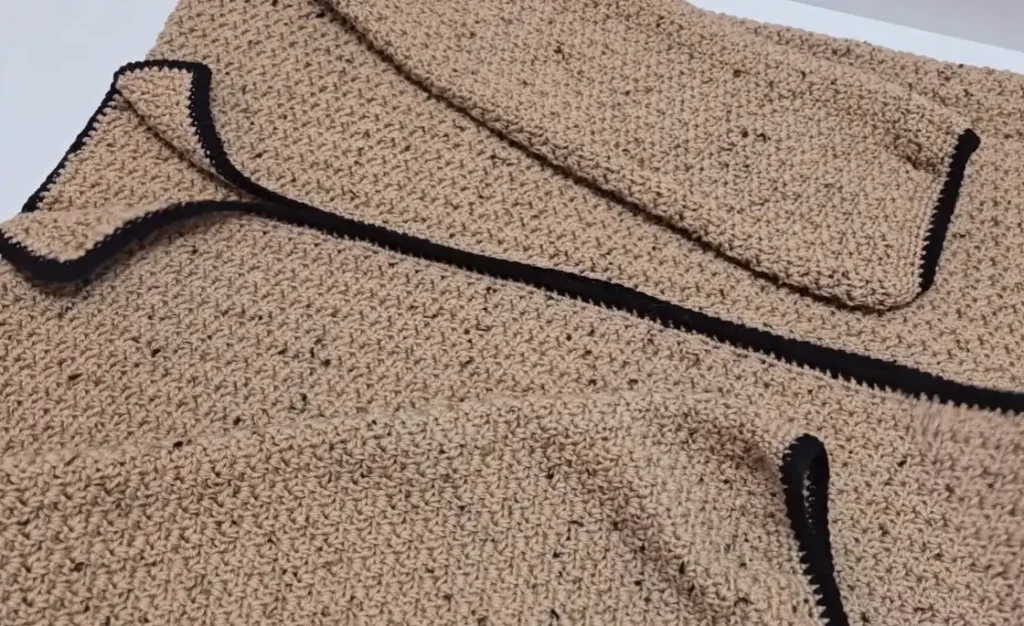
The final step involves cleaning up the edges and finishing the sleeves. For the cuffs, you can leave them baggy or work a few rounds of single crochet with decreases to make them tighter. A common method is to work a round of single crochet, followed by a decrease round where you single crochet in three or four stitches and then work two stitches together.
To finish the body, work a border of single crochet evenly around the entire front opening and neckline. Using the main colour first helps the stitches look neat even if they are not perfectly spaced. You can then add additional rows in a contrasting colour if desired. Finally, work two rows of single crochet across the bottom edge of the cardigan to complete the look.
Video Credits: Bag-O-Day Crochet
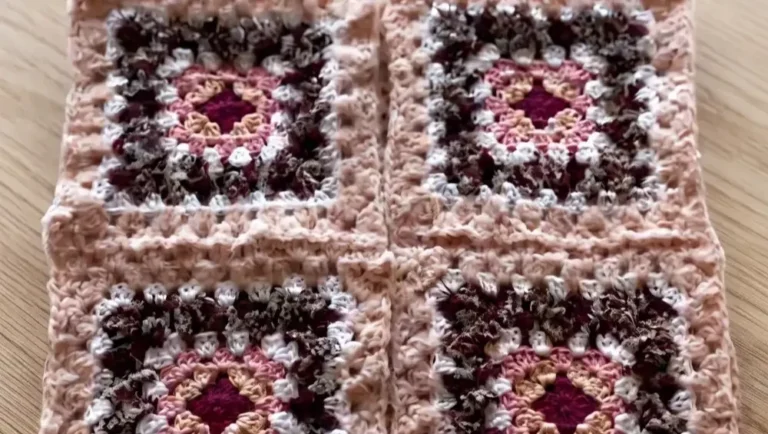
3. Crochet Patchwork Cardigan Pattern
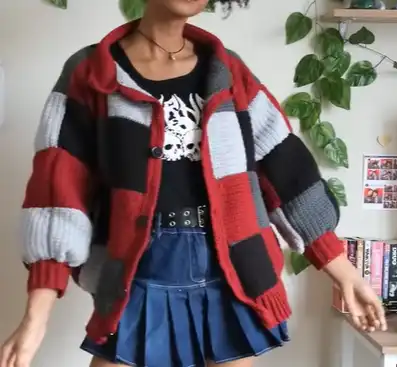
Creating your own patchwork cardigan is a rewarding project that allows for complete creative control over colors, patterns, and fit. By following these four essential steps, you can transition from gathering materials to wearing a custom piece of clothing.
Step 1: Preparation and Design
Before you begin crocheting, you must gather all necessary materials. You will need a 5mm crochet hook, a pair of scissors, a measuring tape, a darning needle, a sewing needle and thread, stitch markers, buttons, and your choice of yarn. While many yarn types exist, worsted weight 4 yarn is recommended for beginners as it is a great medium thickness.
To ensure the cardigan fits perfectly, take accurate measurements of your shoulder width, torso length, arm length, arm circumference, and wrist circumference. It is also helpful to measure a cardigan you already own to use as a template. Once you have your measurements, create a mirrored diagram of your cardigan. This visual aid helps you determine how many squares you need and where to place your chosen colors.
Step 2: Crocheting the Squares and Ribbing
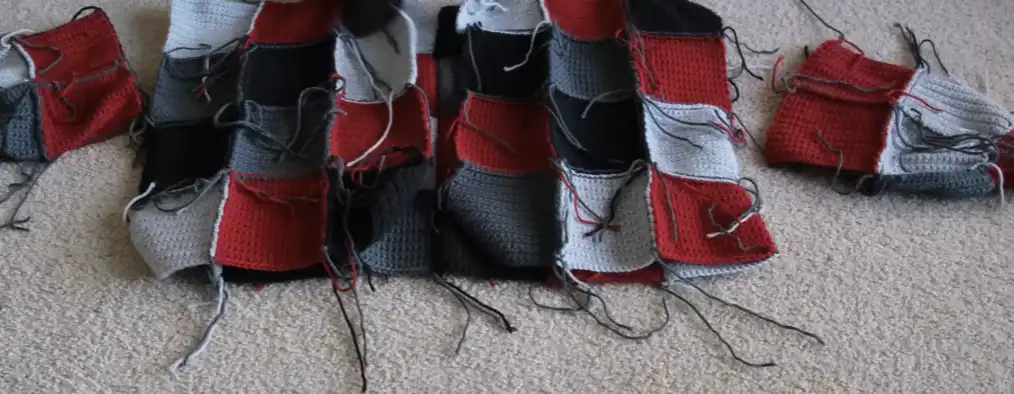
The foundation of the cardigan consists of individual squares, typically measuring 5 by 5 inches. To start a square, create a slip knot and a foundation chain of 20. The source recommends using the single crochet stitch for a tight, less “holey” look, working for approximately 20 rows or until the square reaches the desired size. You can make squares individually or use a color change method to create columns.
Next, you must create the ribbing for the cuffs and the bottom of the cardigan. For the cuffs, chain 12 and work in the back loop only using single crochet to create a ribbed effect. After about 25 rows, or enough to fit your wrist, slip stitch the ends together to form a circle. The bottom ribbing is made similarly but is much longer, requiring around 207 rows, and the ends should not be connected.
Step 3: Assembly and Weaving Ends
Once all squares and ribbing sections are complete, arrange the squares according to your mirrored diagram. Use slip stitches to join the squares into rows and then into larger panels. When sewing the front panels to the back panel, remember to leave openings for the armholes and the button band.
After the panels are connected, you must weave in all loose ends using a darning needle. This step ensures the cardigan is secure and looks clean. Once the ends are hidden, attach the circular arms to the armholes by pulling them right side in and slip stitching them to the cardigan body while aligning the seams. Finally, attach the long bottom ribbing to the base of the cardigan.
Step 4: Finishing the Button Band, Collar, and Buttons
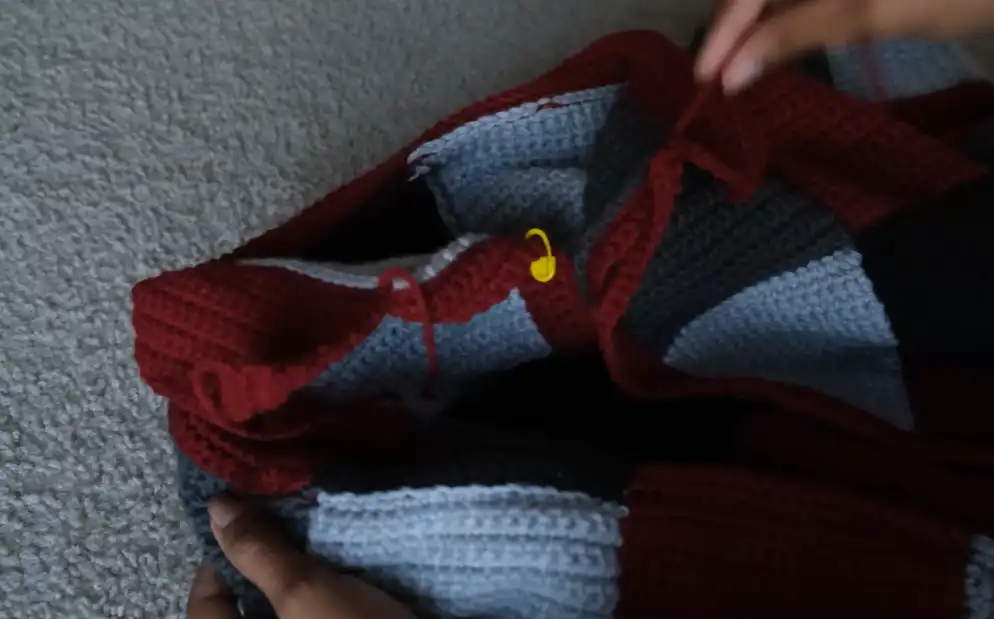
The final stage involves adding the functional details. For the button band, slip stitch along the edge of the front panels and then work four rows of single crochet. On the side where you want the buttons, create buttonholes by chaining three and skipping three loops in the second row of the band. For the collar, slip stitch from one front panel around the neck to the other and single crochet for about 11 rows.
The last step is sewing on the buttons. Use a sewing needle and a long thread, knotting it several times for security. Insert the needle through the button diagonally five to six times, then wrap the thread around the base of the button ten times before securing it on the back of the band. Once all buttons are attached and any remaining threads are clipped, your patchwork cardigan is finished.
Video Credits: ikoxun
4. Crochet Hexagon Cardigan Pattern
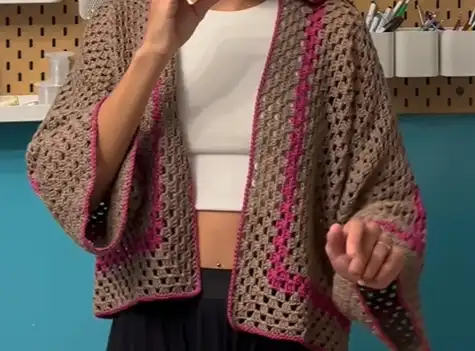
Creating a comfortable and stylish hexagon cardigan is a perfect project for beginners because it relies on the simple and versatile granny stitch. This design is created by making two large hexagonal tiles that are folded and joined to form the body and sleeves.
Essential Materials and Sizing
To recreate the version seen in the tutorial, you will need approximately eight balls of brown cotton yarn and two balls of violet cotton yarn. A 3.5 mm crochet hook is recommended for this specific yarn weight. For sizing, a helpful rule of thumb is to take your shoulder width measurement and add 10 cm of ease for a comfortable fit. For instance, a 40 cm shoulder width would result in a cardigan that measures 50 cm across the back.
Step 1: Crafting the Hexagon Panels
The foundation of the cardigan consists of two identical hexagonal panels. You begin by creating a magic ring and working three chains, which count as your first double crochet. Inside the ring, work two more double crochets, two chains, and then five more groups of three double crochets separated by two chains. This creates the six sides of your hexagon.
In the following rounds, you will work a sequence of three double crochets, two chains, and three double crochets into every corner space to expand the shape. For the sides, simply work three double crochets into each one chain space. Continue this pattern until the panel reaches your desired size, changing colours if you want a striped effect.
Step 2: Folding and Seaming the Sleeves
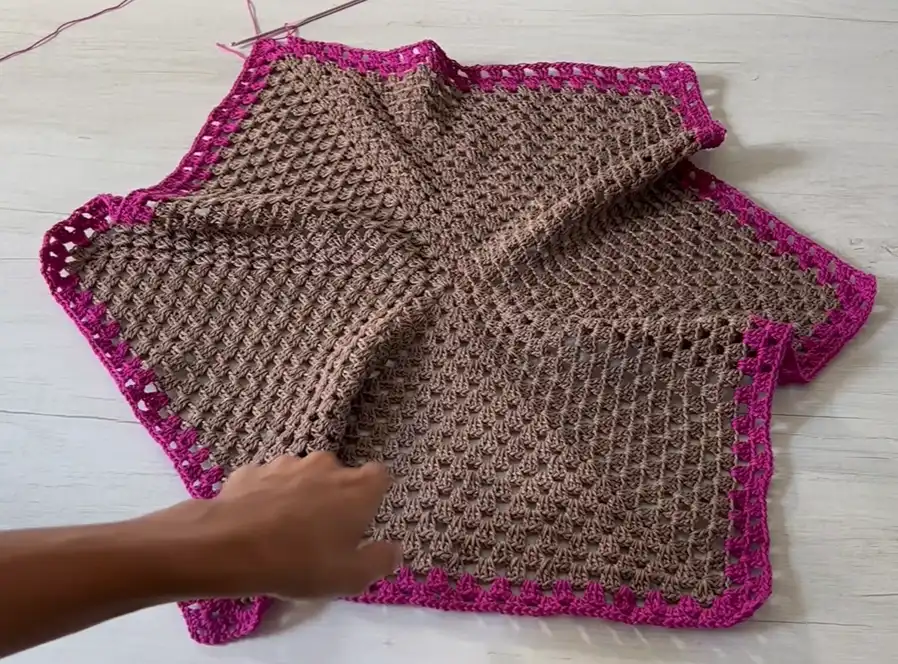
Once you have completed two large hexagons, fold each one into an “L” shape to reveal the cardigan’s structure. One part of the “L” forms the sleeve, while the other forms the front and back of the bodice. To join the sleeves, turn the work to the wrong side so the seam remains hidden on the inside.
Align the edges of the top of the sleeve and join them using single crochet stitches. Work one single crochet into every stitch and space along the top edge to ensure a secure and neat finish. Repeat this process for the second hexagon panel to create two mirrored sides.
Step 3: Customising the Length and Width
If you want longer sleeves or a wider body, you can add extra rounds directly to the folded panels. To extend the sleeves, attach your yarn to the cuff area and work rounds of the granny stitch (three double crochets in each space) until you reach the preferred length. You can finish the cuff with a simple border of single crochets for a clean look.
To increase the width or length of the body, attach yarn to the back or front edges and work granny stitch rounds. In the tutorial, four additional rounds were added around the body to provide a more oversized fit. Ensure you work increases in the bottom corners of the cardigan to maintain the shape as you add length.
Step 4: Final Assembly and Edging
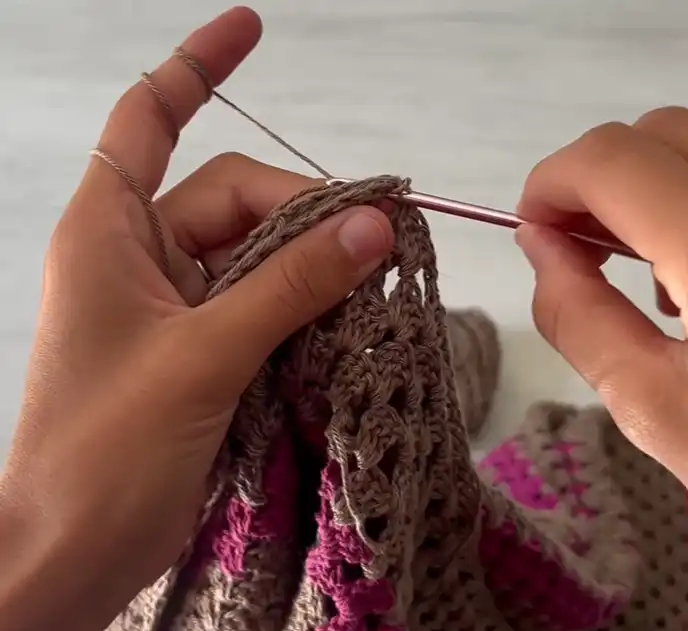
The final major step is to join the two halves of the cardigan at the back. Place the two panels with their right sides together and join the back seam from the bottom up to the neck using single crochet stitches. It is helpful to use stitch markers to keep the panels aligned while you work.
To give the cardigan a professional finish, add a single crochet border around the entire front opening and neckline. Start from the center back neck and work all the way around the front panels and the bottom edge. When you reach the corners, work three single crochets into the same space to create a smooth curve. Finally, weave in all loose yarn ends to complete your project.
Video Credits: vivi e cuci
5. Crochet Kimono Cardigan Pattern
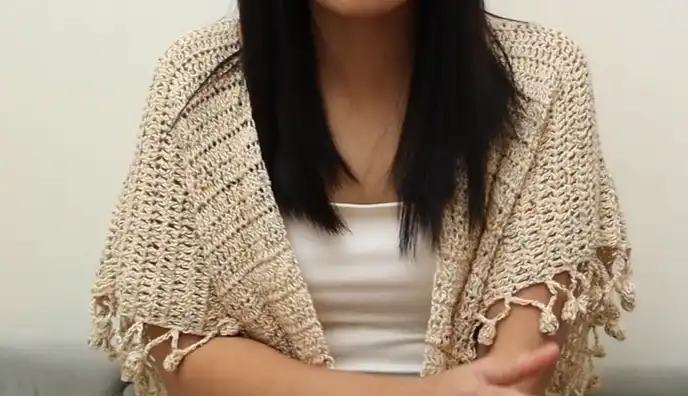
This beautiful kimono cardigan is a lightweight project perfect for summer or lounging at home. It features a loose, oversized fit and a charming pom-pom border along the sleeves,.
Materials and Sizing
To create this cardigan in size extra small or small, you will need approximately two cakes of number two sport weight yarn,. The specific yarn used in the tutorial is Yarn Bee Sugarwheel Hues in Passion Flower, which is a cotton and polyester blend. You will also require a 4.5 millimetre crochet hook, a yarn needle, and scissors. The finished garment for this size measures approximately 27.4 inches wide when laid flat and 25 inches in length.
Step 1: Crochet the Main Body Panel
The cardigan is constructed from the bottom up as a single piece that includes both front panels and the back panel,. Begin by making a slip knot and crocheting 179 chains loosely. For Row 1, work one double crochet into the third chain from the hook and continue with one double crochet in every chain across to reach a total of 177 stitches,. For Row 2, chain two, which does not count as a stitch, and work one double crochet into every stitch across. You will repeat this double crochet pattern for Row 3 through Row 30 to complete the lower section of the body,.
Step 2: Form the Upper Panels
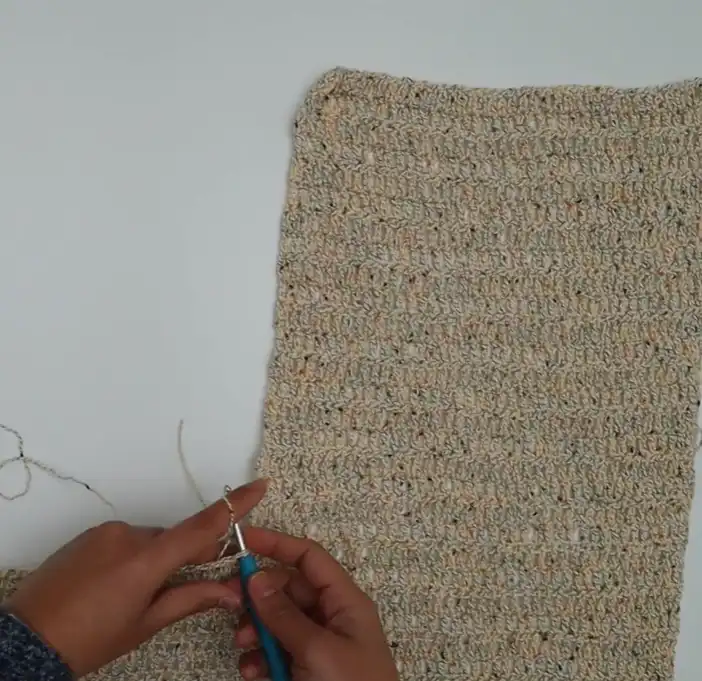
Once the main body is complete, you will divide the work into three separate upper sections. For the upper left side, start Row 31 by crocheting one double crochet into each of the next 41 stitches. Continue working back and forth for Rows 32 through 50 and then fasten off while leaving a 24 inch tail for sewing,. To start the upper back, attach new yarn to the stitch immediately following the last stitch of Row 31 and work 95 double crochets across. Repeat these double crochet rows until Row 50 is reached and then fasten off,. Finally, attach new yarn for the upper right side and crochet 41 double crochets across for Rows 31 through 50, again leaving a long tail for assembly,,.
Step 3: Assemble the Shoulder Seams
To assemble the garment, fold the front panels over the back panel so the right sides are facing each other,. You will be sewing on the wrong side of the fabric. Using a yarn needle and the long tails left earlier, sew the 41 stitches of each front panel to the corresponding stitches on the back panel to create the shoulder seams,. Ensure you do not sew too tightly or too loosely so the seam remains even. Once both shoulders are secured, weave in all of your remaining ends.
Step 4: Add the Pom-Pom Sleeve Border
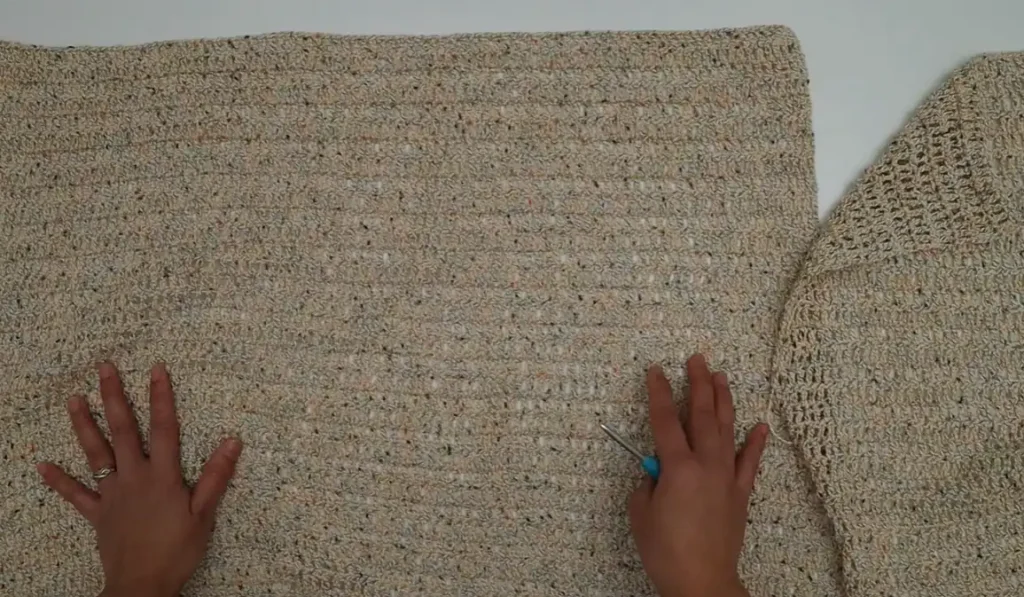
The final decorative touch is a pom-pom border added to the sleeve edges, which is worked on the wrong side of the garment. Attach new yarn at the armpit stitch, work a single crochet, and then chain nine. Create a cluster stitch in the third chain from the hook, chain two, and work another cluster on top of the first one,. Fold these clusters in half and slip stitch into the foundation chain to form the pom-pom shape. Finish the sequence by chaining six, skipping a space, and placing a single crochet into the next space. Repeat this process around the entire sleeve edge and finish by making a slip stitch into the first single crochet,.
Video Credits: KnitcroAddict
6. Easy Striped Crochet Cardigan Pattern
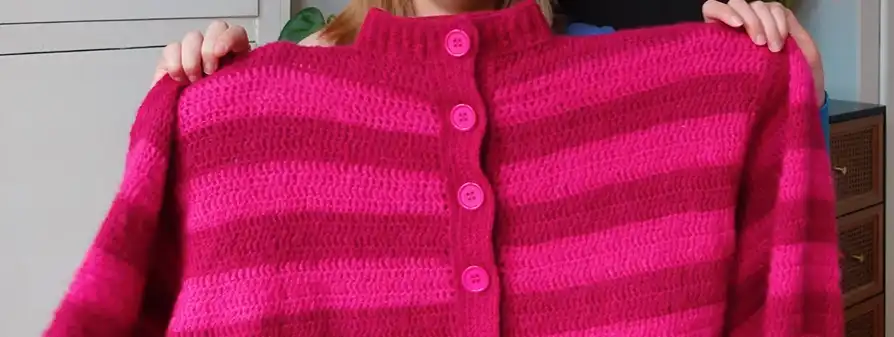
This beginner friendly project creates a stylish, boxy cardigan using simple stitches and a colourful striped pattern. While the instructions are detailed to help those new to crochet, experienced crafters can easily speed through the process.
Materials and Sizing
To get started, you will need Hobbii Diablo yarn. For this specific design, six balls of hot pink and eight balls of magenta were used, as the magenta is also used for the trimmings. A 4.5 mm crochet hook is recommended, though a 4 mm hook is also suitable.
The sizing is customisable. To determine the width, create a foundation chain that is slightly wider than your shoulders for a comfortable, boxy fit. It is important to keep your chain count as an even number because the back panel must later be divided into two for the front panels. Remember to add one or two extra chains to your count to act as your first turning chain.
Step 1: Crocheting the Back and Front Panels
The foundation of the cardigan consists of three rectangular pieces: one large back panel and two smaller front panels.
- The Back Panel: Using the double crochet stitch (US terms), work rows back and forth. To create the striped effect, change your yarn colour every four rows using a magic knot to join the new thread. Continue until you reach your desired length; 44 rows is a standard guide for a regular fit.
- The Front Panels: Create two separate panels that are half the width of the back panel (for example, if your back is 80 stitches wide, each front panel should be 40 stitches). Follow the same striped pattern. For a more shaped look, you can add five increases, which involve doing two stitches into one hole, spaced evenly across the second and third colour blocks.
Step 2: Assembly and Shaping
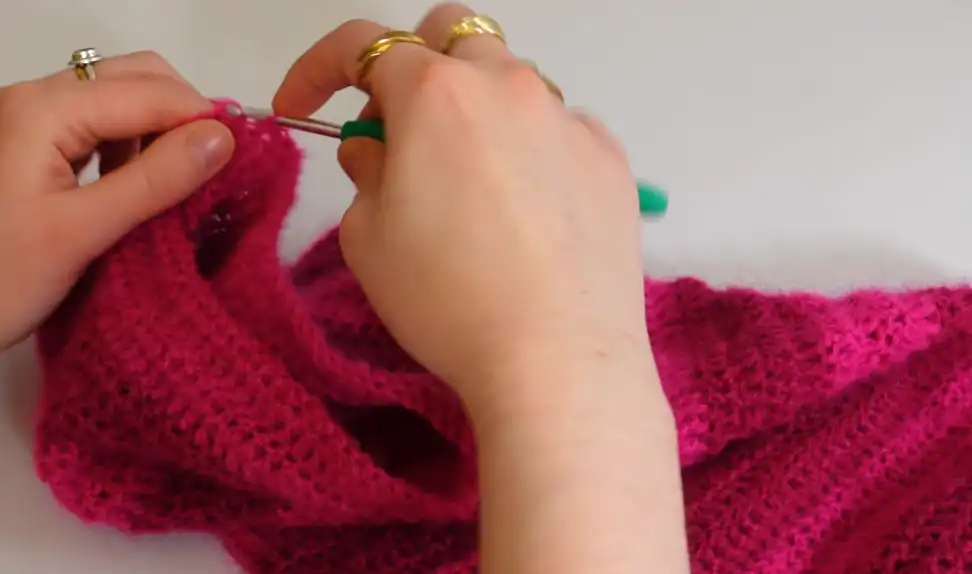
Once the panels are complete, they must be joined together. It is best to perform this assembly with the project inside out so the seams remain hidden on the interior.
- Shoulder Seams: Use a slip stitch to attach the front panels to the back panel at the shoulders. Stitch from the outside edge toward the centre. To determine the neckline width, stitch approximately halfway across the front panel or further if you prefer a closer fit.
- Side Seams: Slip stitch up the sides of the cardigan, starting from the bottom. Stop roughly 16 rows from the top to leave a large opening for the armholes, which allows for “balloony” sleeves.
Step 3: Adding Sleeves and Ribbed Cuffs
The sleeves are worked directly onto the armholes of the assembled body pieces.
- The Sleeves: Attach your yarn and work double crochet stitches in the round. To create a slight tapered effect, perform one decrease in every row by combining two stitches into one. Continue the four-row colour stripe pattern until the sleeve is almost at your wrist, leaving room for the cuff.
- Wrist Ribbing: First, work a row of single crochet around the edge of the sleeve. Chain 21 stitches to begin the ribbing, then single crochet back down the chain. For the remaining rows, work your single crochet into the back loops only (BLO) to create a ribbed texture. Use three or four slip stitches when attaching each row to the sleeve to cinch the cuff tightly.
Step 4: Finishing Borders and Button Details
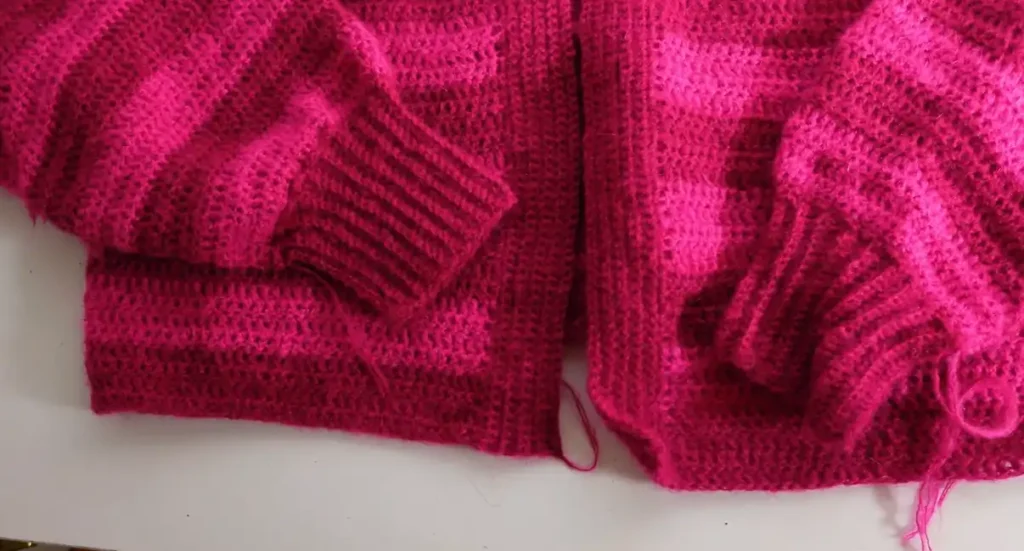
The final steps involve adding professional trimmings to the front edges, neckline, and bottom.
- Front Details and Button Holes: Crochet five rows of single crochet along the vertical front edges. On the fifth row of the button side, create button holes by chaining three and skipping three stitches at regular intervals. Continue for five more rows to create a chunky border, ensuring you work single crochets into the chain gaps on the following row.
- Neck and Bottom Ribbing: Apply a ribbed border to the neckline and the bottom of the cardigan using the same BLO single crochet technique used for the cuffs. Unlike the cuffs, only use two slip stitches to attach these rows to the body so the ribbing remains flat rather than cinched.
- Final Touches: Turn the cardigan right side out and sew your buttons onto the side opposite the holes. Finally, weave in all loose ends to secure your work.
Video Credits: Katie Joslin
Which Cardigan Will You Try?
Six patterns, six totally different techniques, and not a single boring one in the bunch. Maybe you’re drawn to the beginner friendly rectangles, or maybe those hexagon panels caught your eye. Either way, you’ve got a solid starting point for a cardigan you’ll actually wear.
Pick the one that matches your skill level and your yarn stash, then get hooking. Cozy, handmade layers are only a few skeins away.