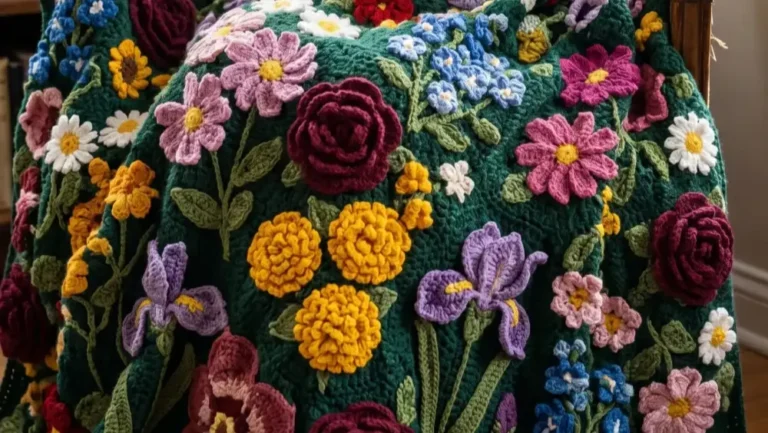
28 Crochet Fall Decor Free Pattern Ideas for a Cozy Home
Fall is the best season for crochet. The colors are rich, the projects are quick, and your home gets cozier with every stitch. If you have been wanting to fill your space with handmade autumn charm, this list has you covered.
Below are 28 fall decor crochet ideas. Each one includes materials, stitch counts, and a walk through the actual construction so you can follow along even as a beginner. Grab your favorite hook and a cup of something warm, and let’s get stitching.
1. Crochet Pumpkin Pillow Pattern
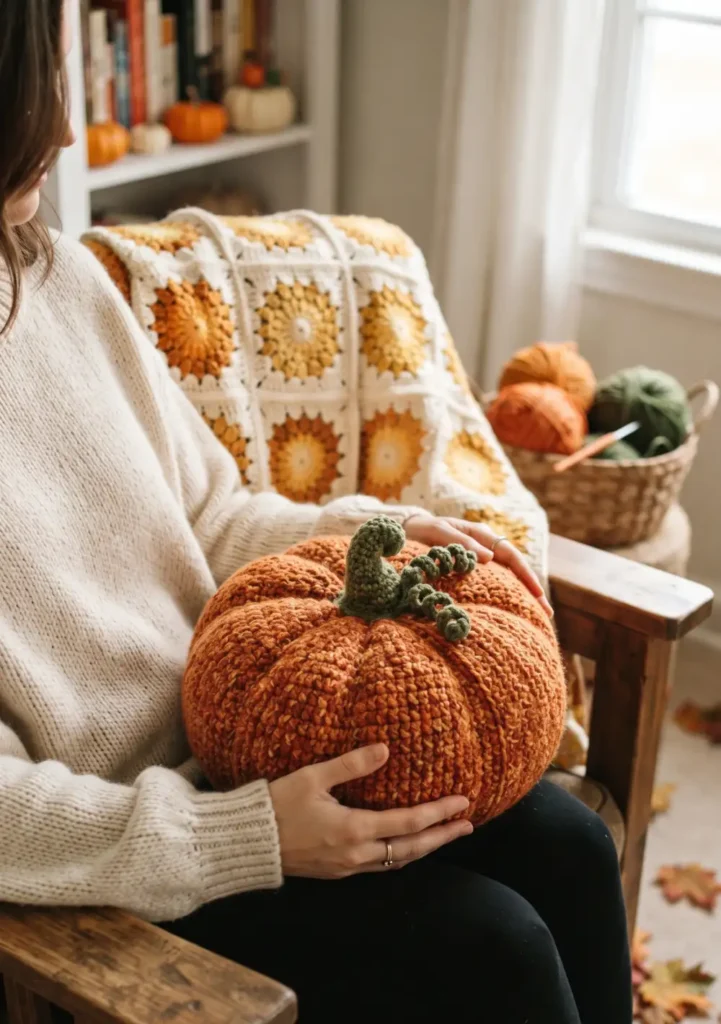
Materials: worsted weight yarn in orange and green, size H hook, fiberfill, yarn needle, stitch marker
Start with a magic ring and single crochet 6 stitches into it. Increase every round until your circle reaches about 12 inches across, roughly 8 to 10 rounds depending on your gauge. Make two matching circles, one for the front and one for the back.
Hold the circles together and single crochet around the outer edge to join them, stuffing with fiberfill as you go and leaving a small gap near the top. Once stuffed, close the gap completely. For the stem, chain 10, then single crochet back down the chain and coil it slightly before stitching it to the top of the pillow along with a few curly chain vines.

Hey there! Some links on this page may be affiliate links which means that, if you choose to make a purchase, I may earn a small commission at no extra cost to you.
2. Rustic Crochet Pumpkin Basket
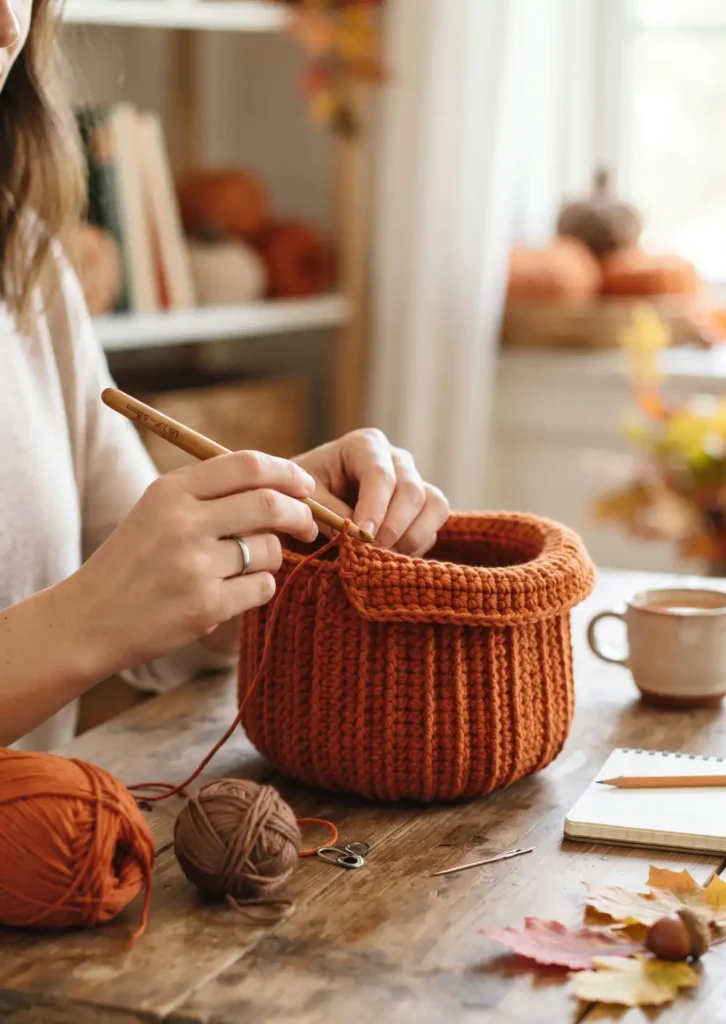
Materials: cotton yarn, size I hook, stitch marker, yarn needle
Begin with a magic ring, single crochet 6 into it, then increase by 6 stitches every round for the next 5 rounds until you have 36 stitches. This forms your flat base. Place a stitch marker at the start of each round so you don’t lose track.
Once the base is wide enough, stop increasing and work even rounds of single crochet to build the sides straight up for about 4 inches. Fold the top edge outward slightly to create a rustic rim, and weave in your ends. The natural stiffness of cotton yarn helps this basket hold its shape without any extra stiffening spray.

3. Crochet Maple Leaf Garland
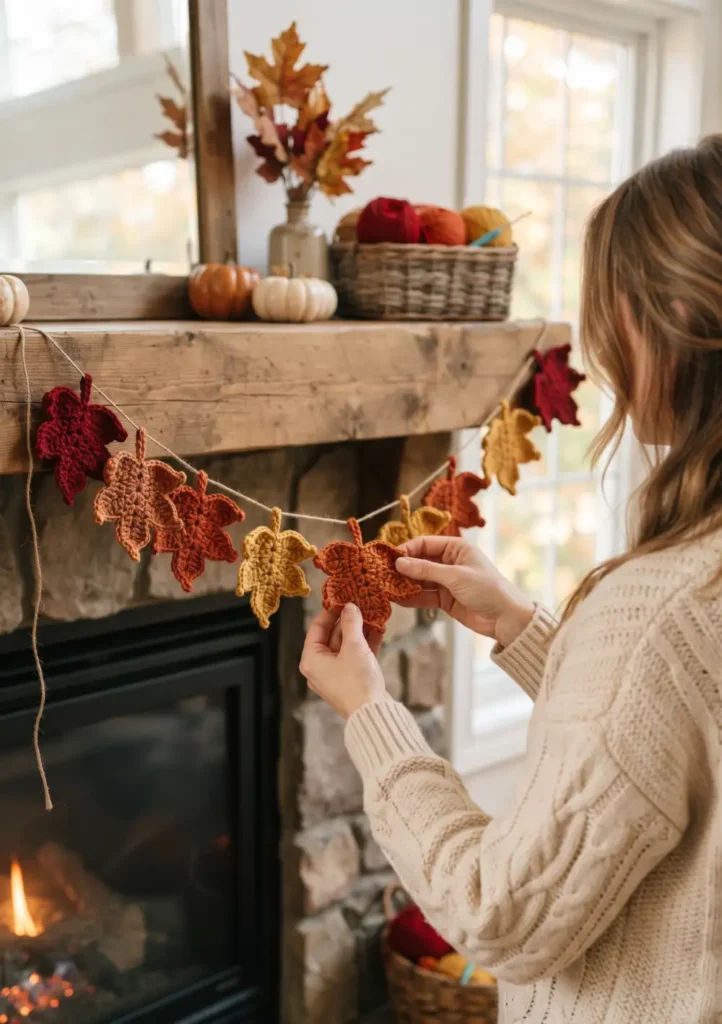
Materials: worsted yarn in red, orange, and yellow, size H hook, yarn needle, twine
For each leaf, chain 6 and work a slip stitch into the second chain from the hook to form the first point. Continue building out lobed sides using a mix of single crochet, half double crochet, and double crochet stitches, increasing sharply at each point to create the classic maple shape with 5 points total.
Make at least 10 to 12 leaves, mixing your three colors so the garland has depth. Leave a small chain loop at the top of each leaf when you finish off. Once all your leaves are done, thread twine through each loop and space them evenly for hanging across a mantel or window frame.

4. Cozy Acorn Amigurumi Decor
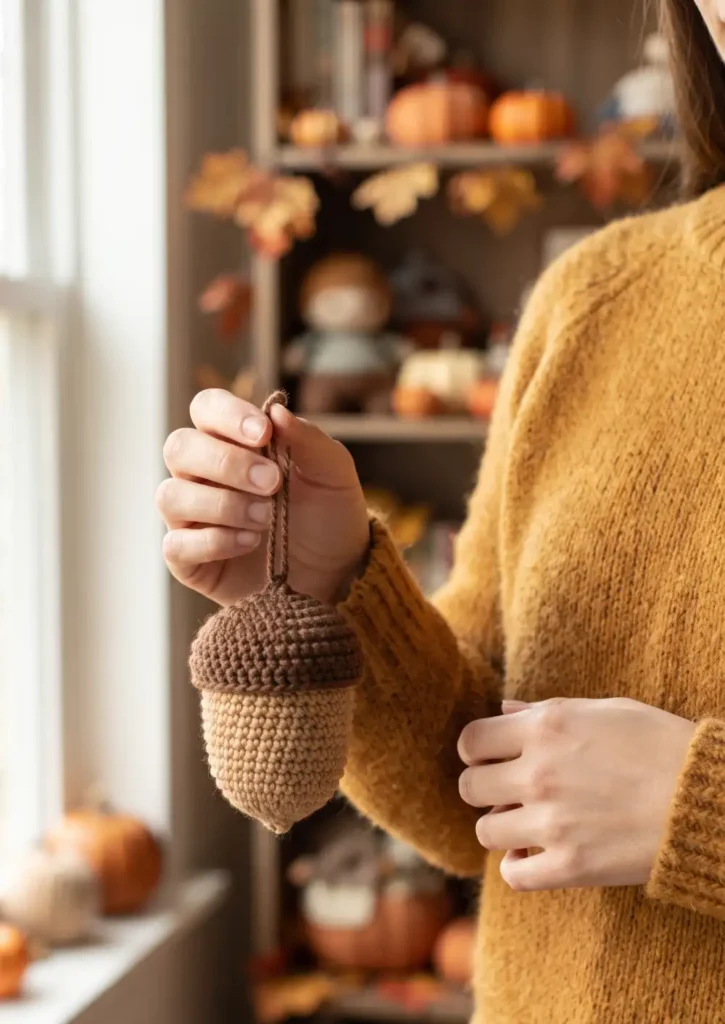
Materials: tan and brown yarn, size E hook, fiberfill, yarn needle
Start the acorn body in tan with a magic ring, single crochet 6, then increase every round until you reach 18 stitches. Work even rounds until the body measures about 2 inches tall, then start decreasing gradually to round off the bottom, stuffing as you close it up.
For the cap, switch to brown and work a slightly looser gauge for texture, using back loop only single crochet for a ridged, cap like effect. Increase to about 20 stitches across, then stitch the cap directly onto the top of the tan body so it overlaps like a real acorn cap.

5. Crochet Sunflower Table Centerpiece
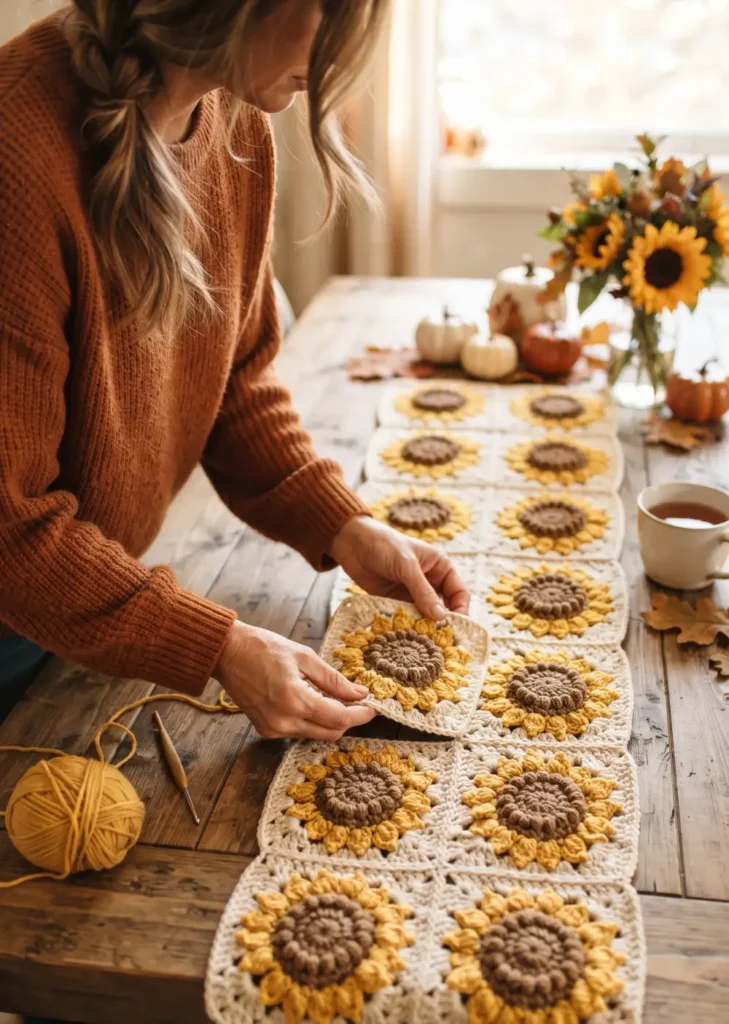
Materials: yellow and brown yarn, size H hook, floral wire, yarn needle
Work the center in brown with a magic ring, single crochet 6, then increase every round until you reach a circle about 3 inches wide. For texture, work the last round in back loop only to create a slightly bumpy, seed like texture.
For the petals, join yellow yarn to the outer edge and work into each stitch around, chaining 4 and slip stitching back down to form a pointed petal shape. Repeat around the entire circle for a full ring of petals. Insert floral wire through the back of the center and secure with a few stitches so the flower can be arranged like a real stem.

6. Fall Gnome Free Pattern
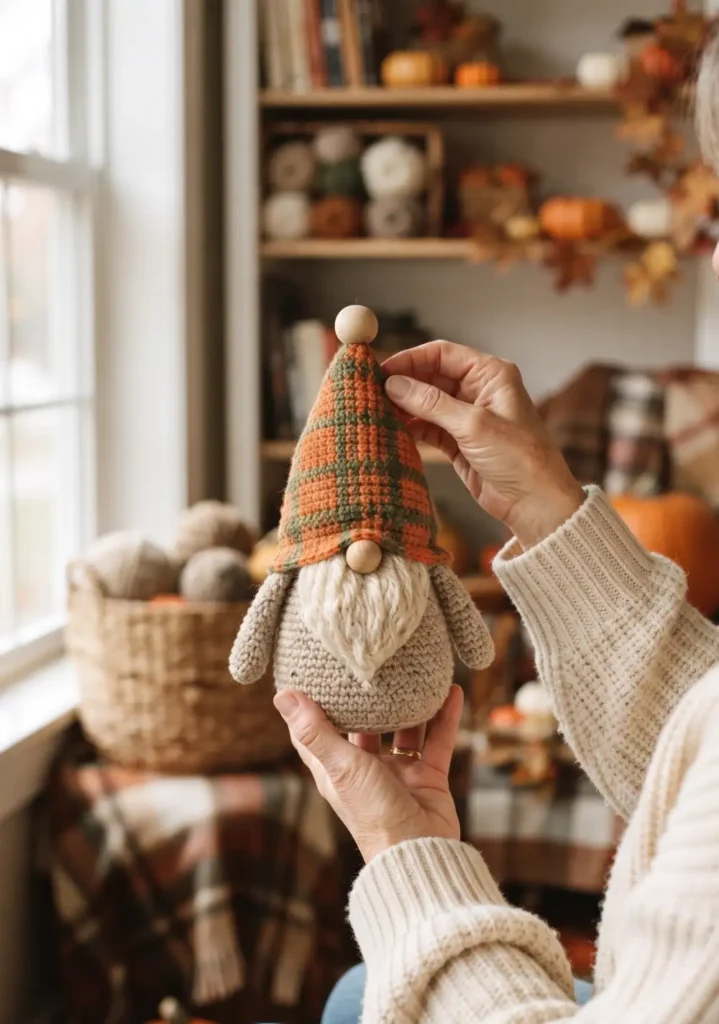
Materials: neutral yarn for the body, orange or plaid yarn for the hat, fiberfill, small pom or felt for the nose
Crochet the body starting with a magic ring, increasing for the first few rounds to shape rounded shoulders, then work straight rounds down to form a cone. Leave the bottom open if you want to add weighted filler like rice or poly pellets for stability.
For the hat, chain a small ring and increase for one round, then work even rounds while gradually decreasing every few rows to create a tapered point. The hat should be tall enough to droop slightly forward. Stuff the body, sew the hat on at an angle, and attach a small pom or felt circle for the nose peeking out from underneath.

7. Crochet Mushroom Plush Decor
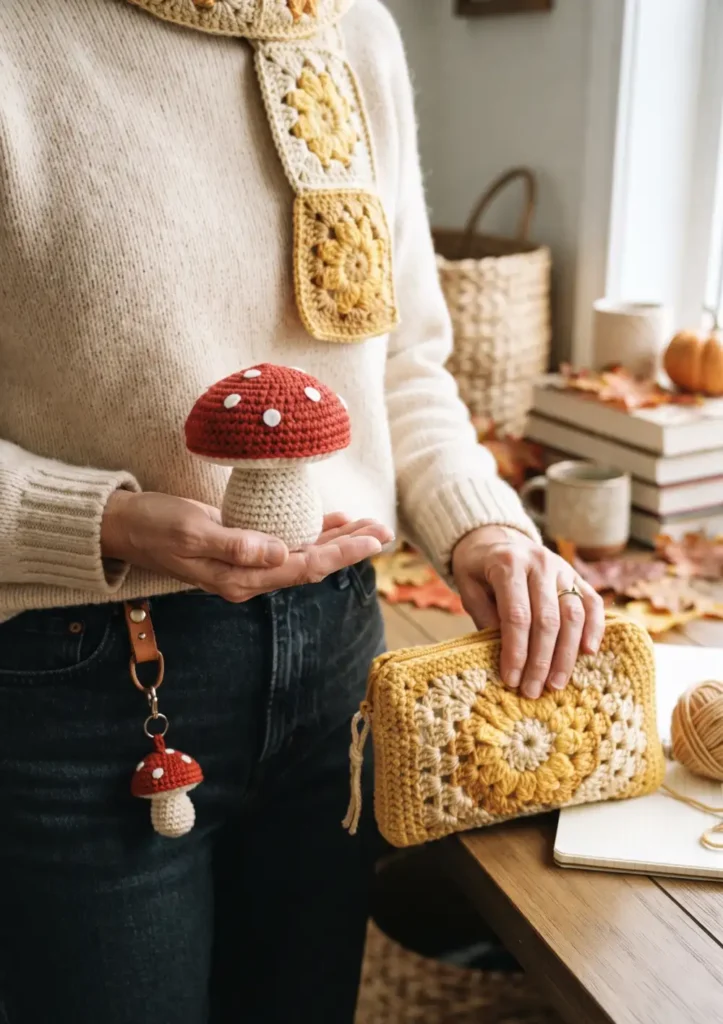
Materials: red and cream yarn, size E hook, fiberfill, white felt or yarn for spots
Work the cap in red starting with a magic ring, increasing every round until you reach about 3 inches across, then decrease slightly at the edge to curve it downward like a real mushroom cap.
For the stem, switch to cream and crochet a short cylinder using even rounds of single crochet, about 1.5 inches tall. Stuff both pieces firmly, then stitch the stem to the underside of the cap. Finish by sewing small white felt circles or yarn dots across the top of the cap for that classic spotted mushroom look.

8. Crochet Wheat Stem Bundle
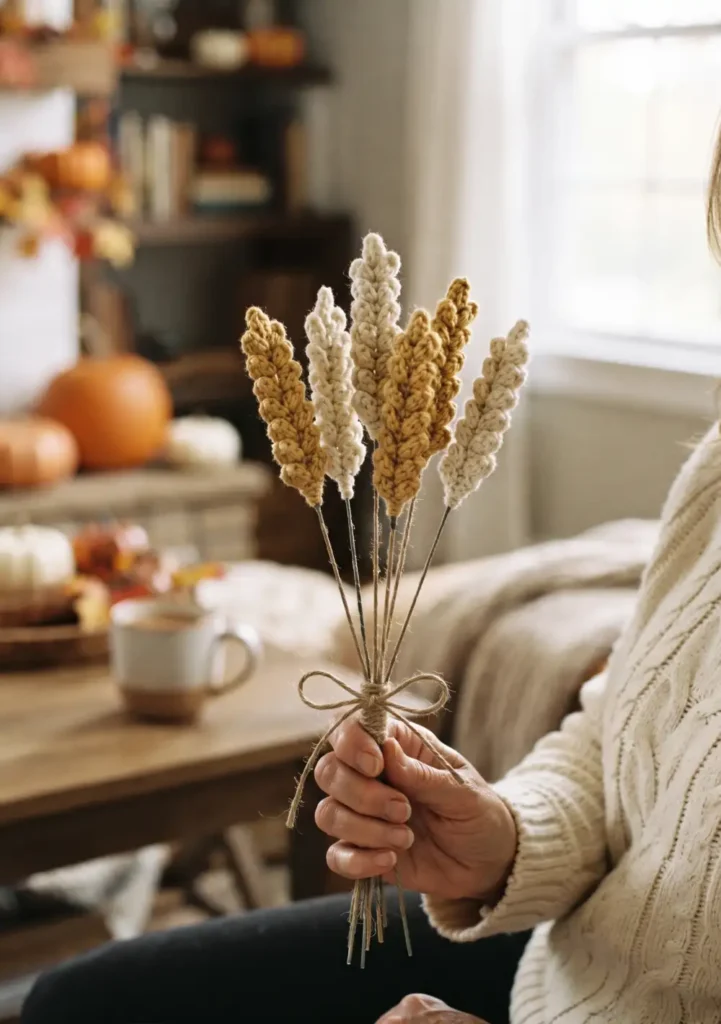
Materials: cream or gold yarn, size E hook, thin floral stem or dowel, twine
Chain a length of about 8 inches to form the base of your stem, then single crochet back down the chain to give it some body. This becomes the core your grains attach to.
Along the top third of the stem, work small picot clusters, chain 3 and slip stitch into the base, spaced closely together on alternating sides to mimic wheat grains. Make 5 to 7 stems this way, then insert a floral stem for support and tie the bundle together with twine.

9. Textured Autumn Wreath Pattern
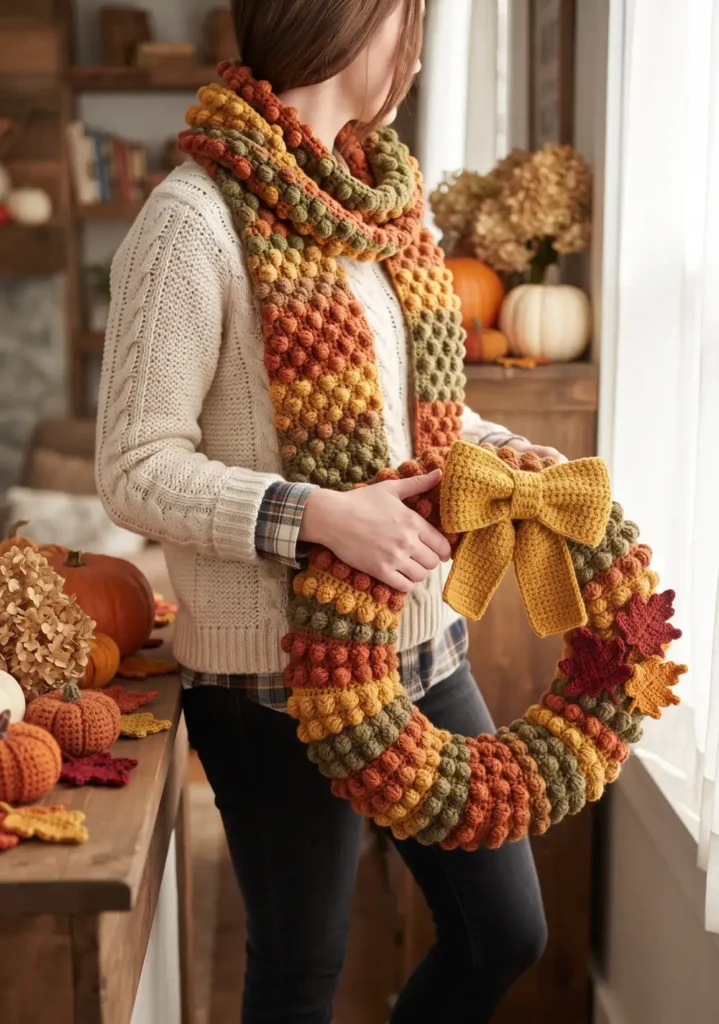
Materials: foam or wire wreath form, yarn in fall colors, size H hook, hot glue or yarn needle
Crochet long strips using a bobble stitch pattern, chain a base row, then work bobbles by yarning over multiple times into the same stitch before pulling through for a raised, textured bump. Make several strips in different lengths and colors.
Wrap the strips around the wreath form, securing each one with a few stitches or a dab of glue as you overlap them. Keep layering strips until the entire form is covered with no gaps. Finish with a crochet bow or a few of the maple leaves from earlier in this list for extra dimension.

10. Crochet Candy Corn Bunting
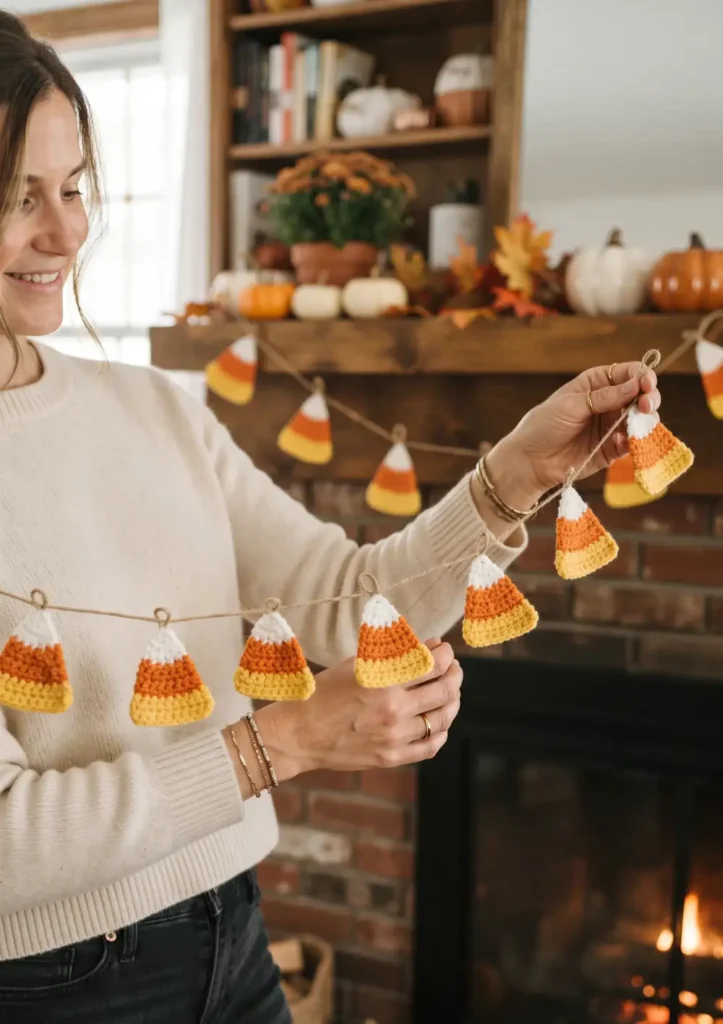
Materials: yellow, orange, and white yarn, size H hook, twine
Each triangle starts at the yellow base with a chain of 8, working single crochet across and decreasing one stitch on each side every row. Switch to orange after 3 rows, then to white for the final 2 rows as you decrease to a point.
Leave a small loop of chain stitches at the wide top of each triangle before finishing off. Make 10 to 15 triangles total, then thread them onto a length of twine, spacing them evenly for a cheerful garland along a shelf or doorway.

11. Farmhouse Pumpkin Coasters
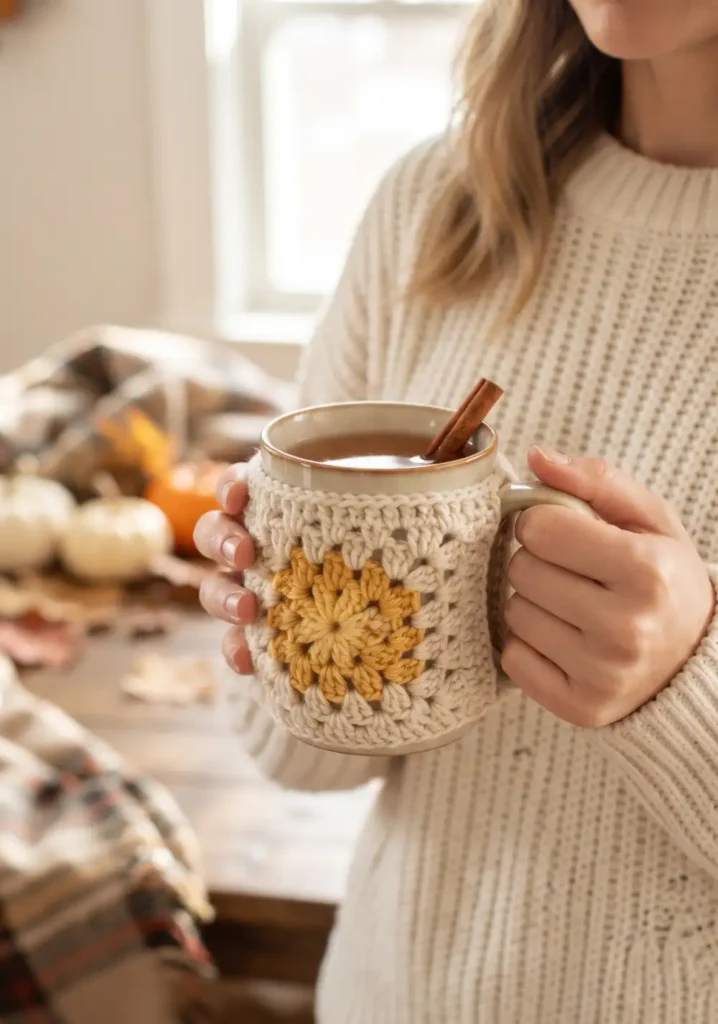
Materials: cotton yarn in orange and green, size E hook, yarn needle
Start with a magic ring and single crochet 6 stitches in, increasing every round until you reach a flat circle about 4 inches across, roughly 5 rounds total. This keeps the coaster sturdy enough to hold a mug.
To add pumpkin ridges, work a round of front post double crochet stitches evenly spaced around the circle, which creates raised vertical lines. Finish with a tiny green stem made from a short chain and a couple of single crochet stitches, sewn to the top edge.

12. Crochet Oak Leaf Placemat
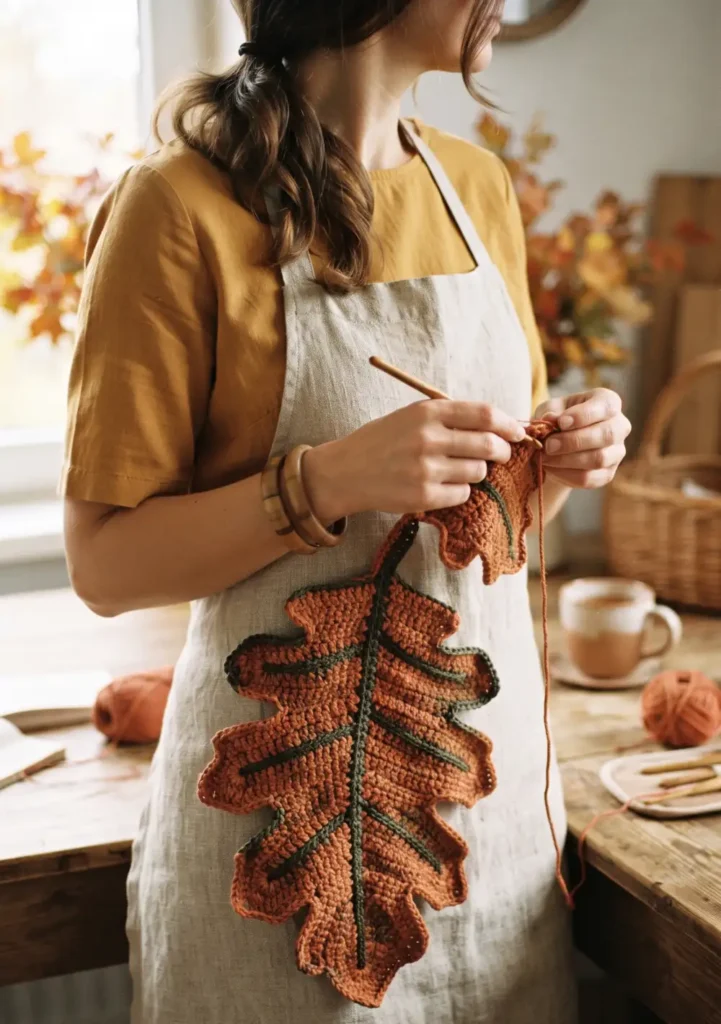
Materials: cotton yarn, size H hook, yarn needle, blocking pins
Chain a center line about 10 inches long to form the spine of the leaf. Working from one end, build out lobed edges using clusters of double crochet separated by chain spaces, increasing and decreasing along the row to create the jagged oak leaf silhouette.
Repeat the lobed pattern down both sides of the spine until you reach the far end, then finish with a small pointed tip. Once complete, pin the placemat out and block it flat, which really helps the leaf shape hold its crisp edges on the table.

13. Crochet Pinecone Bowl Fillers
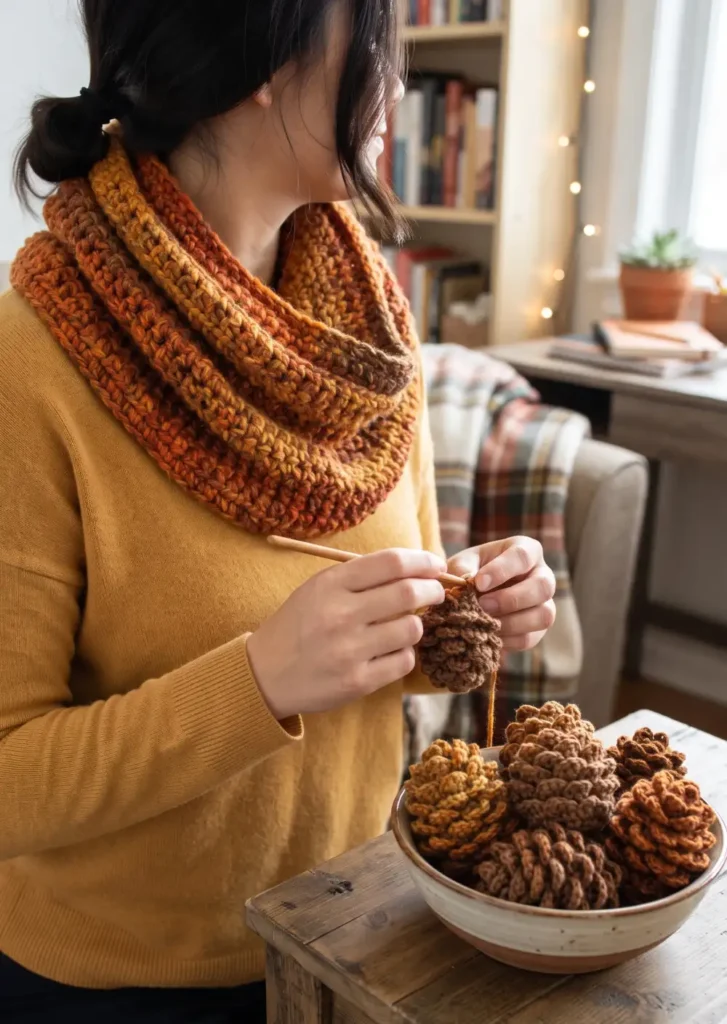
Materials: brown yarn, size E hook, fiberfill, yarn needle
Start with a magic ring and work a few rounds of increases to form a small oval base, about 2 inches long. This becomes the core shape your pinecone scales attach to.
Working in a spiral, add picot stitches, chain 2 and slip stitch back into the base, across each round to build up layered, overlapping scales. Stuff lightly as you go so the shape stays full and round. Continue until you reach the top, then close it off and taper to a small point.

14. Autumn Crochet Table Runner
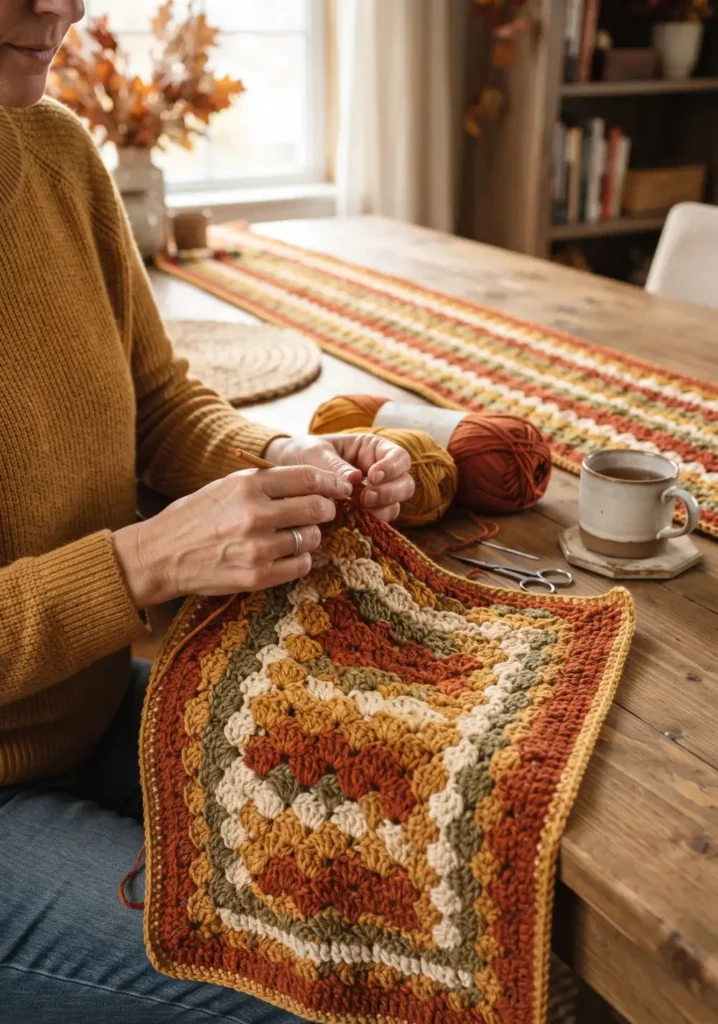
Materials: cotton yarn in fall tones, size H hook, yarn needle
Chain a length to match your table plus a bit of overhang, then work rows in a simple shell stitch pattern, skip 2 chains, work 5 double crochet into the next chain, skip 2, slip stitch into the next, and repeat across.
Continue the shell pattern for as many rows as needed to reach your desired width, alternating colors every few rows if you want stripes. Finish with a simple single crochet border in a contrasting color around all four edges for a clean, finished look.

15. Crochet Plaid Throw Blanket
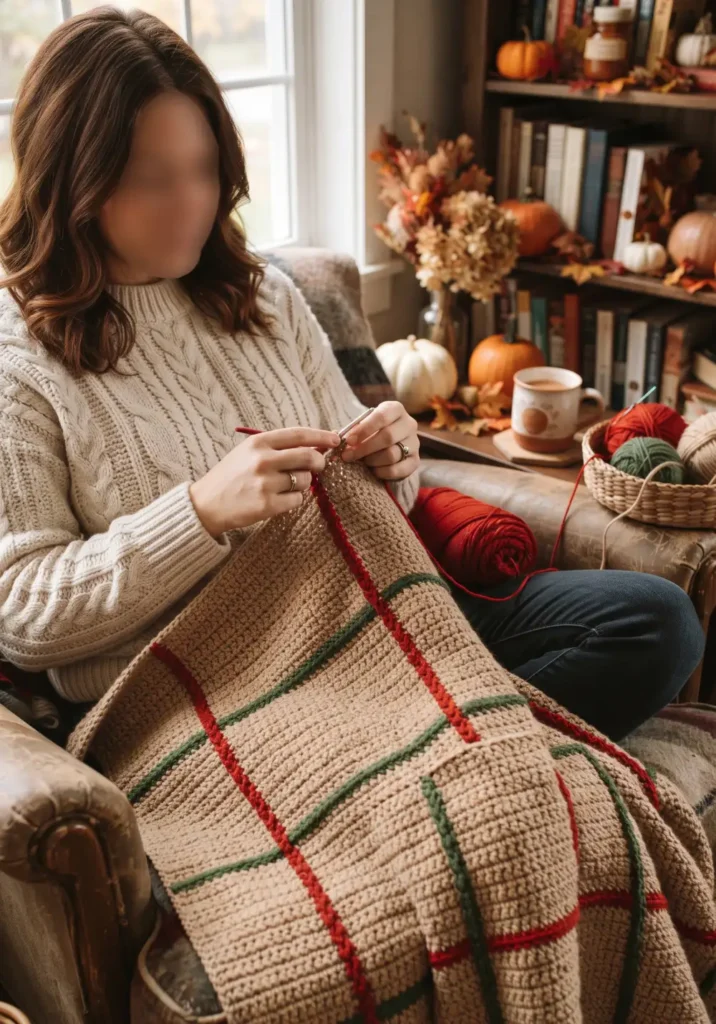
Materials: worsted yarn in red, tan, and green, size I hook, yarn needle
Crochet the blanket base in tan using rows of double crochet, chaining to your desired width and working evenly until you reach the length you want for a throw, typically 40 to 50 inches.
Once the base is finished, add the plaid pattern using surface crochet. Insert your hook into the fabric, pull up a loop of red yarn, and chain stitch a straight vertical line down the blanket. Repeat with vertical and horizontal lines spaced evenly in both red and green to build the crossing plaid pattern on top of the tan base.

16. Chunky Crochet Floor Basket
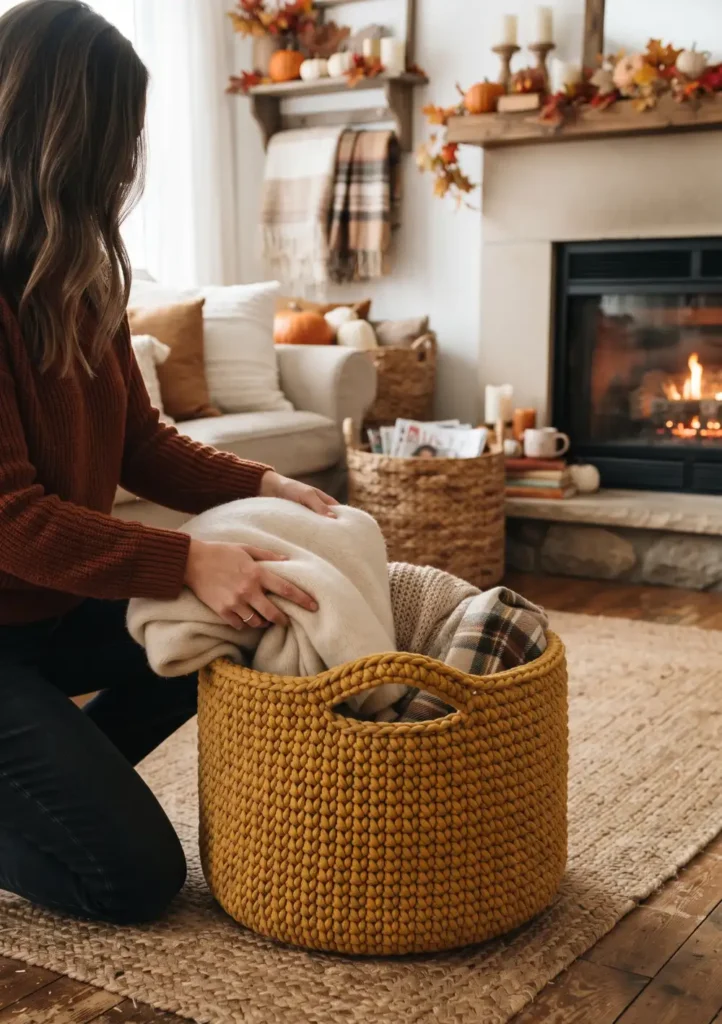
Materials: chunky or jumbo yarn, size N hook, yarn needle
Start with a magic ring and single crochet 6 stitches, increasing every round for about 6 rounds until your base is roughly 14 inches across. The bulky yarn grows quickly, so this works up fast.
Once your base is wide enough, stop increasing and work straight rounds for about 8 inches to build tall sides. The chunky yarn naturally holds its shape, making this basket sturdy enough to store blankets, magazines, or firewood by the fireplace.

17. Crochet Fall Mug Rug
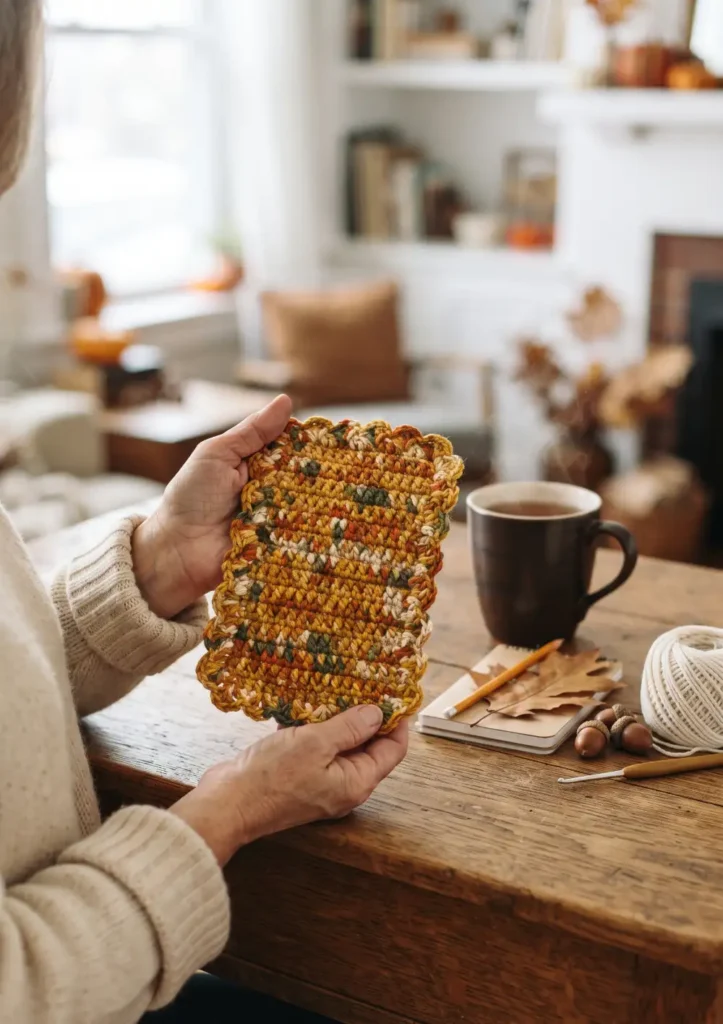
Materials: cotton yarn, size E hook, yarn needle
Chain about 14 stitches to start, then work rows of half double crochet back and forth until your rectangle measures roughly 4 by 6 inches. The half double crochet stitch gives a soft, dense texture that is perfect for catching drips.
Once your rectangle is the right size, add a scalloped border around all four sides, skip a stitch, work 5 double crochet into the next, skip a stitch, slip stitch into the next, and repeat around. This little detail turns a simple rug into something that feels handmade and special.

18. Harvest Corn Amigurumi Decor
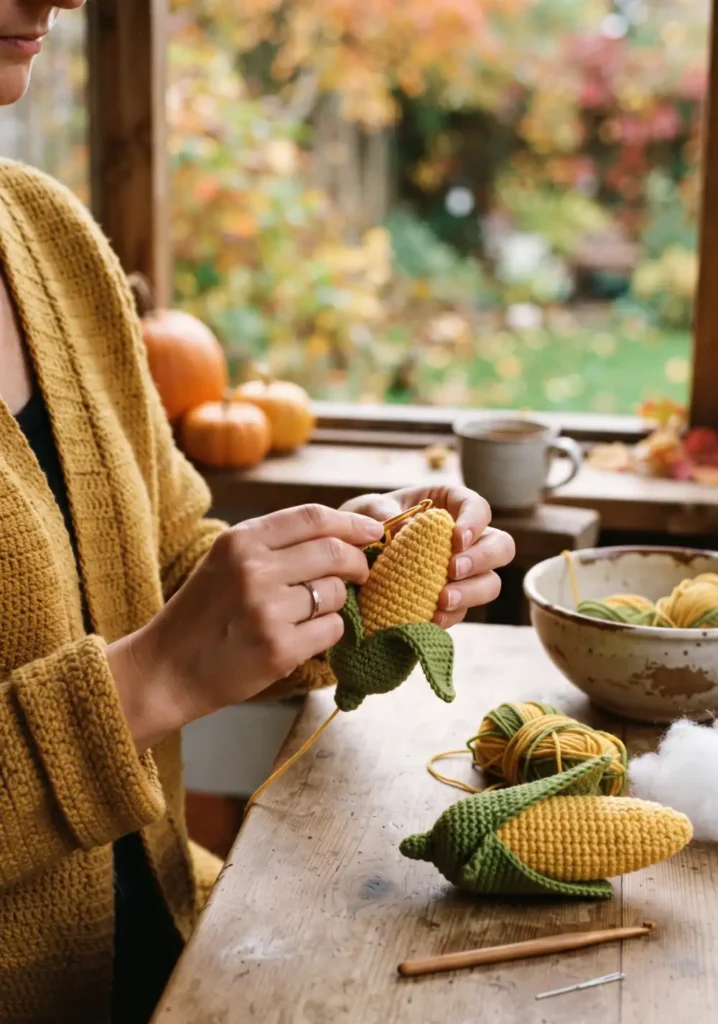
Materials: yellow and green yarn, size E hook, fiberfill, yarn needle
Work the corn body in yellow starting with a magic ring, increasing until your cylinder is about 2 inches across, then work even rounds for roughly 4 inches. For a kernel texture, work in the back loop only for most of the piece.
Stuff the cylinder firmly, then close the top. For the husk, chain a few long pointed leaves in green using increases and decreases to taper each one, and stitch them around the base of the corn so they fold slightly outward like a real husk.

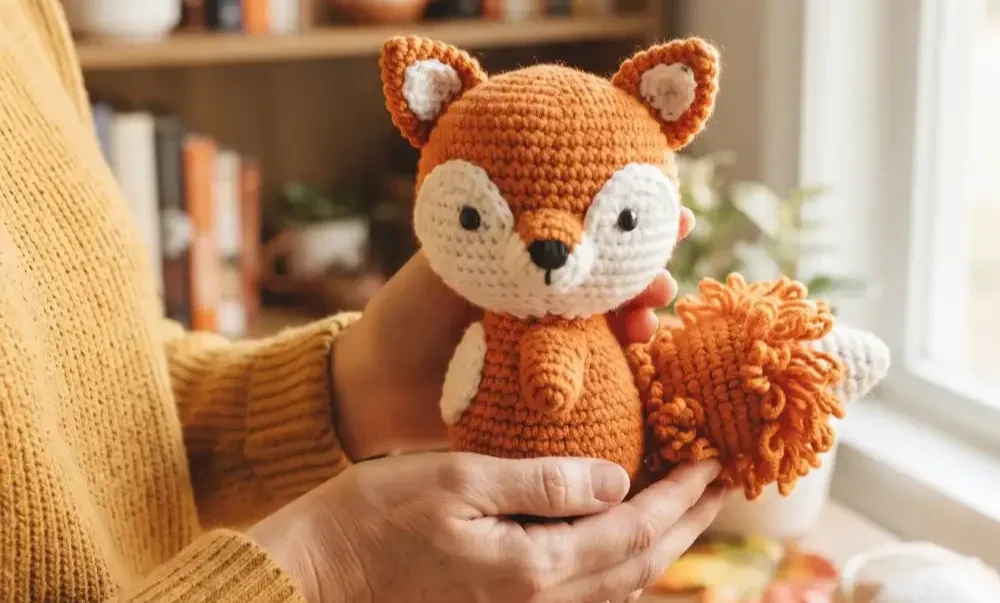
19. Crochet Fox Plush Decoration
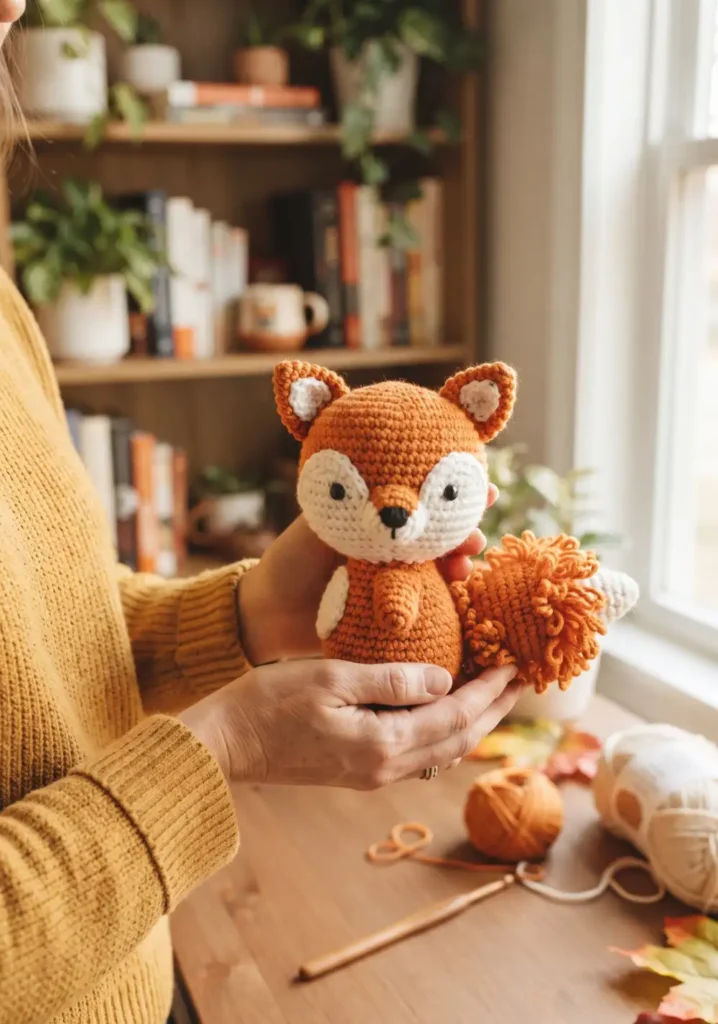
Materials: orange, white, and black yarn, size E hook, fiberfill, yarn needle
Begin the head in orange with a magic ring, increasing every round until you reach about 3 inches across. Switch to white for a small patch on the lower face, worked using color change techniques where you carry the unused color along the back of your stitches.
Crochet the body separately using the same increase pattern, slightly larger than the head, and stuff both pieces before joining them. Add small pointed ears in orange with white centers, black safety eyes or embroidered eyes, and a little black nose. A fluffy tail made with loop stitch or added yarn fringe finishes the look.

20. Crochet Squirrel Shelf Buddy
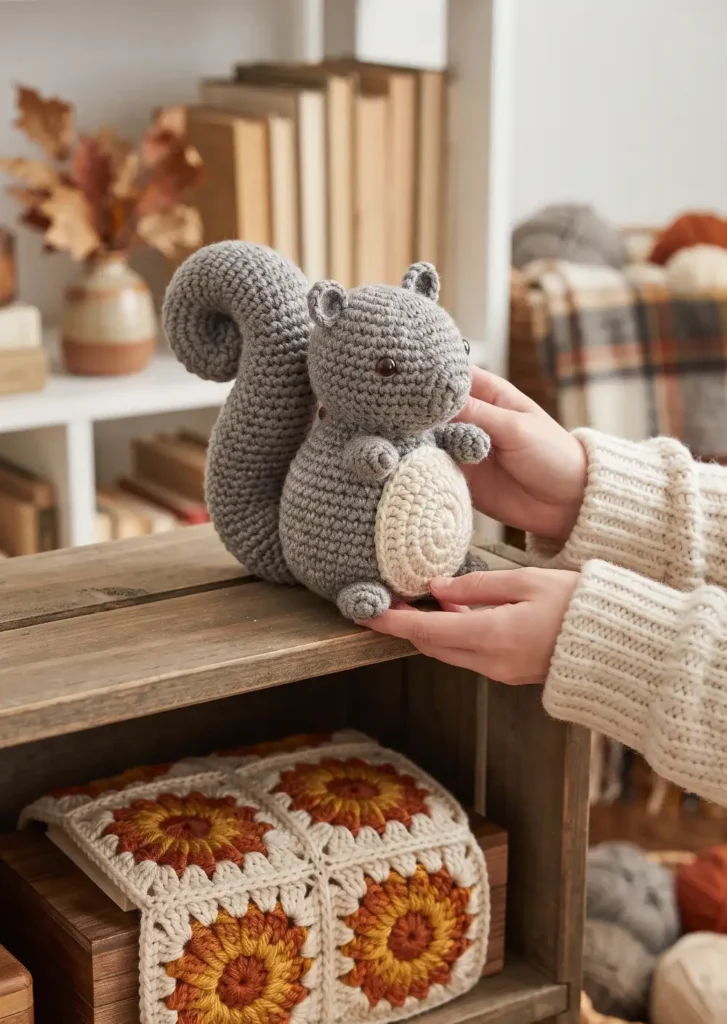
Materials: gray or brown yarn, cream yarn, size E hook, fiberfill, yarn needle
Work the body in gray starting with a magic ring, increasing to shape a rounded belly, then decreasing toward the head area so the body and head are worked as one continuous piece. Add a cream colored belly patch using a simple color change in the front loops only.
For the tail, crochet a long tapered piece separately, increasing in the middle rounds and decreasing at both ends so it curves naturally. Stuff everything, attach small rounded ears, and curl the tail up behind the body before stitching it in place so your squirrel can perch on a shelf.

21. Crochet Apple Basket Pattern
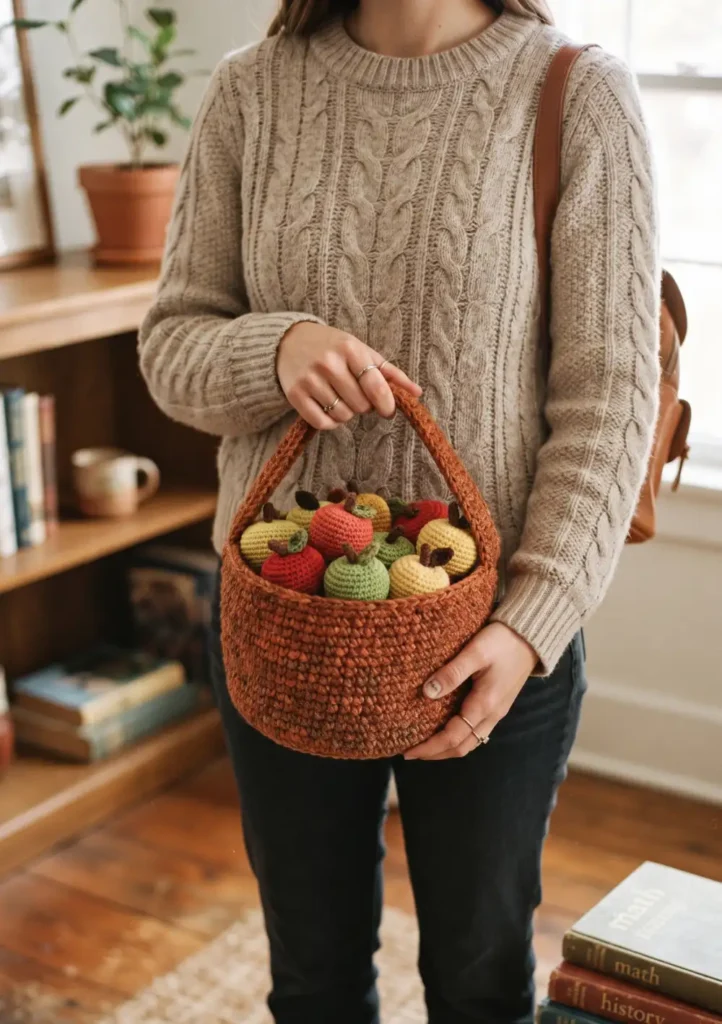
Materials: cotton yarn in red or green, brown for stems, size H hook, yarn needle
Crochet the basket using the same base and side technique as the rustic pumpkin basket, magic ring, increase for several rounds to form the base, then work straight rounds for the sides.
For the apples, start with a magic ring, increase for a few rounds, then decrease to round off the top and bottom into an apple shape, stuffing as you close. Add a small brown chain stem to each apple, then pile them into your finished basket for a cheerful harvest display.

22. Crochet Cinnamon Stick Ornament
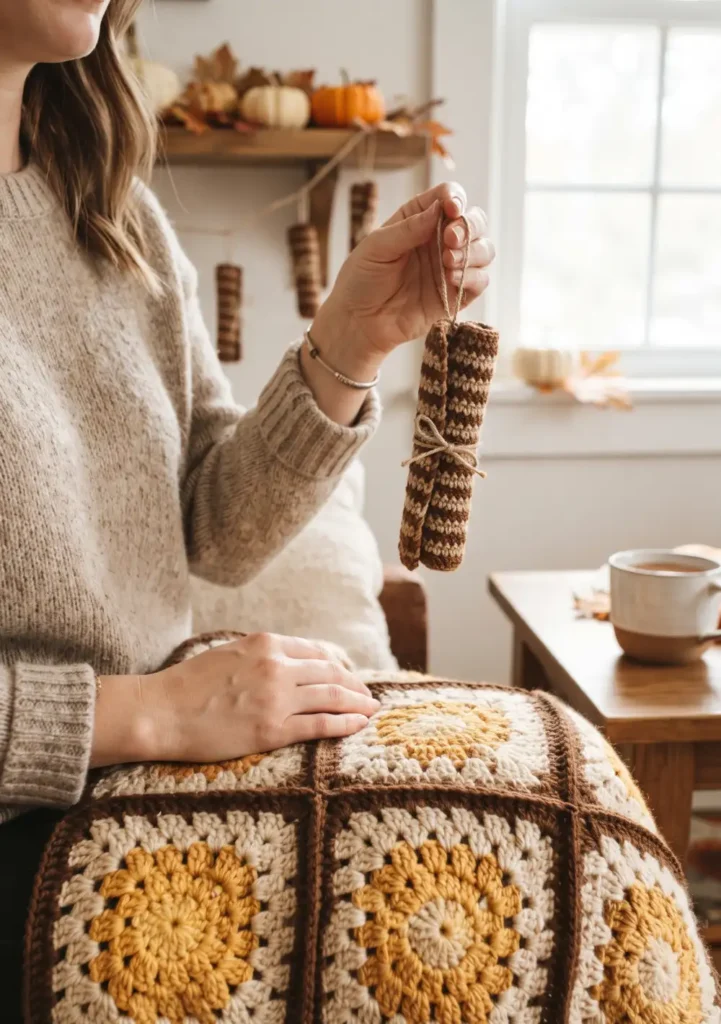
Materials: brown and tan yarn, size D hook, yarn needle, twine or ribbon
Chain a length of about 4 inches, then single crochet back down the chain using both brown and tan yarn held together or alternated every few stitches to create a striped, bark like texture.
Fold the strip lengthwise and whip stitch along the open edge to form a rolled cylinder shape, mimicking a rolled cinnamon stick. Tie a small piece of twine or ribbon around the middle and attach a loop at the top for hanging on a wreath or garland.

23. Crochet Fall Door Hanger
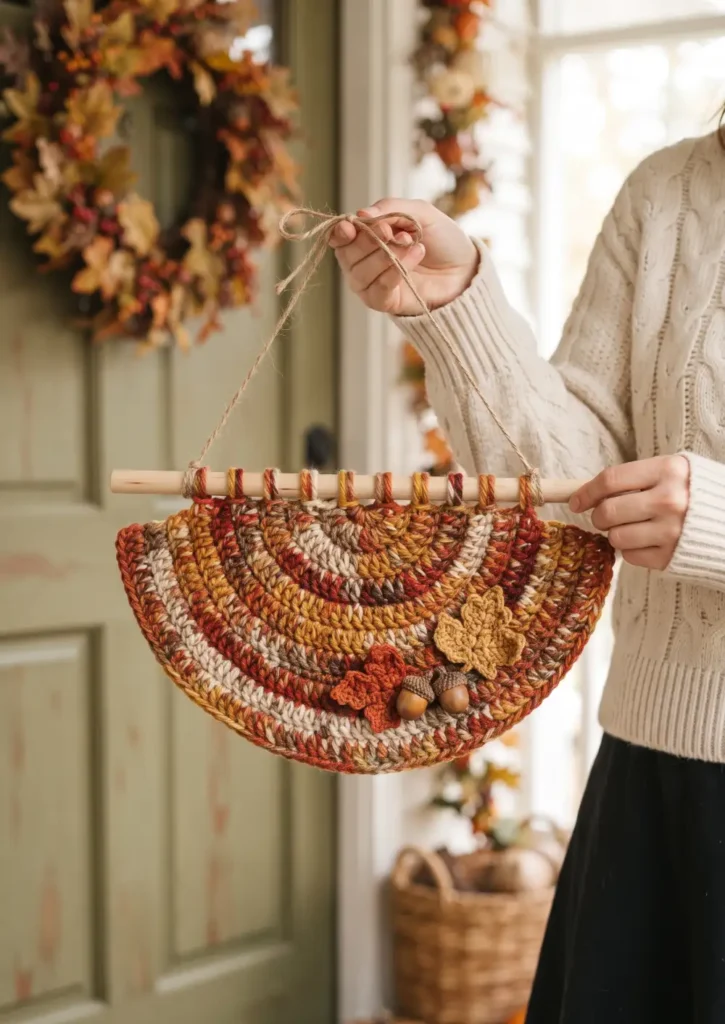
Materials: yarn in mixed fall colors, size H hook, wooden dowel or ring, yarn needle
Crochet a simple fan shaped panel by starting with a small chain and increasing evenly across each row so the piece widens as it grows, similar to how you would shape a shawl.
Once your fan panel is wide enough, attach it to a wooden dowel or ring using loops of yarn spaced evenly along the top edge. Decorate the piece by sewing on a few of the maple leaves or acorns from earlier patterns, then add a ribbon loop at the top center for hanging.

24. Crochet Turkey Centerpiece Pattern
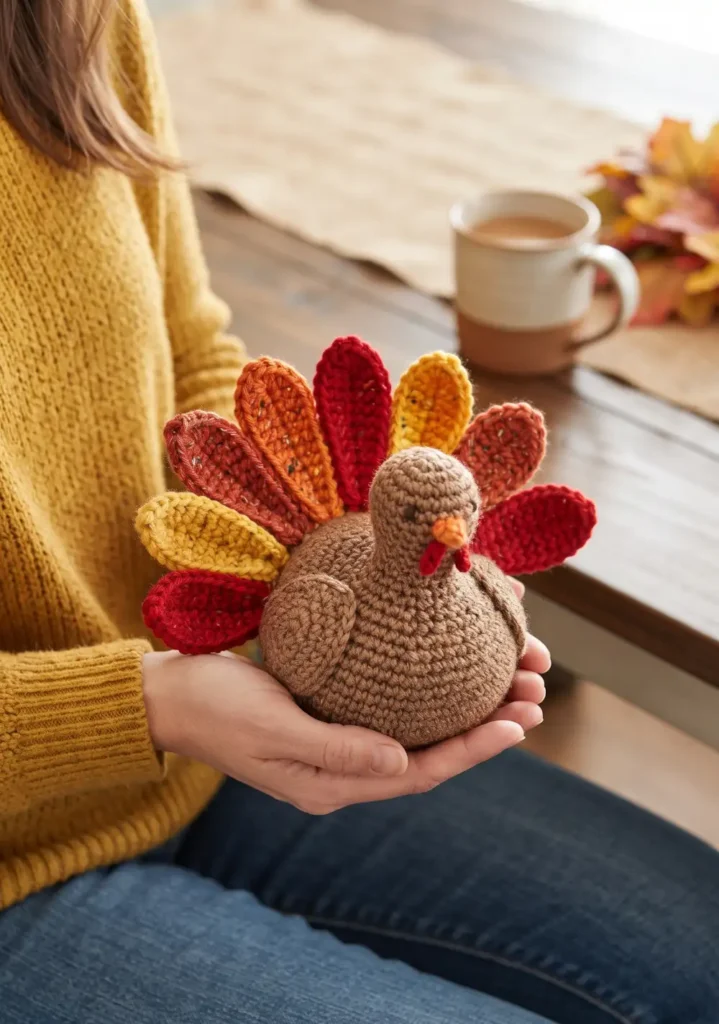
Materials: brown yarn for the body, red, orange, and yellow for tail feathers, size E hook, fiberfill
Crochet the body in brown starting with a magic ring, increasing to shape a rounded form similar to the acorn body technique, then stuff and close. Add a small round head with a tiny orange beak and red wattle detail using embroidery.
For the tail feathers, crochet several teardrop shapes in red, orange, and yellow, increasing then decreasing to a point. Arrange them in a fan behind the body and stitch each one in place so they spread out like real turkey feathers for a festive table centerpiece.

25. Crochet Lantern Cozy Cover
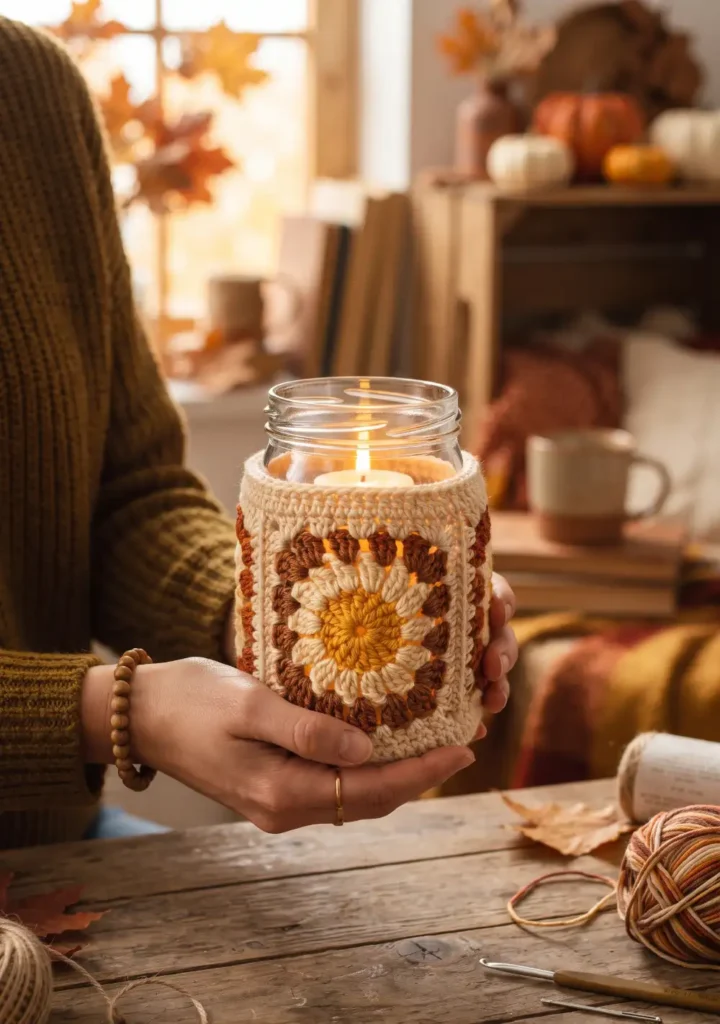
Materials: cotton yarn, size H hook, yarn needle
Measure the height and circumference of your lantern or jar first. Chain enough stitches to match the circumference, join into a round, then work even rounds of single or half double crochet until you reach the desired height.
Leave the top and bottom open so light can still show through if it’s for a candle lantern, or work a closed bottom if it’s meant to sit over a solid jar. Slip the finished cozy over your lantern for an instant seasonal update.

26. Crochet Scarecrow Plush Decor
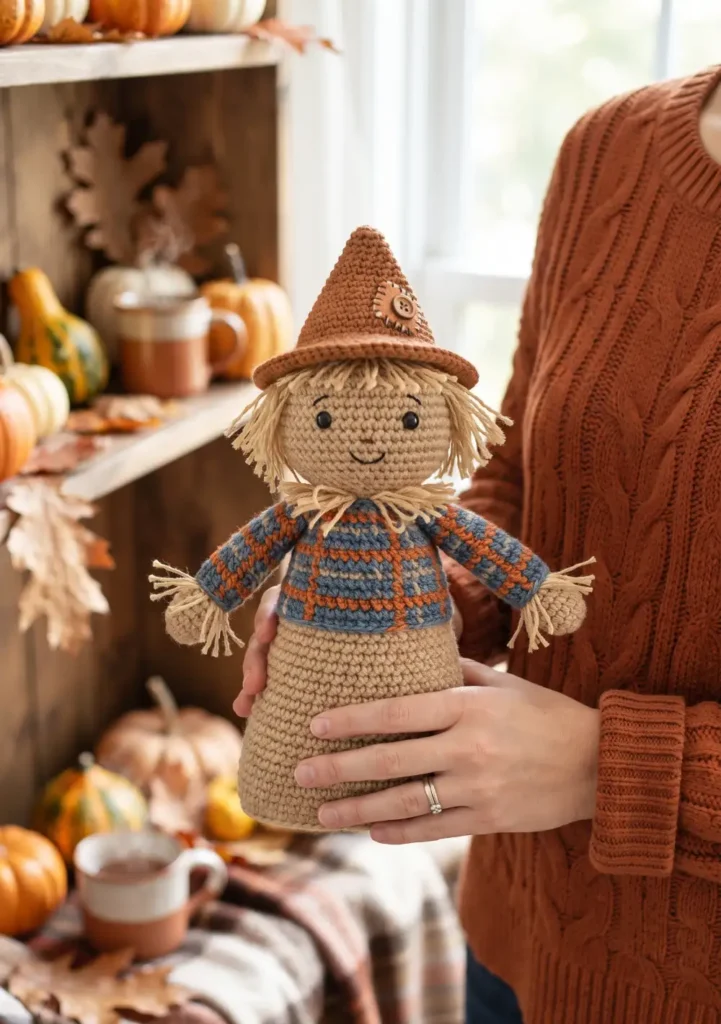
Materials: tan yarn for the body, plaid or blue for clothing, straw colored yarn for hair, size E hook, fiberfill
Work the head and body using the same cone shaped technique as the fall gnome, magic ring, increase for shoulders, then straight rounds down to the base. Add a separate patched shirt piece in plaid yarn using simple color blocking.
Attach straw colored yarn strands at the neckline and cuffs for that classic scarecrow straw look. Finish with a small triangle shaped hat and simple embroidered facial features for a friendly, rustic face.

27. Crochet Woodland Owl Decoration
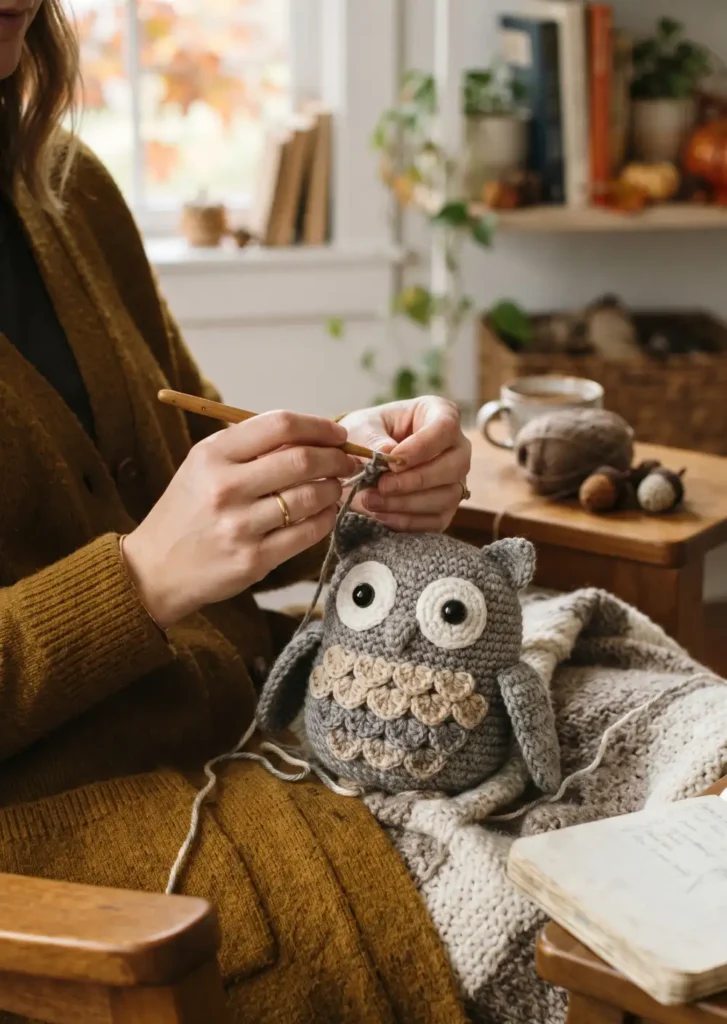
Materials: gray, brown, or cream yarn, size E hook, fiberfill, safety eyes or felt
Crochet the body starting with a magic ring, increasing evenly until you reach your desired width, then work straight rounds down to form the rounded owl shape. Decrease gradually near the top to round off the head without a separate neck.
Add texture to the chest using rows of shell stitches or simple V stitches worked in a contrasting color for a feathered effect. Attach large safety eyes or felt circles, small triangle ears if you like the eared owl look, and stitch on tiny wings using a simple teardrop shape.

28. Crochet Autumn Wall Hanging Pattern
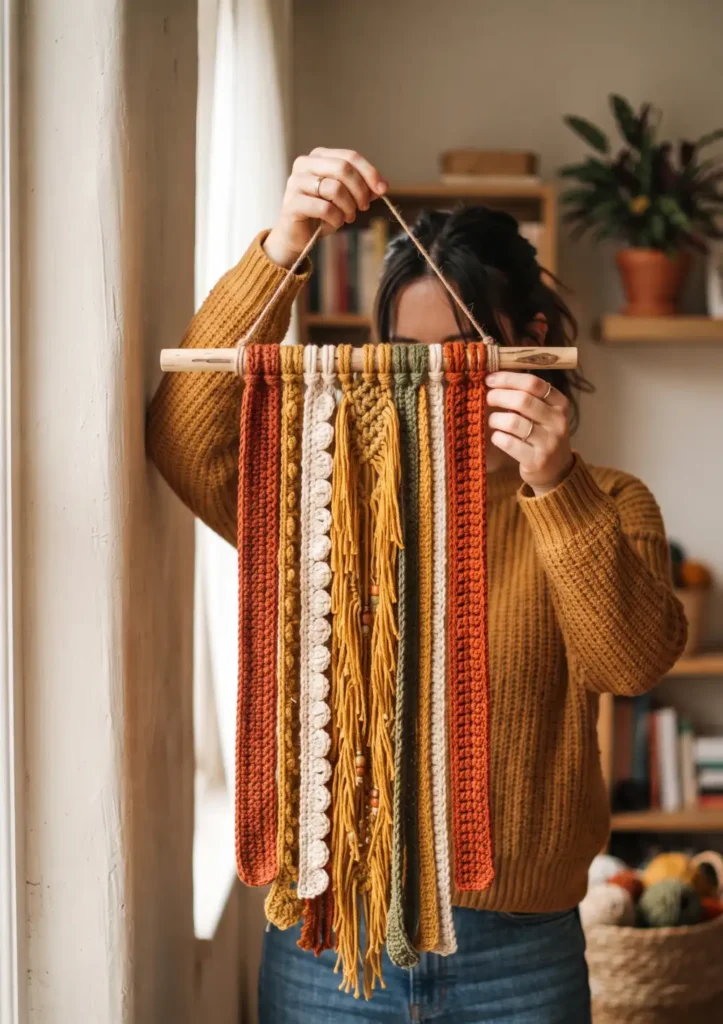
Materials: yarn in fall colors, size H hook, wooden dowel, yarn needle
Crochet several strips in varying lengths and stitch patterns, try single crochet for one, shells for another, and a fringe edge for a third. This mix of textures gives the wall hanging visual interest.
Attach each strip to a wooden dowel by folding it in half and pulling the folded loop through behind the dowel, then pulling the ends through that loop to secure it, similar to a macrame technique. Space the strips evenly across the dowel, trim any fringe ends even, and add a length of yarn or twine to the ends of the dowel for hanging.

FAQs
How much yarn do I need for fall decor crochet projects?
It depends on the project size, but most small items like coasters or ornaments use less than one skein. Larger pieces like blankets or baskets may need 3 to 5 skeins.
What hook size works best for amigurumi decor?
A smaller hook, usually size D to E, is best for amigurumi because it keeps stitches tight and prevents stuffing from showing through.
Can beginners make these fall crochet patterns?
Yes. Most of these patterns use basic stitches like single crochet, half double crochet, and double crochet, making them approachable even if you are just starting out.
How do I keep my crochet pumpkins from looking lumpy?
Stuff evenly and in small amounts at a time, working the fiberfill into the edges first before filling the center.
What yarn weight is best for cozy fall decor?
Worsted weight yarn works well for most projects on this list because it’s easy to handle and creates good stitch definition.