6 Free Crochet Pumpkin Patterns to Make This Autumn
Fall means one thing in my house: pumpkins on every shelf, and none of them from the pumpkin patch. I’ve spent years perfecting these little squash so you don’t have to start from scratch. Six patterns, six totally different techniques, and not a single boring stitch among them.
Whether you want a textured farmhouse pumpkin for your mantel or a squishy amigurumi one for your desk, this roundup has you covered. Grab your hook and your favorite orange yarn. Your autumn decor is about to get a serious upgrade.
1. Crochet Farmhouse Pumpkin Pattern
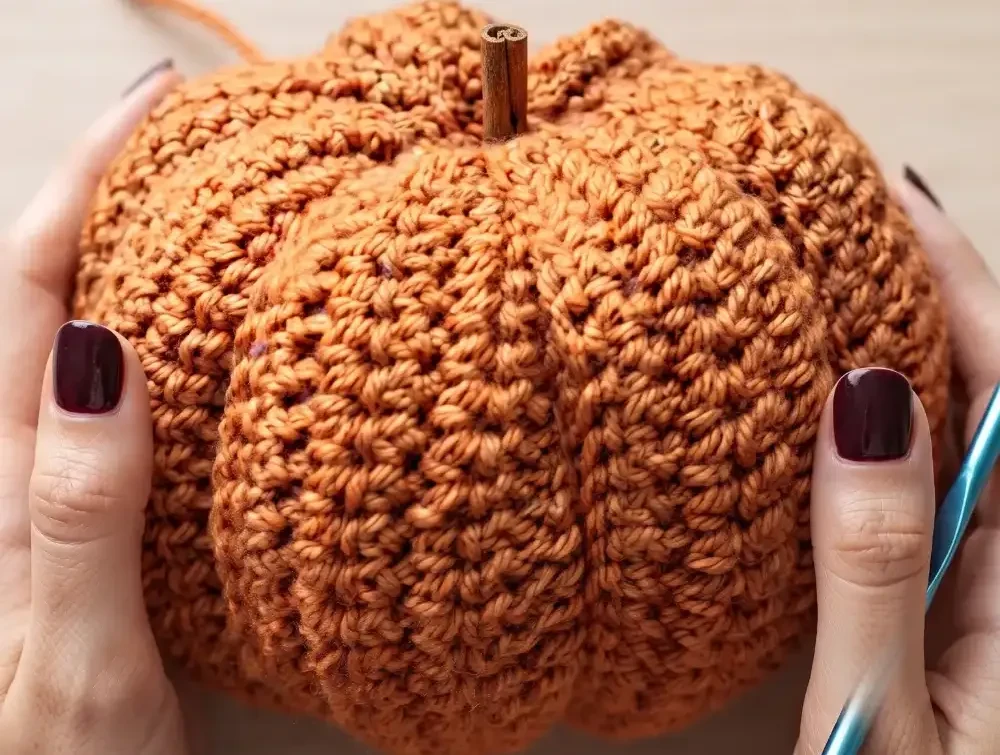
This tutorial provides a unique spin on the standard crochet pumpkin by using the even moss stitch to create a beautiful, ridged texture. You can easily adjust the size of your pumpkin by simply changing your yarn weight and hook size while following the same pattern.
Essential Materials and Sizing
Before beginning, choose the size of pumpkin you wish to create:
- Small Pumpkin: Use medium 4 weight yarn with a 4 mm (G) hook.
- Medium Pumpkin: Use bulky 5 weight yarn with a 6 mm (J) hook.
- Large Pumpkin: Use super bulky 6 weight yarn with a 7 mm hook.
In addition to your yarn and hook, you will need a yarn needle, scissors, fiberfill stuffing, and a pumpkin stem, which can be a natural stick, a cinnamon stick, or even scrap leather.
Step 1: Crafting the Textured Panel
To start, create a chain of 16, or any even number if you wish to adjust the height of your pumpkin. For Row 1, work a slip stitch into the second chain from the hook, followed by a half double crochet into the next chain. Continue alternating these two stitches across the entire row, always ending on a slip stitch.
For Rows 2 through 42, repeat this pattern by working a slip stitch into the first stitch and a half double crochet into the next. This technique ensures that your half double crochets are worked into the ones from the previous row, creating the signature “farm fresh” texture. You can add more rows if you want a wider pumpkin, but ensure you end on an even-numbered row.
Step 2: Seaming and Closing the Base
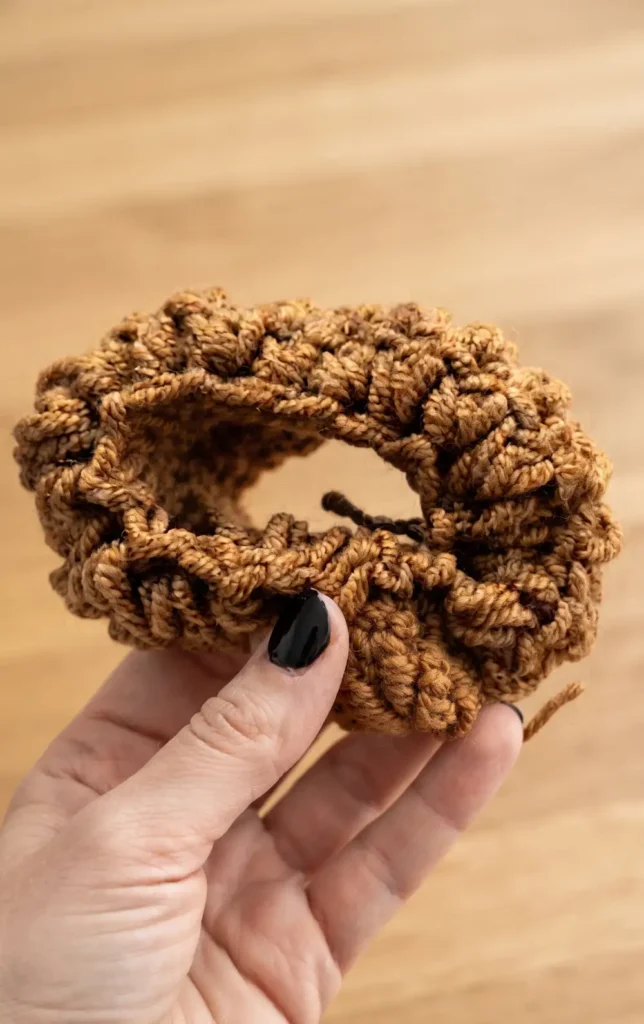
Once your panel is finished, fold it over so the two short sides meet. Join them by working 15 slip stitches across both ends to create a seam, then flip the piece inside out so the seam is hidden on the interior.
To close the bottom, work a round of half double crochet two together (HDC2TOG) into the ends of the rows all the way around. Fasten off your yarn, leaving a long tail of about 24 inches. Thread this tail through a yarn needle and weave it in and out of the bottom stitches, then pull the yarn tight to cinch the hole closed and secure it with a few knots.
Step 3: Stuffing and Closing the Top
Keep your yarn tail attached and push the needle up through the center of the pumpkin so it emerges at the top opening. Fill the pumpkin with fiberfill stuffing to your desired level of firmness, keeping the yarn tail centered in the middle of the stuffing.
Using your needle and the same yarn tail, weave in and out of the stitches around the top opening. Pull the yarn tight to cinch the top hole, leaving a small opening just large enough for your chosen stem to fit through.
Step 4: Final Shaping and Stem Attachment
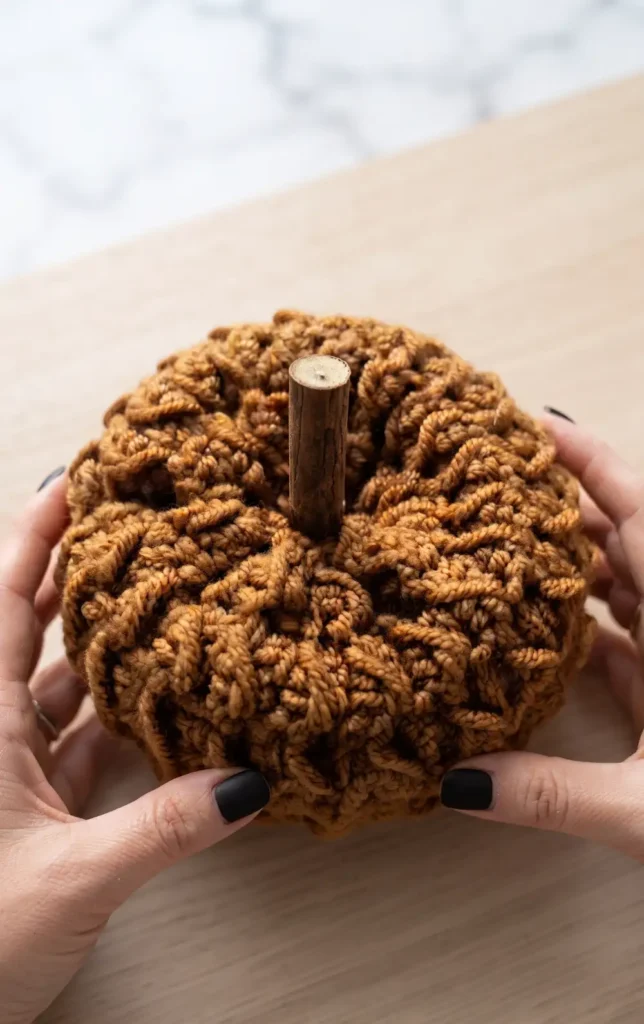
To give the pumpkin its classic squashed shape, poke your needle from the top center all the way back down through the bottom center and pull tight. This cinches the middle and defines the pumpkin’s form. Secure the yarn at the bottom with several knots and weave in the ends before cutting.
Finally, insert your stem into the top hole. You can use a branch from your yard, a cinnamon stick for a festive scent, or a loop of leather. If you want the stem to be more permanent, you can secure it with a dab of hot glue or fabric glue, and feel free to decorate further with twine, faux leaves, or berries.
Hey there! Some links on this page may be affiliate links which means that, if you choose to make a purchase, I may earn a small commission at no extra cost to you.
Video Credits: The Turtle Trunk
2. Crochet Ribbed Pumpkin Pattern
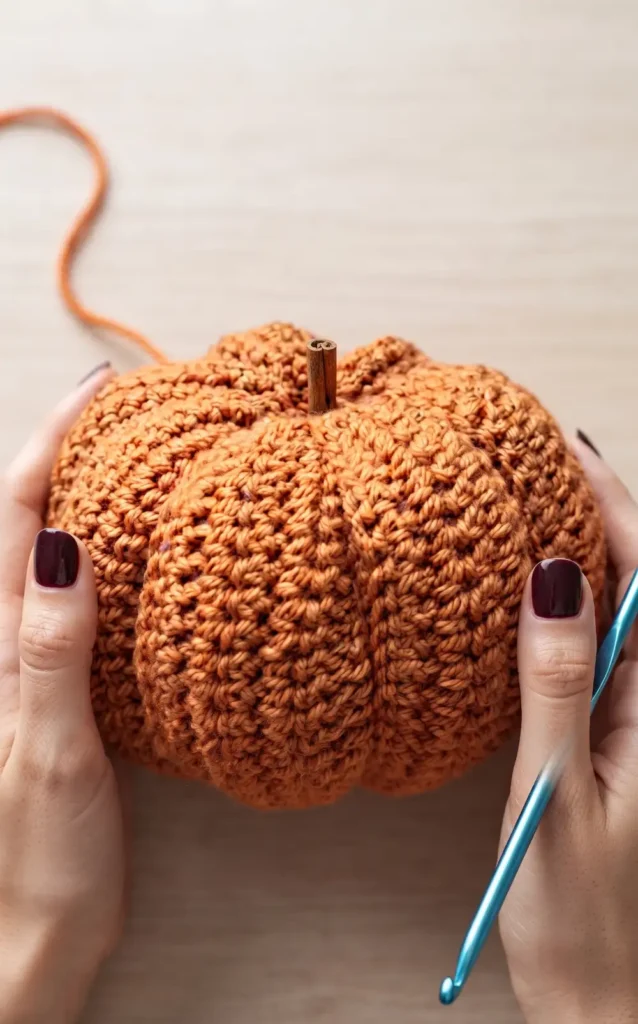
Creating these handmade pumpkins is a quick and versatile project that serves as excellent autumn decor. This pattern produces a pumpkin roughly six inches wide and four and a half inches tall, though you can easily modify the size by changing your yarn weight or starting chain length.
Essential Materials
Before you begin, gather the following supplies:
- Yarn: Size 4 yarn in your chosen colour, though any weight can be used.
- Crochet Hook: A 5mm hook or the size that correlates with your yarn.
- Tapestry Needle: A long needle is preferred for shaping, but a small one will work.
- Stuffing: Polyfill or yarn scraps.
- Finishing Touches: Scissors and a cinnamon stick for the stem.
Step 1: Crochet the Base Rows
Start by making a slip knot and creating a chain of 31. For the first row, place a single crochet in the second chain from the hook and in every subsequent chain. Continue this process for a total of four rows of standard single crochet, making sure to chain one and turn your work after completing each row.
Step 2: Create the Ribbed Sections
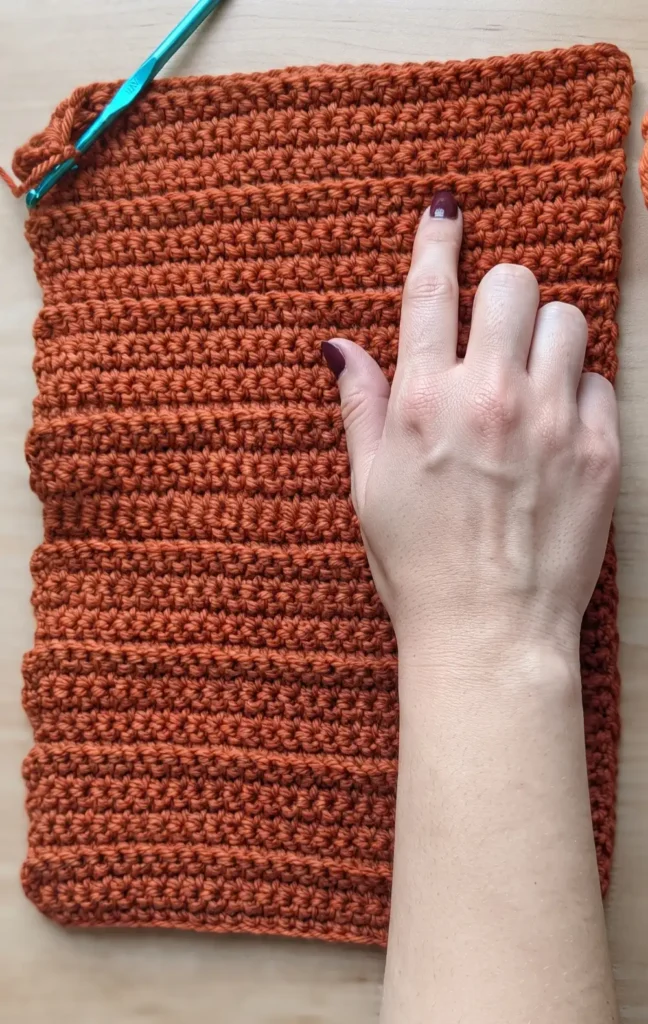
To create the ridges that define the pumpkin’s shape, the next two rows use a different technique. For rows five and six, work a single crochet into the back loop only of each stitch. Once these two rows are finished, repeat the entire six row sequence (four rows of standard single crochet followed by two rows in the back loop only) seven more times. You should end up with a total of eight sections.
Step 3: Join and Stuff the Pumpkin
Fold your project in half so the first and last rows meet. Join them together by working a single crochet through both the back loop of the current row and the corresponding stitch of the first row. Fasten off, leaving a very long yarn tail. Turn the resulting tube right side out. Using your tapestry needle, weave the tail in and out of every other stitch along the bottom edge and pull tight to cinch it closed. Fill the pumpkin firmly with polyfill or yarn scraps to prevent it from looking lumpy.
Step 4: Shape the Sections and Add the Stem
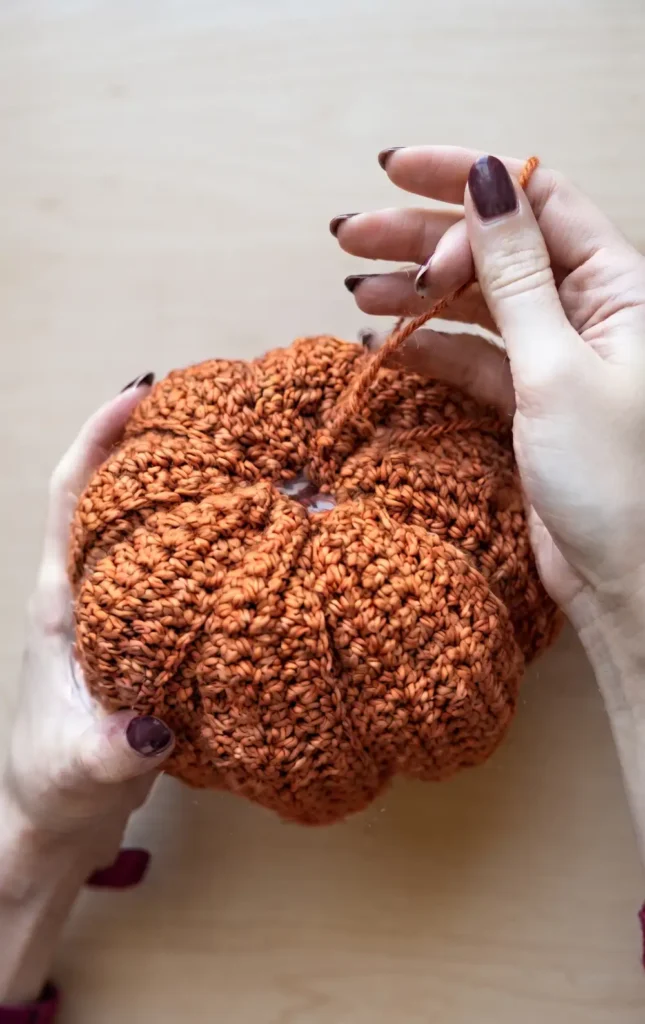
Weave the yarn tail through the top edge and pull it tight to close the opening. To create the pumpkin sections, locate the ridges created by the back loop stitches. Wrap the yarn tail along a ridge from top to bottom, insert the needle through the center of the pumpkin, and pull tight. Repeat this for all eight ridges. Secure the yarn with a knot and hide the end inside the pumpkin. Finally, insert a cinnamon stick into the top center to serve as a natural stem.
Video Credits: Jaclyn | Purls & Top Knots
3. Crochet Amigurumi Pumpkin Pattern
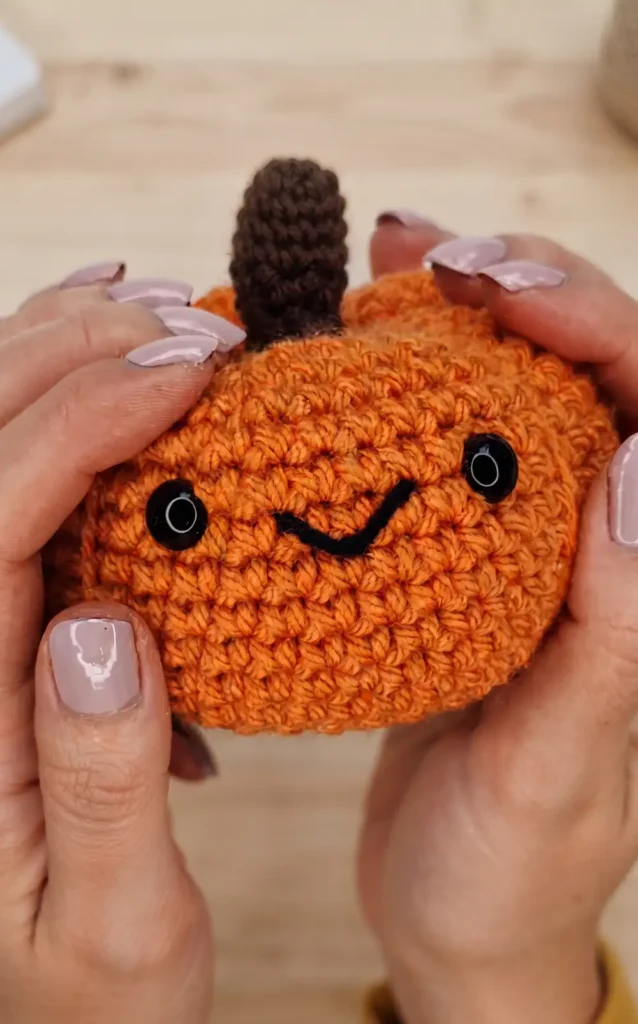
Creating a fat, squashy amigurumi pumpkin is a perfect project for beginners. To ensure your stitches are tight enough so that the stuffing does not show through, it is recommended to use a hook size smaller than what the yarn label suggests.
Materials Needed
- Chunky Yarn: Pumpkin colors (such as spice) and brown for the stem.
- Crochet Hook: A 4mm hook is recommended for chunky yarn to achieve tight stitches.
- Safety Eyes: 10mm safety eyes.
- Tools: Scissors, a stitch marker, a large eye needle, and stuffing.
- Face Details: A small scrap of black yarn for the mouth.
Step 1: Crocheting the Main Body
Start by creating a magic ring and placing 6 single crochet (sc) stitches into it. For the second round, place two sc into each stitch to increase your count to 12. Continue increasing in each subsequent round (sc 1 then increase, sc 2 then increase, etc.) until you reach a total of 48 stitches at the end of round 7. Once the increases are complete, crochet eight rounds of straight single crochet (48 stitches per round) to build the height of the pumpkin.
Step 2: Adding the Face and Eyes
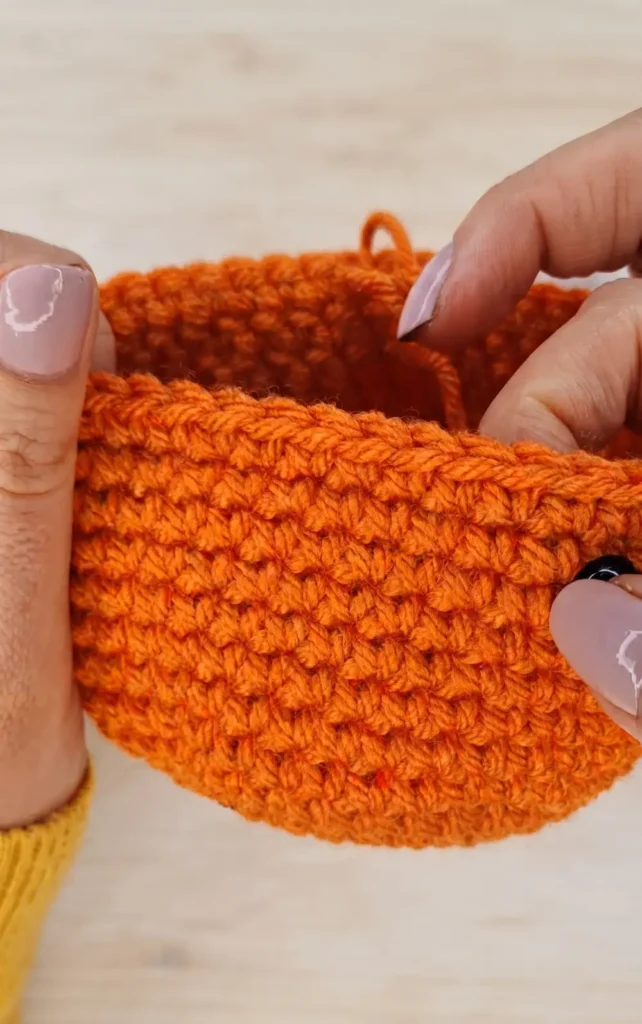
Before closing the pumpkin, you must place the safety eyes and embroider the mouth. Locate the front of your work and place the 10mm safety eyes approximately six stitches apart, a few rows down from your last completed round.
Once the eyes are secured with their backs, use a needle and black yarn to embroider a small smiley face. Aim for the mouth to stretch across four stitches, then knot the yarn ends securely on the inside of the pumpkin.
Step 3: Decreasing and Shaping the Segments
Begin the decrease rounds by following a pattern of 6 sc followed by an invisible decrease, gradually reducing the stitch count in each round. When you reach 18 stitches, pause to firmly stuff the pumpkin, focusing the stuffing around the midsection to help keep the top and bottom flat.
Finish the final rounds until you have only 6 stitches left, then cut the yarn, leaving a long tail of 12 to 16 inches. Use this long tail and a needle to wrap the yarn around the outside of the body and pull it through the center from top to bottom. Pull the yarn tight to cinch the body into the classic segmented pumpkin shape.
Step 4: Creating and Attaching the Stem
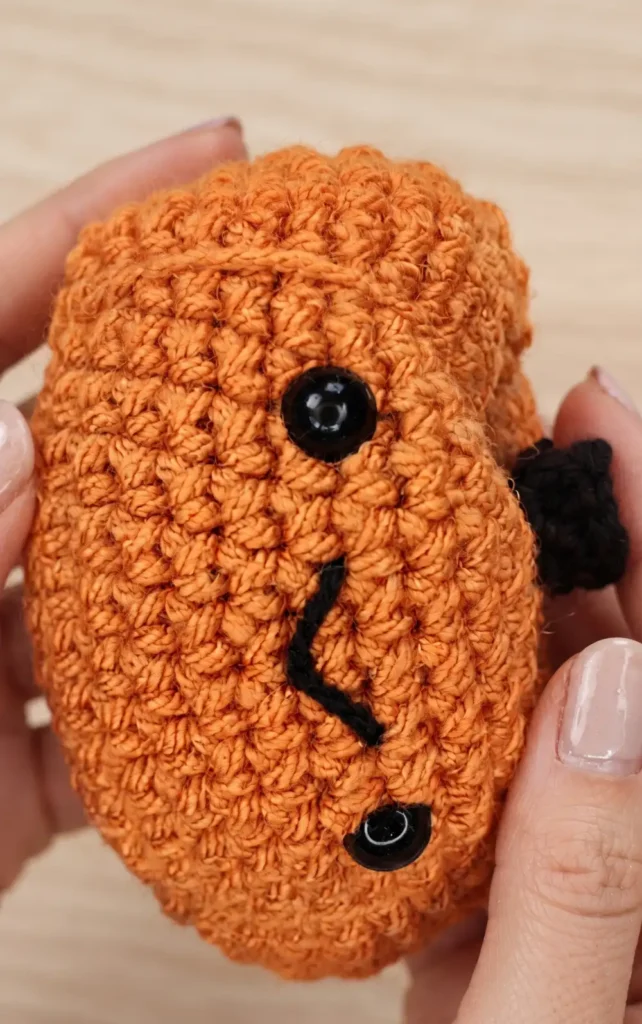
Using brown chunky yarn, start a new magic ring with 6 sc. Crochet four rounds of 6 sc (24 stitches total) to create a small, thin tube. Leave a long tail for sewing and, if desired, push a small amount of scrap yarn inside for stability. Position the stem over the center of the pumpkin’s top to hide the knots from the shaping process and sew it securely into place. Weave in any remaining ends to finish your pumpkin.
Video Credits: Hooked by Robin
4. Crochet Pumpkin Drawstring Pouch Pattern
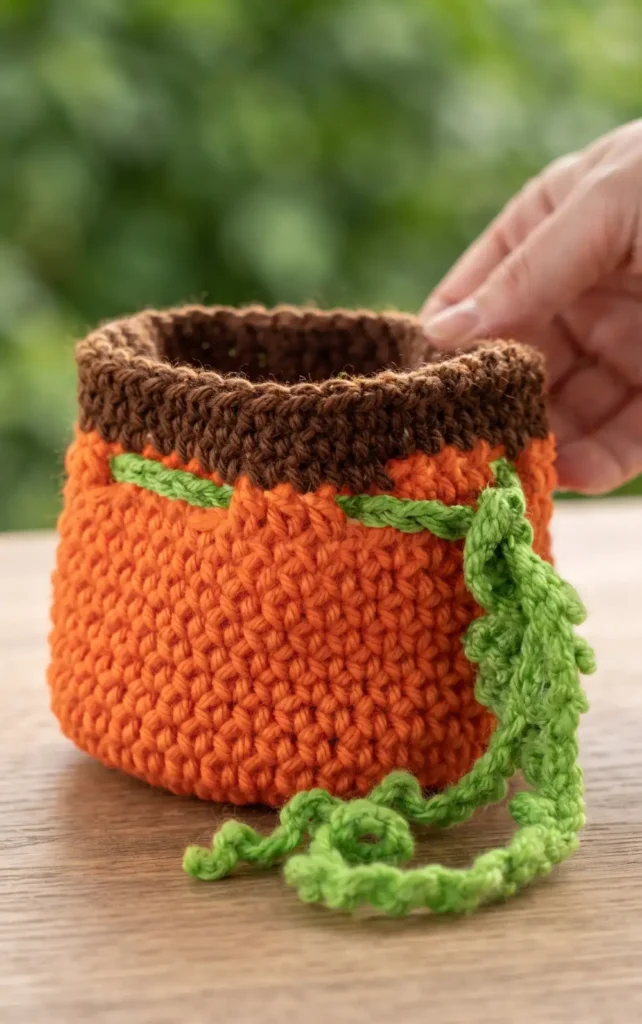
This festive and functional project combines the charm of autumn pumpkins with the utility of a drawstring pouch. It is perfect for gifting seasonal treats or organizing small items in your bag.
Materials Needed
To create this pouch, you will need the following supplies:
- Yarn: Worsted weight acrylic yarn (size 4). You need approximately 25 grams of orange, a small amount of green for the drawstring and vine, and a very small amount of brown for the stem.
- Hook: A 5.5 mm (I-9) crochet hook.
- Tools: A pair of scissors and a yarn needle for weaving in ends.
Step 1: Create the Pumpkin Base
The project begins with a cinch circle. Work 8 single crochet stitches into the circle and cinch it shut. You will work in continuous rounds without joining. To expand the base, follow this increase pattern:
- Row 2: Work 2 single crochets into every stitch (16 stitches total).
- Row 3: Work 2 single crochets into the first stitch, then 1 single crochet into the next. Repeat this around (24 stitches total).
- Row 4: Work 2 single crochets into the first stitch, then 1 single crochet into each of the next two stitches. Repeat around (32 stitches total).
- Row 5: Work 2 single crochets into the first stitch, then 1 single crochet into each of the next three stitches. Repeat around (40 stitches total).
Step 2: Build the Body of the Pouch
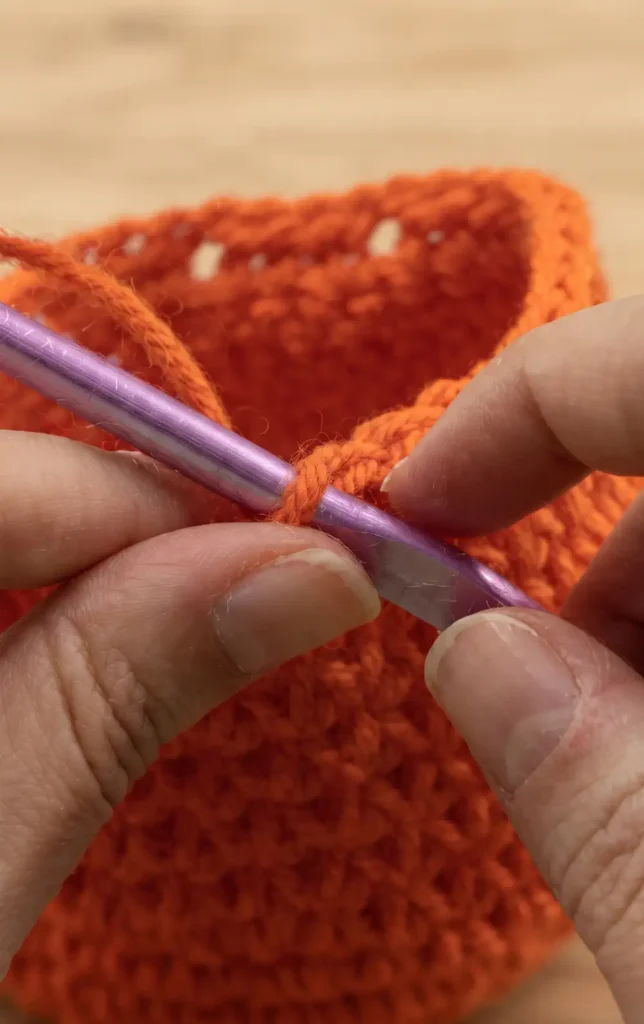
Once the base is 40 stitches wide, the increasing stops. For rows 6 through 15, simply work 1 single crochet into every stitch. This straight stitching for 10 rows creates the height of the pumpkin. After completing row 15, slip stitch into the next stitch to even out the top of the orange section.
Step 3: Add Eyelets and the Brown Stem
To create the drawstring holes, chain 3 (this counts as a half double crochet plus a chain 1). Skip the next stitch, then half double crochet into each of the next three stitches. Repeat the pattern of “chain 1, skip 1, half double crochet 3” all the way around. Join with a slip stitch and fasten off the orange yarn.
Next, join the brown yarn to start the stem. Work one single crochet into every stitch and every chain space around for three rows. This creates a sturdy brown border at the top of your bag.
Step 4: Craft the Drawstring and Decorative Tendril
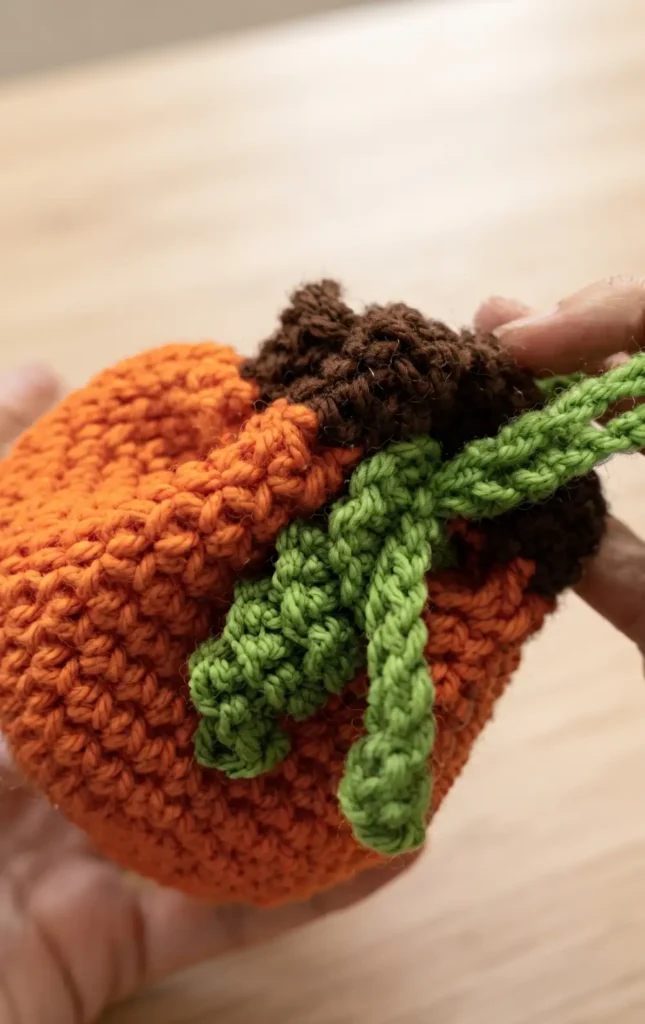
For the drawstring, use the green yarn to create a simple chain of 80 stitches. Fasten off and trim the ends. Weave this chain in and out of the eyelet row you created in Step 3.
To add a decorative curly vine (tendril), chain either 11 (short) or 21 (long). Starting in the second chain from the hook, work 4 single crochets into every single chain. The stitches will naturally twist into a spiral. Once finished, weave the ends of your drawstring through the base of this tendril. The tendril acts as a decorative slide closure, making it easy to open and close your pumpkin pouch without needing to tie tight knots.
Video Credits: Jayda InStitches
5. Zig Zag Crochet Pumpkin Pattern
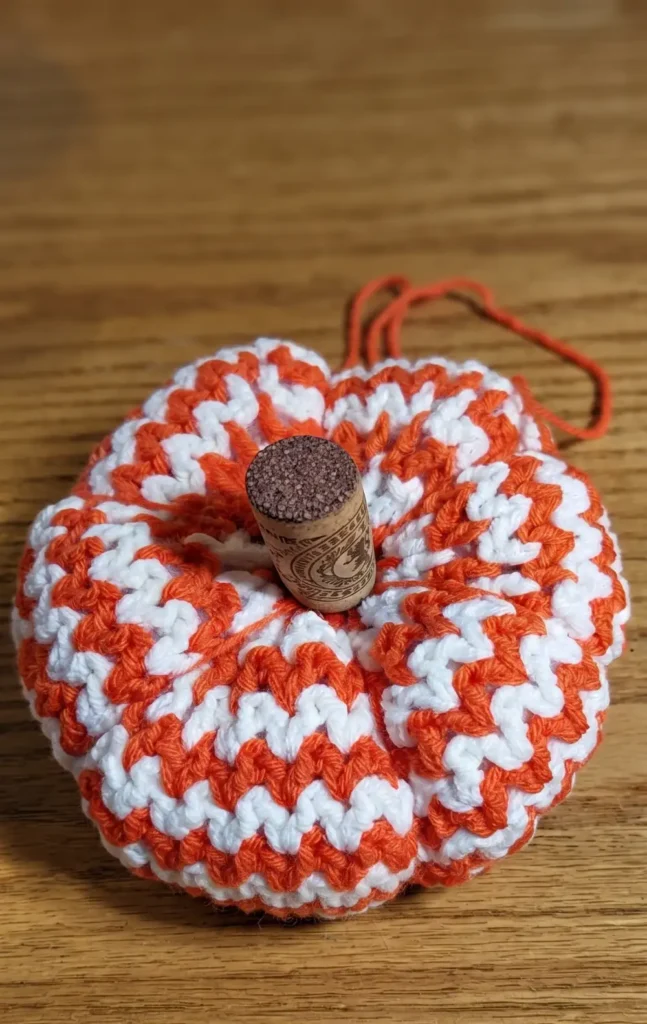
This one-day crochet project uses the rickrack stitch to create a textured, colorful pumpkin [Source Title, 20]. This technique involves working in the gaps between double crochet stitches rather than the tops, resulting in a jagged zigzag pattern that produces a tight fabric ideal for stuffed items. To complete this project, you will need orange and white yarn, a crochet hook, stuffing, a long needle, a wine cork for the stem, and tacky glue.
Step 1: Creating the Base with Increase Rounds
To begin the pumpkin, chain 4 and work 11 double crochets (DC) into the first chain to create a starting circle of 12 stitches. Join the round with a slip stitch and change colors. Throughout the pattern, you will carry the unused yarn color along the inside of the piece since it will be hidden by stuffing.
Start the rickrack pattern by working in the gaps between the DC stitches. In the first increase round, place four DCs into every gap between pairs. In the following rounds, you will stagger the increases by placing four DCs in every other space, then every third space, and finally every fourth space. Do not worry if the circle ripples slightly, as this helps create the round pumpkin shape.
Step 2: Working the Even Sides
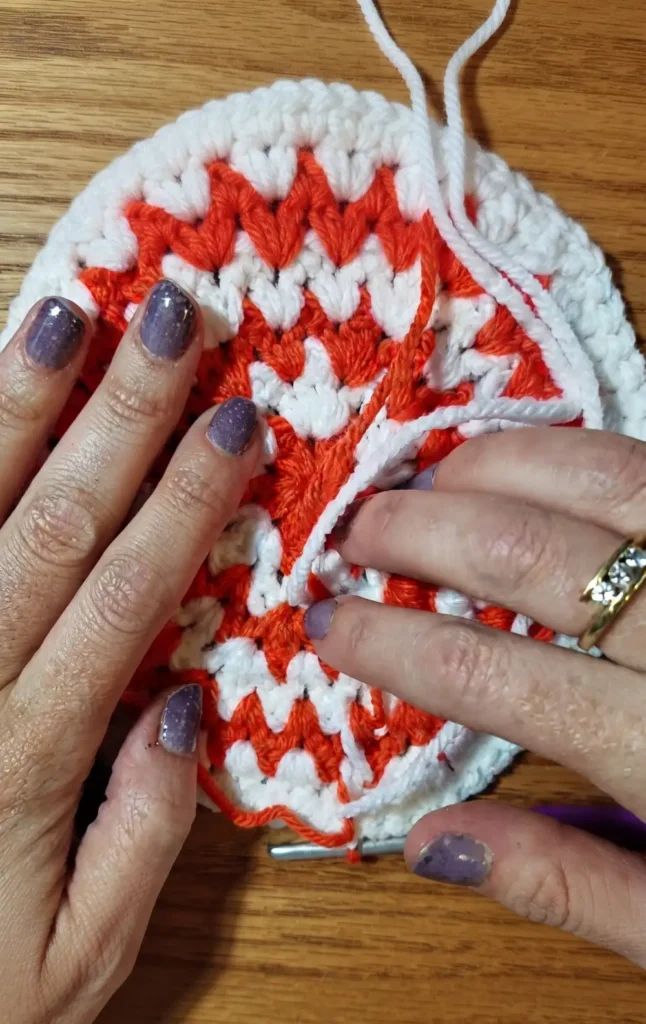
After completing the increase rounds, you will transition to building the height of the pumpkin. For the next six rounds, work straight rickrack rounds without any further increases. In these rounds, place two DCs in every space between the DC clusters of the previous row.
Continue to change colors at the end of every round to maintain the zigzag effect. As you stop increasing, the fabric will naturally start to curve downward to form the sides. This specific stitch choice creates a more jagged and solid feel than a traditional V-stitch, ensuring the stuffing remains hidden.
Step 3: Decreasing and Stuffing the Form
Once the sides are finished, you must decrease the stitch count to close the bottom of the pumpkin. To perform a decrease, place one DC in one space and one DC in the very next space, which reduces two clusters into a single unit. Follow the increase pattern in reverse by working rounds with four clusters between decreases, then three, then two.
Before starting the final rounds, stuff the pumpkin until it is nice and fluffy. Be careful not to overstuff it because the stitch pattern still has very small gaps. Complete a round where you place one cluster between each decrease, and then perform a final round consisting entirely of decreases pulled as tight as possible.
Step 4: Final Shaping and Stem Attachment
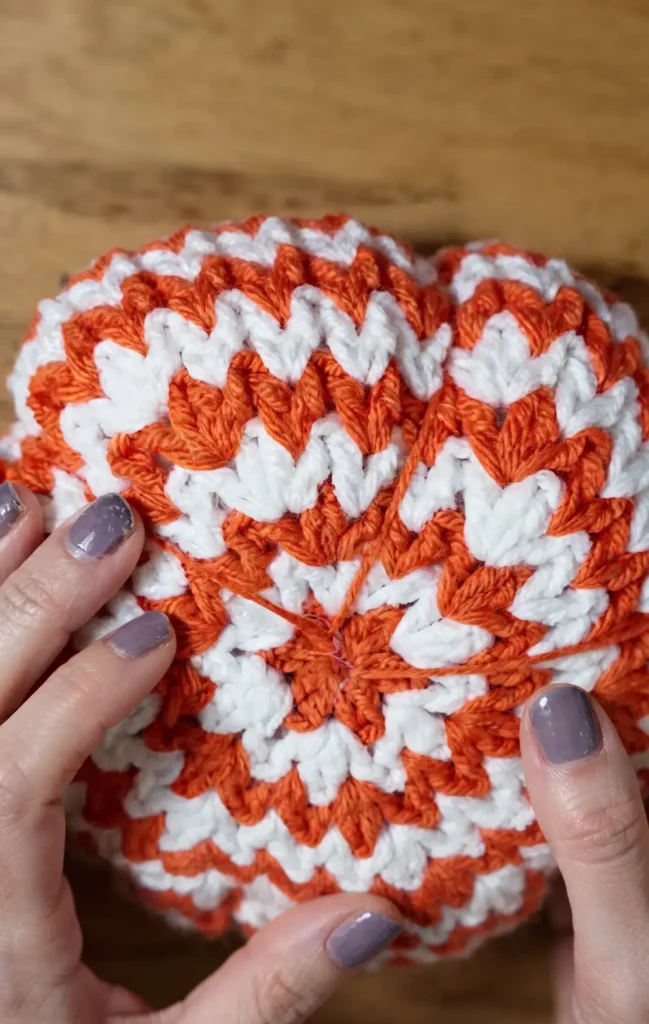
Cut a very long tail of yarn before finishing the last stitch. Thread this tail onto a needle and pass it through all the remaining stitches to pull the bottom hole closed. To give the pumpkin its signature segmented look, push the needle straight through the center from the bottom to the top.
Loop the yarn around the outside of the pumpkin and back through the center again, pulling tight to create a crease. Repeat this process approximately six times around the edges until the pumpkin is uniform and squishy. To finish, apply a generous amount of tacky glue to a wine cork and press it into the center of the top. Allow the glue to dry for several hours to ensure the stem is secure against the yarn.
Video Credits: Hooked by Kati
6. Crochet Baby Pumpkin Hat Pattern
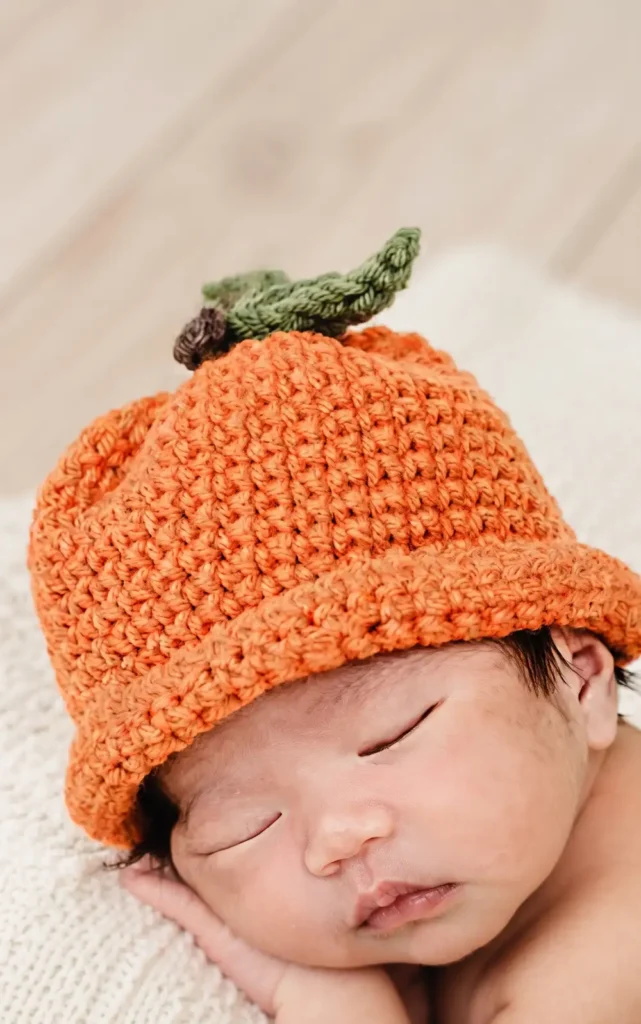
This tutorial guides you through creating an adorable newborn pumpkin hat, designed with ripples at the top to mimic the natural shape of a pumpkin.
Materials Needed
To begin this project, you will need the following items:
- Orange yarn: The tutorial uses Bernat Saber yarn in orange for a newborn size.
- Brown or beige yarn: Used for the stem.
- Crochet hook and yarn needle: Essential for stitching and assembly.
- Stitch marker: Highly recommended to track rounds since the hat is worked in continuous circles.
Step 1: Crafting the Crown and Increase Rounds
The hat begins with a slip knot and a foundation of two chains. In the second chain from the hook, work 10 single crochets to form the center. For the second round, you will double your stitches by placing two single crochets into each of the 10 stitches from the first round, resulting in 20 stitches.
In the third round, continue increasing by placing two single crochets in every stitch again, which brings your total count to 40 stitches. This rapid increasing creates a rippled effect at the top of the hat, giving it a unique pumpkin look rather than a flat beanie shape.
Step 2: Building the Hat Body
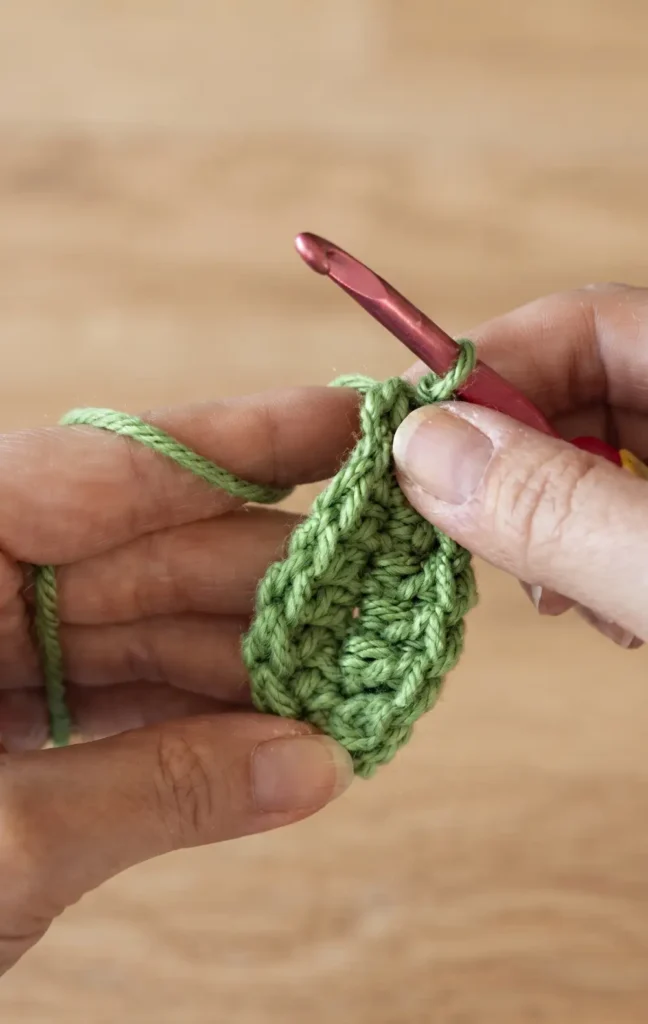
After finishing the increase rounds, the rest of the hat is worked by placing exactly one single crochet into each stitch around. It is vital to count your stitches at the end of every round to ensure you maintain exactly 40 stitches; otherwise, the hat may become too small or too large.
Continue working these single crochet rounds until the hat reaches a total length of approximately 9 inches, which is usually around 27 rounds. At this point, you can fasten off the orange yarn.
Step 3: Crocheting the Decorative Leaves
You can add character to your hat by making small or large leaves. To make a small leaf, chain six and work a slip stitch into the second chain, followed by a single crochet, a half double crochet, and a double crochet in the subsequent chains. In the final chain, work three half double crochets to turn the corner, then mirror the stitch pattern back down the opposite side.
For a large leaf, start with a chain of nine and use a similar graduated stitch pattern, including single, half double, and double crochets to create the teardrop shape.
Step 4: Stem Construction and Final Assembly
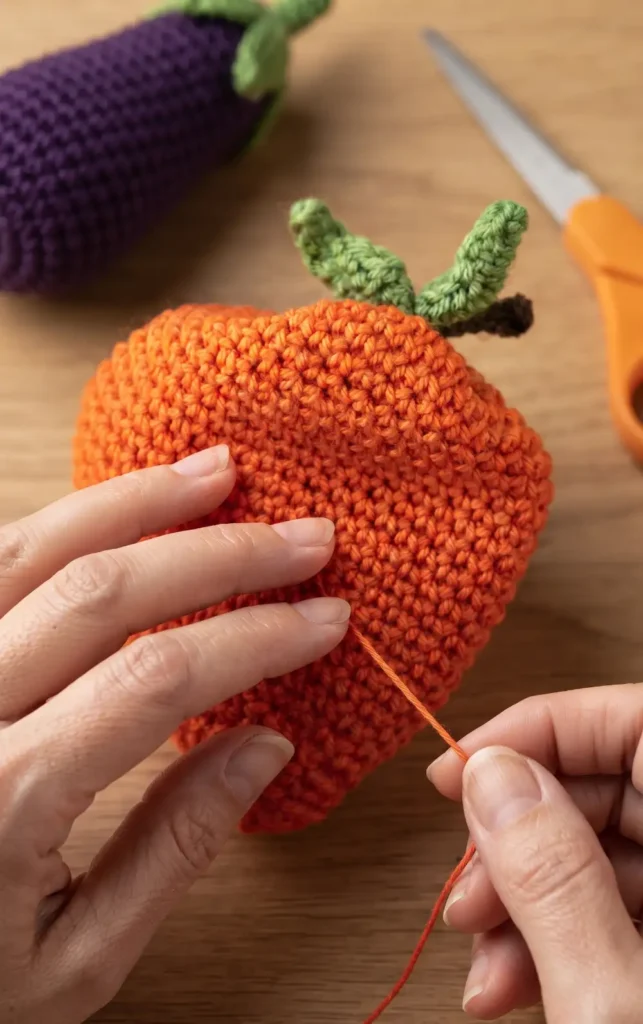
To create the stem, use brown or beige yarn to chain eight and then work a slip stitch back down each chain. Once the stem and leaves are complete, attach them together to form a single piece.
Use a crochet hook or yarn needle to pull the yarn tails from this leaf and stem unit through the top of the hat. Secure the piece on the inside by tying the yarn tails into a knot or a bow. The final step is to roll the bottom edge of the hat up about half an inch to achieve the desired height and style.
Video Credits: Pretty Darn Adorable Crochet Tutorials
Which Pumpkin Feels Right?
So there you have it, six pumpkin patterns for six totally different moods. Maybe you’re drawn to the ridged texture of the farm fresh pumpkin, or maybe that drawstring bag has you thinking about gifts already. Either way, your hook is ready when you are.
Pick one and start today. Once you make your first pumpkin, I promise you’ll be back for the rest before the leaves finish changing color.