4 Mini Crochet Animal Keychains to Make with Amigurumi
Keychains are the fastest way to fall in love with amigurumi. No hours of stitching, no giant yarn stash required, just a few rounds and you’ve got a finished project in your hands. That instant payoff is exactly why so many crocheters keep a hook and scrap yarn tucked in their bag for these tiny makes.
This roundup features four keychain patterns that pack real personality into a small package. A bunny with rosy cheeks, a bear in a ribbon, a panda with its signature patches, and a penguin ready to waddle onto your keys. Each one uses simple shaping and basic stitches, so you can knock out all four in a weekend and still have yarn left over.
1. Mini Bunny Crochet Keychain
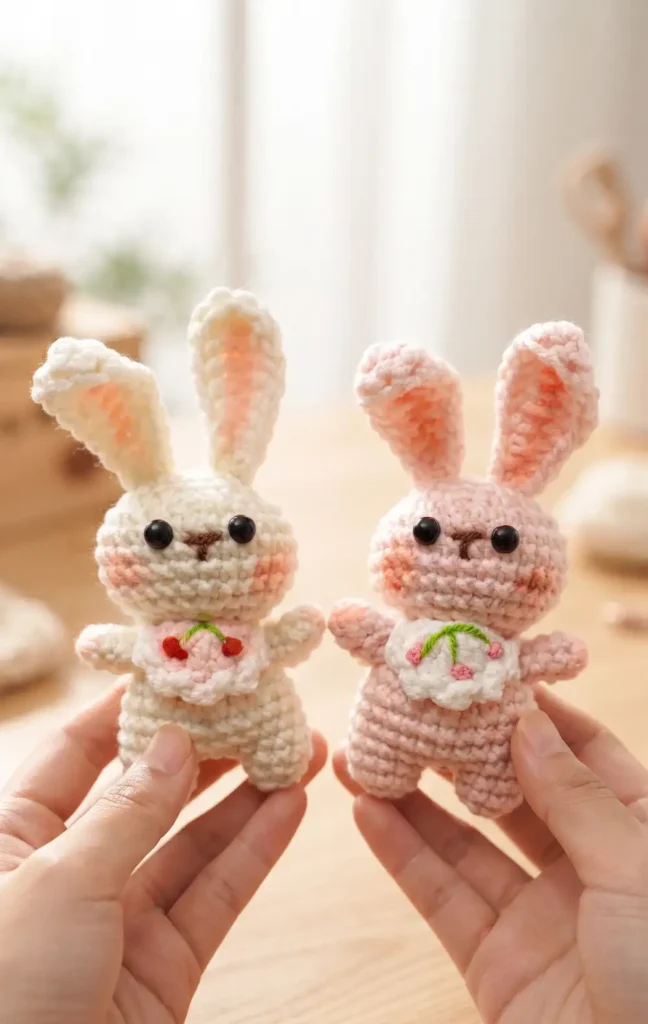
This adorable project is beginner-friendly and results in a charming handmade accessory. Follow these instructions to create your own mini bunny.
Materials and Tools
To complete this tutorial, you will need the following items:
- Crochet hook and yarn
- Stitch markers
- Fillings for stuffing
- 6 mm eyes
- Yarn needle for sewing
- Pink plush for decorative details
Step 1: Crafting the Bunny Head
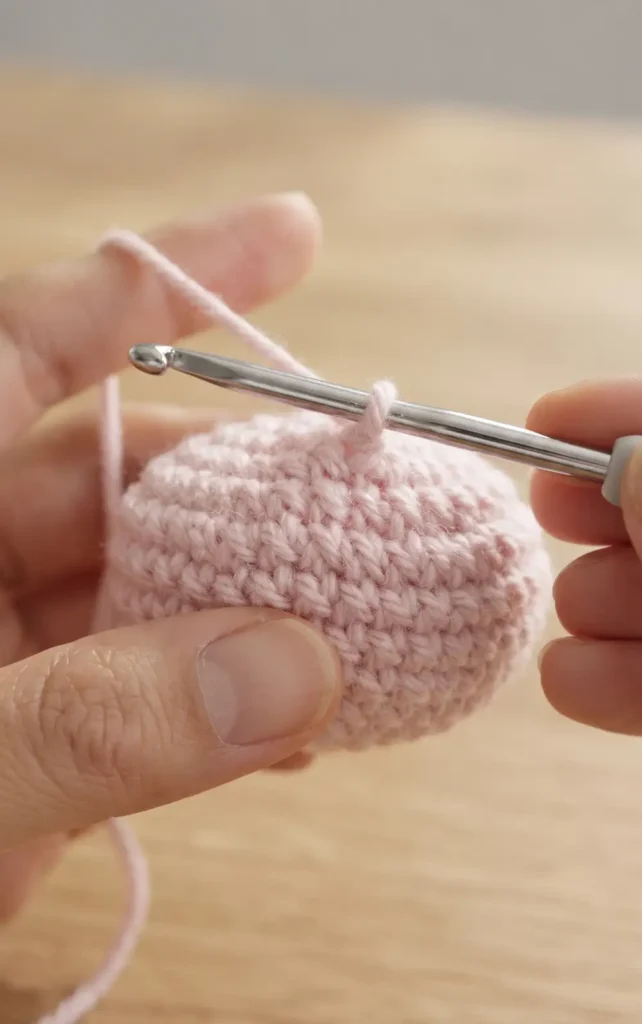
The head begins with a magic ring and six single crochet stitches. You will increase the stitch count over the first five rounds until you reach 30 stitches.
Maintain 30 stitches for rounds 6 through 9 to create the height of the head. Starting at round 10, use a pattern of single crochets followed by decreases to narrow the shape. Before closing round 12, insert your fillings to give the head its round form. Cut the yarn and leave a long tail, which you will use later to sew the head to the body.
Step 2: Constructing the Legs, Body, and Arms
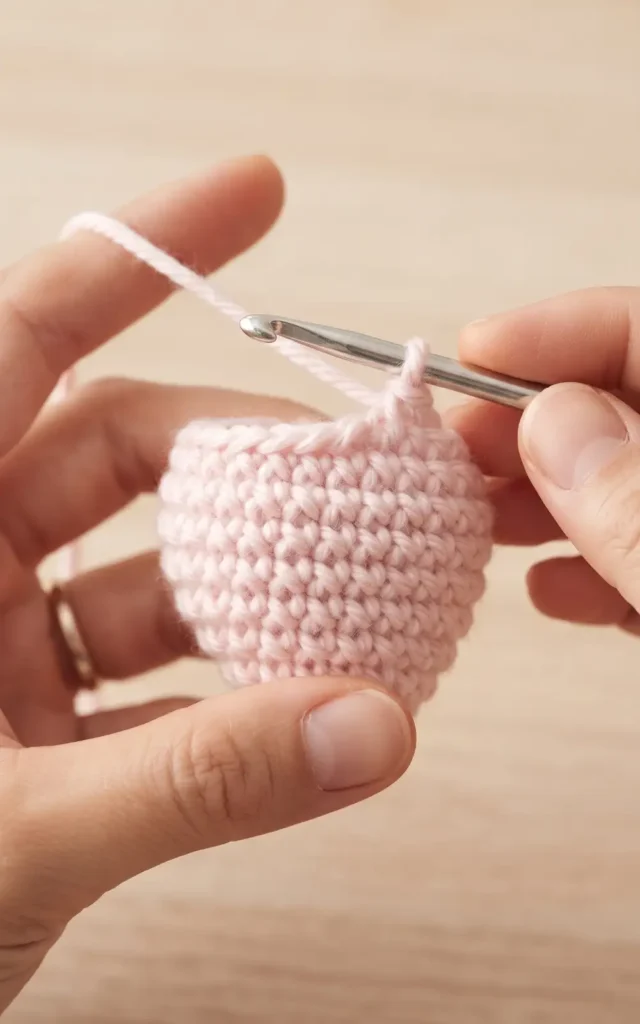
Start by creating two separate legs using a magic ring and increasing to nine stitches by round 2. Once both legs are ready, join them together by chaining three and crocheting around the entire perimeter to begin the body.
Work several rounds of single crochet to build the body height before decreasing the stitch count and adding fillings. For the arms, create two small pieces starting with a magic ring of six stitches and working for four rounds total.
Step 3: Crocheting the Ears and the Bib
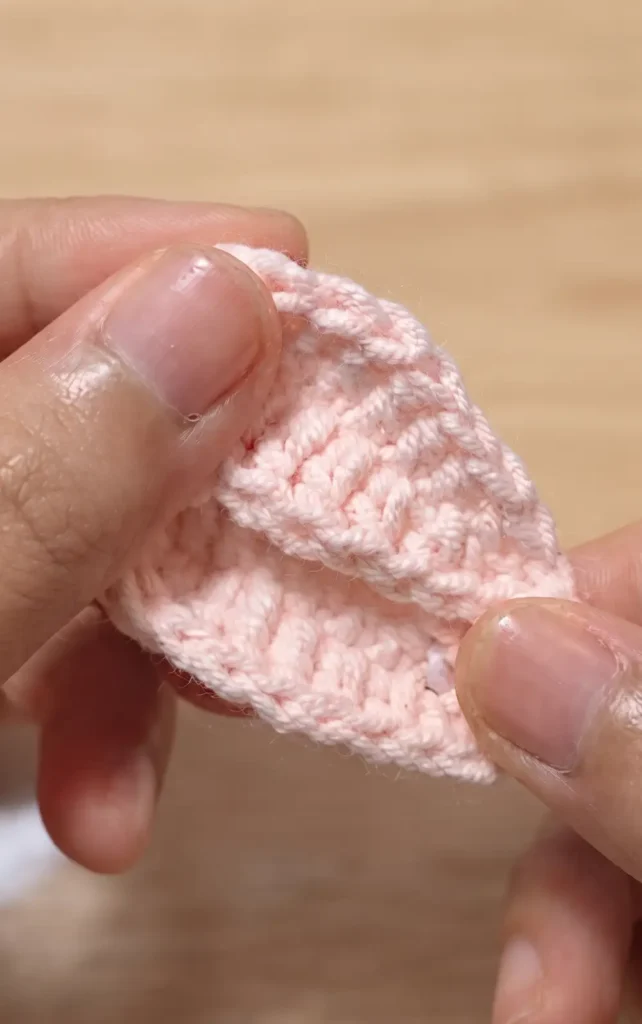
To make the ears, start with a slip knot and a chain of nine. Work a series of single crochets, half double crochets, and double crochets along the chain to create a tapered ear shape.
You will need to make two of these. For the decorative bib, create a magic ring and do six double crochet stitches inside it. Add a long chain of 30 on each side of the bib so it can be tied easily around the bunny.
Step 4: Final Assembly and Decorative Finishing
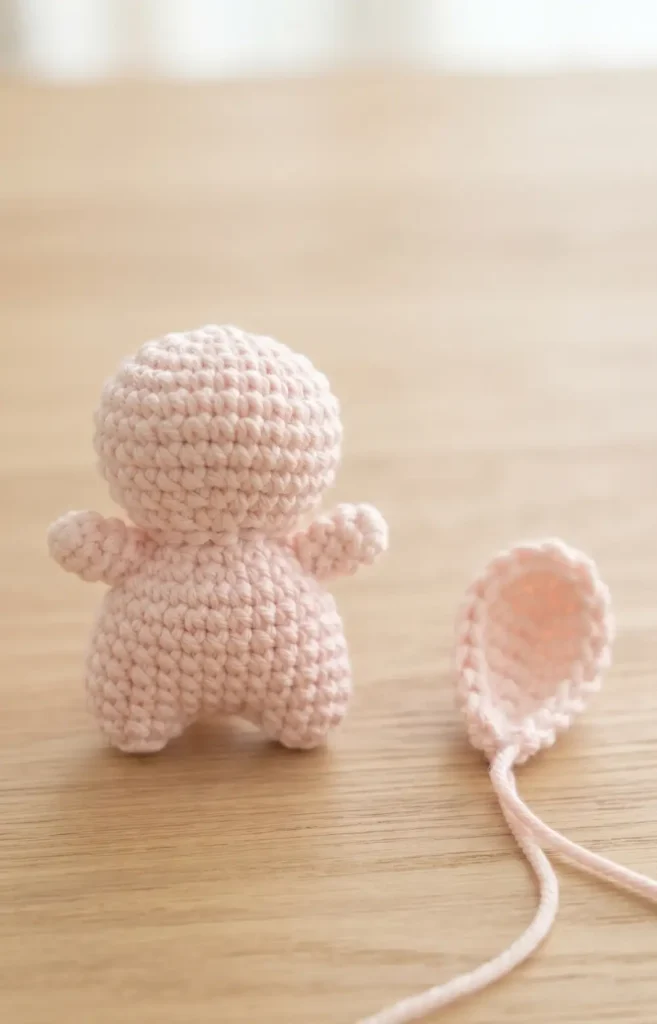
Use a yarn needle to sew the head onto the body, followed by the arms and the ears. Once the structure is complete, glue the 6 mm eyes between rounds 6 and 7 of the head. Sew on a small nose to finish the face. For the final touch, apply pink plush to the bunny’s cheeks, the insides of the ears, and the ends of the arms and legs to add a soft, rosy glow to your keychain.
Hey there! Some links on this page may be affiliate links which means that, if you choose to make a purchase, I may earn a small commission at no extra cost to you.
Video Credits: Mova DIY
2. Mini Bear Crochet Keychain
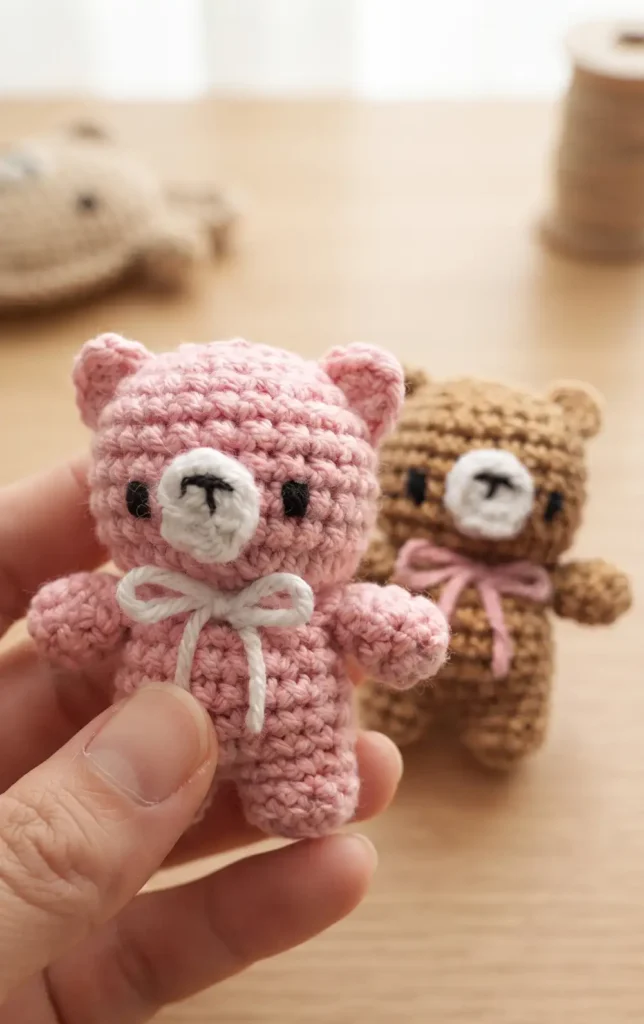
This beginner friendly tutorial guides you through creating a charming and easy mini teddy bear. This project is perfect for those who know crochet basics like the magic ring and single crochet.
Essential Materials
To get started, you will need the following supplies:
- Yarn for the bear body and a contrasting color for the neck ribbon.
- A crochet hook and a stitch marker.
- Fiber filling for stuffing the body and head.
- A darning needle for sewing pieces together.
- Black yarn or thread for the facial details.
Step 1: Building the Foundation and Body
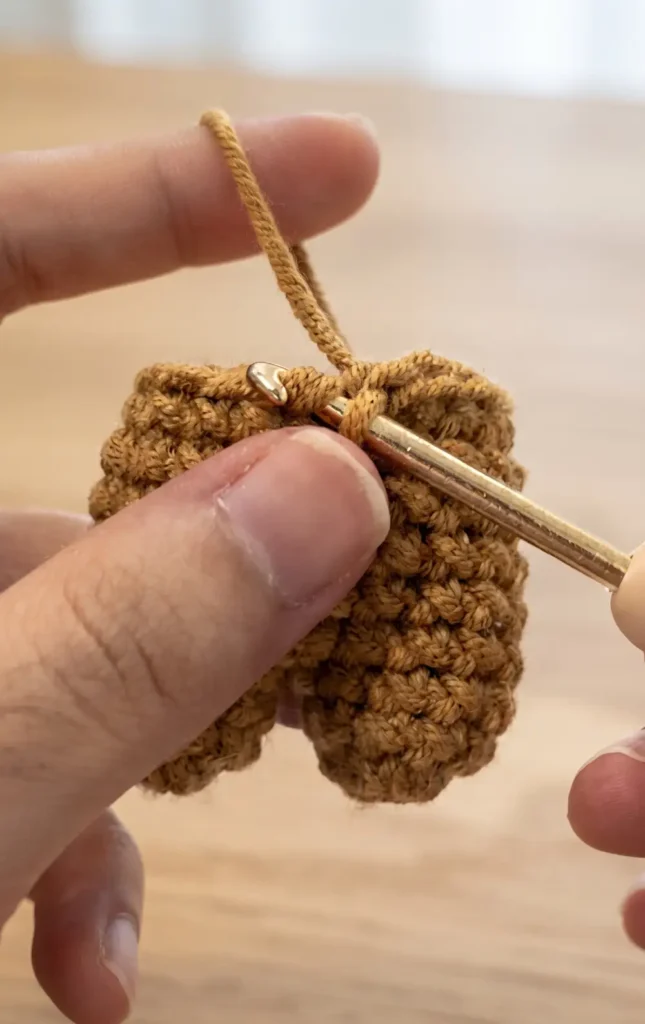
The process begins by making two separate legs. For each leg, create a magic ring and work 10 single crochets into it for the first round. Continue with 10 single crochets for rounds two and three. Once the legs are ready, connect them with a tight single crochet to minimize gaps.
This joined round (Round 4) should have 20 stitches. Work one single crochet in each stitch for rounds five through nine to build the height of the body. Finally, for round 10, perform 10 decrease stitches using only the front loops to shape the neck area.
Step 2: Shaping the Head
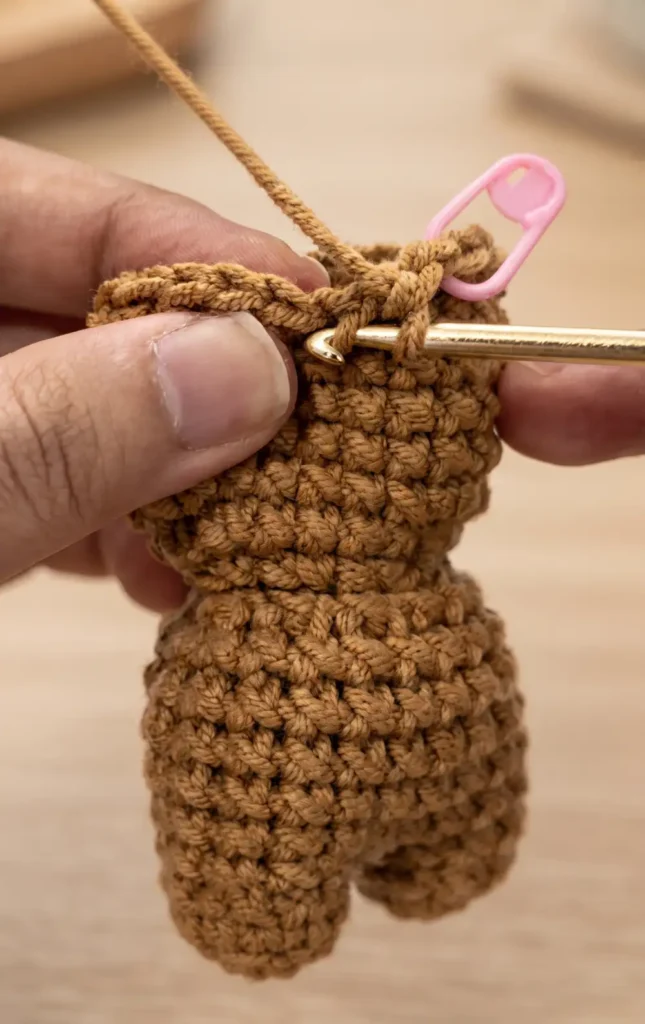
After stuffing the body with fiber filling, transition to the head. In round 11, work two single crochets into each front loop to expand the stitch count to 20. Round 12 follows a pattern of four single crochets then an increase stitch (two single crochets in one place) to reach 24 stitches.
Maintain this size for five rounds (13 through 17). To close the head, perform decrease rounds: round 18 uses a pattern of two single crochets and a decrease, while round 19 uses one single crochet and a decrease. After filling the head with stuffing, finish round 20 with six decreases, leave a long tail, and use a needle to sew the top closed.
Step 3: Crafting and Attaching Limbs
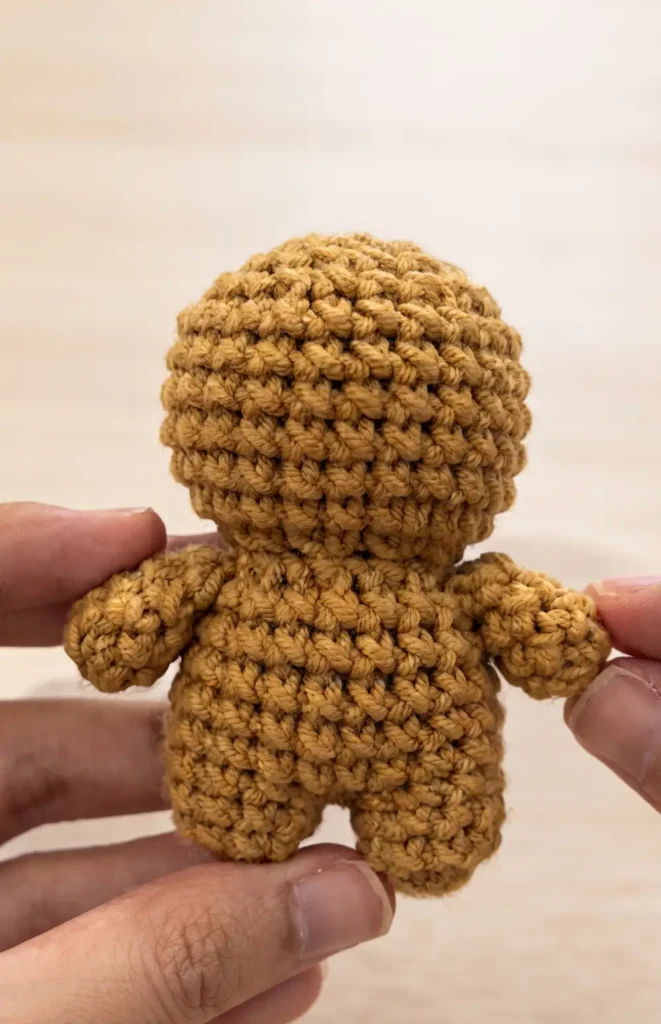
The arms are made by working 7 single crochets into a magic ring for round one, followed by three more rounds of 7 single crochets. Sew the arms near the neck and use the remaining yarn tail to close any gaps between the legs.
For the ears, crochet 5 single crochets into a magic ring and sew them onto the last three rounds of the head, directly above the arms. The nose is created with 8 single crochets in a magic ring, finished with a slip stitch, and sewn onto the face roughly three rounds above the neck.
Step 4: Finishing Facial Details and Accessories
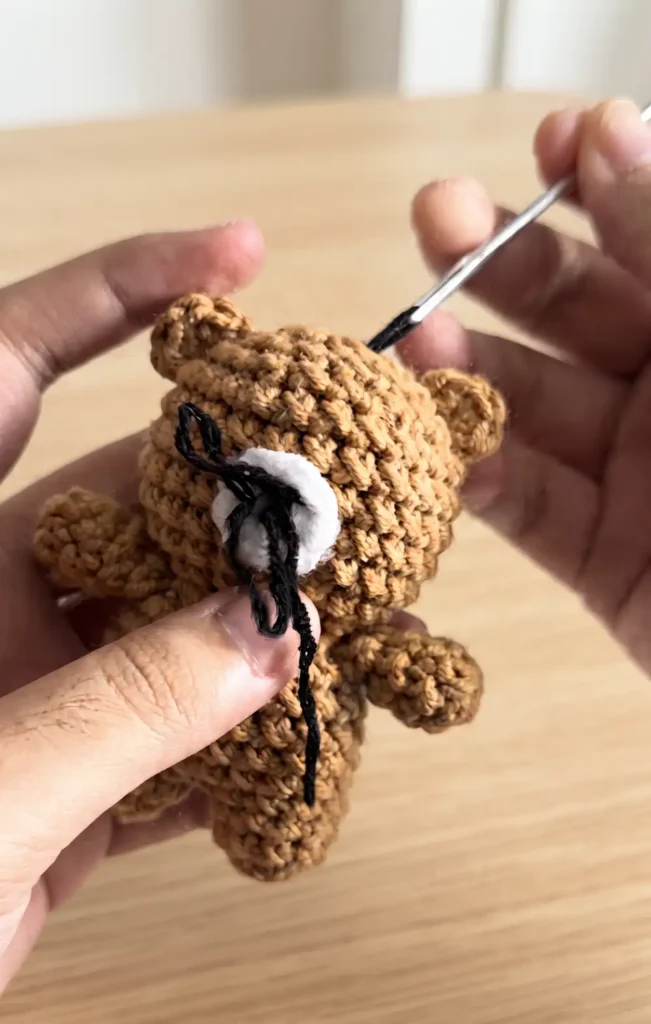
The final step brings the bear to life with detailed stitching. Split black yarn into thin threads to sew a letter T onto the nose. For the eyes, add “poofy” stitches on round 14, roughly one stitch apart from the nose. To complete the keychain bear, tie a long piece of yarn around the neck into a ribbon and adjust it to your liking. Your cute mini bear is now ready to be attached to your keys or bag.
Video Credits: ETM’s Studio
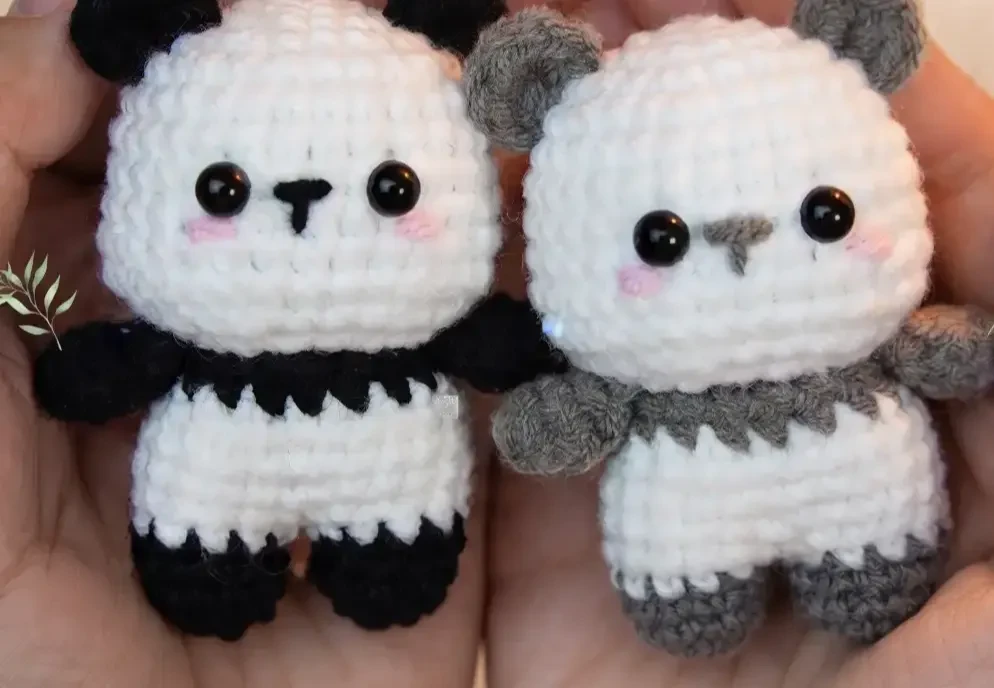
3. Mini Panda Crochet Keychain
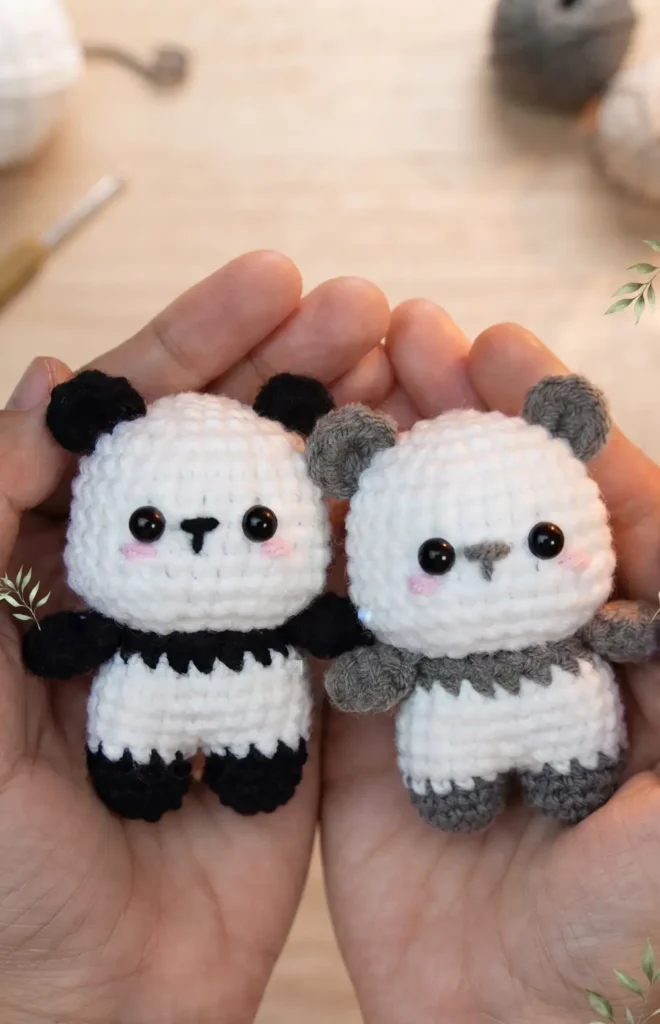
This miniature panda project is a perfect entry point for beginners and a quick, satisfying craft for experienced crocheters. Its small size makes it an ideal accessory for keys, backpacks, or as a thoughtful handmade gift.
Essential Materials
To begin your panda, you will need the following supplies:
- Cotton or acrylic yarn in black and white
- A 2.5mm or 3.0mm crochet hook
- Polyester fiberfill stuffing
- 6mm safety eyes
- A yarn needle and sharp scissors
- A metal keychain ring and jump link
Step 1: Constructing the Head and Body
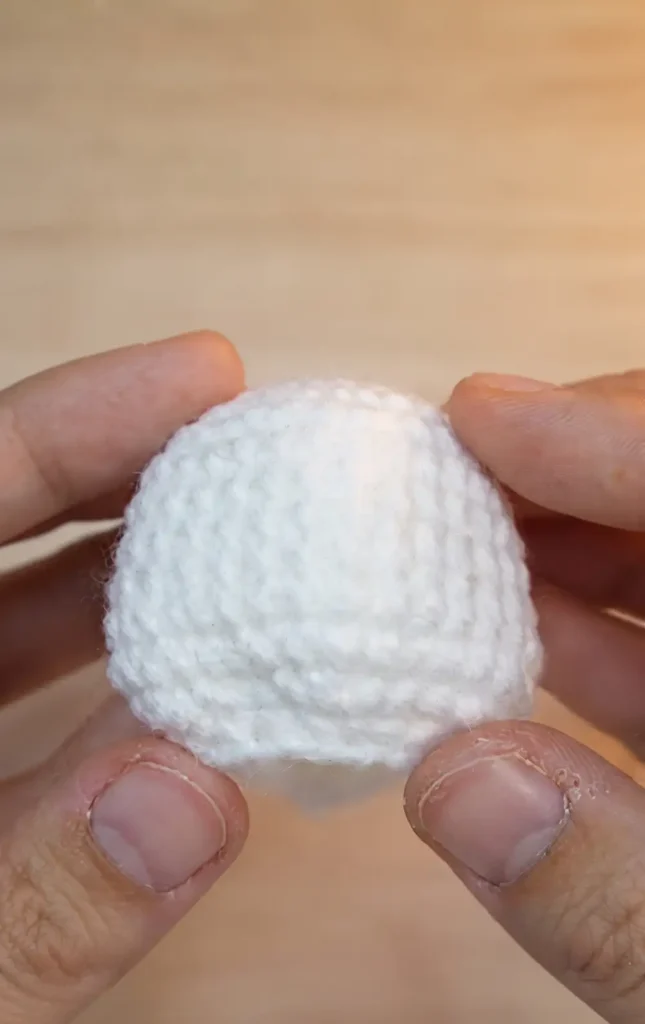
Start with white yarn and a magic ring to create the head. Work in continuous rounds of single crochet, increasing until you have a small sphere. If the pattern uses a single piece for the head and body, you will switch from white to black yarn midway through to create the torso. It is vital to secure the safety eyes and firmly stuff the head before you begin the decreasing rounds that close the body.
Step 2: Creating the Panda Facial Features
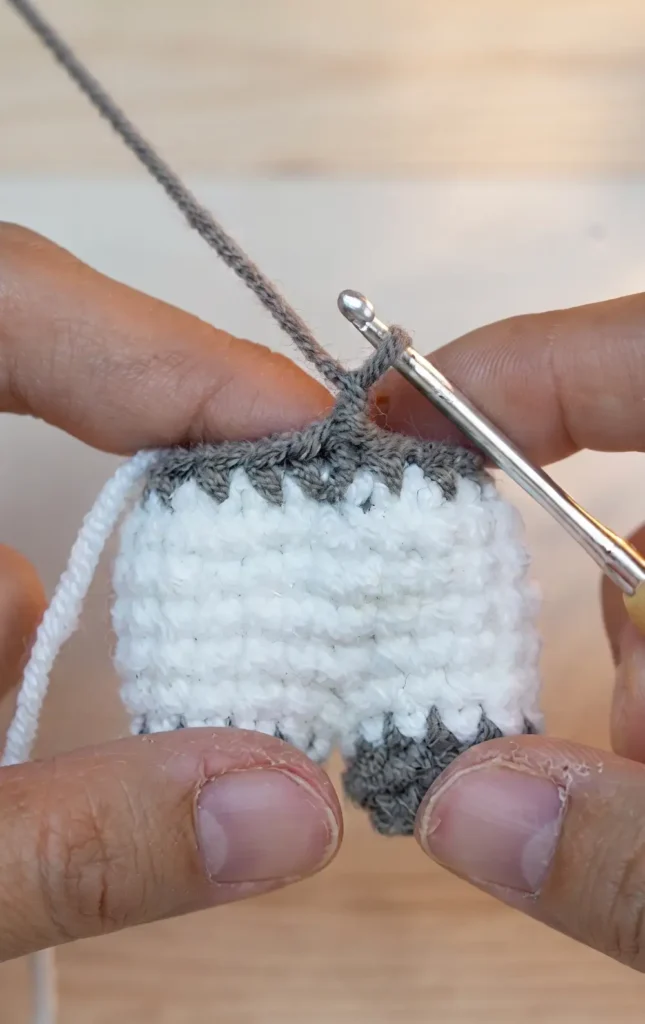
The character of your panda comes from its iconic black markings. Using black yarn, crochet two tiny circles for the eye patches and two semi-circles for the ears. These details are typically small, consisting of only one or two rounds of stitches. Leave long yarn tails on each piece, as you will need these for sewing them onto the head in the final stage.
Step 3: Crocheting the Limbs
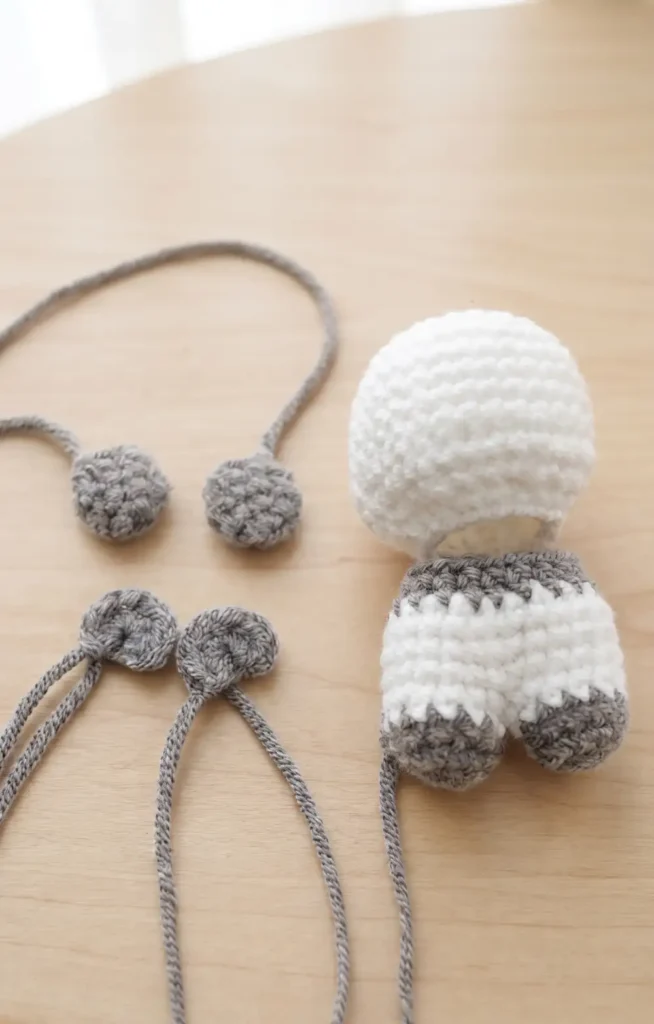
For a keychain-sized panda, the arms and legs are often simple, rounded nubs. Using black yarn, create four identical small cylinders or balls. Because these pieces are so small, they often do not require stuffing. If you prefer a sitting panda, you can sew the legs slightly forward, or keep them straight down for a standing pose.
Step 4: Final Assembly and Hardware
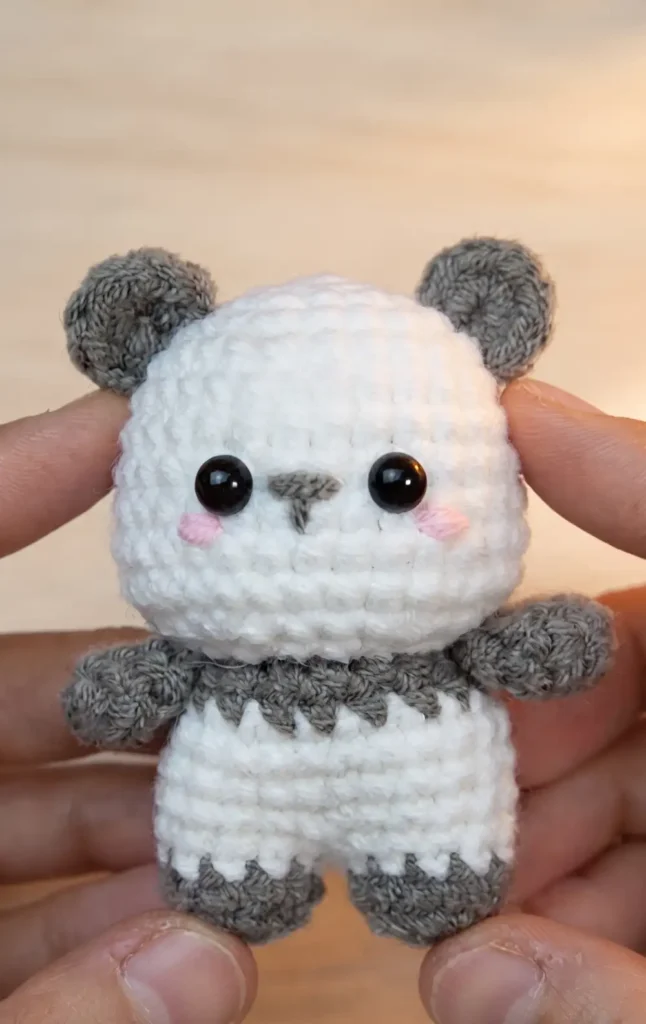
The final step is to bring all the pieces together using a yarn needle. Sew the eye patches onto the face, then attach the ears to the top of the head. Secure the arms to the sides of the torso and the legs to the bottom. Once the panda is fully assembled, embroider a tiny nose and mouth with black yarn. Finally, attach the keychain ring through several stitches at the top of the head to ensure it is secure.
Video Credits: Crochet with Mai
4. Mini Penguin Crochet Keychain
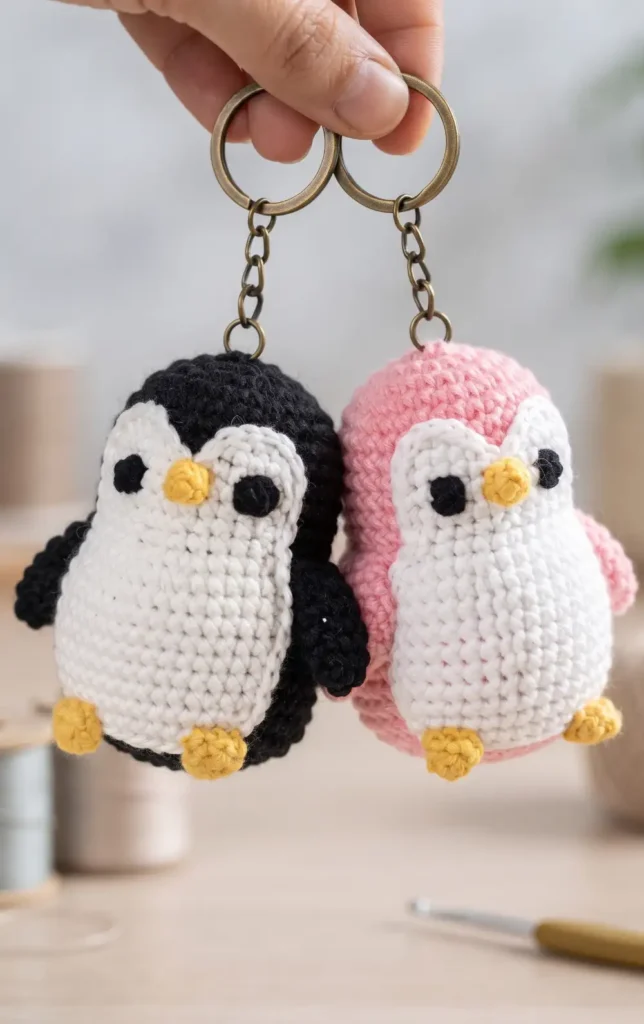
Creating this adorable penguin keychain is a perfect project for beginners and seasoned crafters alike, making it a wonderful gift or a cute accessory for bags and cars. This project uses basic crochet techniques to create a professional looking handmade item.
Essential Materials
To begin, you will need 4-ply acrylic yarn in dark pink, white, and yellow, along with a small amount of black yarn for the eyes. You also require a 2.5 mm crochet hook (size 4), fiberfill for stuffing, a needle, scissors, and a metal keychain ring.
Step 1: Crocheting the Head and Body
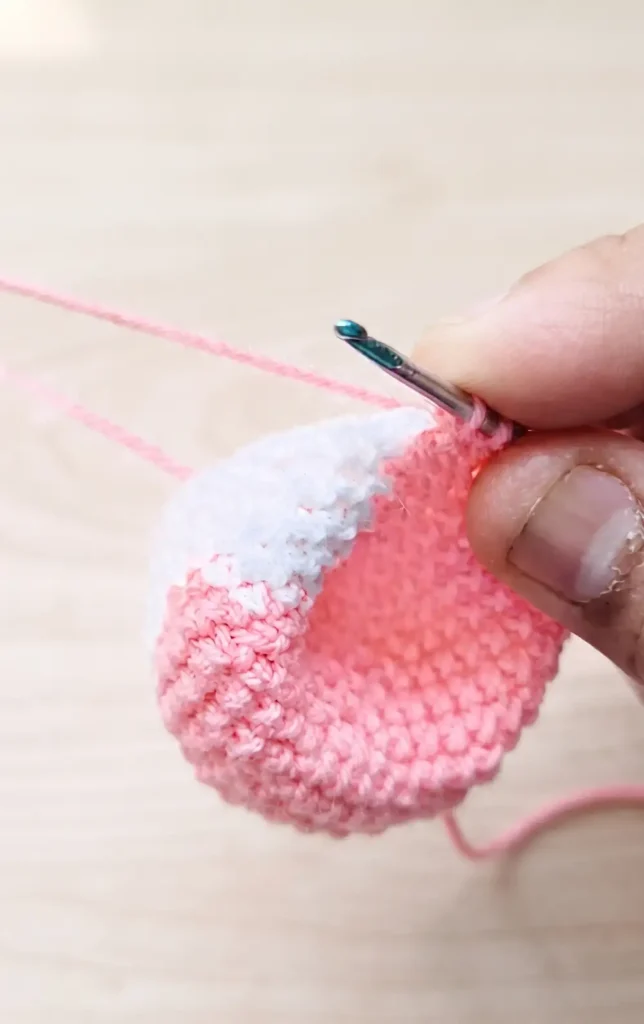
The main structure is worked from the top down as a single piece. Start with pink yarn using a magic ring and work six single crochet stitches, then increase over the next five rounds until you have 30 stitches. In round seven, introduce white yarn to begin the face patch, alternating colours between pink for the back and white for the front. After completing the head at round 11, use a decreasing round to shape the neck before increasing again to form the rounded belly. Once the body reaches the desired length, fill it firmly with fiberfill and continue decreasing until the opening is small enough to be sewn closed with a needle.
Step 2: Creating the Wings, Beak, and Legs
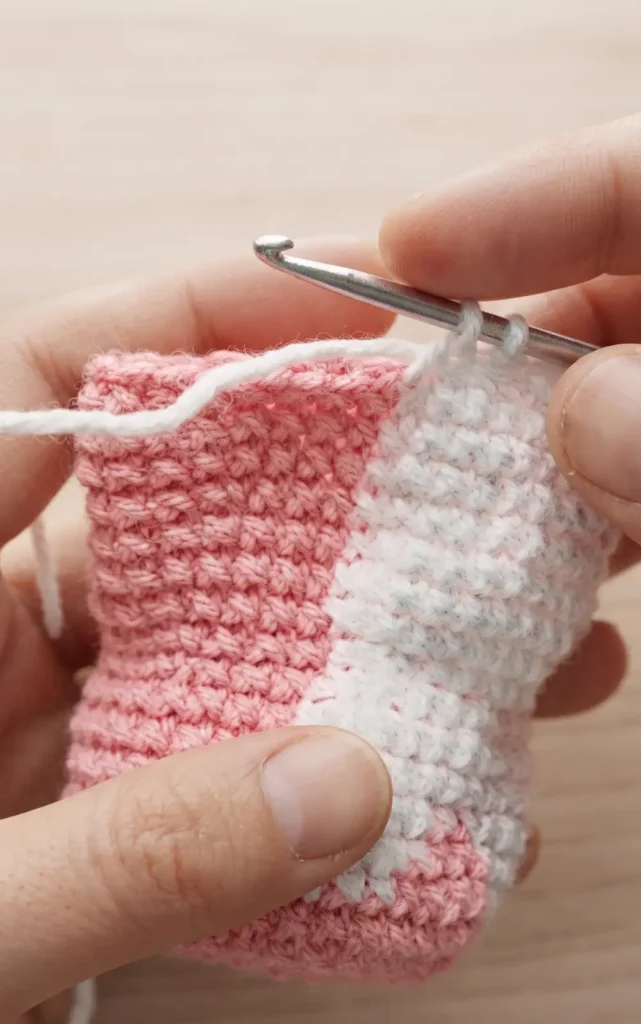
Next, you will crochet the separate components using the following patterns:
- Wings: Using pink yarn, start with a magic ring of 6 stitches, increase to 9 stitches for three rounds, and then decrease back to 6 before flattening the piece.
- Beak: Using yellow yarn, create a simple magic ring with only 4 single crochet stitches and fasten off, leaving a long tail for sewing.
- Legs: Using yellow yarn, start with 4 stitches in a magic ring and increase to 6 stitches over the second round to create two small feet.
Step 3: Embroidering Details and Refining the Face
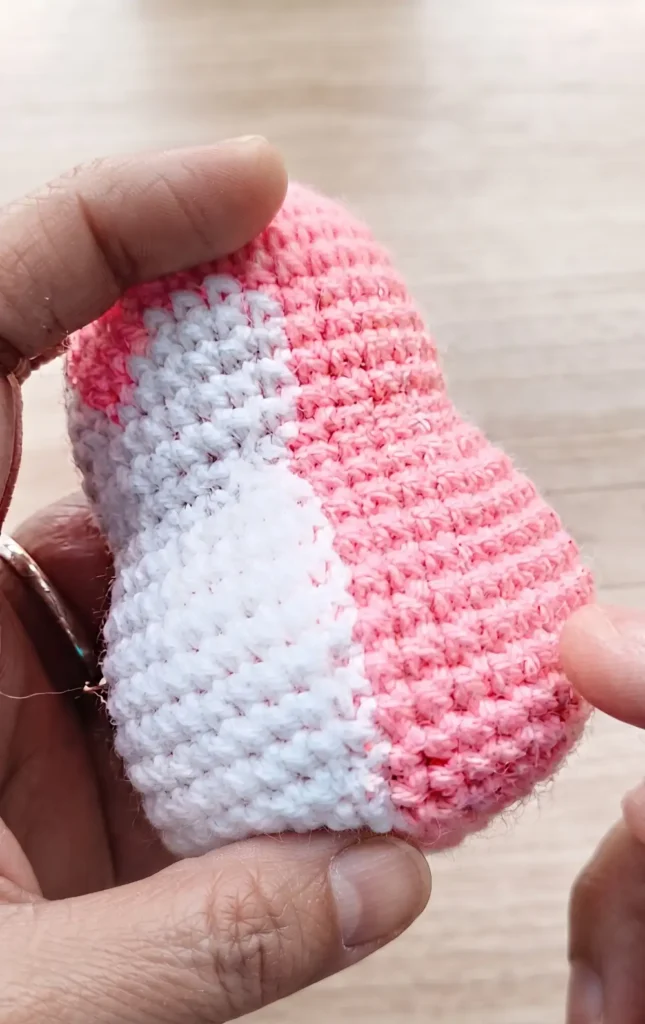
Before assembling the parts, use black yarn and a needle to embroider the eyes on the 10th round, leaving approximately three stitches of space between them. To give the penguin a high quality finish, use white yarn and a needle to create surface chain stitches around the edge of the white face patch. This technique hides any uneven colour transitions and mimics the look of a clean slip stitch border.
Step 4: Final Assembly and Keychain Attachment
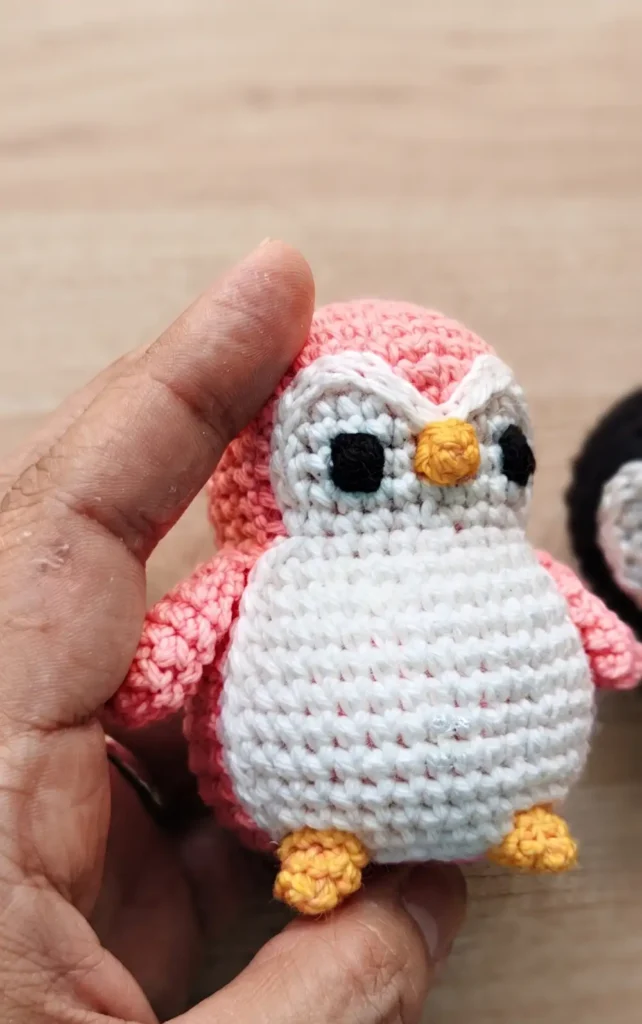
The final stage involves sewing all the pieces onto the body:
- Beak: Attach the yellow beak centrally between the eyes on round 10.
- Legs: Sew the feet onto the bottom of the body between rounds 23 and 24.
- Wings: Attach the wings to the sides of the body between rounds 13 and 14, ensuring they are aligned with the white belly patch. Once all parts are secure and the yarn ends are hidden inside the body, attach the keychain ring to the top of the head. Your mini penguin is now ready to be used as a charm or a heartfelt handmade gift.
Video Credits: Nitya Uphaar
Which Pattern Inspired You?
These four keychains prove that small projects can still be full of character. Whether you’re drawn to the bunny’s soft pastel charm, the bear’s cozy ribbon, the panda’s bold patches, or the penguin’s crisp black and white, each pattern gives you a satisfying make from start to finish in just a sitting or two.
Grab your hook and pick a favorite, or work through all four for a matching set of gifts. Tag your finished keychains so other crocheters can see which one caught your eye. There’s nothing quite like clipping on a handmade charm you made yourself.