6 Free Amigurumi Animal Crochet Patterns for Your Next Weekend
Weekend plans just got a lot cuter. These six amigurumi patterns turn a few skeins of yarn into a grumpy owl, a Highland cow with real fringe, and a chameleon that curls its own tail. Every one is beginner friendly, so you don’t need years of experience to finish something adorable by Sunday night.
What makes this roundup different is the mix of techniques. You’ll practice popcorn stitches on the frog, master seamless leg shaping on the cow, and even try a free form build with the owl. Grab your hook, pick a project that excites you, and let’s get stitching.
1. Beginner friendly No Sew Crochet Frog Pattern
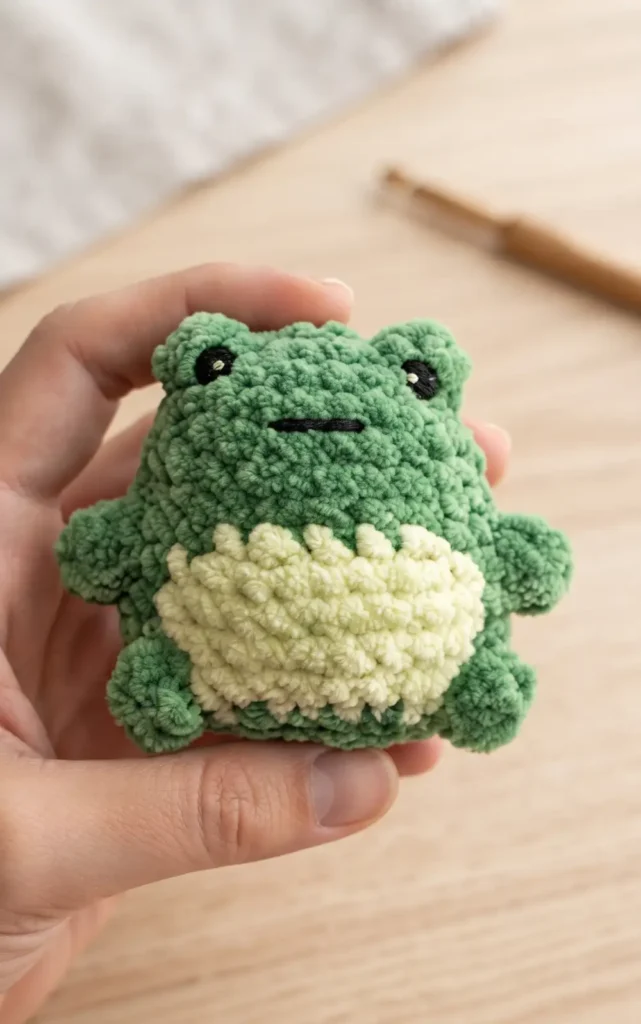
This guide provides a comprehensive walkthrough for creating an adorable crochet frog without any sewing required. By using specific stitches like the popcorn stitch for eyes and legs, you can create the entire shape in one continuous piece.
Step 1: Materials and Head Construction
To begin, you will need dark green and light green Chenille yarn, a crochet hook, a stitch marker, polyester fiberfill stuffing, safety eyes, a darning needle, and black cotton yarn. Start by creating a magic ring with dark green yarn and crocheting six single crochet stitches into it. Close the ring carefully, as Chenille yarn is delicate and can snap if pulled too hard. For the second round, crochet an increase into every stitch to reach a total of 12 stitches.
In round three, you will begin shaping the head by incorporating eye bumps using four-stitch popcorn stitches. A four-stitch popcorn stitch is created by crocheting four double crochet stitches into the same stitch, then pulling the loop from the last stitch through the top of the first double crochet. By the end of round four, which includes further increases, you should have 24 stitches.
Step 2: Body Shaping and Color Changes
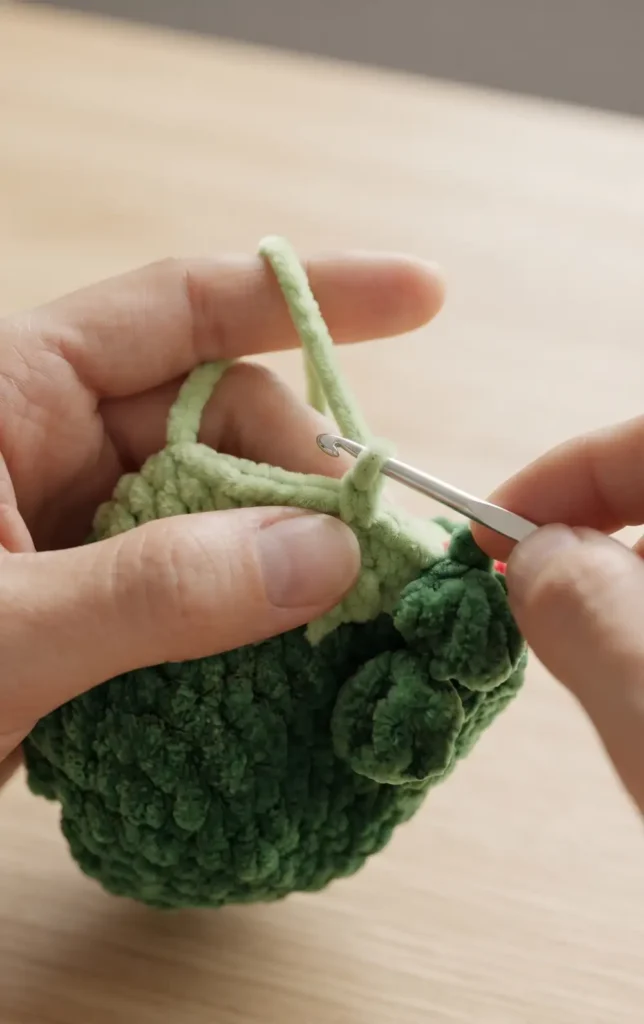
Rounds five through seven consist of simple single crochet stitches to build height. In round eight, you will introduce light green yarn to create the frog’s belly. The tutorial recommends a color-change method where you cut the yarn after each change and tie the ends later, as they will be hidden inside the finished piece.
During round nine, you will add the first set of legs using five-stitch popcorn stitches. These are similar to the eye bumps but use five double crochet stitches instead of four. Continue following the pattern through round 11, alternating between dark green and light green yarn to maintain the belly patch.
Step 3: Adding Legs and Safety Eyes
Round 12 completes the lower legs with two more five-stitch popcorn stitches. Once this round is finished, it is time to add the safety eyes and secure your loose ends. Place the safety eyes between rounds three and four, angling them downward so the backings can be attached inside the head.
After the eyes are secured, turn the piece partially inside out to tie all the loose ends from your color changes into knots. This ensures the color transitions stay secure without the need for weaving in ends manually. Flip the frog back to the right side to prepare for the final rounds.
Step 4: Stuffing, Closing, and Finishing Touches
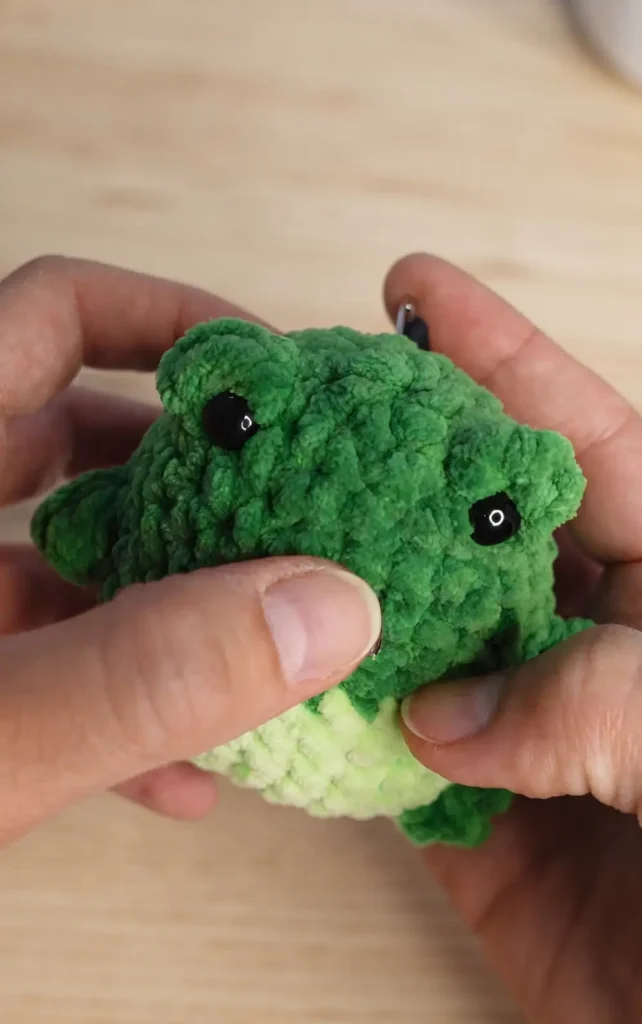
Beginning in round 13, you will start decreasing to close the bottom of the frog. A decrease is performed by pulling up loops in two consecutive stitches and crocheting them together. After round 14, pause to fill the body with polyester fiberfill stuffing. The amount of stuffing used will determine if your frog is firm or squishy.
Complete the final decreases in round 15 to bring the stitch count down to six. Cut the yarn, leaving a tail, and use a darning needle to weave through the outer loops of the remaining stitches to pull the hole closed. Finally, use black cotton yarn to embroider a small straight-line mouth. To avoid bulky knots on the face, insert the needle through the back of the head, stitch the mouth, and tie the ends at the entry point before hiding the knot inside the body.
Hey there! Some links on this page may be affiliate links which means that, if you choose to make a purchase, I may earn a small commission at no extra cost to you.
Video Credits: Danika
2. Crochet Highland Cow Pattern
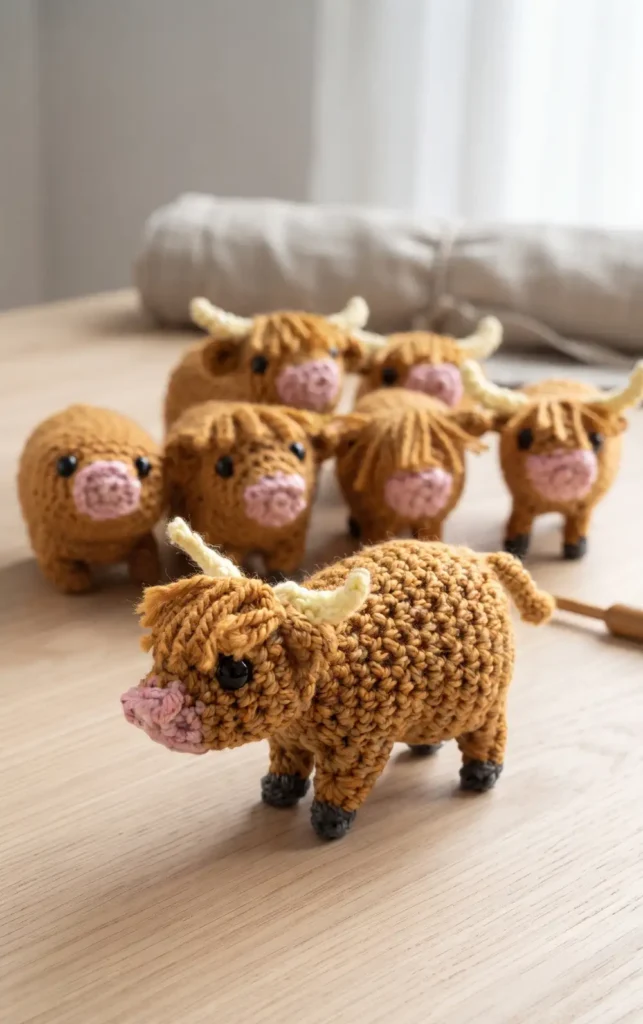
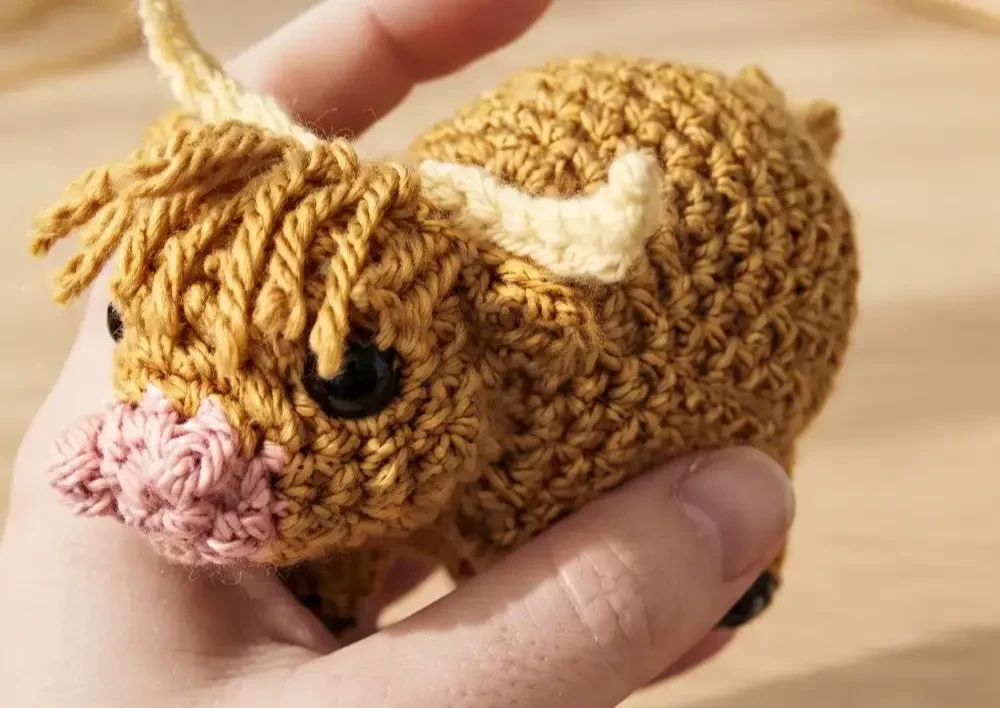
This adorable Highland cow is designed as an almost no-sew project, worked primarily in one piece from the nose to the back.
To begin, you will need 8-ply 100% acrylic yarn in four colours: a main orange-brown, pink for the nose, yellow for the horns, and black or charcoal for the feet. Essential tools include a 3.5 mm crochet hook, 9 mm safety eyes, stuffing, scissors, a yarn needle, and stitch markers or bobby pins to help with ear placement.
Step 1: Crafting the Face and Ears
The project starts at the tip of the nose using pink yarn with a magic ring of six. In row two, you create the nostrils by working treble crochets and single crochets into the same stitches; if you prefer smaller nostrils, you can substitute double crochets for the trebles.
After shaping the muzzle, you change to the main orange yarn, tying the ends securely inside the work. As the head grows, row nine involves creating the ears by working a sequence of stitches (single crochet, double crochet, two tight chains, double crochet, and single crochet) into the front loops only of specific stitches.
In row ten, you lock these ears into place by working into the previously marked back loops. Before moving to the body, insert the 9 mm safety eyes into row four, approximately four stitches apart and aligned between the nostrils and ears, then add a small amount of stuffing to the head.
Step 2: Forming the Front Legs and Chest
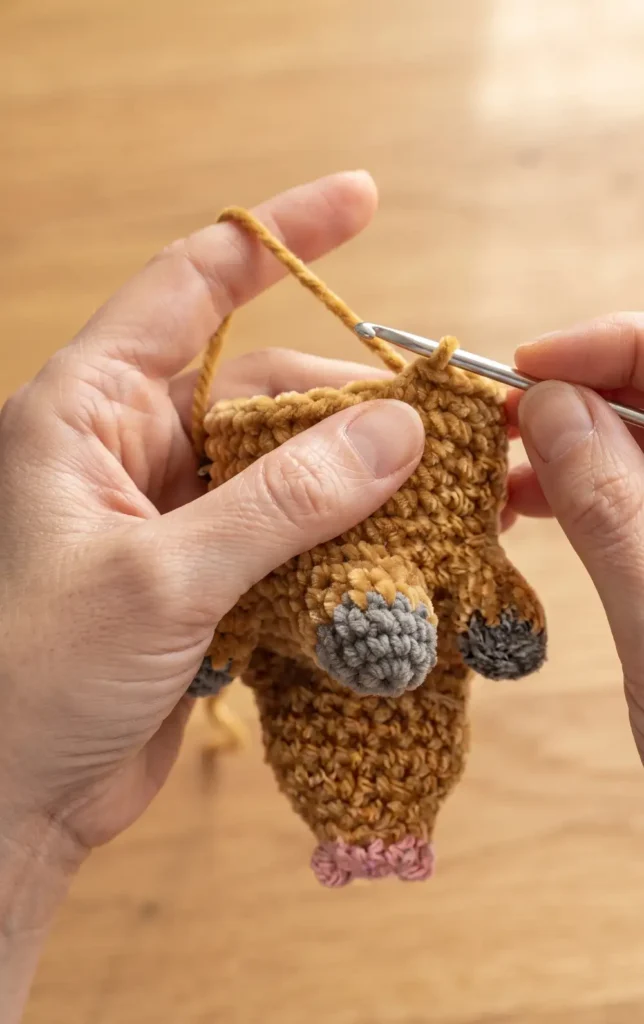
As you move into the body, the pattern uses specific increases and decreases to position the legs. In row 14, you introduce the foot colour to create the “pity patty feets”. To do this, you work five single crochets into one stitch using the black or charcoal yarn, then immediately switch back to the orange yarn for the space between the legs.
The most critical shaping occurs in row 15, where you skip 13 stitches over each foot area to instantly form the leg tubes and narrow the round from 45 stitches down to 19. This technique creates the front legs without the need for separate sewing.
Step 3: Shaping the Body, Tail, and Back Legs
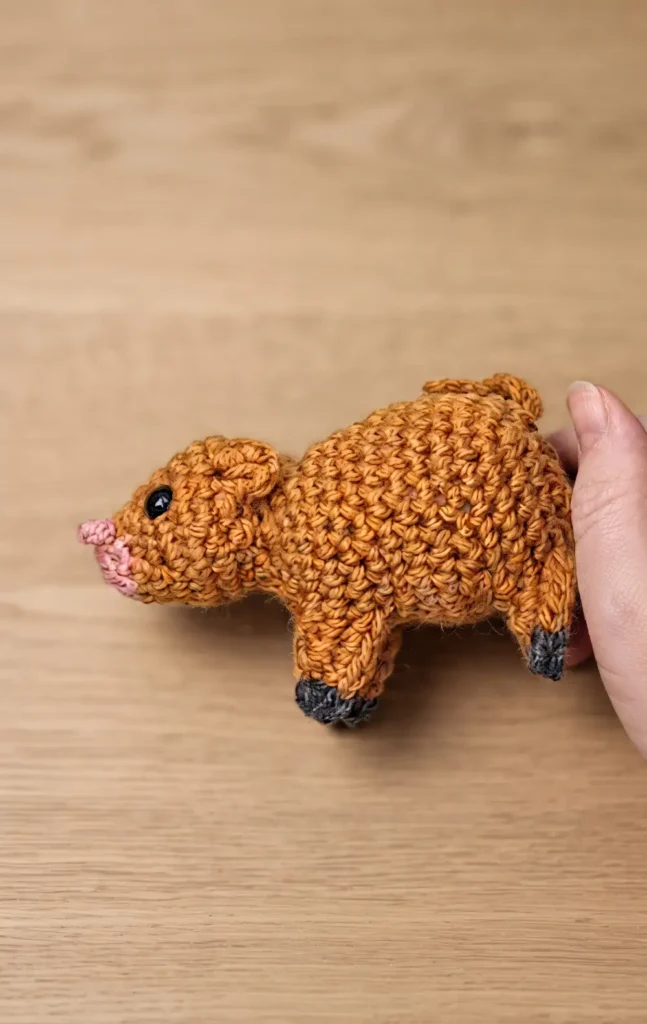
After completing the front legs, you work several rows to build the belly and main body. Row 20 begins the back leg section, where you may need to adjust your stitch count slightly to ensure the legs line up with the front ones. In row 22, you create the waggy tail by chaining ten, then working a slip stitch, an increase, and seven slip stitches back toward the body. Similar to the front legs, row 23 requires skipping 13 stitches over each back foot to define the legs. At this stage, ensure the body is firmly stuffed, as the next step will close the piece.
Step 4: Finishing and Decorative Details
The final round consists of seven decreases, which you close using a drawstring method by pulling the yarn through the front loops only. To tidy the legs, use a yarn needle to “lace up” the openings at the back of each leg, similar to lacing a shoe.
For the iconic Highland cow look, add a fringe by attaching six 8 cm strands of yarn between the ears using lark’s head knots. Finally, create the horns by working six single crochets over a long tail of yellow yarn. By pulling the tail, you can cause the tip of the horn to curl naturally before sewing them onto the head just behind the fringe.
Video Credits: ComplicatedKnots
3. Grumpy Owl Crochet Pattern
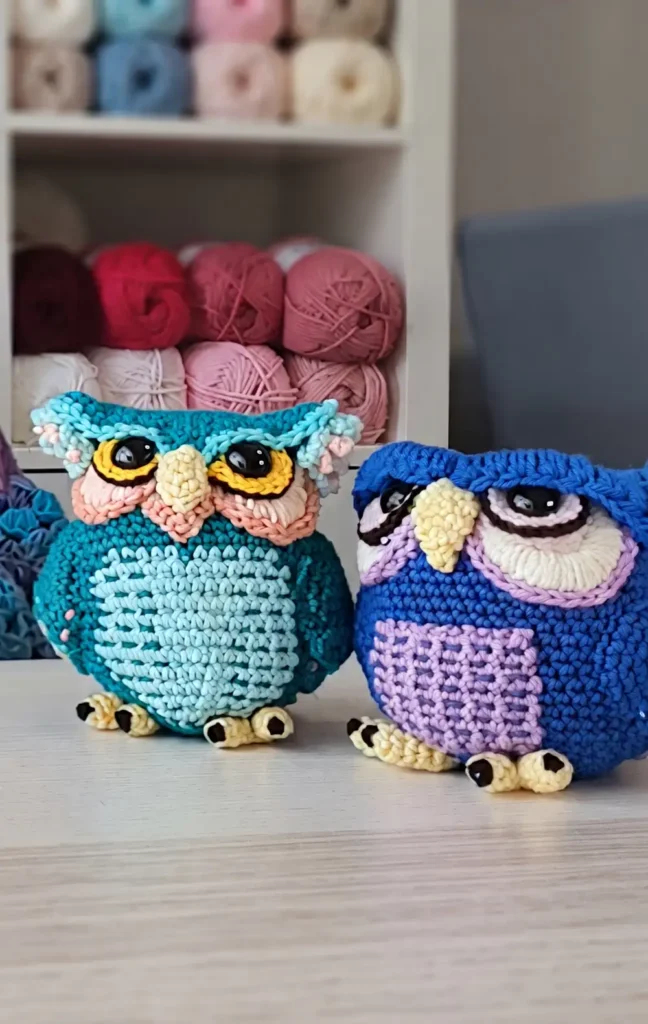
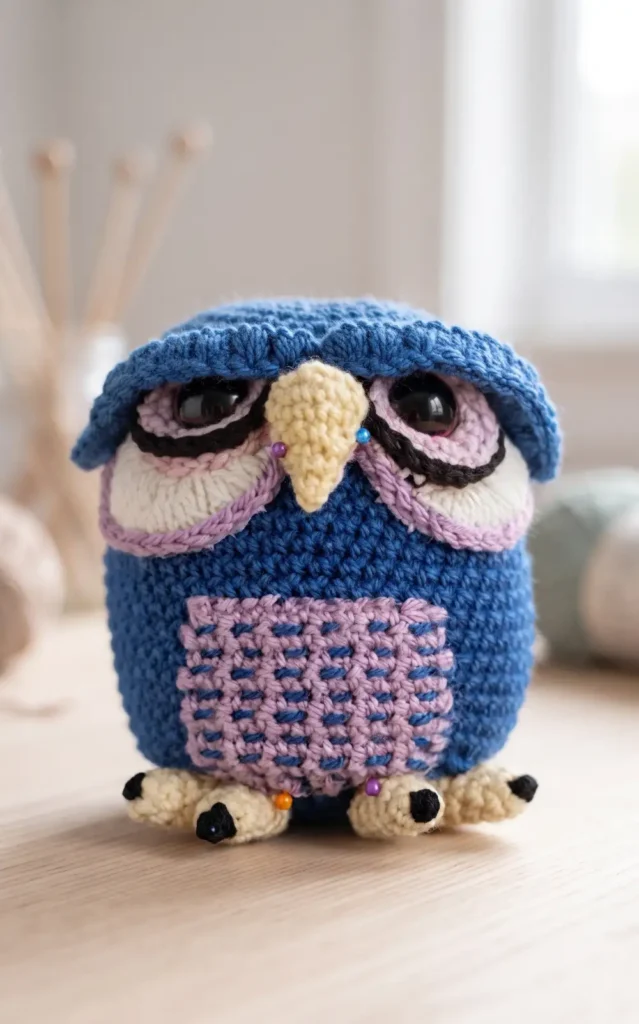
Designing a grumpy owl involves layering simple shapes to create a complex, professional look. This “free-form” approach allows you to customise your bird as you go, rather than following a rigid pattern.
Essential Materials and Tools
To begin your project, you will need 8 ply (DK) 100% acrylic yarn in a main body colour, a few accent colours, plus black, white, and yellow. A 3.5 mm crochet hook is recommended, though you should choose a size appropriate for your specific yarn. You will also need 20 mm safety eyes (or black yarn to crochet domes), stuffing, pins, needles, scissors, and stitch markers.
Step 1: Create the Body “Nugget”
The foundation of every owl is a basic egg shape. Start by crocheting a flat circle, using a guide that adds six increases per row. To ensure the body is perfectly round rather than hexagonal, you should stagger your increases every second row to avoid forming corners.
Once your circle reaches the desired width, work basic rows of single crochet to add height. A helpful rule of thumb is to make the owl roughly as tall as it is wide; you can calculate this by taking the row number of your widest circle and doubling it to determine your total height rows. Finally, follow a decrease guide to close the base, ensuring you stuff the body firmly before the opening becomes too small.
Step 2: Craft the Grumpy Facial Features
The “grumpy” personality comes from layering the eyes, beak, and eyebrows.
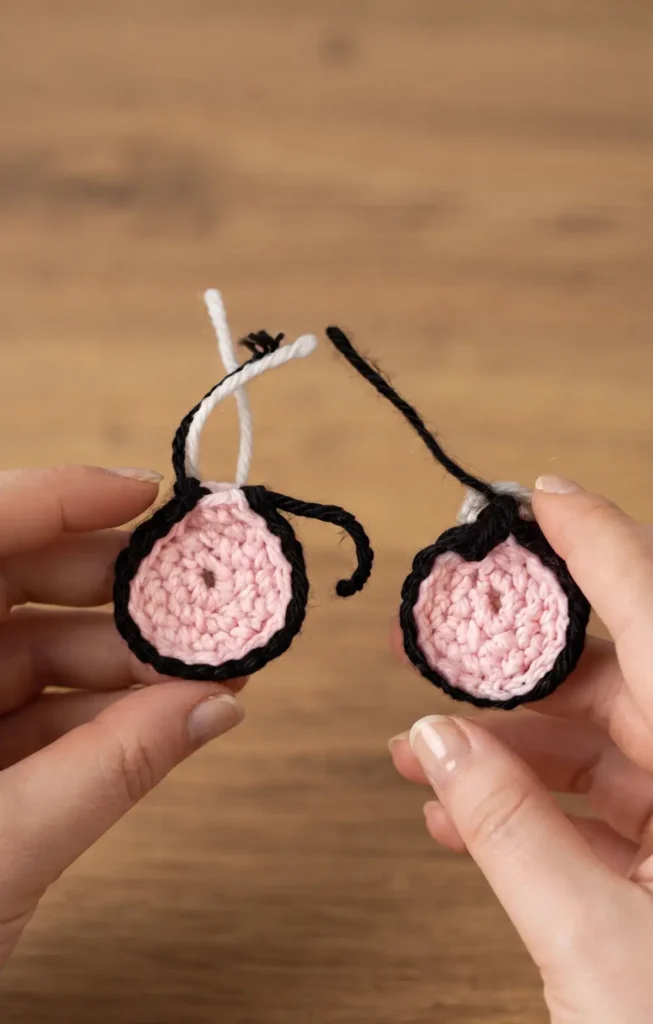
- The Eyes: These consist of three pieces: the pupil (safety eye or black dome), the iris, and the “focus”. Each layer should be slightly larger than the previous one. For extra definition, add a row of front post stitching around the edges of the iris and focus.
- The Beak: Crochet a teardrop shape by consistently decreasing at two points along the sides to create a 3D effect that sits flat against the face.
- The Eyebrows: This is the most important part for the owl’s expression. Crochet a simple rectangle and add puff stitches along the edge to create “magnificent eye mustaches”. When pinned at an angle over the eyes, these create a look of deep disapproval.
Step 3: Form the Horns and Belly Patch
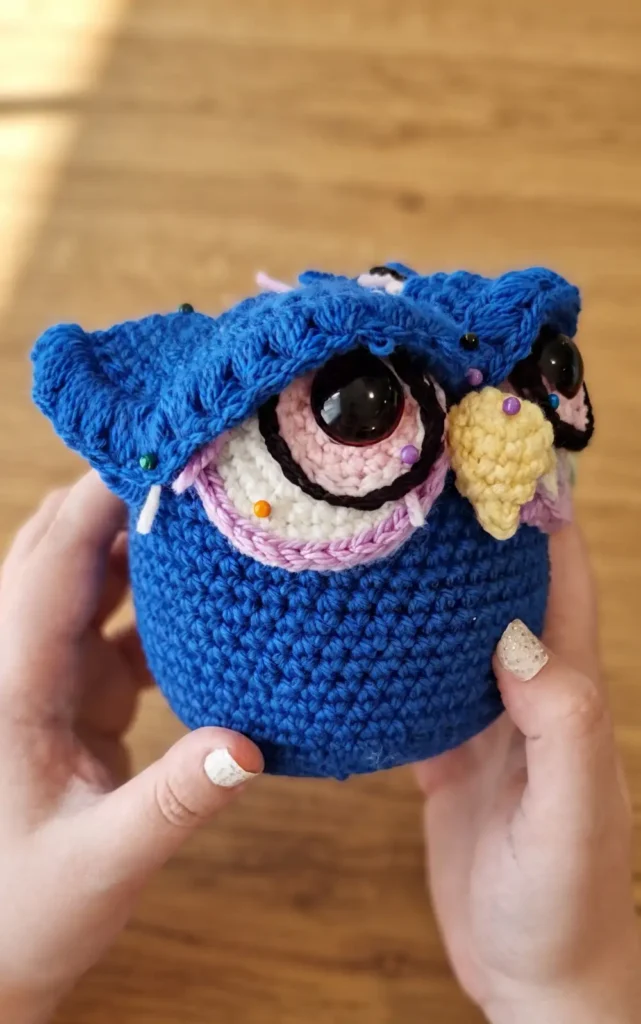
To give your owl ears or tufts, crochet two triangular pyramids. Unlike the body, these should have increases worked in the same three places each row to encourage sharp corners. Pin these to the head so they line up with the outer edges of the eyebrows.
For the belly, you can crochet a simple flat circle or a rectangle. If making a rectangle, chain a width approximately one quarter of your owl’s total circumference. To make the patch look more integrated, use a long stitch technique to weave yarn in and out of the stitch gaps, which helps blend colours and adds interesting texture.
Step 4: Construct Limbs and Final Assembly
The final step involves creating the wings, tail, and feet before sewing everything together.
- Wings and Tail: Assemble these from a round base decorated with ruffles and individual feathers. Layering these simple pieces makes the wings look much more intricate than they actually are.
- Feet: Instead of complex shapes, crochet four simple tubes or “sausages”. Stitch a small black patch onto the tips to represent talents or claws.
- Sewing: With 31 separate pieces, assembly is the biggest task. Use a yarn needle and only work into the gaps between stitches to make the seams nearly invisible. Layer the face first, then the belly, horns, and finally the limbs, ensuring the bird can balance on its feet before securing them permanently.
Video Credits: ComplicatedKnots
4. Chameleon Easy Crochet Pattern
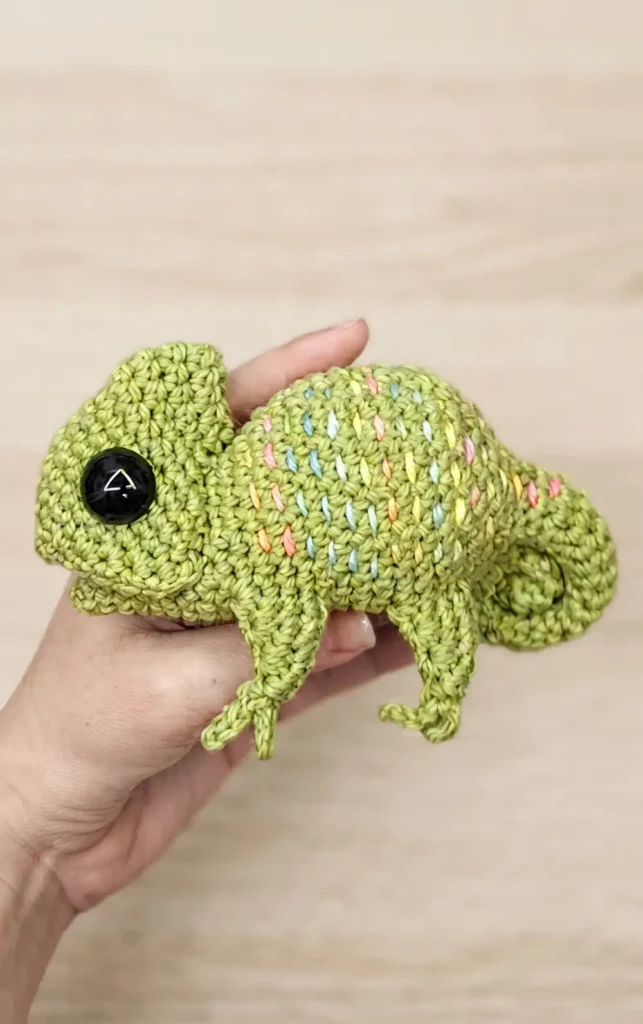
To create this large chameleon, you will need 8-ply 100 percent acrylic yarn in a main color, an accent color for details, and pink if you want to include a tongue. Required tools include a 3.5 mm crochet hook, stuffing, pins, needles, and either 20 mm safety eyes for a cute look or 9 mm eyes for a realistic appearance. Use stitch markers or bobby pins to help track rows and manage the complex shaping of the legs.
Step 1: Crocheting the Body and Tail
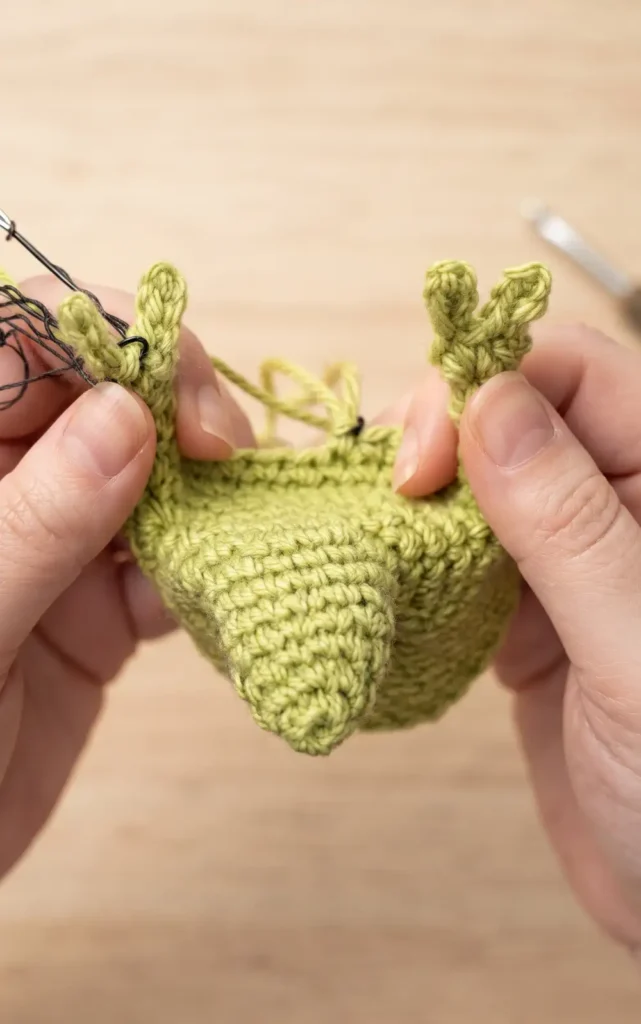
The project begins at the tip of the jaw with a magic ring of six single crochet. The body is worked in one piece, incorporating both the legs and the tail as you go.
You will use massive increases of five single crochet into a single stitch to form the legs, later adding toes with chains and slip stitches. The tail is constructed by gradually narrowing the round from nine stitches down to six over several rows. Finally, the tip of the tail is closed by pulling yarn through the front loops like a drawstring bag.
Step 2: Making the Head and Eyes
The head is crocheted separately as a large triangular shape starting from the tip of the nose. It features a distinct crest on top, which is built using half double crochet stitches to provide extra height.
If you are using large safety eyes, they should be snapped into place behind row seven before the head is stuffed. For a realistic look, you can crochet separate eye frames using back-loop-only stitches to encase 9 mm safety eyes. You also have the option to crochet a simple pink tube to serve as an optional tongue.
Step 3: Lacing the Legs and Assembly
Closing the legs requires a technique where you use a needle to sew through the front loops of eight pairs of stitches. This process is repeated for all four legs to ensure they stay straight and maintain their structure.
The head crest is also laced shut using the same method to create a clean seam. To assemble the lizard, pin the head over the bottom jaw and sew it from one corner of the mouth, across the back, to the other corner. This method leaves the mouth open so a tongue or other items can be tucked inside.
Step 4: Finishing Touches and Shaping
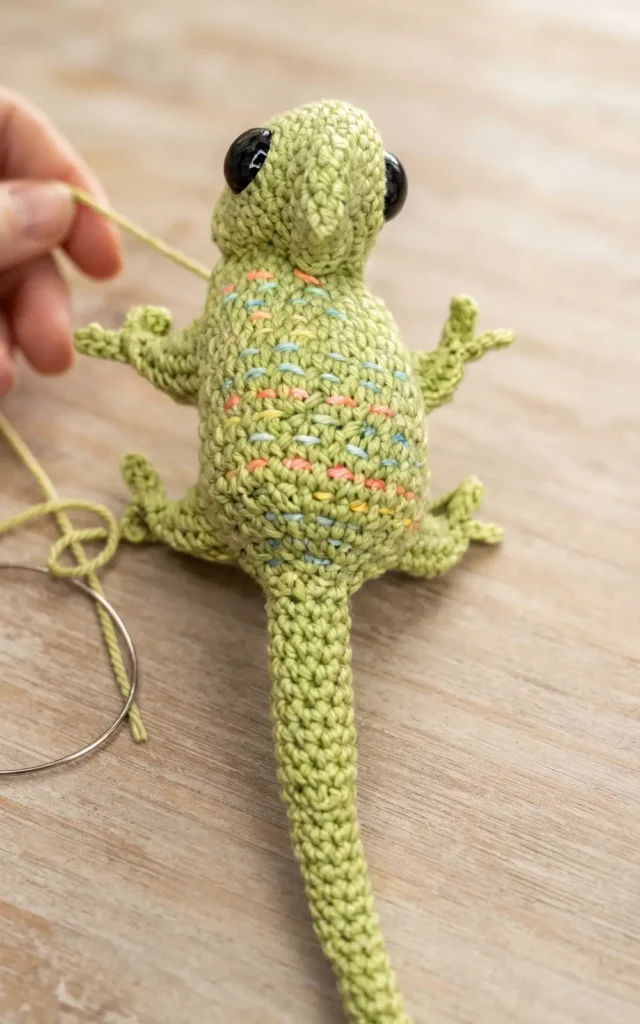
You can add a decorative touch by using an accent color to work a ladder stitch back and forth across the chameleon’s back. This detail is worked between the gaps of the crochet stitches from the front legs to the base of the tail.
To finish the iconic silhouette, lay the chameleon on its back and roll the tail under itself into a cinnamon roll shape. Secure this roll with a few small stitches to lock it in place. If you chose the realistic eyes, sew the crocheted eye frames onto the head at the level of row seven.
Video Credits: ComplicatedKnots
5. Crochet Kangaroo Amigurumi Pattern
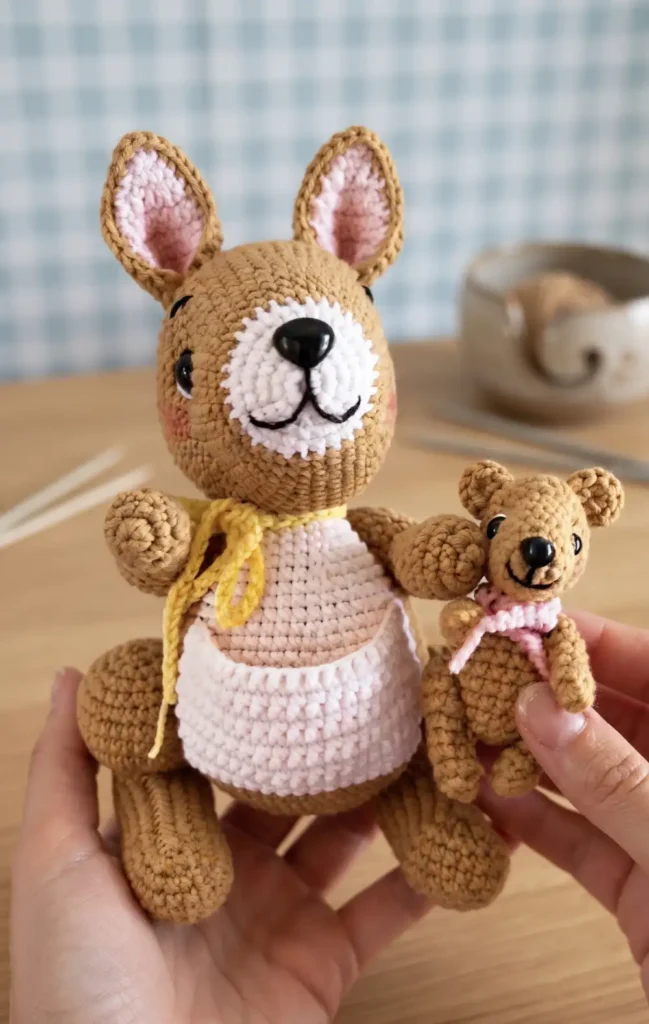
To begin this amigurumi project, you will need several basic supplies. These typically include a crochet hook (around 2.5 mm to 3.5 mm), yarn in a kangaroo color such as tan or brown, and polyester fiberfill for stuffing. You will also require safety eyes to give the kangaroo its expression and a yarn needle for future assembly.
Step 1: Starting the Head with a Magic Ring
The foundation of most kangaroo amigurumi is the head, which starts with a magic ring. This technique creates a tight center that prevents stuffing from escaping. You will usually crochet six single crochet stitches into the ring and then pull the yarn tail to close the circle completely.
Step 2: Working Increasing Rounds
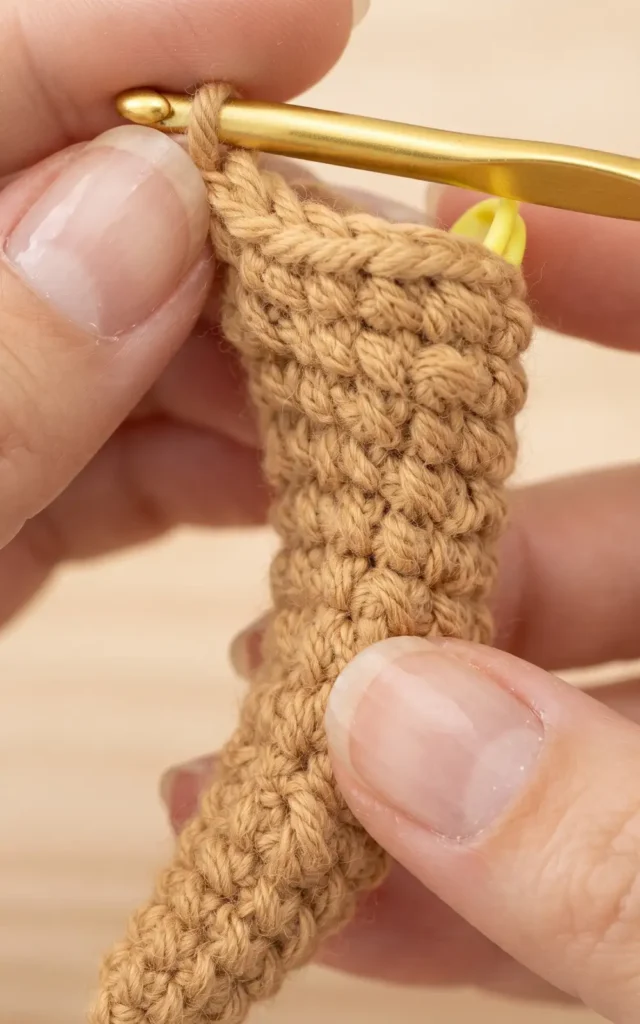
After the initial ring, you must increase the number of stitches to create the width of the head. In the second round, you will typically place two single crochet stitches into every stitch from the previous round. You will continue to increase in a mathematical pattern across subsequent rounds until the head reaches the desired size.
Step 3: Adding Height through Constant Rounds
Once the maximum width is achieved, you will crochet several rounds without any increases. This step creates the depth of the kangaroo’s face. If you are using safety eyes, this is the point where you would normally insert them between the rounds before the piece begins to close.
Step 4: Shaping with Decreases and Adding Stuffing
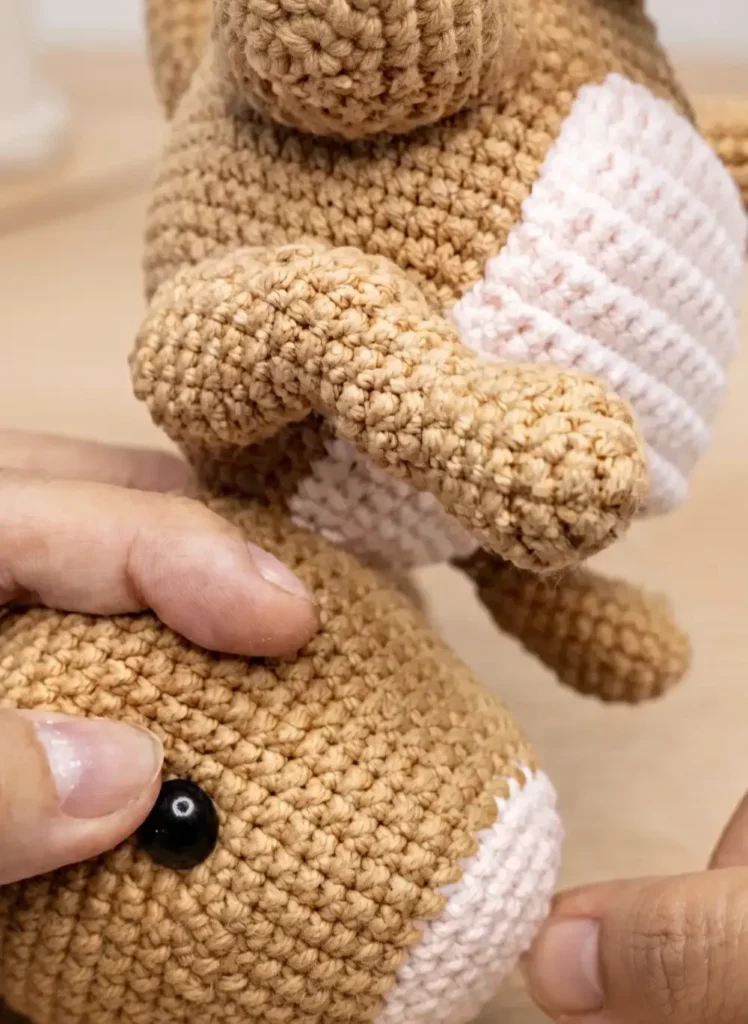
To finish the first part of your kangaroo, you must use invisible decreases to narrow the opening. As the opening gets smaller, you should firmly pack the piece with your fiberfill stuffing. Continue decreasing until only a small hole remains, then fasten off your yarn and leave a long tail for sewing the head to the body later.
The provided source for this video contains only repetitive filler phrases and does not offer specific pattern details. Would you like me to use the search tool to find the actual pattern details from the web to provide a more accurate conversion? This would allow me to include the exact stitch counts and the specific materials used by the creator.
Video Credits: Crochet with Aybi
6. Amigurumi Crochet Sloth Pattern
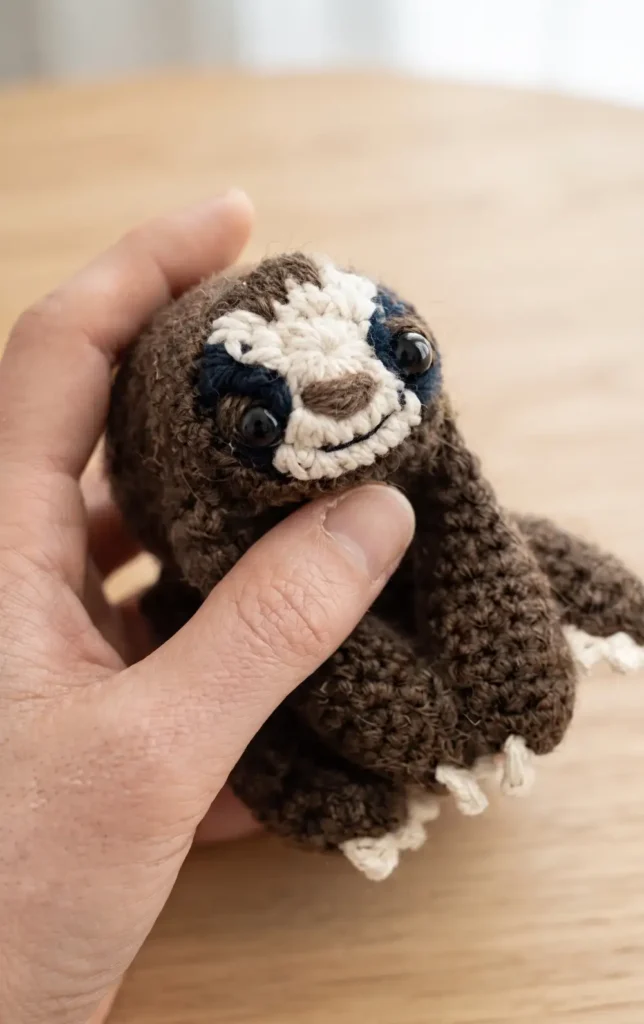
Creating Simon the Sloth is a rewarding project that combines intricate colorwork with clever assembly techniques to make a lifelike three-toed pygmy sloth.
Before starting, gather your materials: worsted weight fuzzy brown wool for the fur, off-white cotton for claws, black cotton for face details, a small amount of brown cotton for the nose, and black thread for the smile. You will also need a size G (4 mm) crochet hook, a darning needle, stuffing, two 8 mm safety bead eyes, and miniature magnets for the hands.
Step 1: Crafting the Claws and Magnetic Arms
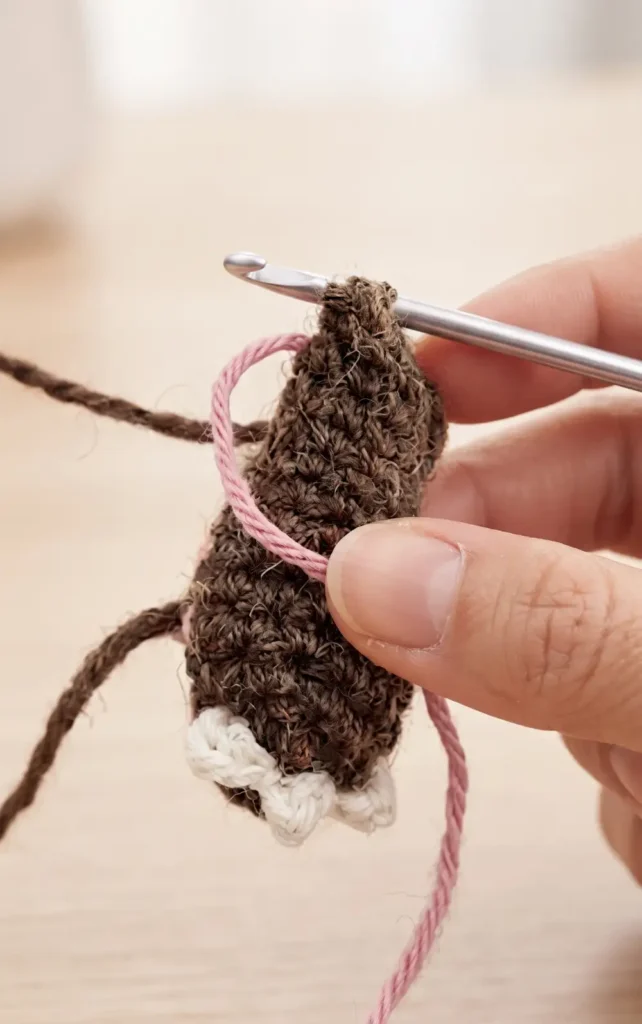
The process begins with the claws, which are made using off-white yarn and a slip knot. For a three-toed sloth, you chain three and single crochet into the back loop of the third chain from the hook, repeating this sequence three times.
Once you have made four sets of claws, you transition to the arms using fuzzy brown yarn. Starting with a magic loop, you crochet rounds of single stitches, increasing to twelve stitches before sewing the claws into the center of the hand. After some shaping with invisible decreases, you must place two miniature magnets inside each hand, using external magnets to keep them in the correct position while you add a small amount of stuffing. The arms are finished by crocheting through both sides of the piece simultaneously to flatten the end for easy attachment later.
Step 2: Crocheting the Body and Face Mask
The body and face are crocheted as one continuous piece, starting with a white yarn magic loop. This section involves detailed color changes between white and black yarn to create the sloth’s distinct face mask.
In round two, you perform a series of increases while alternating colors, followed by a “perfect stripe method” in round three that uses brown yarn for the top of the stitches to create a crisp division between the face and body. After completing these complex color-change rounds, you continue the rest of the pattern using only the brown fuzzy yarn. You will crochet several rounds of single stitches to form the neck before adding increases to give the sloth a slightly rounded belly.
Step 3: Adding Facial Details and Body Shaping
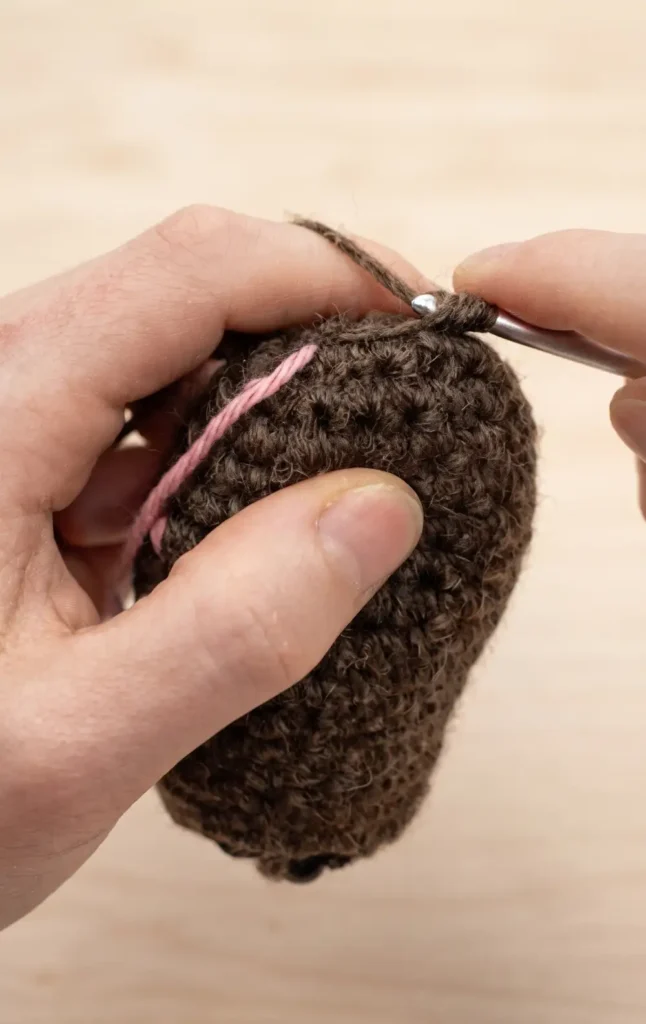
Before closing the body, you must install the facial features to give Simon his personality. Insert 8 mm safety eyes into round two, then use extra brown yarn to embroider sleepy eyelids over the top of the eyes.
For the nose, use the brown cotton yarn to stitch a small horizontal bar between the eyes, and use black thread to create a simple, soft smile. You can also embroider fuzzy hair tufts on the top of the head to hide color changes and add character. As you move toward the bottom of the sloth, use invisible decreases to hunch the back over. Stuff the body firmly but avoid overstuffing, then sew the final six stitches closed.
Step 4: Final Assembly and Alignment
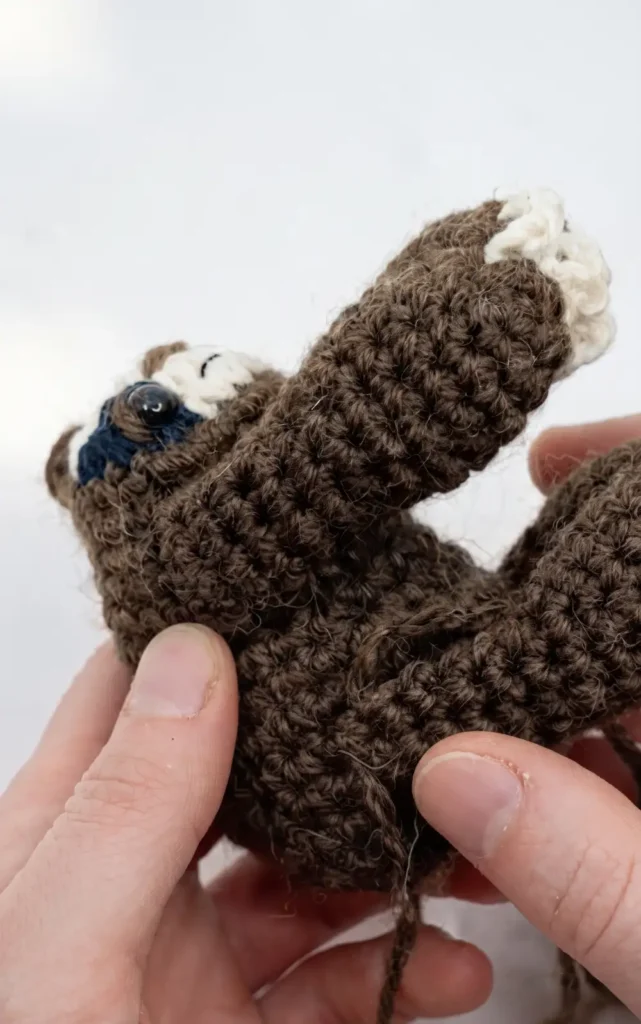
The final step is sewing the four limbs onto the body using a darning needle. It is helpful to keep the arms connected via their magnets during this process to ensure they are perfectly aligned. When positioning the limbs, ensure the claws are angled downward toward the sloth’s back rather than upward toward the face.
Use five stitches to travel up each limb, double-knotting the yarn tails inside the body to hide them. Once all four limbs are attached, your Simon the Sloth is ready to “hang out” on metal surfaces like curtain rods or even your crochet hook.
Video Credits: Club Crochet
Which Design Stole Hearts?
Six patterns, six totally different skill sets, and one weekend of cozy crochet ahead of you. Whether you fell for the grumpy owl’s attitude or the chameleon’s curled up tail, each project proves that amigurumi doesn’t have to mean hours of tedious sewing. A little planning with color changes and stuffing goes a long way.
Pick the pattern that speaks to you and cast on today. Tag your finished animals so the rest of us can admire your handiwork, and don’t be surprised if one weekend turns into six.