5 Stylish Crochet Crossbody Bag Patterns for Everyday Wear
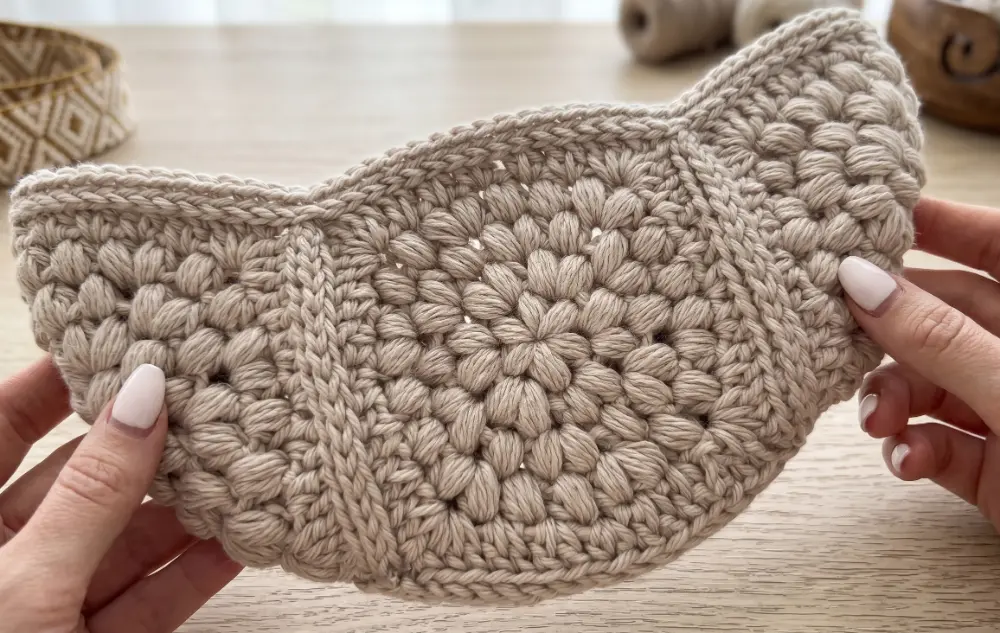
Every crochet bag pattern I’ve ever loved started with one problem: I needed something to carry my stuff, and I refused to buy it when I could make it. Drawstring bags sit at that sweet spot where function meets creativity, and once you understand the basic construction, you can riff on them endlessly.
These five free patterns cover everything from boho granny squares to structured thermal stitch panels, so whether you’re a confident beginner or you just want a quick weekend project, there’s something here that will actually get finished. I pulled patterns that don’t waste your time with vague instructions, because nothing kills momentum like stalling on a join halfway through.
1. Puff Stitch Granny Square Crossbody Bag
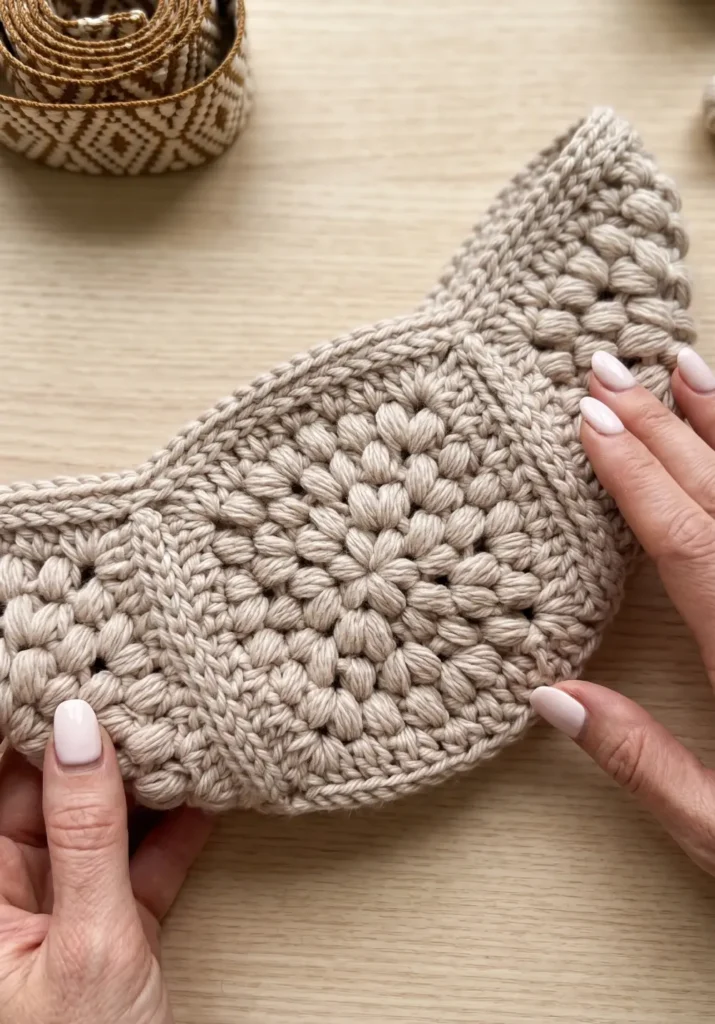
This stylish crossbody bag features a unique puff stitch texture that gives it a modern, chunky look. By combining four individual squares and finishing them with a sturdy strap, you can create a functional accessory that is perfect for everyday use.
Essential Materials
To complete this project, you will need the following supplies:
Yarn: Bulky weight yarn (the tutorial uses Swish Bulky in Nutmeg Heather). One hank is typically enough for the bag if using a store-bought strap, but you will need an additional hank if you plan to crochet your own strap.
Crochet Hooks: A 6 mm hook for the squares and a 5.5 mm hook for the bag’s top border.
Hardware: Two brass or wooden rings and optional lobster clasp attachments if you want a removable strap.
Notions: A yarn needle for weaving in ends and scissors.
Creating the Puff Stitch Squares
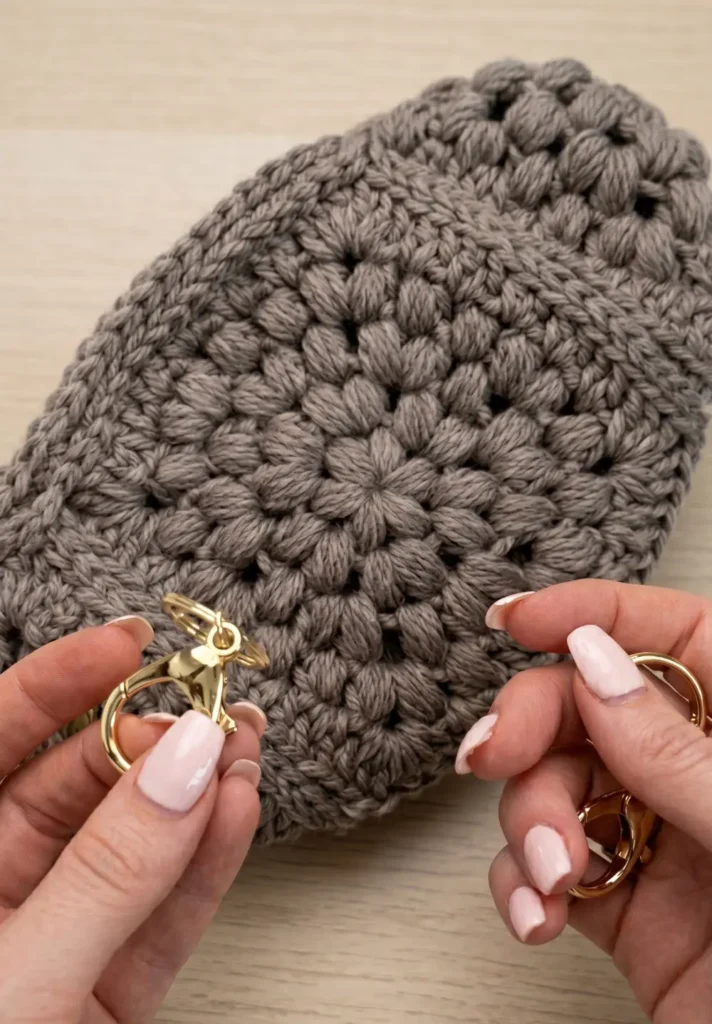
You will need to crochet four identical squares to form the body of the bag. Each square begins with a magic ring.
- Round 1: Work six puff stitches into the magic ring. To make a puff stitch, yarn over and pull up a loop four times (resulting in nine loops on the hook), then yarn over and pull through all loops. Chain one between each puff.
- Round 2: Work two puff stitches into every chain one space around for a total of twelve puffs.
- Round 3: Alternate between one puff and two puffs in each chain one space, increasing your count to eighteen puffs.
- Round 4: Follow a pattern of one puff, one puff, then two puffs in the chain one spaces to reach twenty four puffs total.
- Round 5 (Squaring Off): To turn the circle into a square, work corners consisting of three double crochets, chain two, and three double crochets. For the sides, work two double crochets in the next two spaces, two half double crochets in the center space, and two double crochets in the following two spaces.
Assembling the Bag
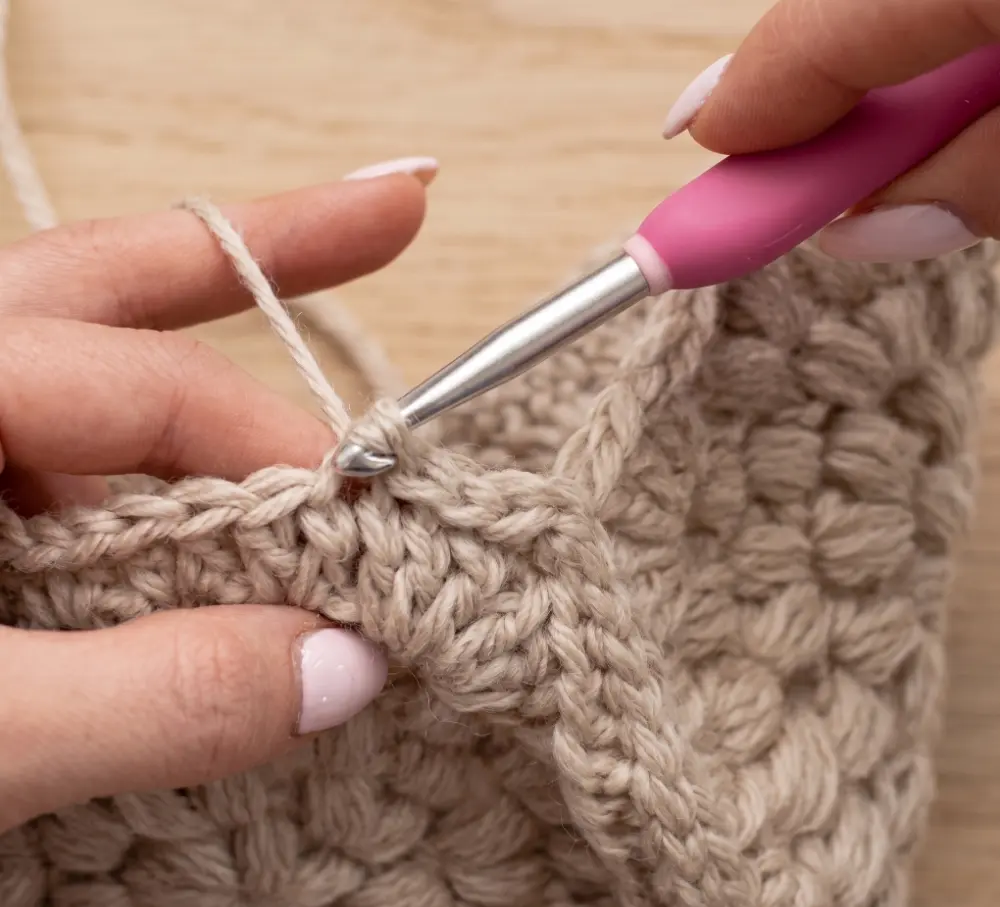
Once your four squares are finished, you must join them together using a flat slip stitch join.
- Seaming: Align two squares and slip stitch through the loops closest to the center, working from corner to corner.
- Forming the Shape: Join all four squares in a row and then fold them to create the bag’s structure. Seam the remaining sides to close the bottom and the sides of the bag.
- Top Border: Slip stitch around the entire top opening of the bag. Switch to the 5.5 mm hook and work one round of single crochet into the back loops. While working this round, crochet over your brass rings at the side corners to secure them.
Adding the Strap
You can choose to attach a store-bought leather or metal strap, or you can crochet a matching one.
To crochet a strap, use a Tunisian knit stitch. Start with a slip knot on your 6 mm hook and pull up six loops from one of your rings. Work the Tunisian knit stitch until the strap reaches your desired length (approximately 30 inches is standard for a crossbody). To finish, single crochet the end of the strap directly onto the second ring to secure it. Finally, weave in all remaining yarn tails to the inside of the bag for a clean finish.
Video Credits: MJ’s Off The Hook Designs
2. Boho Crochet Crossbody Bag
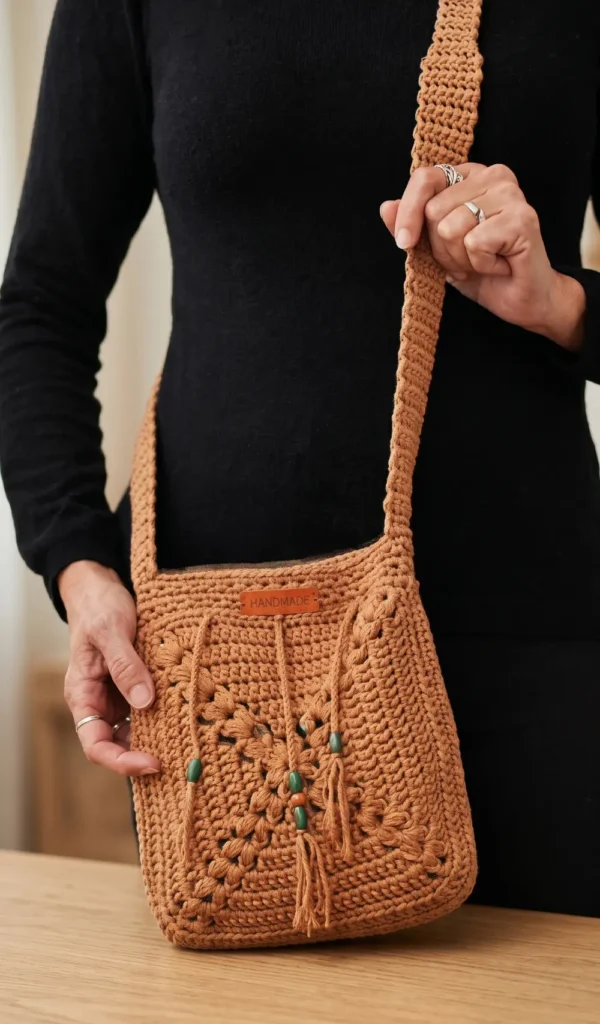
This stylish and functional crossbody bag is built around a classic granny square design, making it a perfect project for those who enjoy modular crochet. By following these steps, you can create a beautiful accessory using simple stitches and a unique assembly method.
Essential Materials
To get started, you will need the following supplies:
- A number 4 crochet hook.
- Acrylic yarn used with three strands simultaneously (this tutorial uses three separate balls of yarn held together).
- A tapestry needle for sewing the pieces together.
- A magnet closure and any desired decorative elements for the final touch.
Creating the Granny Square Base
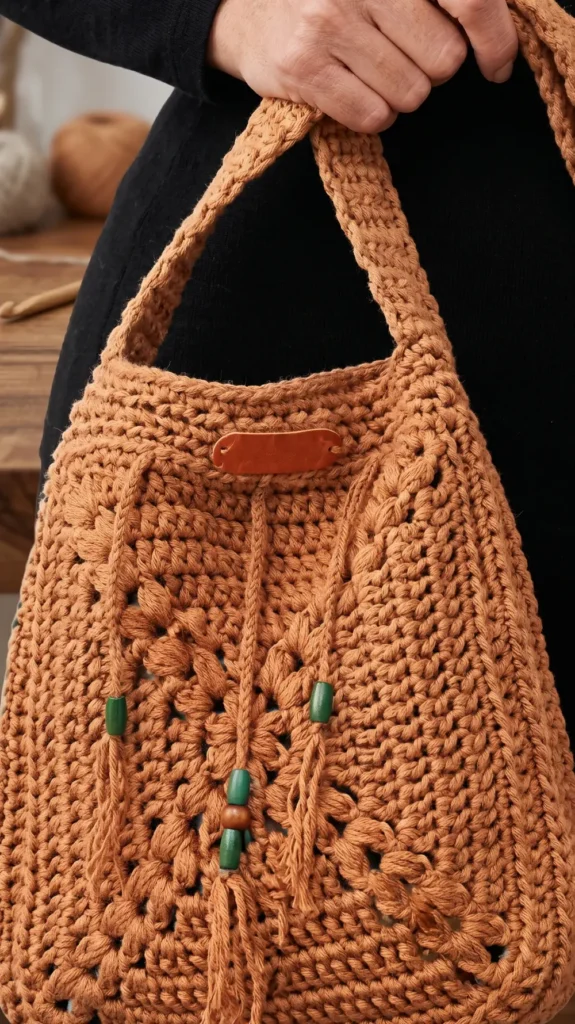
The foundation of the bag is a square that begins with a magic ring. Inside this ring, you will work eight puff stitches, each separated by two chains. To keep the work centered for the next round, the final puff stitch is joined with a half double crochet instead of chains.
As you build the square, you will create corners by placing two puff stitches in the same space, separated by two chains. The sides between these corners consist of three double crochets. In subsequent rounds, you will increase the size by adding two double crochets into the chain spaces at each end of the side sections. Continue these increases until you have completed six rounds in total.
Adding the Border and Side Panels
Once the granny square is complete, work a round of single crochets all the way around to create a clean edge. In the corners, place three single crochets to maintain the square shape.
To give the bag depth, you will create side panels. Starting from the center point of a corner, work 10 single crochets using only the back loop, then switch to half double crochets for the middle section, and finish with another 10 single crochets. Repeat this for two rounds to create the necessary width for the bag’s sides.
Assembly and Finishing the Opening
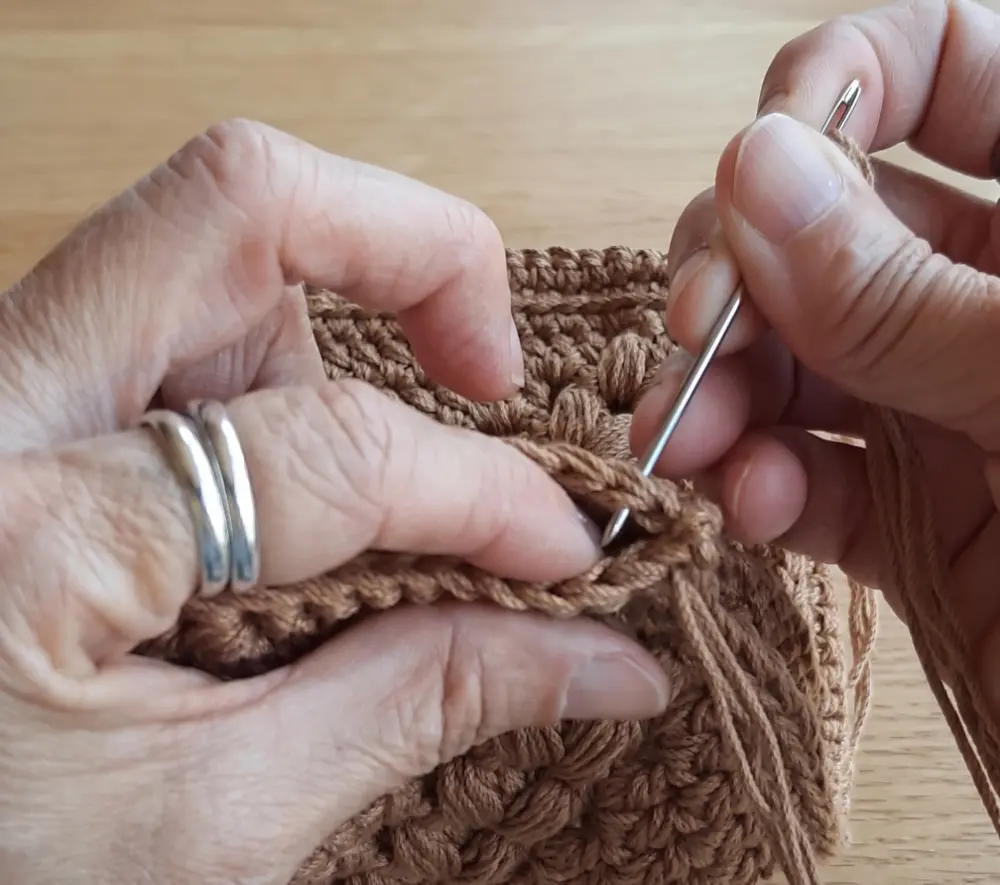
After making two identical panels, place them together with the right sides facing and sew the sides using a tapestry needle and a long strand of yarn.
With the body of the bag assembled, you will finish the opening (or mouth) of the bag by working rounds of single crochet. A decorative pattern is created by alternating one single crochet and one chain, skipping a stitch in between. In the following round, work two single crochets into each chain space. Repeat this sequence of rounds once more to complete the top border.
Final Touches: Straps and Closures
The final step is to create and attach the strap. This tutorial suggests a strap made of six single crochets at the ends, narrowing to four single crochets in the center for comfort. Securely sew the strap to the sides of the bag. Finally, add a small magnet for a closure and any extra decorations to give your boho bag a personal touch.
Video Credits Susana Gonzalez, everything in crochet
3. Hobo Crochet Crossbody Bag
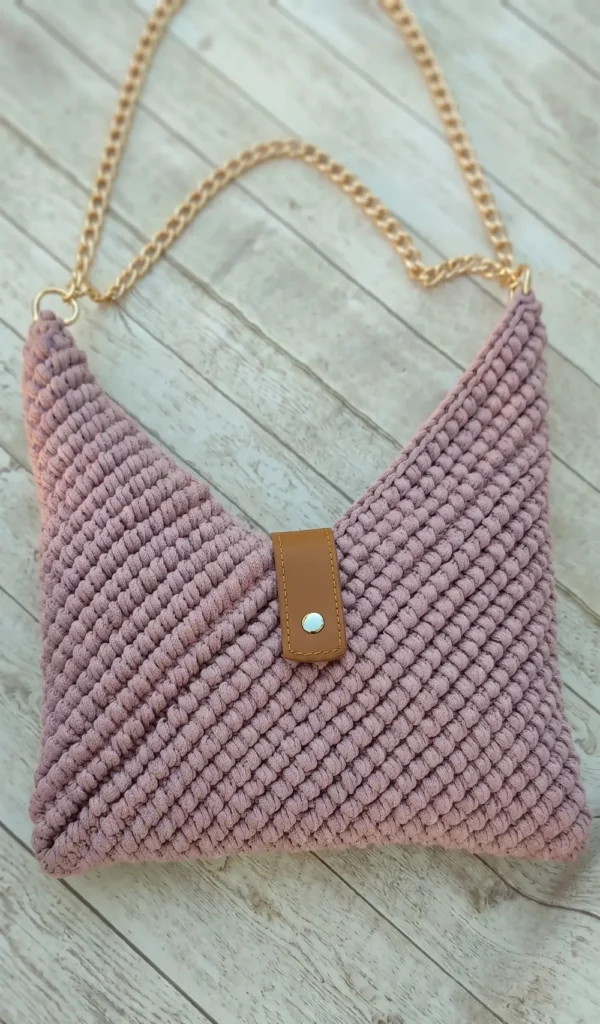
This project focuses on creating a stylish and functional hobo bag from a single crocheted piece. The finished dimensions for this design are approximately 22 cm (8.6 in) in height and 66 cm (25.9 in) in length.
Materials and Preparation
To begin this project, you will need crochet cord and a buckle to complete the fastening. The pattern is worked as a single rectangular panel that is later folded and seamed.
Step by Step Pattern Instructions
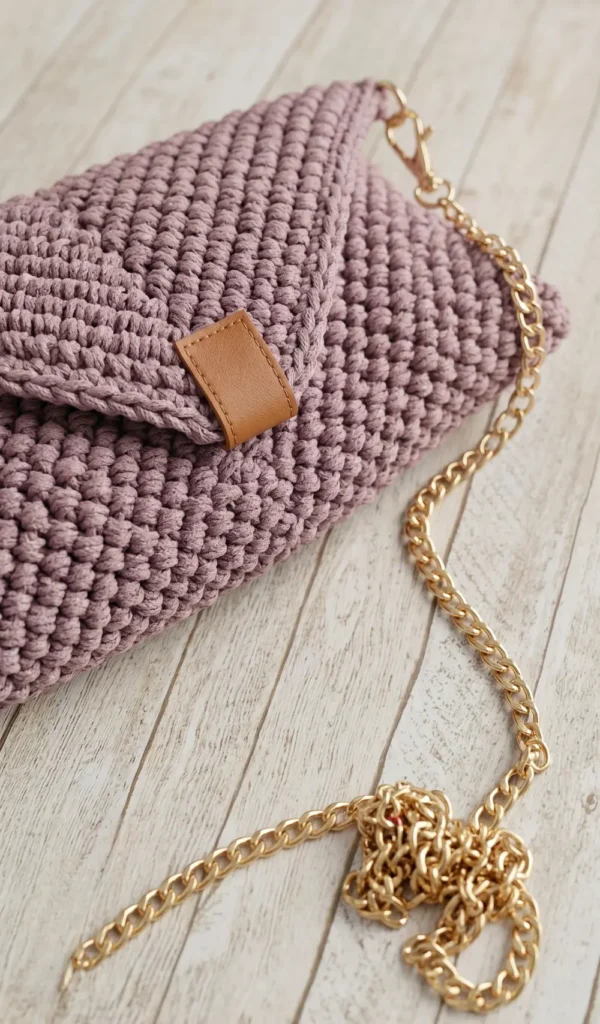
The construction starts with a foundation chain of 75.
Row 1: Work a slip stitch into the back bar of the second chain from the hook. Continue making slip stitches across the entire row for a total of 74 stitches, then chain one and turn.
Row 2 (Fantasy Stitch): This row uses a specific “fantasy stitch” technique. With your yarn under the hook, insert the hook into the two top loops of the second stitch. Yarn over, pull up a loop, and then pull that first loop through the remaining two loops on the hook. Complete this across the row for 74 stitches, then chain one and turn.
Row 3: Work a slip stitch into the two top loops of every stitch across the row, then chain one and turn.
Rows 4 through 40: Continue the pattern by repeating the fantasy stitch and slip stitch rows 18 more times.
Folding and Seaming
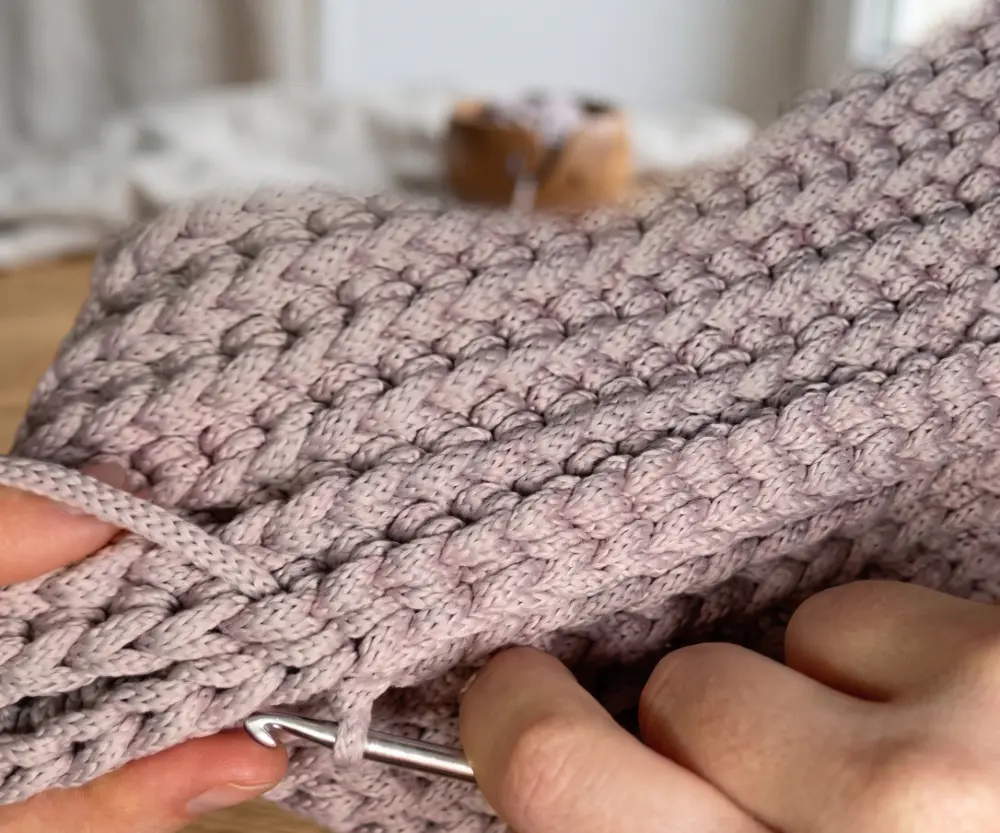
The bag’s shape is created through a specific folding sequence once the panel is finished. With the right side of the work facing you, fold one edge to the bottom and the other edge to the top. You then fold the left edge to the top one more time.
Row 41 (First Seam): Locate the edge with the cord and work a slip stitch into the next 24 stitches. Continue by working slip stitches through both pieces at once to join them. Cut the cord and weave in the tail.
Row 42 (Second Seam): Turn the work and skip 24 stitches from the top edge. Join the cord and use slip stitches to join the sides by working through both layers. Cut the cord and weave in the remaining tail.
Final Finishing
Once the seaming is complete, pull the bag inside out to hide the seams. To complete the accessory, sew your buckle onto the bag. Following these steps results in a durable crossbody bag with an almost invisible seam.
Video Credits Natessa | Sacred Crochet Art
4. Thermal Stitch Crochet Crossbody Bag
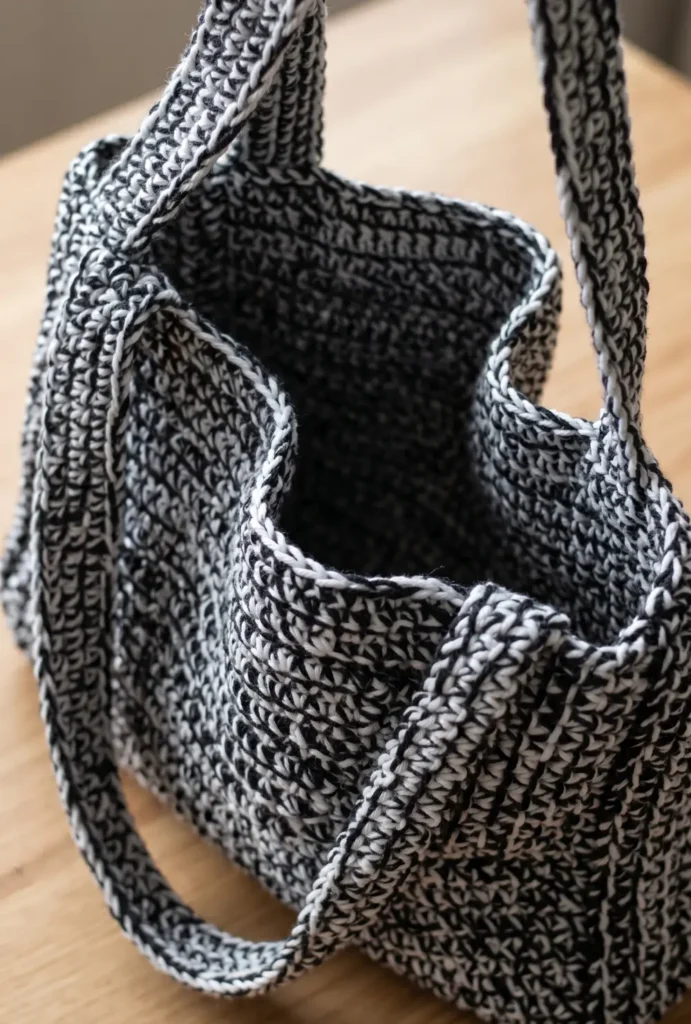
This stylish and durable crossbody bag is created using single crochets and the thick, sturdy thermal stitch. The design features clean edges and a reinforced base to prevent the bag from stretching too much during use.
Materials Needed
To create this project, you will need the following supplies:
Yarn: Approximately 460 grams of yarn in total, such as Lion Brand Pound of Love. The tutorial uses two colours, charcoal and white (230 grams each), worked with two strands held together throughout.
Hook: A 6 mm crochet hook.
Tools: Stitch markers, scissors, and a tapestry needle for weaving in ends.
Creating the Main Panels
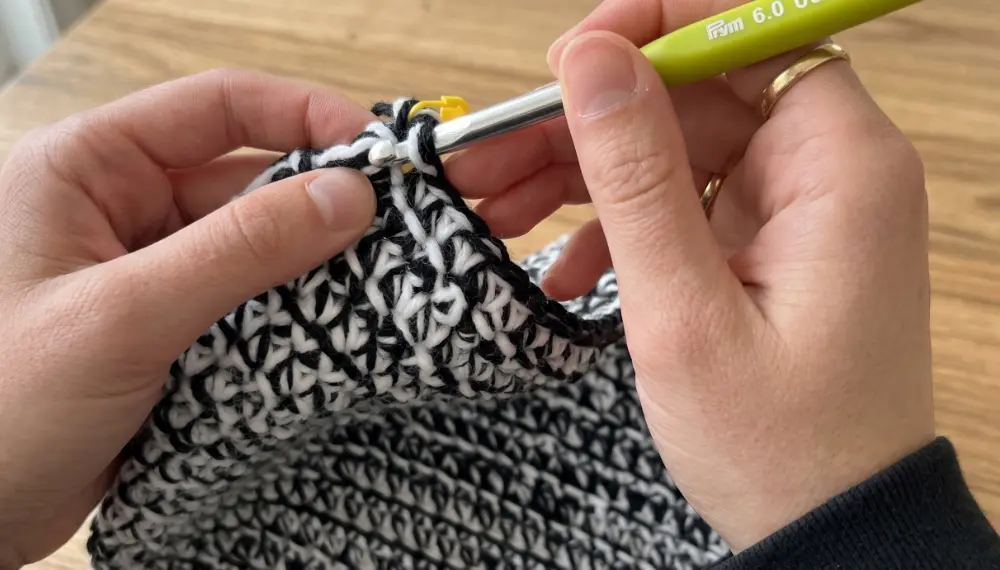
You will need to make two identical panels for the front and back of the bag.
- Foundation: Start by making a slip knot and chaining 41.
- Row 1: Work single crochets into the back bars of the chain, skipping the first one, for a total of 40 stitches.
- Body: Chain one and turn to start each new row, continuing until you have completed 31 rows of 40 single crochets.
- Border: Crochet single crochets all the way around the rectangle. This includes 31 stitches on the sides and 40 stitches on the top and bottom, adding an extra stitch in each corner to help the panel lay flat.
- Finishing: Use a needle to create a seamless “fake stitch” at the end of the border to join the round invisibly.
Crafting the Thermal Stitch Base
The base of the bag is a long rectangle that provides structure.
- Foundation: Chain 107 and work 106 single crochets into the back bars for the first row.
- Transition: For row two, chain one, turn, and work 106 single crochets in the back loop only.
- Thermal Stitching: From row 3 to row 21, work the thermal stitch. To do this, insert your hook into the back loop of the current stitch and the loop directly underneath it from the row below, then complete a single crochet.
- Counting Rows: When finished, you should count 11 rows on the flat side and 10 rows on the textured side, excluding the top and bottom rows, to confirm you have 19 rows of actual thermal stitches.
Making the Long Handles
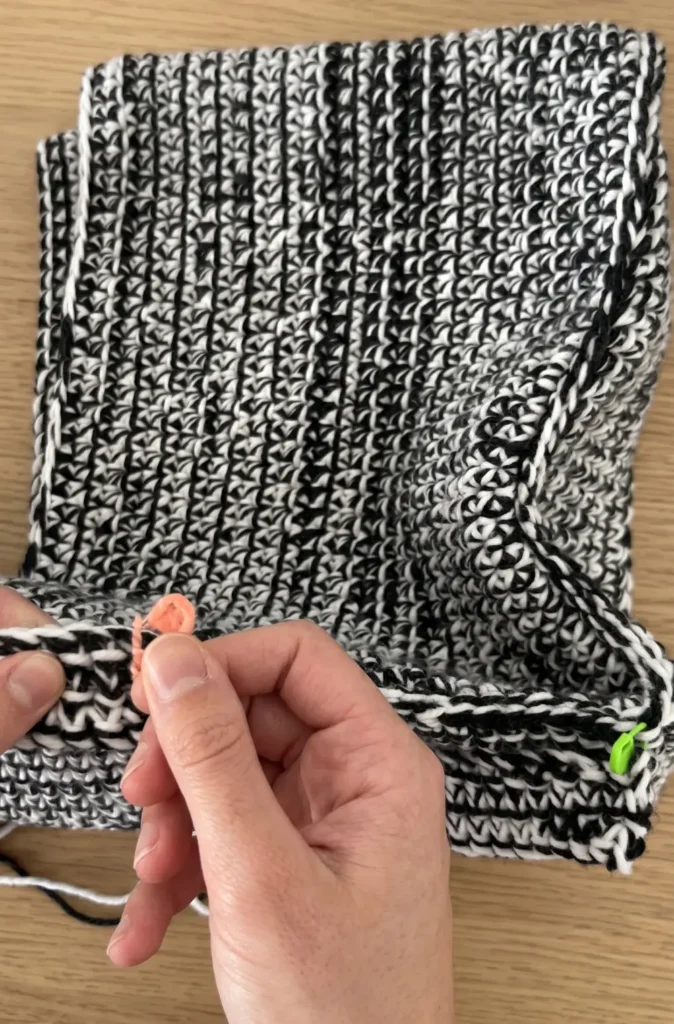
Because this is a crossbody bag, the handles are extra long. You must make two handles following a similar process to the base.
- Foundation: Chain 151 and work 150 single crochets into the back bars.
- Rows: Complete row two using back loop only single crochets, then complete three rows of the thermal stitch.
Assembling Your Bag
Once all components are finished, it is time to join them together.
- Marking the Base: Use stitch markers to map out where the panels will attach to the base. Mark sections of 31 stitches for the sides and 40 stitches for the bottom, skipping one stitch between these sections to accommodate the corners.
- Joining Panels: Align the corners of your panels with the markers on the base. Join them by making slip stitches all the way around, inserting your hook through the front loop of the base and the back loop of the panel.
- Attaching Handles: Place the handles so their flat side faces outward. Sew them to the sides of the bag using a tapestry needle. Pass the yarn twice through each stitch for a secure hold, working through the front loops of the handle and the corresponding loops on the bag base.
- Final Gaps: Use any remaining yarn tails to stitch closed the small holes that may appear where the handles meet the base and then weave in all ends.
Video Credits: crochet daniela
5. Sunflower Fanny Pack Crossbody Bag
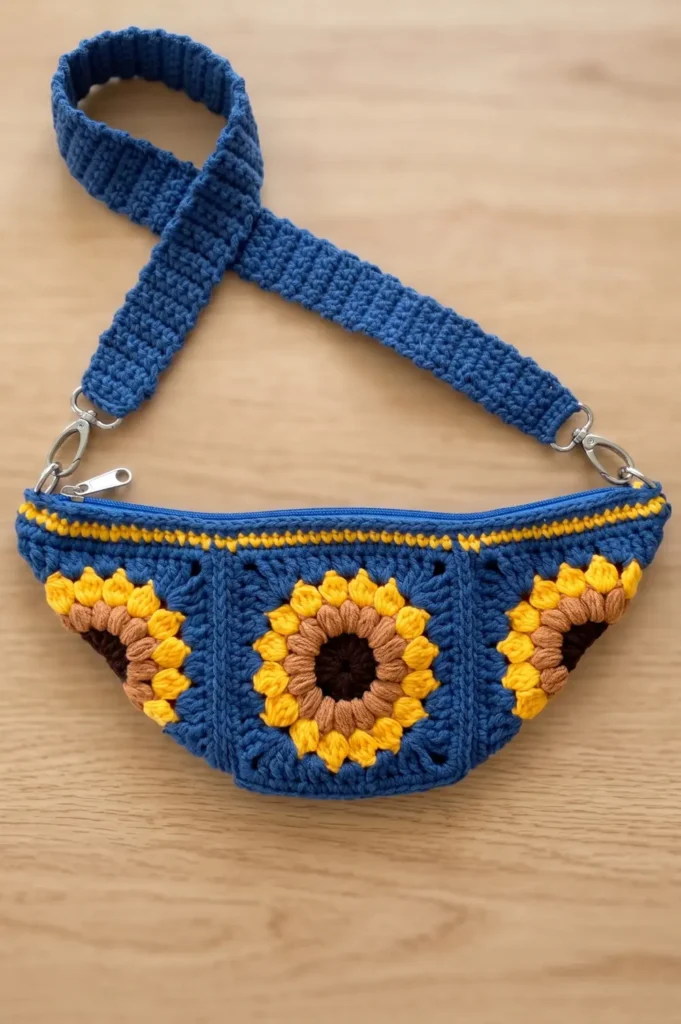
This stylish and versatile accessory, often referred to as a banana bag, combines the vintage charm of sunflower granny squares with the modern utility of a fanny pack. Depending on the strap length you choose, this piece can be worn around the waist as a traditional belt bag or over the shoulder as a trendy crossbody bag.
Essential Materials for Your Bag
To complete this project, you will need several specific items to ensure a professional finish:
- Yarn: You will need at least four different colours. These typically include a dark centre colour, a bright yellow for petals, a background colour for the square, and an accent colour for the edging.
- Crochet Hook: Suited to your chosen yarn weight.
- Zipper: To secure the opening of the bag.
- Hardware: Two D-rings for the bag corners and two carabiners for the strap.
- Strap: You can use a ready-made handle or crochet your own.
Creating the Sunflower Granny Squares
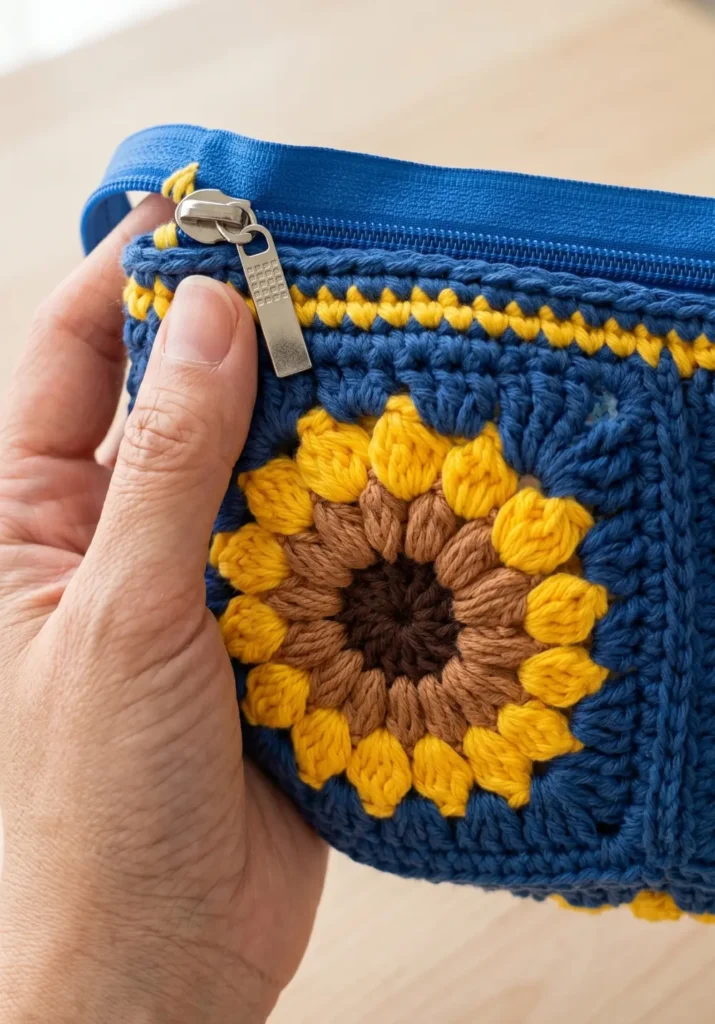
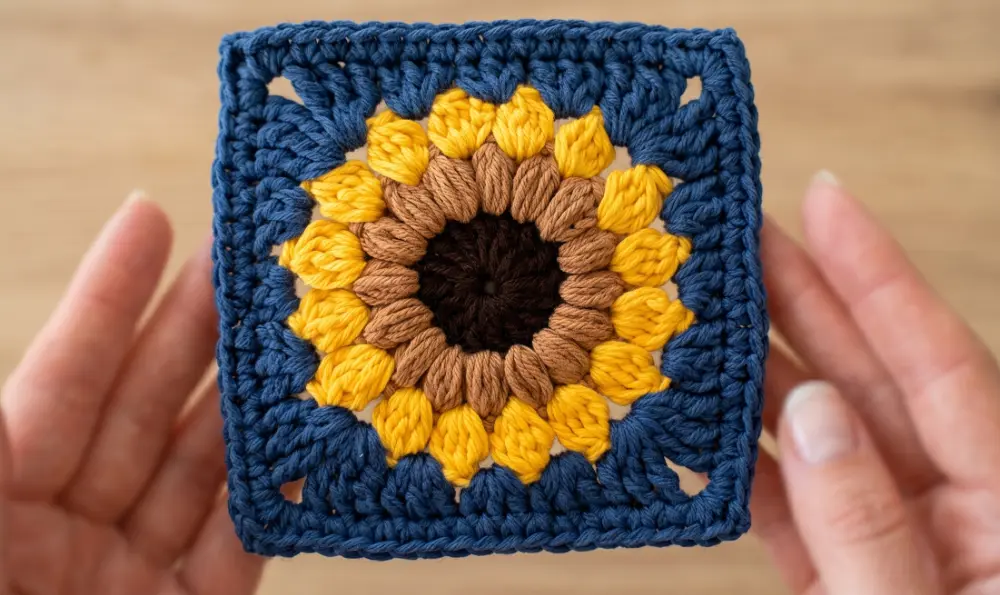
The foundation of the bag consists of four sunflower granny squares. The process begins with the centre of the flower using puff stitches. You will create a total of 16 puff stitches in the first stage to form a circular core.
The second stage involves adding the petals using bobble stitches. In the third round, you will crochet 16 bobble stitches, each separated by two chains, which gives the flower its distinctive texture.
To transform the circular flower into a square, you will work a combination of stitches into the spaces between the bobble stitches. This involves using treble crochets and chains to create the corners, while double crochets and half double crochets are used to flatten the sides.
Assembly and Bag Shaping
Once you have completed four matching squares, you must join them together. The recommended method is using a flat stitch, which connects the loops of one square to the loops of the other to create a clean, professional seam. By connecting all four squares in a specific sequence, the flat crochet work naturally takes on the three dimensional shape of a bag.
Finishing and Hardware Attachment
After the main body is assembled, use your third and fourth yarn colours to crochet a border of single crochet along the top edge. During this process, you should join the D-rings into the corners of the bag, as these will serve as the attachment points for your strap.
The final construction step is to sew a zipper into the top opening of the bag to ensure your belongings stay secure. For the handle, if you choose to crochet one, you can work approximately 100 rows of stitching and attach a carabiner to each end, allowing the strap to be easily clipped onto the D-rings.
Video Credits Crochetclubstore
Which Stitch Do You Love?
Five patterns, five different construction methods, and all of them free. That’s a solid lineup for anyone who wants to actually build their bag-making skills, not just bookmark another pretty project.
Pick the one that matches your current yarn stash and start there. The sunflower fanny pack is my personal favorite for gifting, but the thermal stitch bag is the one that holds its shape the longest.
Tag me when you finish yours. I genuinely want to see what colors you chose.