5 Easy Crochet Drawstring Bag Patterns You Can Make Free
Drawstring bags are one of those projects that never get old. They’re fast, functional, and let you actually practice real skills like shaping, stitch texture, and closures without committing to a massive project.
I’ve rounded up five free patterns that range from a classic granny stitch bag to a full 3D pineapple design. Whether you’re picking up a hook for the first time or you just want a satisfying weekend make, there’s something here for every skill level.
1. Granny Stitch Drawstring Crochet Bag
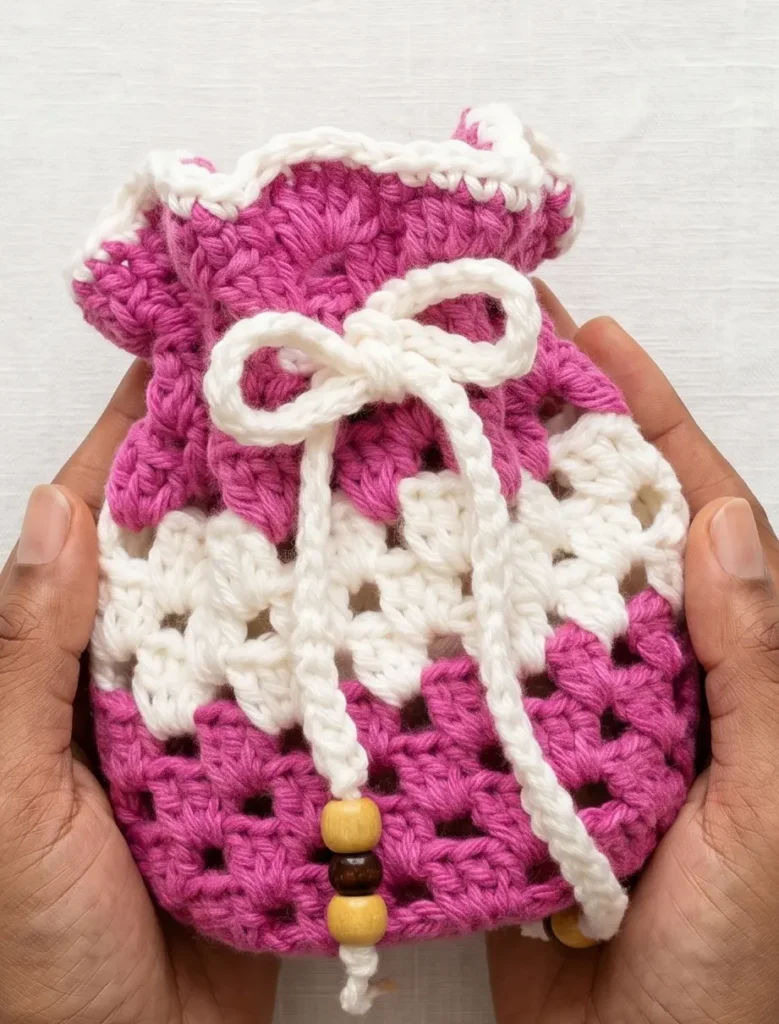
This beginner friendly pattern works up quickly and results in a spacious, sturdy bag that can hold its shape and stand on its own. The design is worked in two main parts: a granny circle base and granny stripe sides.
Essential Materials and Tools
To begin this project, you will need the following supplies:
- Yarn: A size 4 medium or worsted weight acrylic yarn is recommended. You can use a single color or multiple colors to create a rainbow effect.
- Crochet Hook: A size G or 4 mm hook is used in this pattern. While the yarn may recommend a 5 mm hook, using a smaller size ensures the stitches are tight and stiff enough for the bag to stand up.
- Extras: You will also need a pair of scissors and a yarn needle. Optional wooden beads can be added to the drawstring for decoration.
Step 1: Crafting the Circle Base
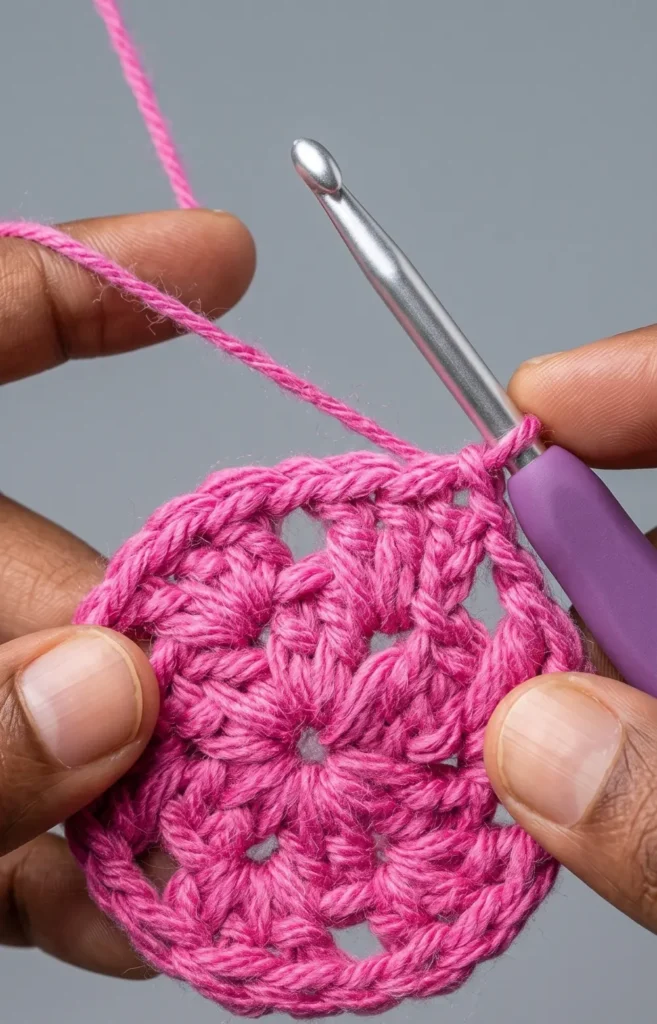
The base consists of four rounds that expand into a flat circle.
- Round 1: Start with a slip knot and chain five, then slip stitch into the first chain to form a small circle (a magic circle is also an option). Chain three, which counts as your first double crochet, and work one double crochet into the center. Chain one, then repeat the set of two double crochets and one chain five more times. Slip stitch into the third chain of your starting chain three to finish the round with six sets total.
- Round 2: Slip stitch until you reach the first chain one space. Chain three and work two double crochets into that space to create your first three double crochet cluster. Chain one, then work a three double crochet cluster into every chain one space around. Finish with a slip stitch into the starting chain.
- Round 3: Slip stitch into the next chain one space. In this round, you will increase by putting two clusters into every space. Work three double crochets, chain one, and three more double crochets all in the same space. Follow every cluster with a chain one.
- Round 4: Slip stitch to the next chain one space. Work one cluster of three double crochets into every chain one space, separating each cluster with a chain one. You should have 12 clusters at the end of this round.
Step 2: Working the Bag Sides
From round 5 through round 15, you will simply repeat the pattern from round 4.
In each round, slip stitch to the first chain one space and work one cluster of three double crochets and a chain one into every space around. As you progress, the sides will begin to fold upward to form the bag shape. If you wish to change colors, cut the yarn at the end of a round and join the new color into any chain one space. You can continue adding rounds if you prefer a taller bag.
Step 3: Finishing with a Scalloped Border
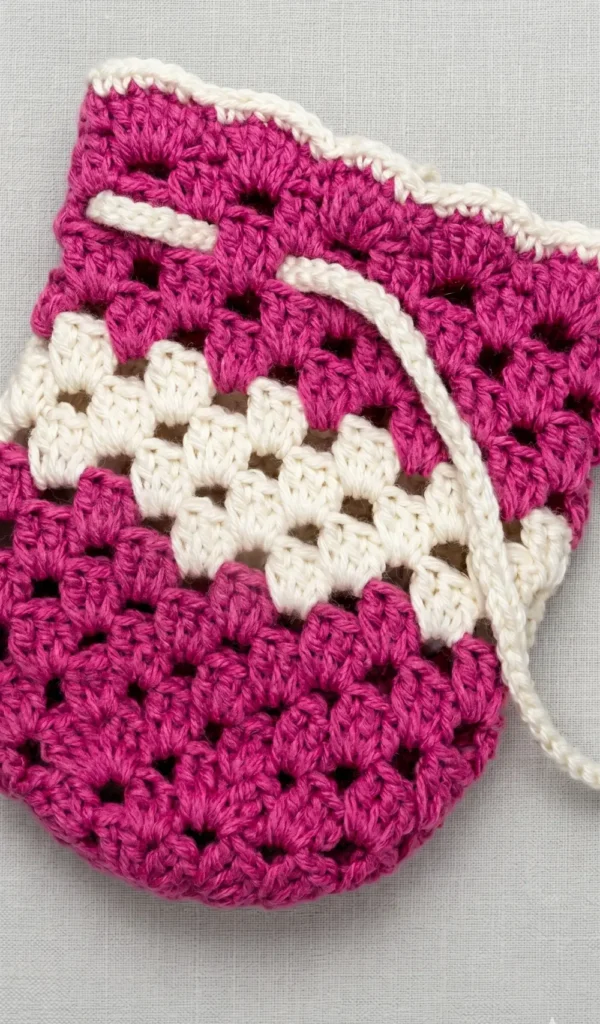
To give the bag a decorative edge, you can add a scalloped border.
Slip stitch into the second double crochet of a cluster. In the next chain one space, work six double crochets. Secure the scallop by making a single crochet in the middle (second) double crochet of the next cluster. Repeat this pattern around the entire top. For extra detail, you can work one final round of single crochets in a contrasting color over every stitch of the scallop.
Step 4: Adding the Drawstring
Create a drawstring by making a long chain or a separate crochet cord. Using your yarn needle or fingers, thread the cord through the gaps in the row just below the scalloped border. If you are using beads, slide them onto the ends of the cord and tie a knot to secure them
Crochet Credits: https://www.youtube.com/watch?v=V_Q48TdedHU
2. Treble Shell Stitch Drawstring Crochet Bag
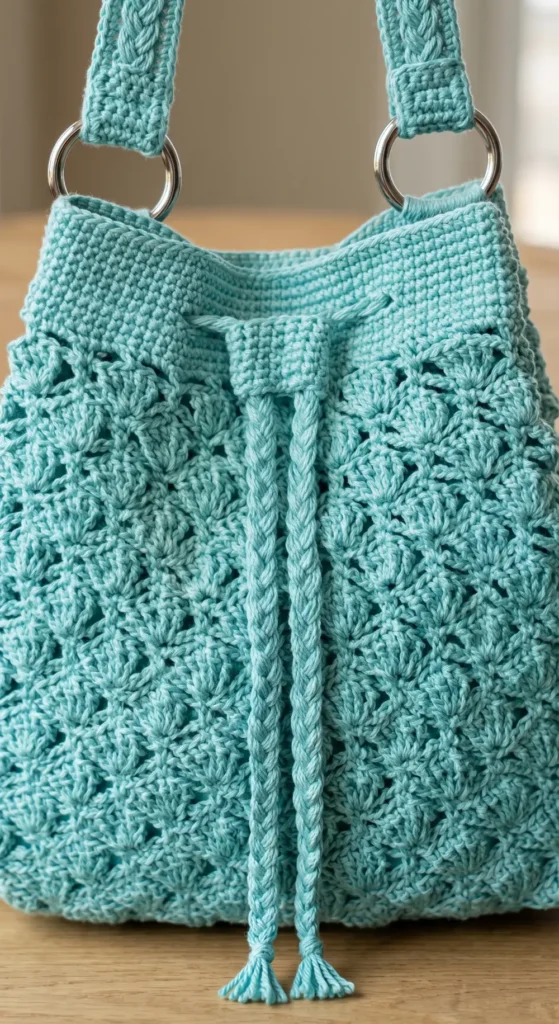
This tutorial guides you through creating a medium-sized drawstring bag featuring a unique treble shell stitch motif. Unlike standard shell stitches that use double crochet, this design utilizes treble stitches for a taller and more textured appearance.
Materials and Tools Needed
To begin this project, you will need the following materials:
- Yarn: Poly (polyester) or Nylon type yarn is recommended for its durability in bags.
- Crochet Hook: Size 4/0 or 5/0, depending on your thread thickness.
- Base Support: Eva foam (3mm or 4mm thickness) to provide stiffness to the bottom of the bag.
- Hardware: Two oval rings (3.3 cm diameter) and a ring-walk (3.5 cm diameter) for the adjustable handle.
- Finishing Supplies: Stitch markers, adhesive glue for the foam, and strong nylon sewing thread for the inner lining.
- Lining: Fabric for the inner lining (furing), which can include an optional cellphone pocket.
Constructing the Oval Base
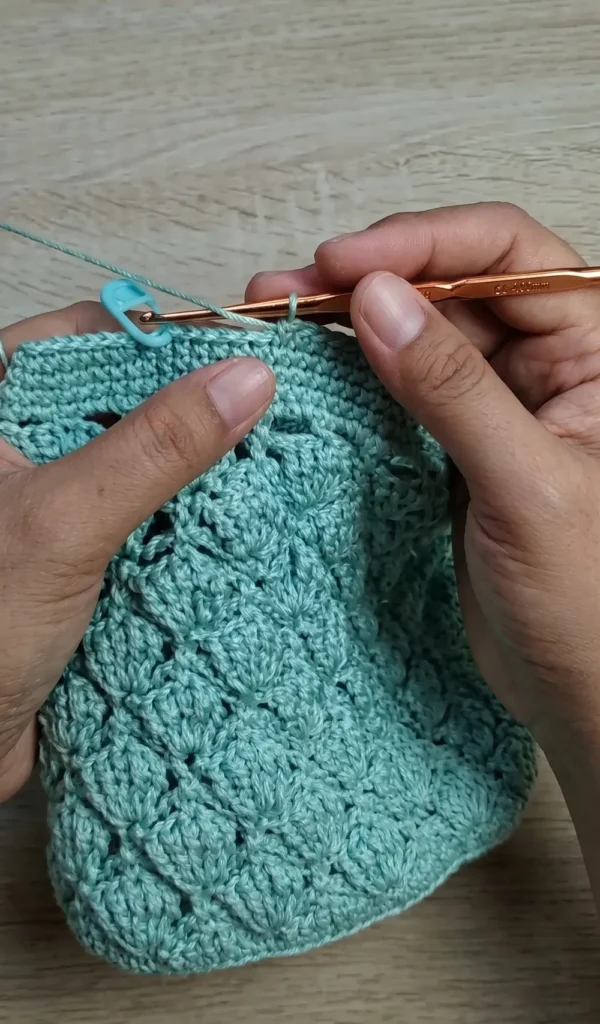
This bag project begins with an oval base that must be worked in multiples of 8. To achieve the size used in this tutorial, start by making a knot and creating a foundation of ch-49. Once the base reaches your desired width and length, finish the round and prepare to transition to the body of the bag.
Crocheting the Bag Body: The Treble Shell Stitch
Before starting the decorative motif, work one round of single crochet in the back loops only. The main body consists of a 4-round repeating pattern:
- Round 1: Start with ch-4 and two treble stitches in the first stitch. Follow the pattern of ch2, skip 3 stitches, and sc in the next stitch. Then, repeat the sequence of ch2, skip 3, 5tr, ch2, skip 3, and sc around the bag.
- Round 2: Work ch1 and sc in the first stitch. Repeat the sequence of ch4, sc between the shell stitches, and ch4, sc in the third treble stitch.
- Round 3: This round uses the same steps as Round 1, but the position of the shells is alternated.
- Round 4: This round is identical to Round 2.
Continue repeating these four rounds until the bag reaches a height of approximately 19cm (7.5 inches), which typically requires seven full repeats of the pattern.
Finishing the Top and Adding Drawstring Holes
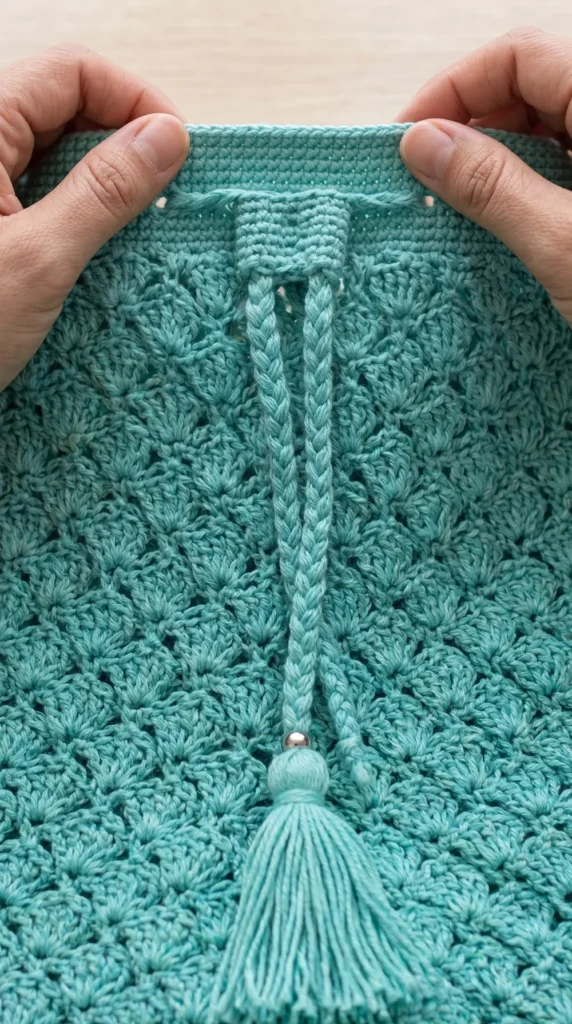
After completing the shell motifs, work five rounds of single crochet (sc) around the top. To maintain the correct shape, you should have 160sc in total, which equates to 8sc for each of the 20 shell motifs.
To create the drawstring holes, divide the top edge into eight sections. At each of the eight marker points, work ch4 and skip 4 stitches to create a hole. Ensure two holes are centered in the middle for the rope to enter and exit. After the hole round, work five additional rounds of sc, placing 4sc into each ch4 space.
Adding the Inner Lining and Support
To give the bag structure, cut Eva foam to match your base pattern and glue it to the inside. For the inner lining, cut one piece for the base and two pieces for the sides, adding 2 to 3 cm for seam allowances. You can also sew in a pocket for a cellphone, adjusting the width based on the bag’s height. Use strong nylon thread to sew the lining into the bag, positioned just below the drawstring holes.
Creating the Braided Drawstring and Handle
For the drawstring, take 15 strands of thread and create a 3-strand braid at least 1 meter long. Create a small sc holder (ch-15 for 6 rows) to secure the rope.
The handle strap is made by crocheting 5sc for approximately 125 to 130 centimeters. For extra strength, you can sew around the perimeter of the strap with sewing thread to prevent stretching. Finally, attach the oval rings to the bag with 12sc and thread the handle through the ring-walk for an adjustable fit.
Video Credits: Febe Andrian Crochet
3. 3D Pineapple Drawstring Crochet Bag
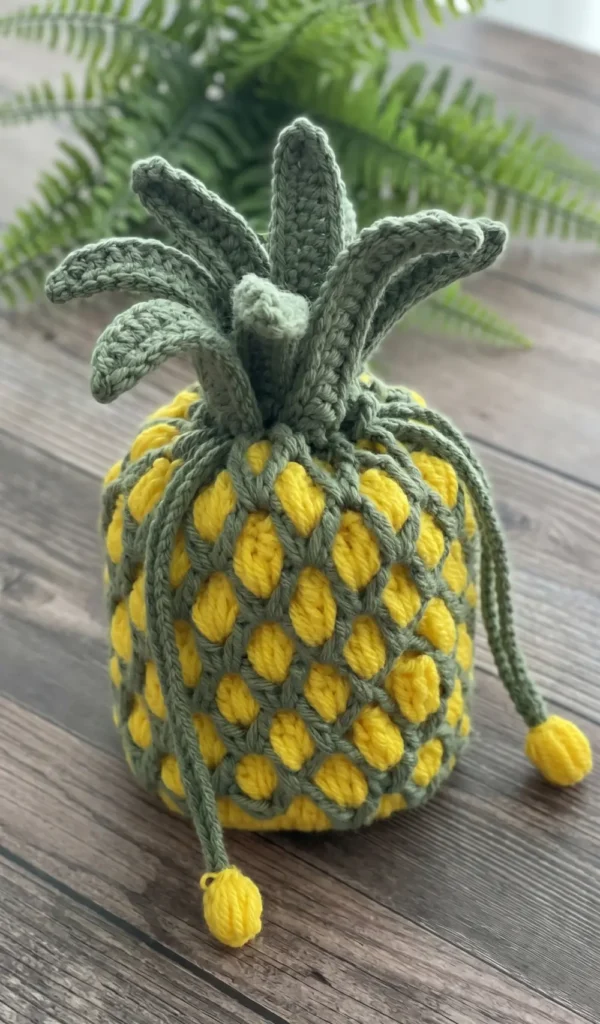
Create your own vibrant and textured 3D Pineapple Drawstring Crochet Bag with this comprehensive guide. This project is perfect for beginners looking to practice double crochets, V-stitches, and shaping techniques to create a functional accessory.
Materials Needed
To begin this project, you will need the following materials:
- 3.75 mm crochet hook.
- Medium weight yarn in two colours: yellow or gold for the pineapple body and green for the leaves and cords,.
- Scissors and a yarn needle for weaving in ends,.
Step-by-Step Instructions
The construction starts from the bottom up, beginning with a flat circular base before transitioning into the textured pineapple pattern.
Creating the Circular Base
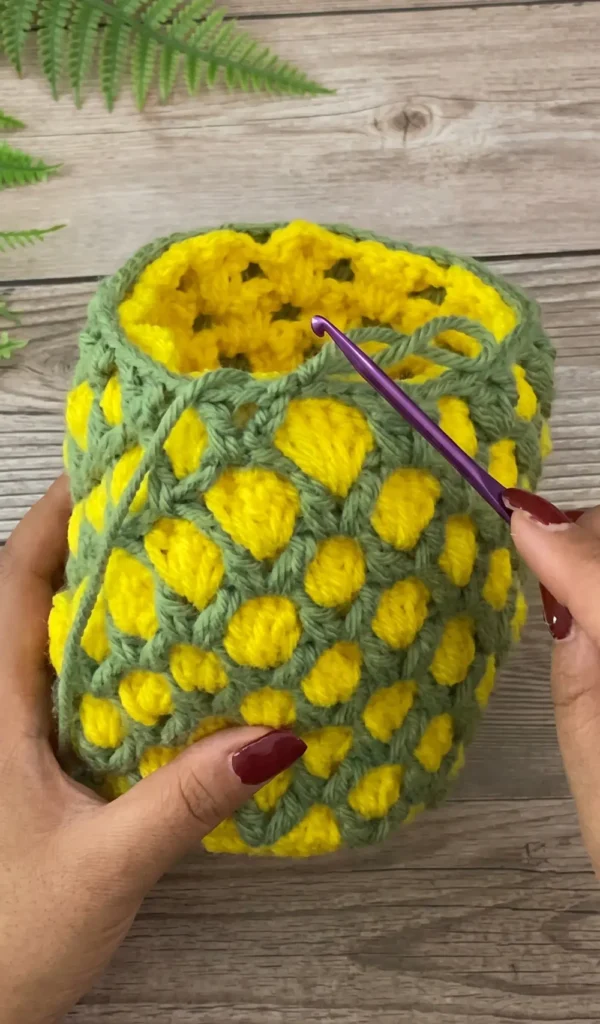
Round 1: Start by making a slip knot and chaining four. Join with a slip stitch into the first chain to form a circle. Chain three (this counts as your first double crochet) and work 11 more double crochets into the center of the circle for a total of 12 double crochet stitches. Join the round with a slip stitch.
Round 2: Chain three. Work one double crochet into the same stitch. Proceed to work two double crochets into every stitch around the circle. You should have a total of 24 double crochet stitches at the end of this round. Join with a slip stitch.
Round 3: Chain three and work one double crochet into the same stitch. Work one double crochet in the next stitch. Follow the pattern of two double crochets in one stitch, then one double crochet in the next all the way around,. This round finishes with 36 double crochet stitches. Join with a slip stitch.
Round 4: Chain three and work one double crochet in the same stitch. Work one double crochet into each of the next two stitches. Repeat the pattern of two double crochets in one stitch followed by one double crochet in each of the next two stitches,. You will end this round with 48 double crochet stitches. Join with a slip stitch.
Building the Pineapple Body
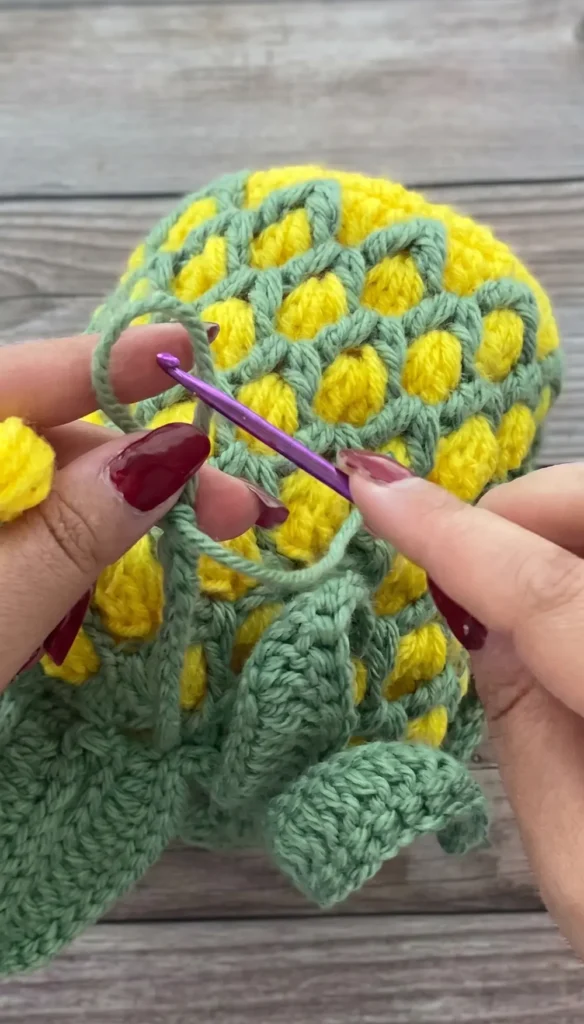
Round 5: This round sets the foundation for the 3D texture. Chain three and work one double crochet in the next two stitches. Chain one and skip the next stitch, then work one double crochet into each of the next three stitches. Repeat this pattern of three double crochets and a skipped chain space around the bag,. Join with a slip stitch.
Round 6: Pull up a tall loop with the yellow yarn and leave it. Attach the green yarn to one of the skipped chain spaces from the previous round,. Chain four (counts as one double crochet and a chain one), then work one double crochet into the same space to create a V-stitch. Chain two, skip the next three double crochets, and work another V-stitch (double crochet, chain one, double crochet) into the next skipped space. Repeat this around and join with a slip stitch.
Round 7: Leave the green yarn in a tall loop and pick up the yellow yarn. Insert your hook into both the green chain-one space and the yellow chain-one space together,. Work a single crochet and chain two (counts as the first double crochet), then work four more double crochets into that same combined space for a total of five double crochets. Chain one and repeat by working five double crochets into every joined chain-one space around the bag,.
Rounds 8 to 11: Continue the pattern by alternating rounds of green V-stitches and yellow double crochet shells. For the V-stitches, work them into the chain-two spaces of the previous green round. For the yellow shells, always work them through both the yellow and green spaces together to create the 3D effect,. Repeat these rounds until the bag reaches your desired height.
Crafting the Pineapple Leaves
Once the body is complete, secure the yellow yarn and switch to green to create the leaves.
- Foundation for Leaves: Work a round of four-chain loops by single crocheting into the spaces between the shells from the previous rounds,.
- The Leaf Pattern: In each four-chain space, chain 18. Skip the first chain from the hook, work one single crochet, then one half double crochet in each of the next two stitches,. Complete the leaf by working one double crochet in each of the remaining 14 stitches. Slip stitch back into the foundation chain space.
- Finishing the Leaves: To give the leaves a pointed, finished look, work slip stitches up one side of the leaf, chain one at the tip, and work slip stitches back down the other side.
Adding the Drawstring Cords
You will need two identical cords for the drawstring mechanism.
- The Cord: Start with the yellow yarn and work a puff stitch into a three-chain circle to create a small decorative end. Attach the green yarn and chain 50 (or your desired length).
- Assembly: Weave the first cord through the four-chain spaces at the base of the leaves,. Secure the end by joining it back to the puff stitch,
Video Credits: MUSHYY
4. Whale Drawstring Pouch Crochet Bag
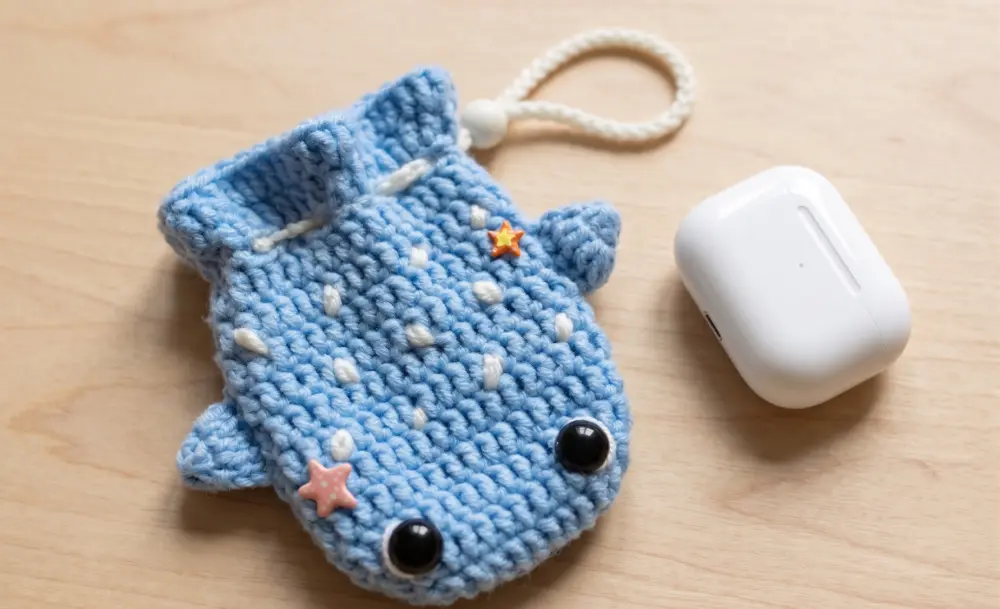
This adorable whale pouch is a versatile accessory that can be used as a drawstring bag or an ocean-themed bag charm. Unlike some designs, this version features a convenient drawstring closure instead of a zipper.
Materials Needed
To create this pouch, the sources recommend the following materials:
- 5-ply milk cotton yarn
- 3mm crochet hook
- 10mm safety eyes
- Silicone glue for attaching the eyes
- Tapestry needle for assembly and adding details
- Scissors
Step 1: Crocheting the Pouch Body
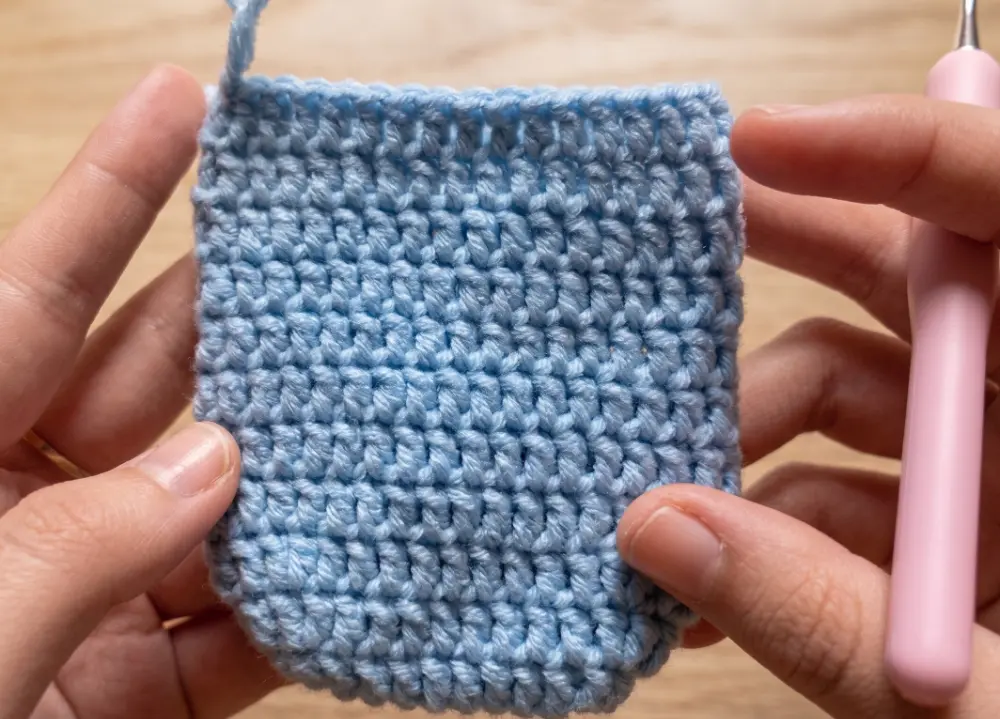
The body begins with a slip knot and 12 chains. If you prefer a larger pouch, you can increase the number of initial chains.
- Round 1: Skip the first two chains and make double crochets (DC) in each chain until the last one. In the last stitch, work three double crochets together, then continue with double crochets on the opposite side of the chains. Finish the round with two double crochets in the final stitch and a slip stitch to join.
- Round 2: Start with two chains and then perform a double crochet increase (two DC in one stitch). Continue with DC in each stitch until you reach the curved end, where you will make three double crochet increases. Work DC back down the other side and finish with two more increases.
- Round 3: This round follows a pattern of one double crochet followed by one double crochet increase at the curved ends of the pouch to further expand the base.
- Rounds 4 to 11: For these rounds, simply work one double crochet in every stitch around to build the height of the whale’s body.
Step 2: Creating Strap Holes and Ruffles
After finishing the main body, you need to create the openings for the drawstring and the decorative “tail” ruffles.
- Strap Holes: Work two single crochets followed by two chains, skipping two stitches between each set. Repeat this pattern around the top edge.
- Tail Ruffles: To create the whale’s tail ruffles, work a pattern of one double crochet increase followed by one double crochet in each stitch around. If you want even more ruffles, you can perform an increase in every single stitch.
Step 3: Crocheting and Attaching the Fins
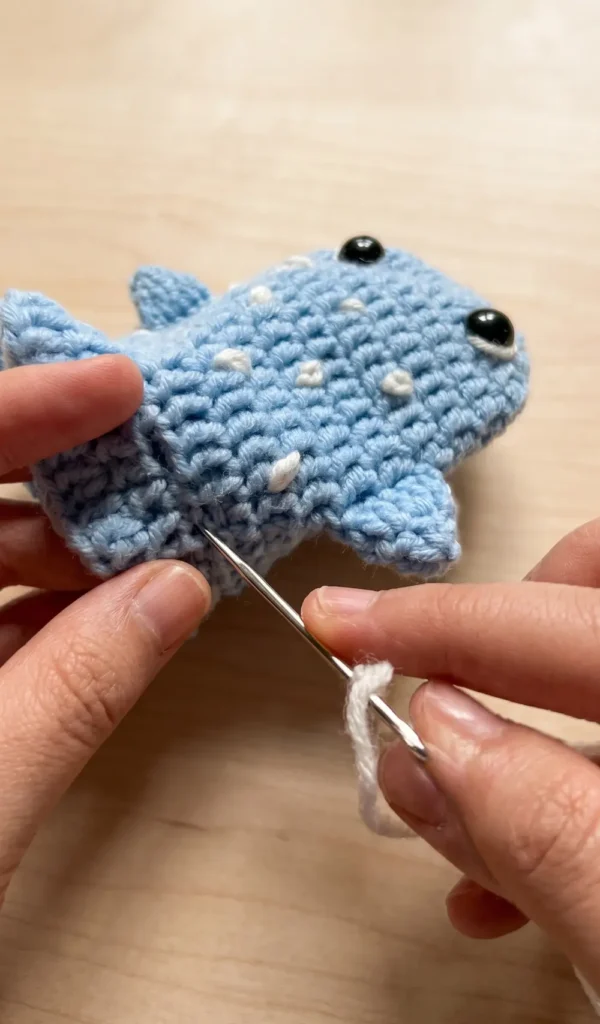
You will need to make two fins for your whale.
- Start with a magic ring and work five double crochets into it for the first round.
- For the second round, perform a double crochet increase in every stitch to reach a total of 10 stitches.
- Push the center of the fin to make it pointy and leave a long tail for sewing.
- The fins should be sewn onto the body around rounds 7 and 8.
Step 4: Final Details and Assembly
To give your whale its personality, you will add eyes and decorative embroidery.
- Eyes: Insert the 10mm eyes between rounds 2 and 3 and secure them with silicone glue.
- White Spots: Using white thread, embroider small spots on the whale’s body. The sources suggest adding three or four spots per row for a tidy appearance.
- Drawstring Strap: Create a slip knot and crochet a chain of 60 or more stitches. Use a tapestry needle to weave the strap through the holes created earlier. While the video shows two straps, the creator recommends using one strap for easier use. Tie the ends together to secure the drawstring.
Video Credits: ETM’s Studio
5. Rose Drawstring Crochet Bag
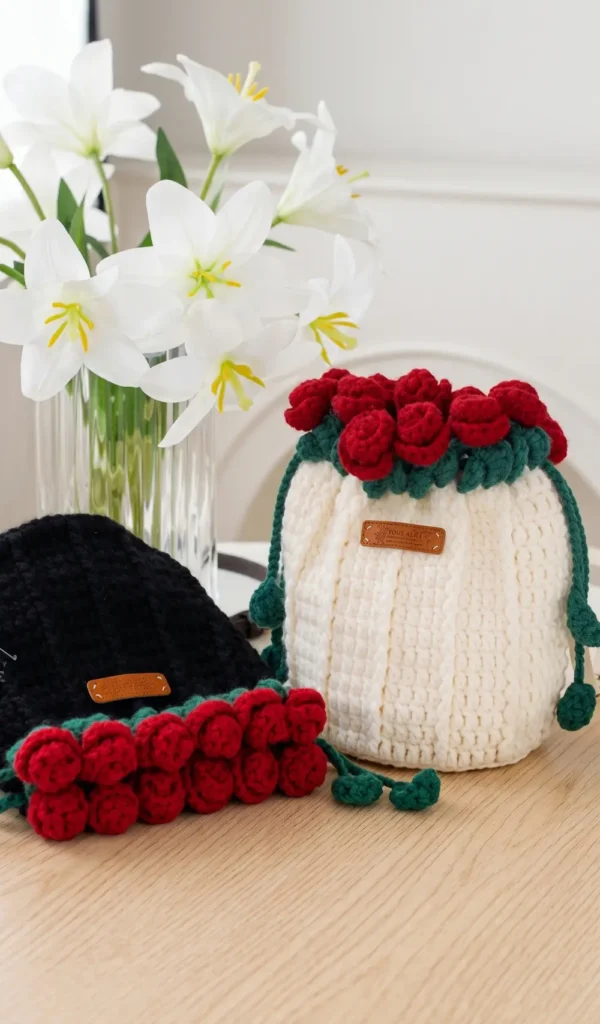
This elegant rose bouquet drawstring bucket bag is created in five distinct parts: the bag bottom, the bag body, the leaf section, the roses, and the drawstrings. To complete this project, you will need the corresponding yarn in white, green, and red, a crochet hook, stitch markers, a sewing needle, a decorative label, and a bag strap.
The Bag Bottom
The foundation of the bag is a circular base consisting of five rounds, starting with a magic ring.
- Round 1: Crochet 12 double crochets (DC) into the magic ring and join with a slip stitch.
- Round 2: Work two DC into each stitch for a total of 24 stitches.
- Round 3: Follow a pattern of one DC followed by two DC in the next stitch (an increase), resulting in 36 stitches.
- Round 4: Increase the stitch count to 48 by following a pattern of two DC then one increase.
- Round 5: Complete the bottom with a final round of three DC and an increase, bringing the total to 60 stitches.
The Bag Body
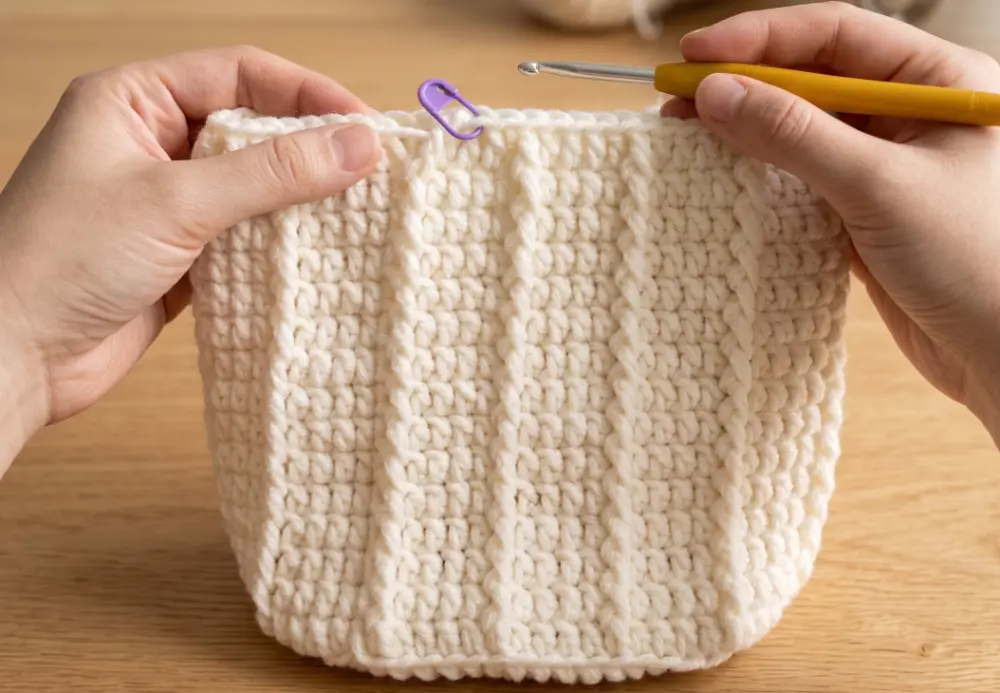
The body of the bag adds height and texture over 15 rounds.
- Round 1: Work 60 double crochets evenly, but only pick up the back loops of the previous round to create a distinct edge for the base.
- Round 2: Establish the textured pattern by working four double crochets followed by one front post double crochet (FPDC).
- Rounds 3 to 15: Continue repeating the pattern of four DC and one FPDC until the bag reaches the desired height, then break the yarn.
The Leaf Section
Using green yarn, the leaf section is worked around the top of the bag body.
- Round 1: Create a foundation of chain braids by working one single crochet (SC) and skipping two stitches with two chains.
- Round 2: Work 60 single crochets evenly around the top.
- Round 3: This round creates the actual leaves. For each leaf, chain three and work a combination of SC, half double crochet (HDC), and DC into the chain space to form the left and right sides of the leaf. There are 12 groups of leaves in total.
Crocheting the Roses
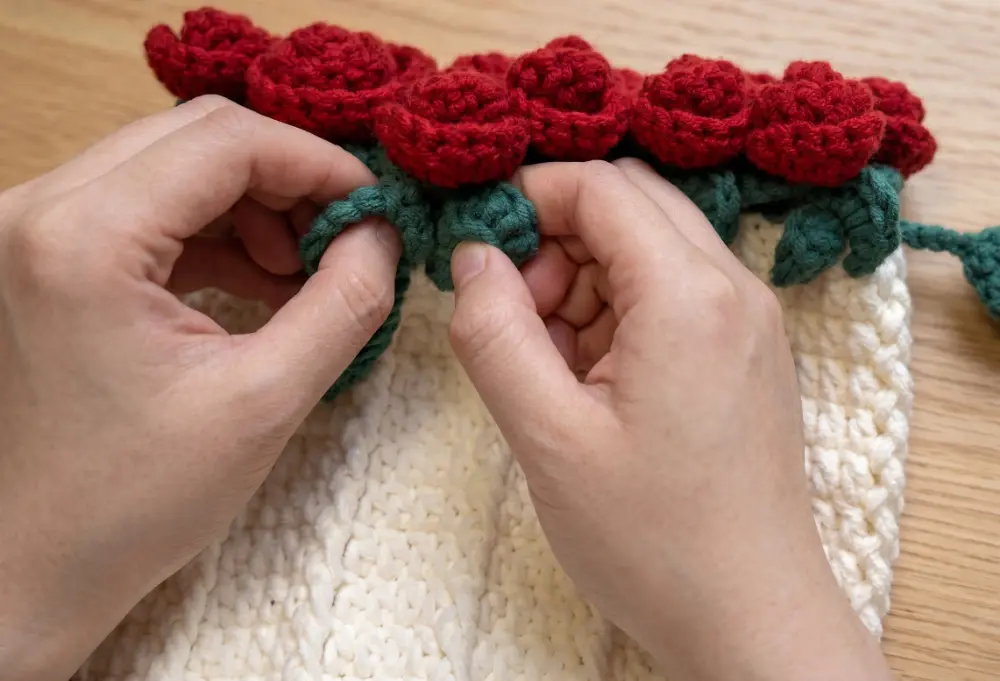
The roses are crocheted separately using red yarn and then attached to the bag. You will need to make 12 roses in total.
To make a rose, start at the top of a leaf and chain 11. In the fourth chain from the hook, work three double crochets into each of the next eight stitches. This creates a ruffled strip that you manually roll into a rose shape. Secure the shape with a slip stitch and tie off the yarn tails. Each rose is fixed to the single crochet stitch at the top of a leaf.
Drawstrings and Finishing Touches
The final steps involve creating the closure and adding decorative elements.
- Drawstrings: Crochet two drawstrings by making a small leaf, chaining approximately 80 stitches, and then making another leaf at the other end.
- Assembly: Thread the two drawstrings through the leaf section from opposite sides so they can be pulled to close the bag.
- Final Details: Sew a small decorative label onto the front of the bag using a sewing needle and thread. Finally, attach the strap to the front post double crochet stitches on the sides of the bag to complete your rose bouquet bucket bag.
Video Credits: Susan’s Family 蘇蘇姐家
Which Drawstring Crochet Bag Will You Make First?
Five patterns, five completely different vibes. That’s what I love about drawstring bags; there’s no single way to make one and every version teaches you something new.
Pick the one that excites you most and just start. Share your finished bag in the comments. I’d love to see what colors you chose.