18 Crochet Dog Keychain Free Pattern Ideas for Beginners
Dog keychains are among the most personal and heartfelt things you can crochet. Whether you are recreating someone’s actual pet or crafting an adorable puppy charm, they always land with love. Most designs are beginner-friendly once you are comfortable working in the round, with the magic coming from small details like ear shape, snout length, color, and expression.
For nearly all of these patterns, you will need DK or fingering weight yarn, a 2 to 3 mm hook, polyfill stuffing, 6 to 8 mm safety eyes, black embroidery thread, stitch markers, keychain rings with jump rings, and small pliers. All keychains are worked in tight single crochet in the round from a magic ring, so keep your tension firm so the stuffing stays hidden.
1. Simple Puppy Face Crochet Keychain
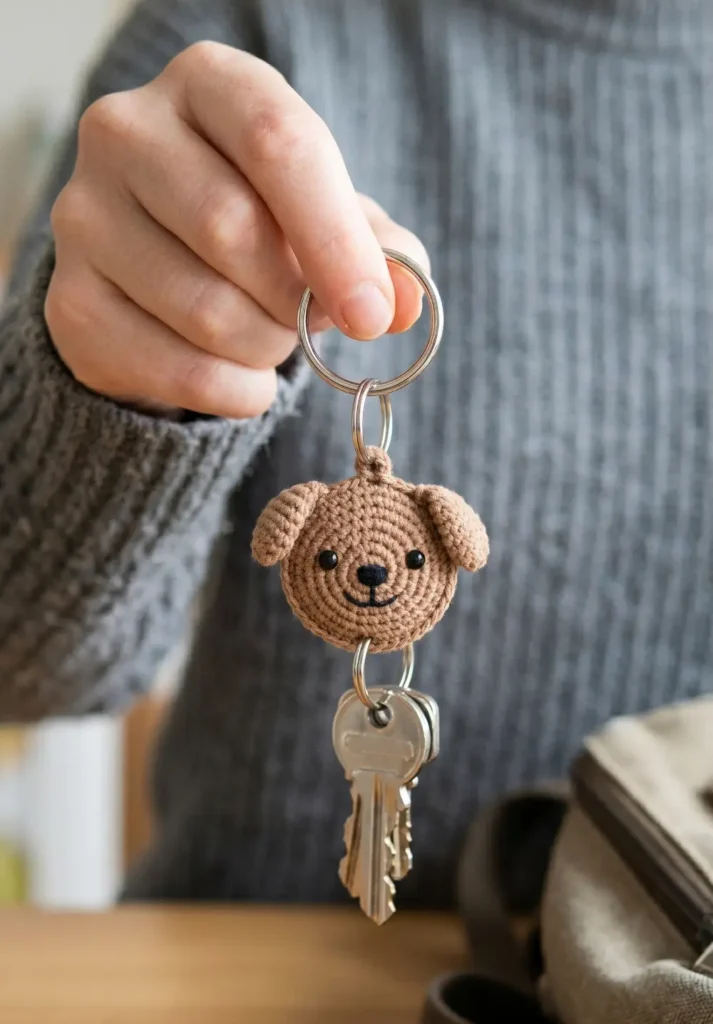
This is the most beginner-friendly design on the list. It is just a round flat face with ears and a simple embroidered expression. No shaping, no body, no complexity. Just a sweet little dog face that anyone can make in under 30 minutes.
- Start with a magic ring in your chosen dog color and single crochet 6 into the ring.
- Round 2: increase in every stitch for 12.
- Round 3: alternate 1 single crochet and 1 increase around for 18.
- Round 4: work 2 single crochet then 1 increase, repeat for 24.
- Slip stitch to close and do not stuff. This flat circle is the face.
- For ears: make two small ovals by chaining 5 and working single crochet around both sides of the chain for 2 rounds.
- Sew the ears to the top sides of the face circle.
- Insert safety eyes in the center, spaced evenly.
- Embroider a small oval nose and curved smile in black thread.
- Attach a jump ring through a chain loop at the top and add a keychain ring.
Tip: Placing the eyes slightly lower on the face circle gives a rounder, more puppy-like expression than centering them at the midpoint.

2. Tiny Amigurumi Dog Keychain Pattern
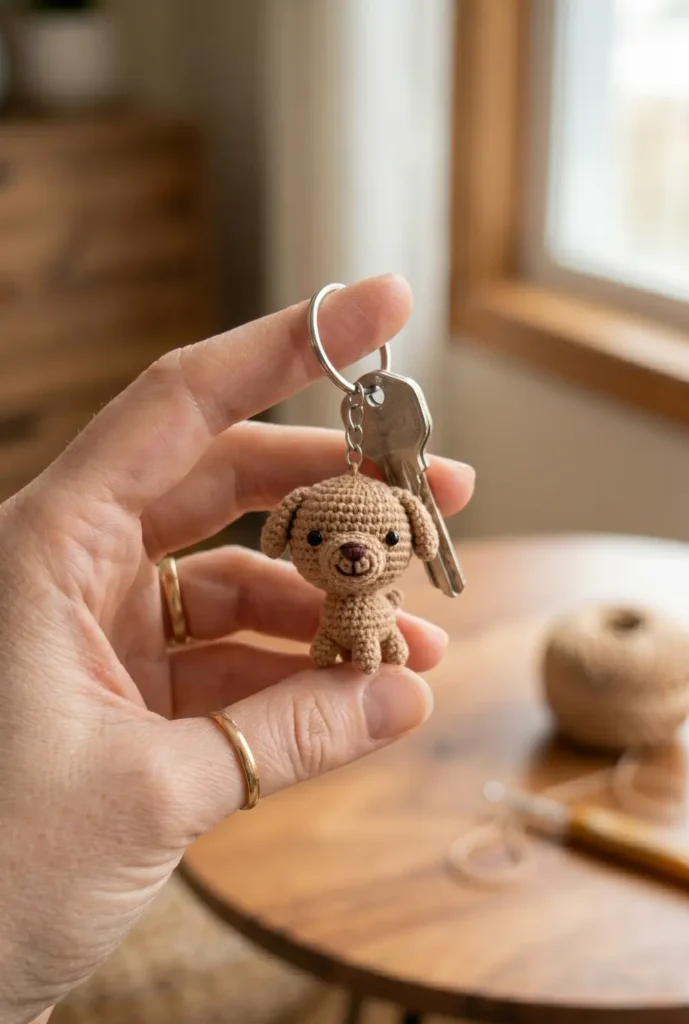
This is the classic full-body amigurumi dog in miniature. It has a round head, a small body, four stubby legs, and a tiny tail. The whole thing measures about 2 inches tall and is impossibly cute.
Head
- Magic ring, 6 single crochet.
- Increase to 12, then 18 over 2 rounds.
- Work 2 even rounds.
- Decrease to 12, stuff firmly, and close.
Body
- Magic ring, 6 single crochet.
- Increase to 12, then 18.
- Work 3 even rounds.
- Decrease to 12, stuff, and close.
Legs (make 4)
- Magic ring, 6 single crochet.
- Work 4 even rounds in a tube.
- Stuff lightly and close.
Tail
- Chain 8 and work single crochet back along the chain.
Assembly
- Sew the head to the body.
- Attach legs evenly to the underside.
- Sew the tail to the back.
- Add safety eyes and embroider a nose and smile.
- Attach a keychain ring at the top of the head through a chain loop.
Tip: Make the head noticeably larger than the body. An oversized head is what gives amigurumi dogs their adorable chibi look.

3. Crochet Bulldog Keychain for Beginners
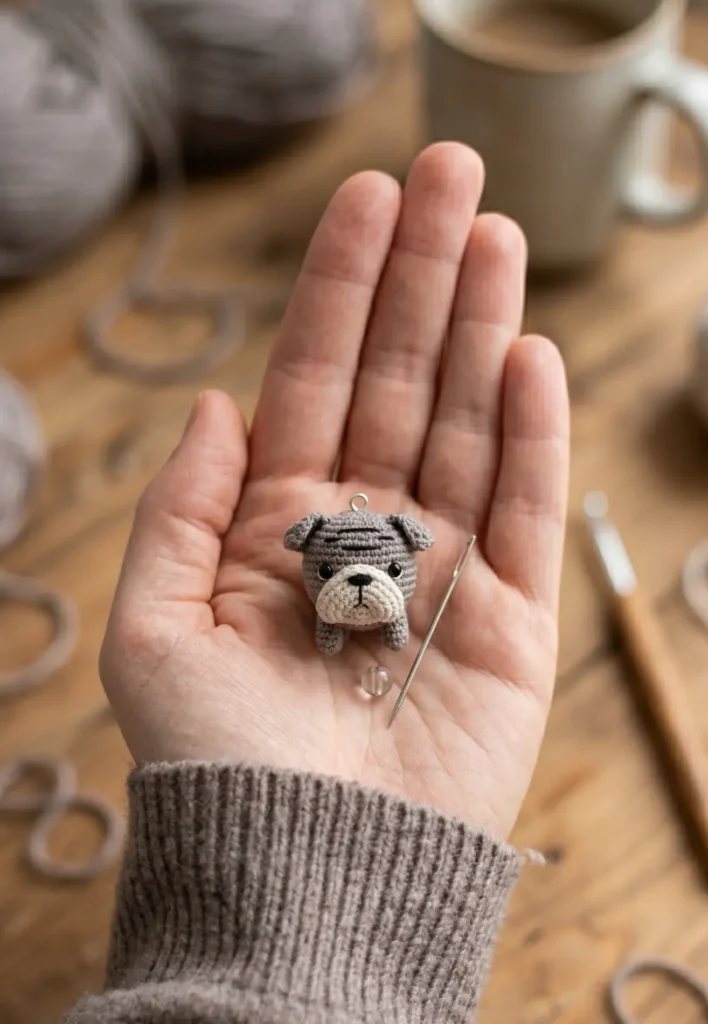
A bulldog has a few distinctive features: a wide flat face, a pushed-in snout, and heavy-set proportions. This version captures all of that in a compact, beginner-friendly design.
Head
- Magic ring in grey or brindle brown, 6 single crochet.
- Increase to 12, 18, 24 over 3 rounds.
- Work 3 even rounds.
Snout
- Work a separate flat oval in a slightly lighter shade.
- Chain 6 and work single crochet around both sides for 3 rounds.
- Sew the snout to the lower center of the face with a slight upward tilt.
- Embroider two small nostrils on the snout in black.
Eyes and Ears
- Add safety eyes wide apart and slightly above center.
- Make two small folded triangles for ears and sew to the sides of the head, folding the tip forward.
Assembly
- Stuff the head and close.
- Add wrinkle lines above the snout using black embroidery thread.
- Attach a keychain ring at the top.
Tip: A few horizontal stitch lines across the forehead are all it takes to make a bulldog look like a bulldog. Do not skip the wrinkles.

4. Mini Dachshund Crochet Charm
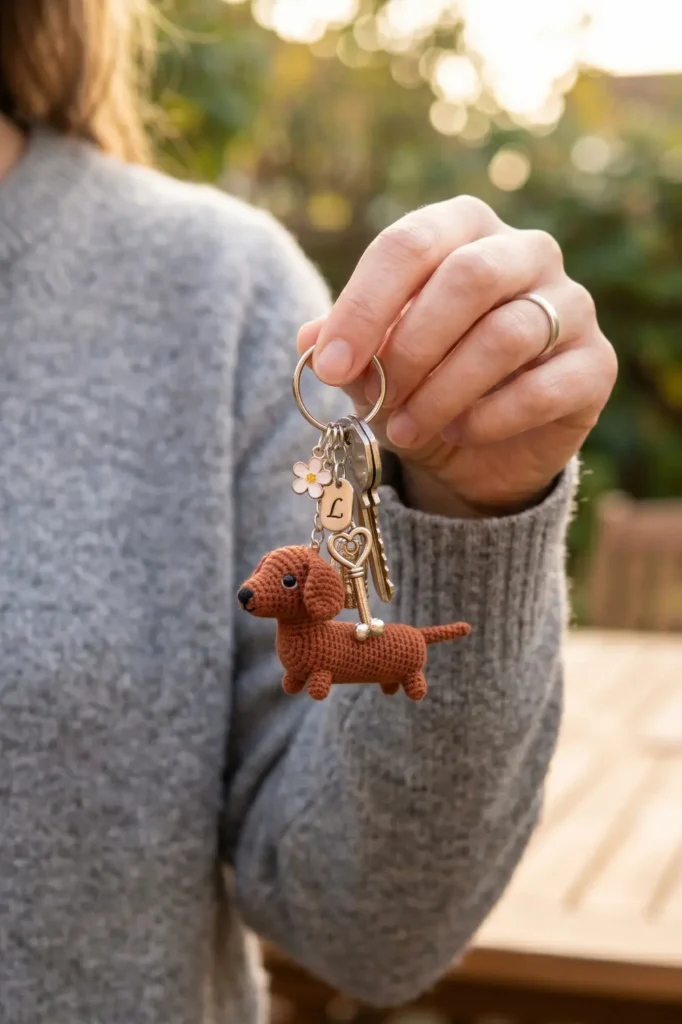
The dachshund is all about proportion: a very long body and very short legs. Getting that elongated shape is the whole personality of this keychain.
Body
- Chain 12 and work single crochet in the round along both sides of the chain for 6 rounds, creating a long sausage shape.
- Stuff firmly as you close the ends.
Head
- Magic ring, 6 single crochet.
- Increase to 12, then 18.
- Work 3 even rounds.
- Add a slightly pointed snout by working 4 more single crochets on the front center of the face over 2 rows.
- Stuff and close.
Legs (make 4)
- Make 4 very short tubes of just 3 rounds each from a magic ring of 6.
Assembly
- Attach all four legs to the underside of the long body at even intervals.
- Sew the head to one end of the body.
- Add floppy ears by making two rounded ovals and attaching them low on the sides of the head.
- Add safety eyes and embroider a nose.
Tip: Keep the legs very stubby and short. The comedy of the dachshund comes from the contrast between the long body and tiny legs.

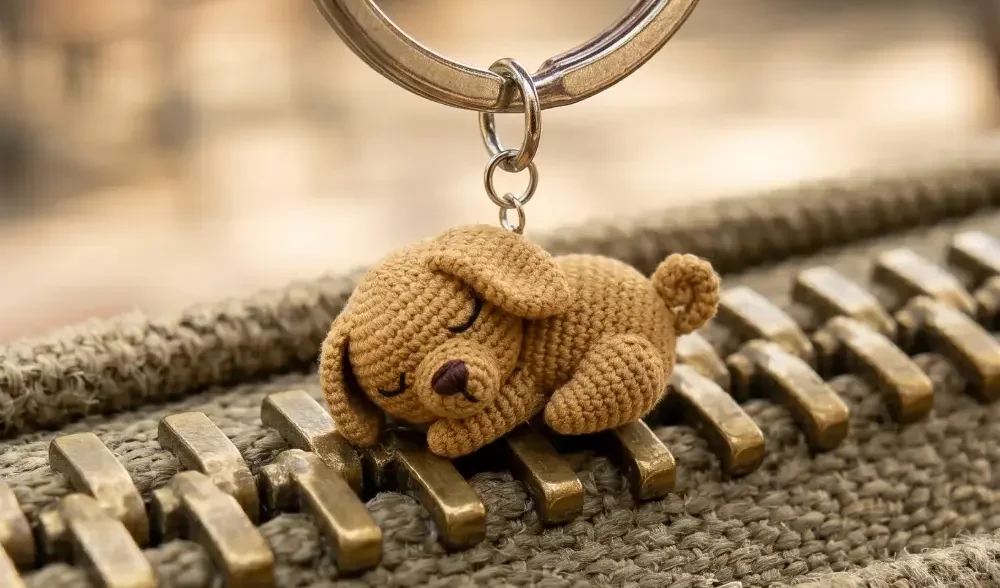
5. Cute Sleeping Puppy Keychain
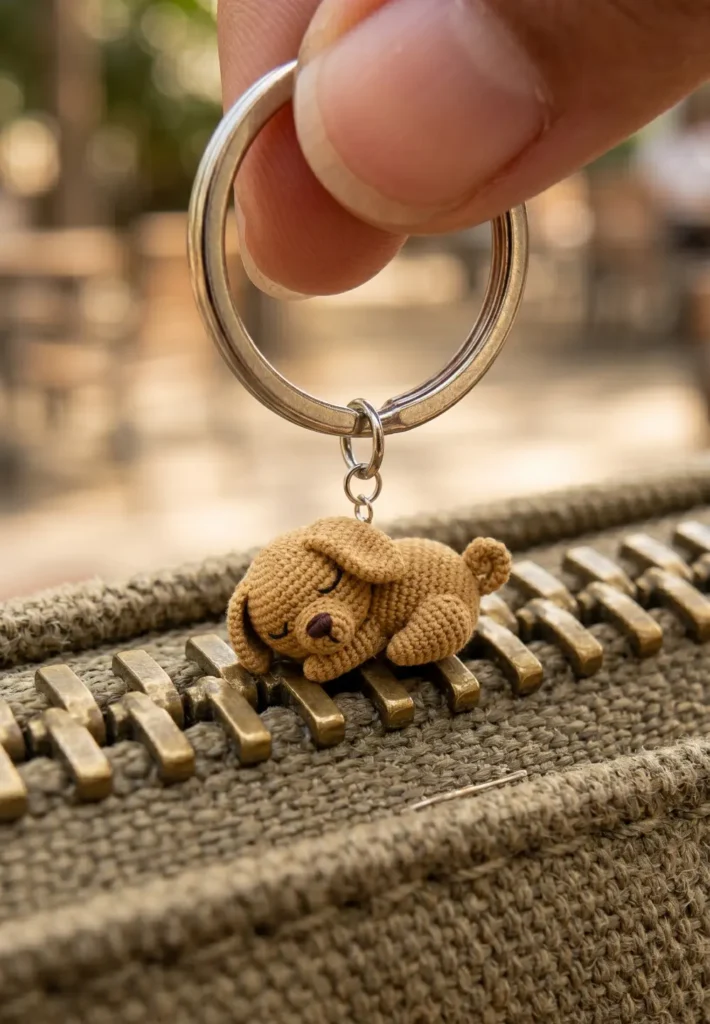
A sleeping puppy keychain is different from most on this list because it lies flat rather than hanging upright. The closed eyes and curled body make it uniquely sweet and it looks wonderful as a bag charm.
Body
- Chain 10 and work single crochet around both sides for 4 rounds, creating a plump oval shape.
Head
- Work a smaller flat circle of 3 increasing rounds to 18 stitches.
- Attach to one end of the oval, overlapping slightly.
- Embroider two curved closed eye lines in black thread.
- Add a small oval nose above the eyes.
Ears
- Make two soft rounded ovals and sew them flat against the sides of the head.
Tail
- Chain 8 and curl into a small loop.
- Sew to the back end of the body.
Assembly
- Attach a jump ring through the highest point of the body.
- Add a keychain ring.
Tip: Sew the tail in a tight curl so it holds its shape. A few tacking stitches through the curl will keep it from springing open over time.

6. Crochet Paw Print Keychain Pattern
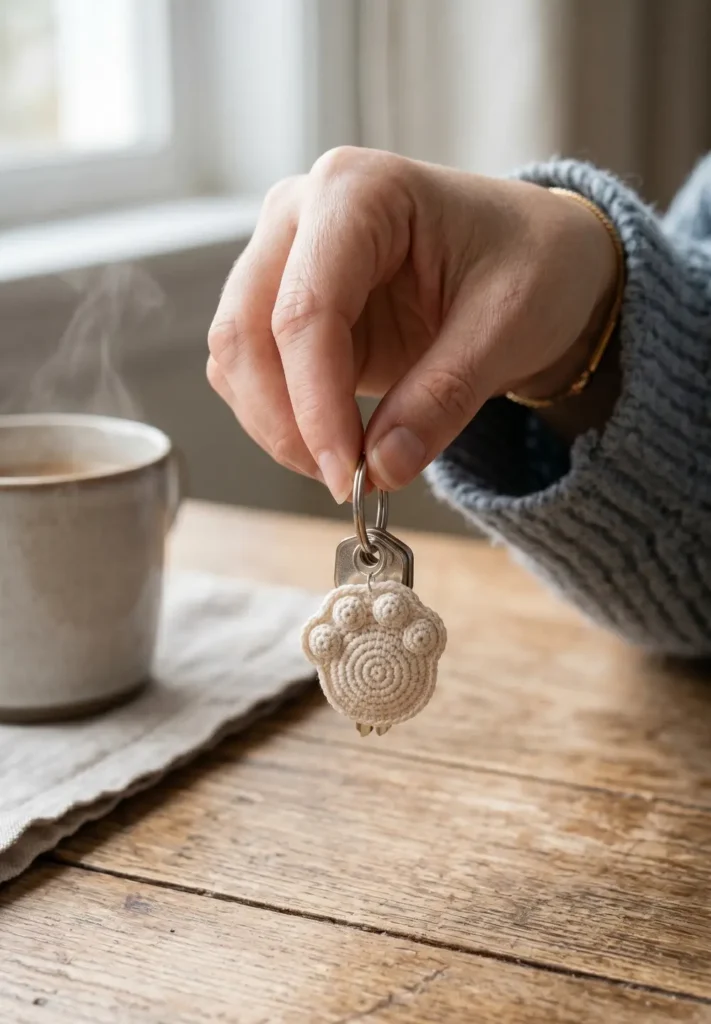
This is a flat design that skips the face entirely and focuses on one of the most recognizable dog symbols: the paw print. It is fast, graphic, and works beautifully in a single bold color.
Main Pad
- Work a flat oval of 4 increasing rounds to about 24 stitches.
Toe Pads (make 4)
- Make 4 tiny circles using a magic ring with just 6 single crochets each, pulled closed into a small dot.
- Arrange the four toe pads above the main pad in a curved row and sew them firmly in place.
- Use a contrasting color for the toe pads or keep everything in one tone for a minimalist look.
Finishing
- Add a border of single crochet around the entire paw shape for a neat edge.
- Attach a jump ring at the top center and add a keychain ring.
Tip: A black paw print on a white background or a white paw on a black background gives the cleanest, most graphic result. Use firm cotton so the flat shape does not curl.

7. Small Beagle Amigurumi Keychain
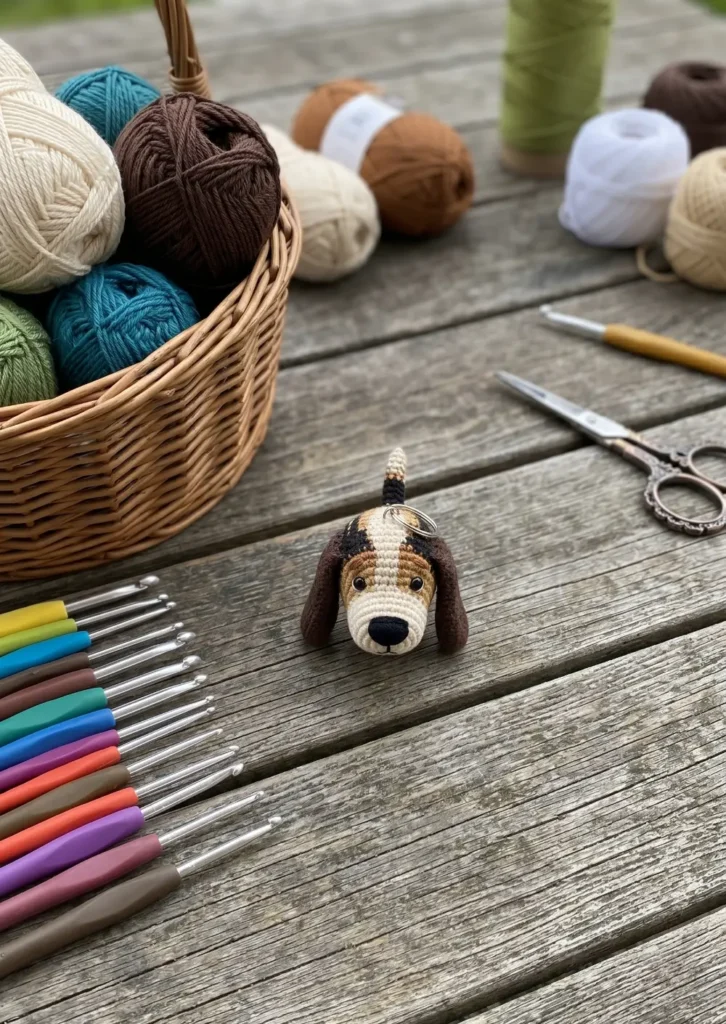
Beagles have a very specific look: tricolor markings, long droopy ears, and a gentle expression. Even at keychain scale these features make the breed instantly recognizable.
Head
- Magic ring in cream or tan, 6 single crochet.
- Increase to 12, 18, then 24.
- Work 3 even rounds.
Color Patches
- Once the head is assembled, use brown and black embroidery thread to add patches around the eyes and top of the head in the classic beagle pattern.
Face Details
- Add safety eyes in the center of the tan face area.
- Embroider a large soft nose in black.
Ears
- Chain 8 and work 4 rounds in dark brown to make two long rounded rectangles.
- Attach them low on the sides of the head so they hang down past the chin.
Assembly
- Stuff and close the head.
- Attach a keychain ring at the top.
Tip: The length and placement of the ears are what sells the beagle. Make them longer than feels right and hang them low. Beagle ears almost reach the jawline.

8. Kawaii Dog Head Crochet Keychain
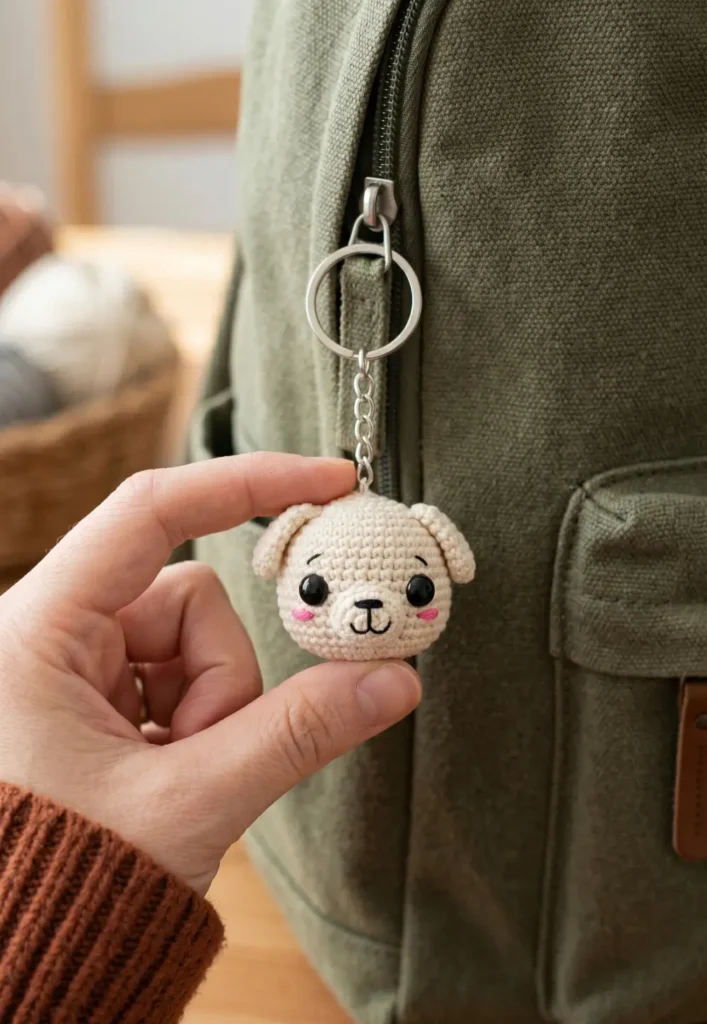
Kawaii style means oversized features, simplified shapes, and maximum cuteness. This dog head has enormous eyes, tiny blush marks, and a sweet little expression that leans fully into the cute aesthetic.
Head
- Magic ring, 6 single crochet.
- Increase to 12, 18, 24, then 30 over 4 rounds for a large round head.
- Work 4 even rounds.
- Decrease back evenly, stuffing before closing.
Face Details
- Use large safety eyes of 10 mm or 12 mm for the kawaii look.
- Add small pink circles on each cheek using pink embroidery thread or a tiny flat circle of pink yarn sewn on.
- Embroider a tiny U-shaped nose and small curved smile.
Ears
- Make small round ears and sew them flat to the top sides of the head.
Assembly
- Attach a keychain ring at the top through a loop.
Tip: The blush marks on the cheeks make a bigger difference than any other detail. Do not skip them. They are what transforms a regular dog face into a kawaii one.

9. Crochet Labrador Puppy Charm
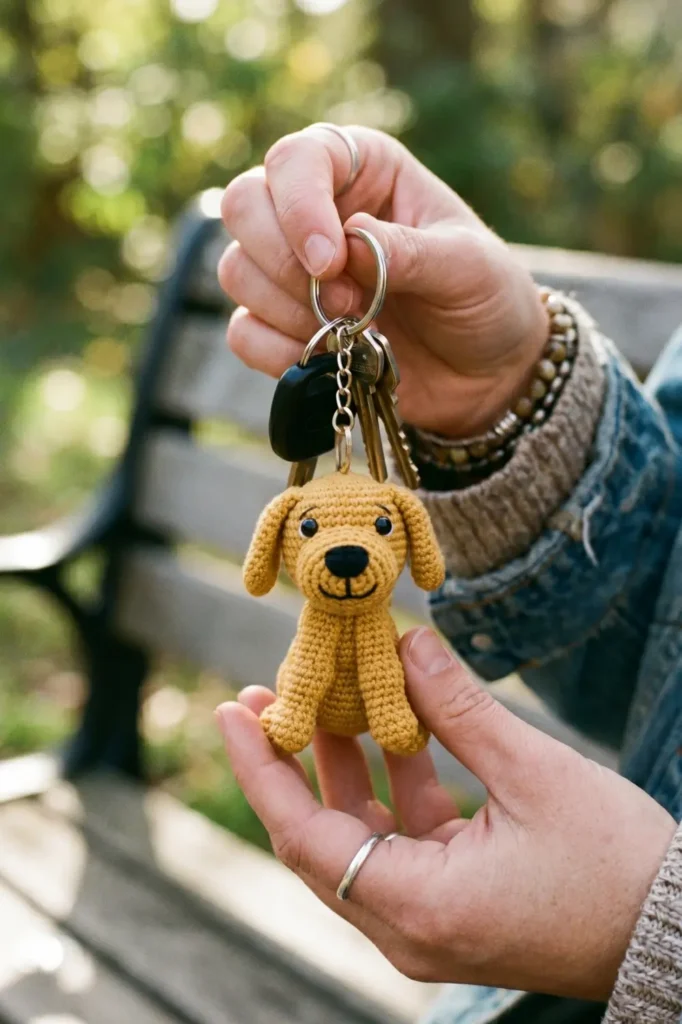
Labradors come in three colors: black, yellow, and chocolate. This keychain is equally charming in all three and the construction is exactly the same regardless of which color you choose.
Head
- Magic ring, 6 single crochet.
- Increase to 12, 18, then 24 over 3 rounds.
- Work 3 even rounds.
Muzzle
- Work a small oval separately and sew it to the lower half of the face, giving it a slightly raised, rounded look.
- Keep the muzzle broad to capture the Labrador’s softer, wider snout.
Face Details
- Add safety eyes above the muzzle, wide set.
- Embroider a large broad nose and a gentle smile.
Ears
- Make two medium floppy rounded rectangles in the same color.
- Sew them to the sides of the head at a slight droop.
Assembly
- Stuff the head and close.
- Attach a keychain ring at the top.
Tip: For a yellow Lab, use a warm golden honey yarn rather than a pale yellow. It looks far more true to the breed.

10. Tiny Shiba Inu Crochet Keychain
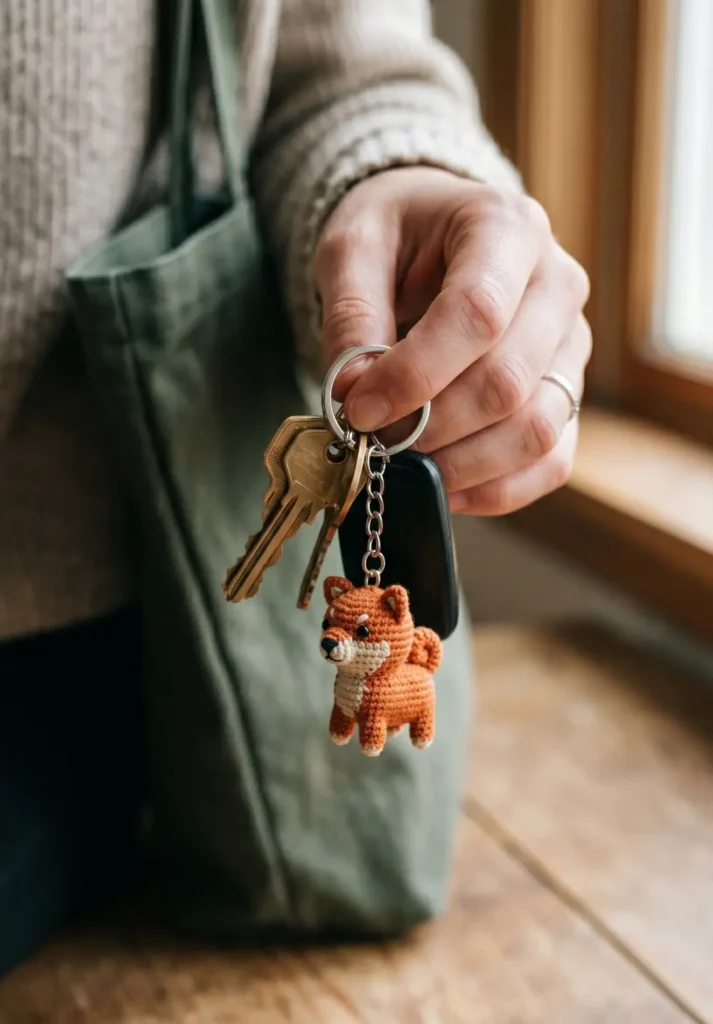
The Shiba Inu is one of the most requested dog breeds in the crochet world right now. The fox-like face, pointed ears, and curled tail are distinctive and the expression is famously alert and expressive.
Head
- Magic ring in orange-red or sesame yarn, 6 single crochet.
- Increase to 12, 18, then 24.
- Work 3 even rounds.
Face Markings
- Once assembled, embroider cream or white patches on the inner cheeks, above the eyes, and on the chin using a yarn needle and lighter yarn.
- This urajiro pattern is the Shiba’s most defining feature.
Ears
- Make two small triangles and sew them upright to the top of the head.
Face Details
- Place safety eyes to give an alert expression, using almond-shaped ones if available.
- Embroider a small black nose.
Tail
- Chain 10 and work single crochet, then curl tightly.
- Sew to the back of the body in a ring shape.
Assembly
- Attach a keychain ring at the top of the head.
Tip: The cream face markings are essential for breed recognition. Without them it is just an orange dog. With them it is unmistakably a Shiba Inu.

11. Crochet Poodle Keychain Pattern
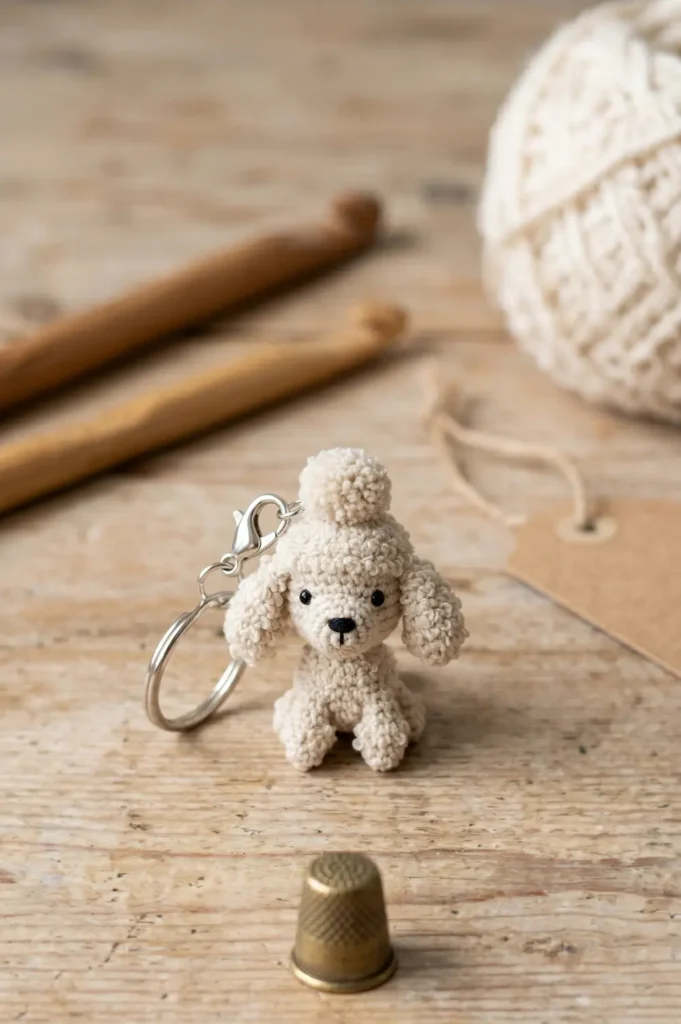
The poodle is one of the most distinctive breeds to crochet because the fluffy pompom texture is the whole look. Use a bouclé or loopy yarn for the head and body to capture that iconic curly coat.
Head
- Magic ring in white or apricot, 6 single crochet.
- Increase to 12, then 18 over 2 rounds.
- Work 3 even rounds using bouclé or loop stitch yarn.
- For loop stitch: insert hook, wrap yarn around your finger to form a loop, pull both strands through the stitch and complete as a single crochet.
- This creates texture on the outside of the piece.
Face Details
- Add safety eyes through the loops.
- Embroider a small nose.
Topknot Pompom
- Make a small tight circle of 10 stitches and sew to the very top of the head.
Ears
- Make two long floppy panels in the same loopy yarn.
Assembly
- Attach a keychain ring at the topknot through a loop.
Tip: If bouclé yarn is hard to work with at a small scale, use regular yarn for the construction and brush the surface with a stiff pet slicker brush after finishing to fluff it up.

12. Beginner-Friendly Dog Bone Keychain
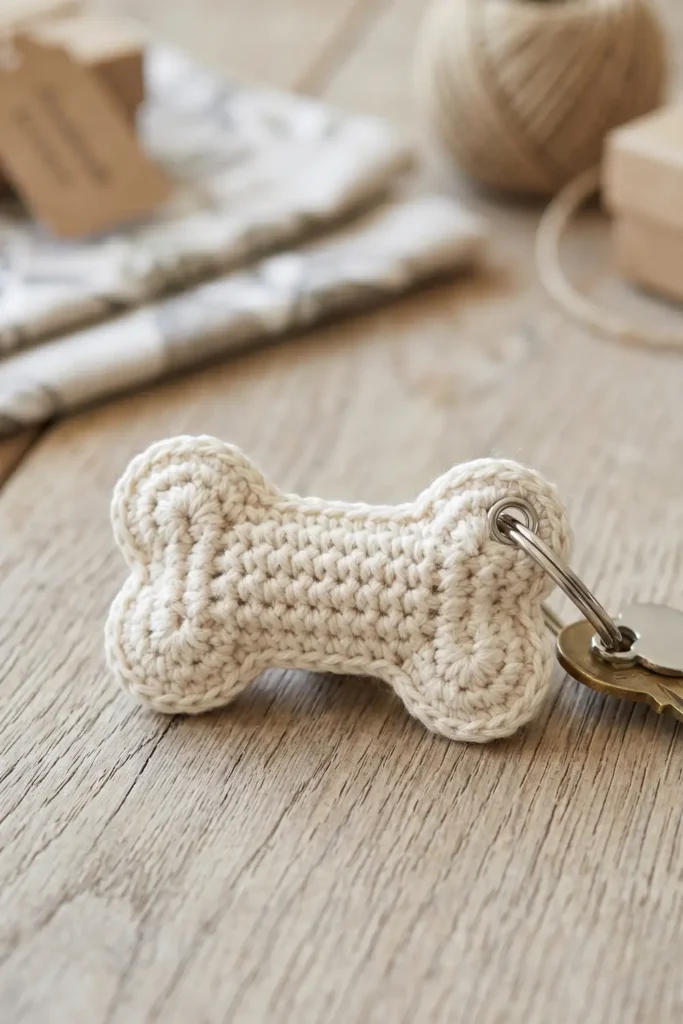
No face, no shaping, no amigurumi skills needed. A dog bone is the simplest dog-themed keychain on this list and it still makes a charming, recognizable charm.
Bone Shaft
- Chain 14 and work single crochet across for 3 rows to form the shaft.
Knobs (make 4)
- At each end of the shaft, pick up stitches and work 2 rounds of increasing single crochet to form a round knob.
- Decrease back and close.
- Repeat on both sides of each end to make 4 knobs total, creating a classic bone silhouette.
Assembly
- Make two bone shapes and sew them together back to back for extra thickness.
- Add a border of single crochet around the whole shape.
- Attach a jump ring at one end and add a keychain ring.
Tip: Use white or cream yarn for a classic bone look. A brown or tan yarn reads more like a real chew bone and makes a fun alternative colorway.

13. Crochet Husky Puppy Mini Charm
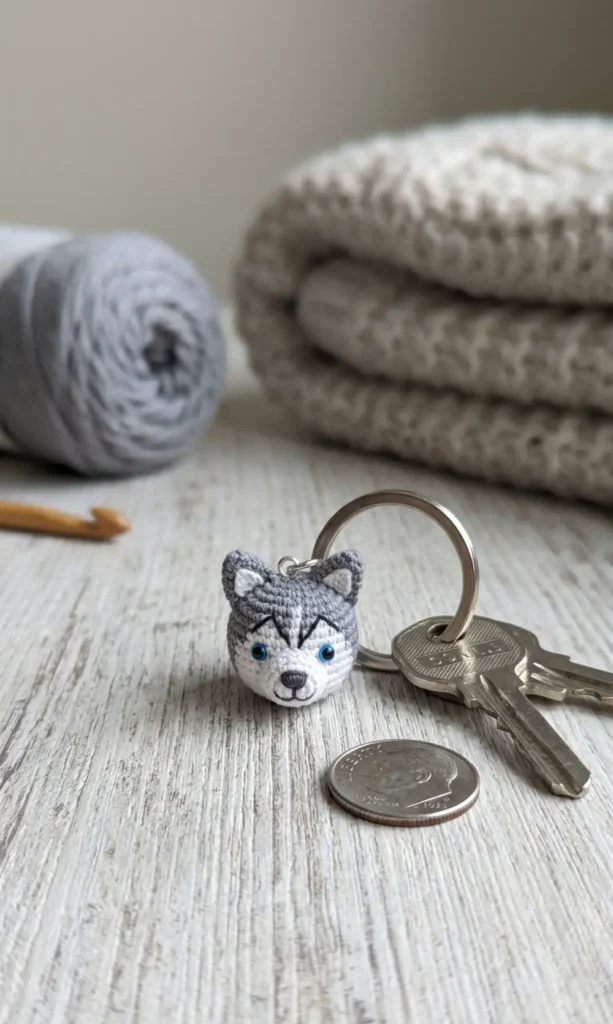
Huskies have a very striking look: blue or different-colored eyes, a thick two-tone coat, and those expressive facial markings. Even at tiny scale, those features make the breed unmistakable.
Head
- Magic ring in grey or white, 6 single crochet.
- Increase to 12, 18, then 24.
- Work 3 even rounds.
Face Markings
- Embroider over the grey base in white thread around the muzzle and inner cheeks once the head is assembled.
- Use black or dark grey embroidery thread to add the classic husky markings above the eyes and across the forehead.
Face Details
- Use blue safety eyes if available, or paint standard black eyes lightly with blue nail polish once attached.
- Embroider a dark nose.
Ears
- Make pointed ears in grey with a white inner lining and sew them upright to the top of the head.
Assembly
- Attach a keychain ring at the top.
Tip: Blue safety eyes are available on most craft supply websites and are worth ordering for huskies specifically. They make a huge difference to breed recognition.

14. Little Corgi Crochet Keychain
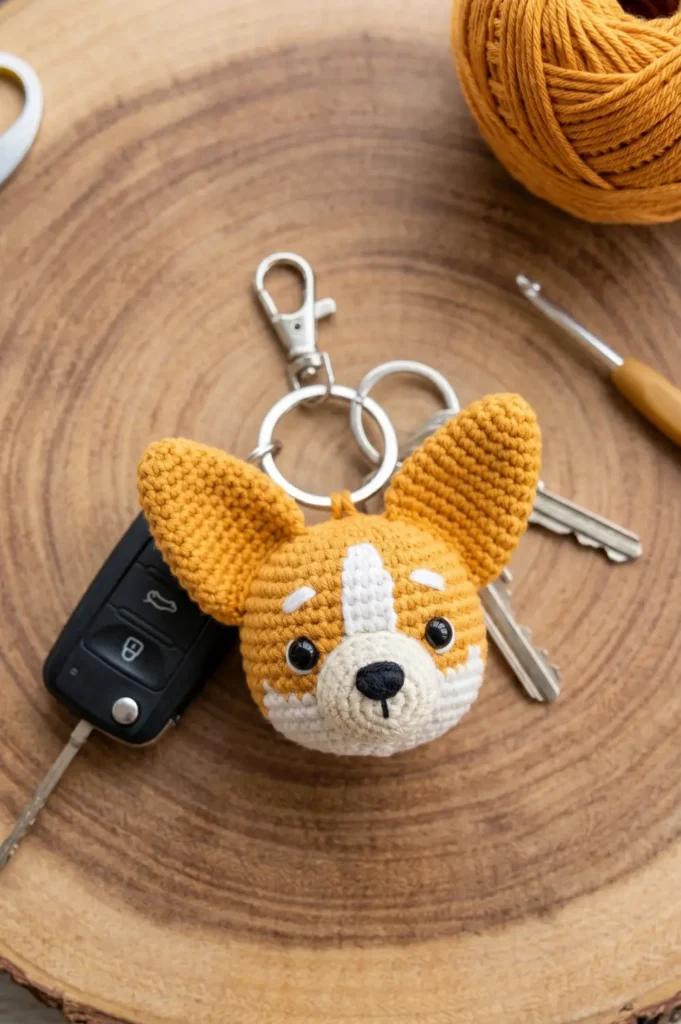
Corgis are one of the most beloved dog breeds to crochet and for good reason. The fluffy orange and white coat, oversized ears, and distinctive fluffy backside make them irresistible in any medium.
Head
- Magic ring in golden orange, 6 single crochet.
- Increase to 12, 18, then 24.
- Work 3 even rounds.
Face Markings
- Embroider white patches on the inner cheeks and a white blaze down the center of the forehead.
- Keep the muzzle area in a lighter tan or cream.
Face Details
- Add a small broad nose.
- Place safety eyes low and wide on the face.
Ears
- Make two very large pointed triangles, significantly bigger than seems right.
- Corgis are famous for their enormous upright ears, so size up generously.
- Sew them wide and upright on the top sides of the head.
Assembly
- Attach a keychain ring at the top of the head.
Tip: Really commit to the ear size. If the ears look too big when you hold them up to the head, they are probably exactly right. Big ears are the whole personality of a corgi keychain.

15. Crochet Dog with Heart Charm
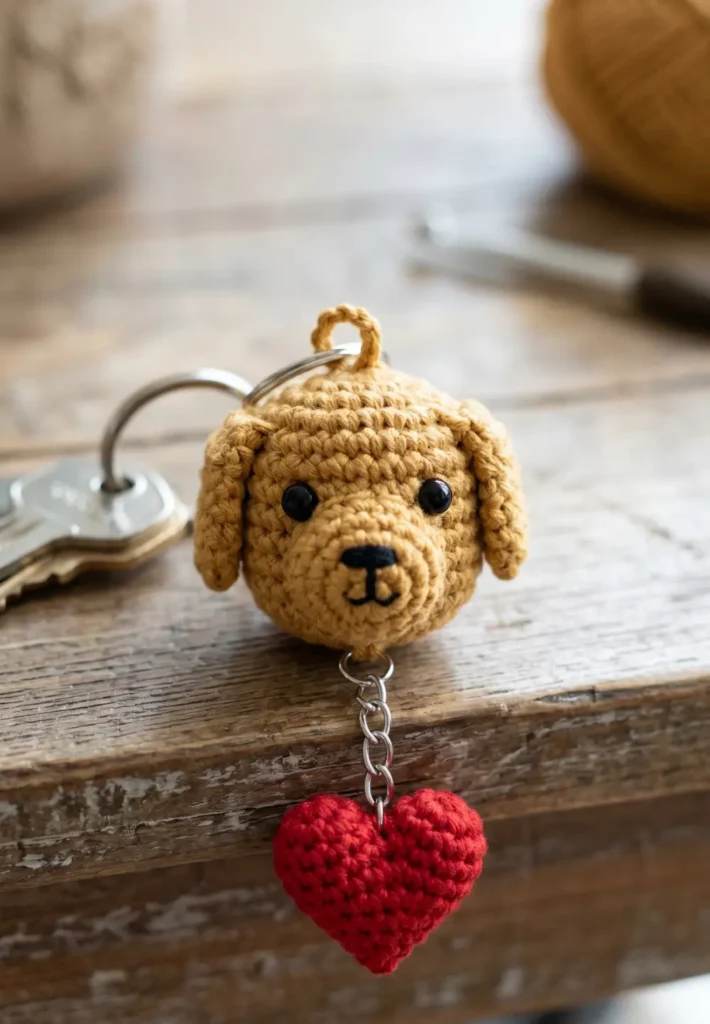
This design pairs a simple dog face or head with a small crocheted heart dangling below it. It makes a wonderful gift for dog lovers and works in any breed style you prefer.
Dog Head
- Make any dog head of your choice from the patterns in this list.
- Attach it to a keychain ring as usual.
Mini Heart
- Make two small lobes joined together and tapered to a point.
- Use a contrasting or complementary color to the dog.
Assembly
- Attach the heart below the dog head using a jump ring and a short length of chain, about 3 links, so it dangles freely.
- The combined charm reads as a dog holding or wearing a heart.
Tip: A red heart against a golden yellow or brown dog face is a classic combination. A pink heart against a cream or white dog face is softer and equally beautiful.

16. Fluffy Puppy Crochet Bag Charm
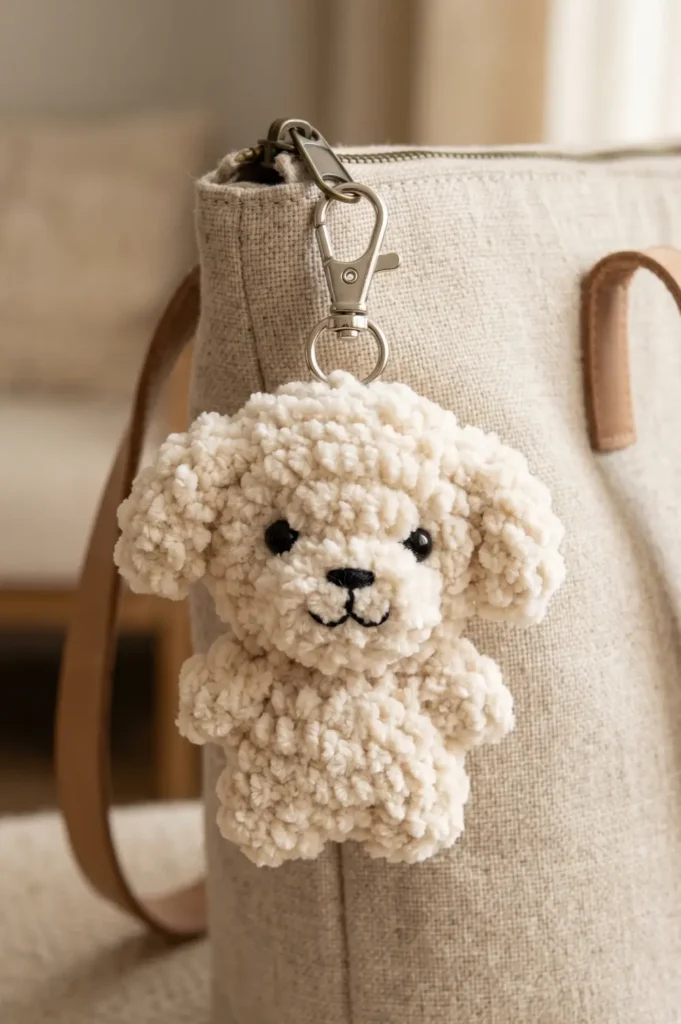
This design uses loop stitch throughout to create a fully textured, fluffy puppy that looks more like a pompom toy than a standard amigurumi. It is tactile, fun, and gets a lot of attention on a bag.
Head
- Work the head exactly as in idea 2, but use loop stitch for every round instead of standard single crochet.
- Loop stitch: insert hook into the stitch, wrap yarn around your index finger once to form a loop behind the work, pull both strands of the loop through the stitch, yarn over and complete as a single crochet.
- The loops form on the outside of the piece as you work.
Body and Ears
- Work the body and ears using the same loop stitch technique throughout.
Finishing
- Trim loops with scissors for a more even, velvety texture if preferred.
- Add safety eyes and embroider a nose through the loops.
Assembly
- Attach a keychain ring at the top.
Tip: Work loop stitch with white or cream yarn and the result looks like a bichon frise or a maltese. Use a pale golden yellow for a golden retriever pup effect.

17. Crochet Cartoon Dog Keychain Idea
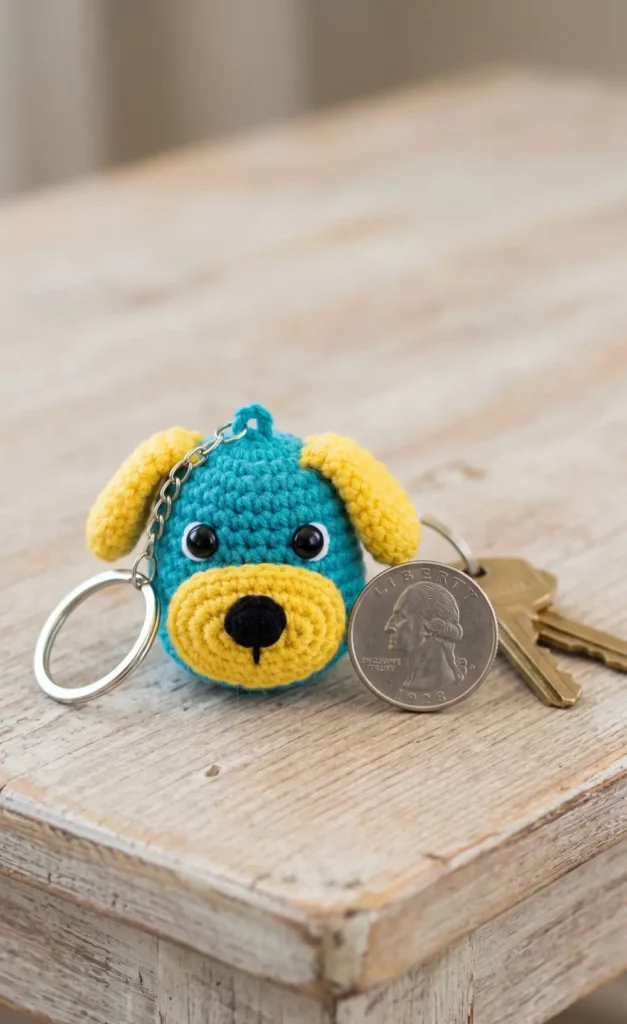
This is a stylized, simplified dog inspired by cartoon aesthetics rather than breed realism. Think round shapes, simple lines, and bold color contrast. No breed accuracy needed and perfect for kids.
Head
- Magic ring, 6 single crochet.
- Increase to 12, 18, 24, then 30 for a large rounded head.
- Work 4 even rounds.
- Stuff firmly and decrease back to close.
- Use a bold color like bright tan, blue, or any fun shade.
Snout
- Work a large flat oval in a contrasting color.
- Sew it to the lower half of the face, taking up about a third of the face area.
- The oversized snout is the key cartoon detail.
Face Details
- Add very large safety eyes of 12 mm.
- Add a big round black nose with a couple of embroidered nostrils.
Ears
- Make big floppy ears in a contrasting color and attach to the sides of the head.
Assembly
- Attach a keychain ring at the top through a loop.
Tip: Cartoon dog keychains are great for using leftover oddments in unexpected color combinations. A blue dog with a yellow snout is just as charming as a realistic one.

18. Pocket-Sized Puppy Crochet Pattern
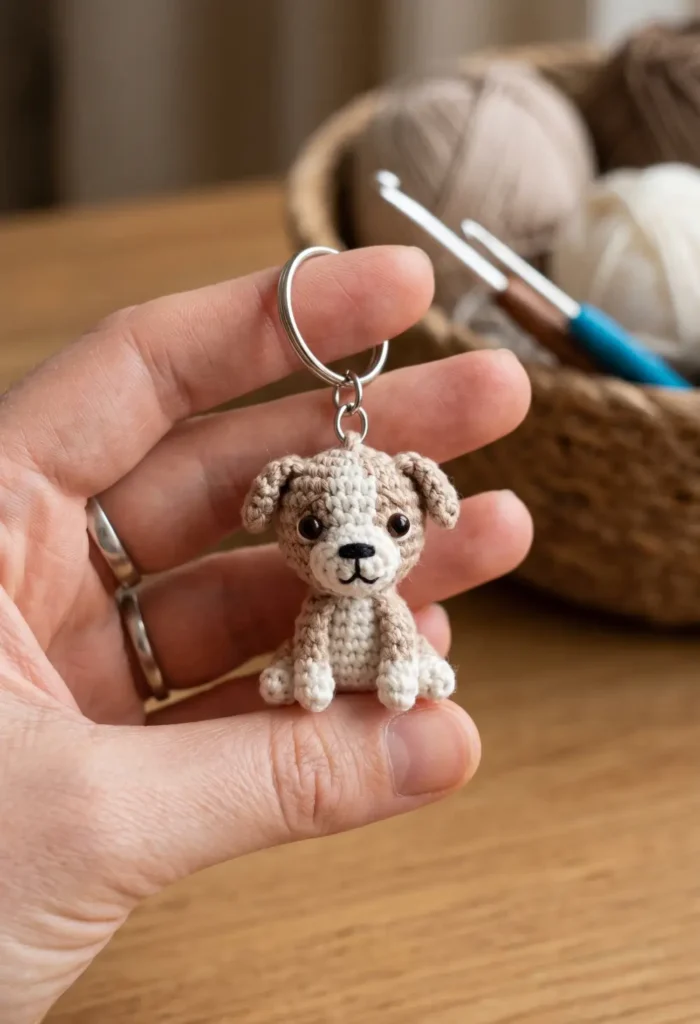
This final design is the tiniest on the list. It is a complete little dog in a sitting pose that is small enough to sit in the palm of your hand. Under 2 inches tall and completely adorable.
Use fingering weight yarn and a 2 mm hook throughout. For the head: magic ring, 6 single crochet. Increase to 12 over 1 round. Work 3 even rounds. Decrease to 6, stuff firmly, close.
Body
- Magic ring, 6 single crochet.
- Increase to 12.
- Work 3 even rounds.
- Decrease to 6, stuff, and close.
Legs (make 4)
- Make 4 very small tubes of 6 stitches around and 2 rounds tall.
- For a sitting pose, attach the back legs pointing forward and down at the base of the body.
- Attach the front legs hanging from the chest.
Ears
- Make tiny rounded triangles of 4 rounds and sew to the sides of the head.
Face Details
- Add 4 mm safety eyes if available, or use French knots in black thread.
- Embroider a tiny nose.
Assembly
- Sew all parts together.
- Attach a keychain ring at the top of the head.
Tip: At this tiny scale, polyfill stuffing can make shapes lumpy. Roll a small pinch of yarn into a tight ball and use that instead for neater, rounder shapes.

Frequently Asked Questions
What is the easiest dog keychain to make for a complete beginner?
Ideas 1, 6, and 12 are the most beginner friendly. The simple puppy face, paw print, and dog bone all use basic flat construction with no complex shaping or amigurumi assembly required.
What yarn works best for tiny dog keychains?
DK or fingering weight cotton is ideal. It is firm, holds detail well, and does not shed. Avoid fuzzy or mohair yarns at this scale as they blur the stitch detail and make it very hard to embroider faces neatly.
How do I make my dog keychain look like a specific breed?
Focus on three things: color, ear shape, and facial markings. Ear shape is the biggest differentiator between breeds. Upright pointed ears read as husky, corgi, or shepherd. Long floppy ears read as spaniel, beagle, or dachshund. Facial markings in contrasting colors add breed-specific character very quickly.
How small can I make these keychains?
With fingering weight yarn and a 2 mm hook, you can make a complete dog head in under 1.5 inches. Idea 18 gives full guidance for a pocket-sized version. Going smaller than 1 inch becomes very difficult to work and assemble neatly.
Can I make these without safety eyes?
Absolutely. Embroider the eyes using black thread and a satin stitch for a filled circle effect. French knots also work well for very small eyes. Embroidered eyes are safer for items intended for young children as safety eyes can be a choking hazard if not secured correctly.
How do I get the face expression right?
Eye placement is everything. Lower eyes with more forehead space look younger and cuter. Eyes placed at the midpoint look more mature and realistic. The distance between the eyes affects the face too. Wider-set eyes look gentler. Closer eyes look more intense. Practice on a scrap piece before committing to your finished keychain.
How long does a dog keychain take to make?
A flat face or paw print takes 20 to 30 minutes. A full amigurumi head takes 45 to 60 minutes. A complete body with legs and tail can take 2 to 3 hours including all the assembly steps.
What is the best way to attach the parts together?
Use a yarn needle and matching yarn to whip stitch pieces together. Pin the parts in place with straight pins before sewing to check positioning. Take your stitches through multiple layers of both pieces for maximum security. A loose head or ear will detach quickly with daily use so sew more than you think you need to.
Can I sell these dog keychains?
Yes. Dog keychains sell very well at craft markets, especially when displayed in breed groups. Custom breed requests are common and you can charge a small premium for personalized color matching. Breed-specific designs like corgis, huskies, and Shiba Inus tend to attract the most attention and sell the fastest.
Where can I find free crochet dog keychain patterns?
Ravelry has the largest searchable database of free patterns. Search by breed name combined with the word amigurumi for the most relevant results. Pinterest is also excellent for finding blog-based free patterns with photo tutorials. YouTube has step-by-step video tutorials for most popular breeds if you prefer to learn visually.