6 Free Crochet Fall Sweater Patterns for Cozy Days
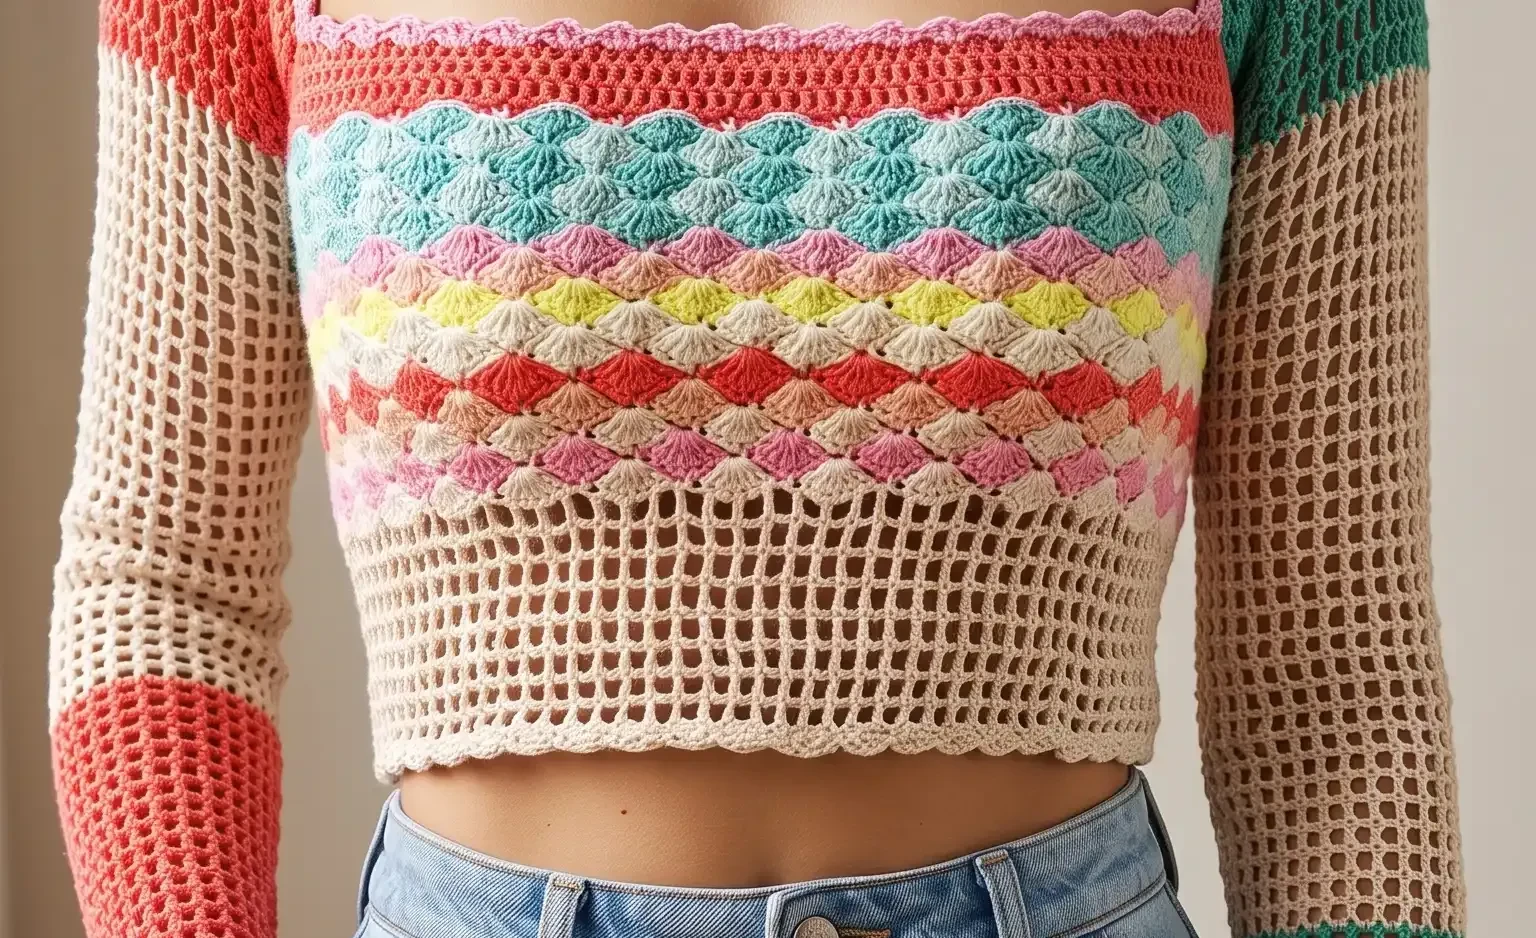
Sweaters practically ask for a fall sweater in your yarn stash before the leaves even finish turning.
There is something about that first cool morning that makes every crocheter reach for the wool basket. Cozy season means chunky yarn, slow stitches, and sweaters you actually want to live in. These six free patterns give you options for every skill level and style.
From boxy granny stitch pullovers to raglan yokes worked top down, this roundup covers the full range. Whether you want a quick weekend project or something with a little more shaping, there is a pattern here for you. Grab your hook and let’s get into it.
1. Crochet Granny Stitch Sweater Pattern
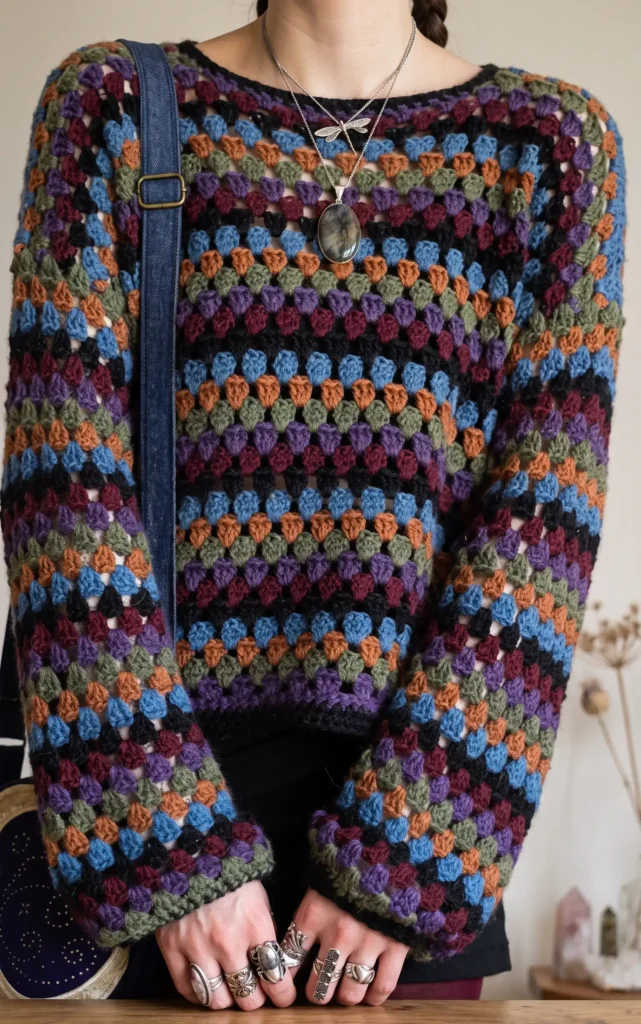
This beginner friendly project creates a beautiful, boxy sweater with a simple construction that avoids the need to sew on sleeves. By using granny stitch clusters, the garment works up quickly and provides a relaxed, stylish drape.
Essential Materials
To get started, you will need the following items:
- Crochet Hook: A 6.5 mm hook is recommended to achieve a better drape, even if your yarn suggests a 5.5 mm hook.
- Yarn: Any yarn from your stash works well, though alpaca blends wet block beautifully.
- Tools: A tapestry needle for seaming and stitch markers to define the neckline and armholes.
Step 1: Crafting the Front and Back Panels
Begin by creating a foundation chain that is divisible by three. This chain should reach from shoulder to shoulder for a form fitting look or extend further for a boxy fit. For the first row, place one single crochet in every stitch. Starting in row two, you will begin the granny stitch pattern by placing three double crochets in one stitch, skipping two stitches, and repeating this across the row.
You will continue by alternating between two specific repeat rows to ensure the edges remain straight as the piece grows. Repeat these steps to create two identical panels for the front and back of the sweater.
Step 2: Creating the Neckline and Seaming Shoulders
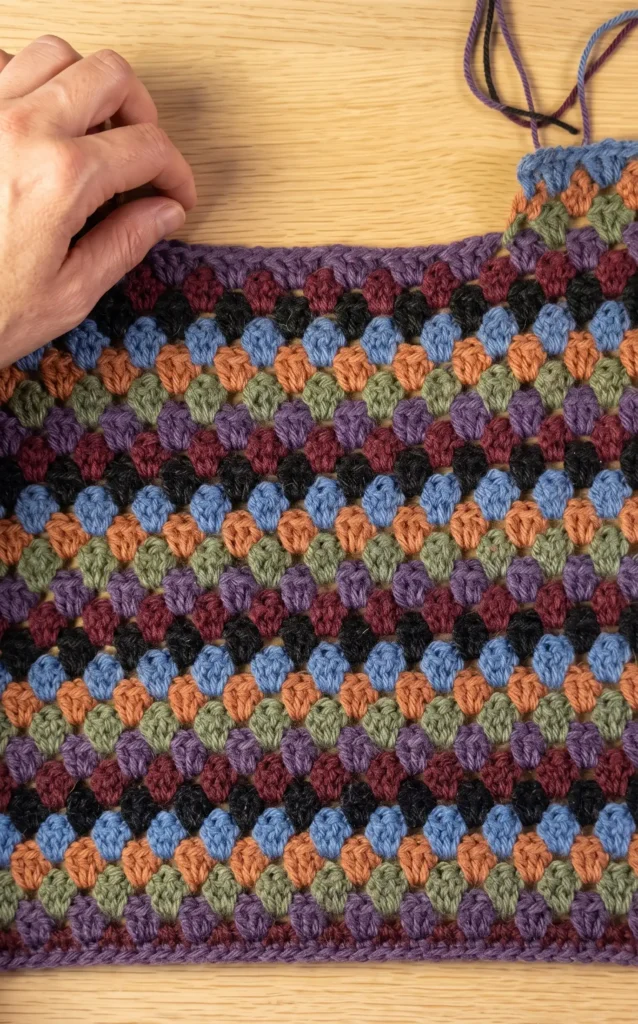
Once your panels reach the desired length, use stitch markers to define a central neck hole, ensuring the spacing is even on both sides. You will then crochet shorter rows of the granny stitch pattern on either side of the markers to create shoulder height; three rows are often sufficient.
After completing both panels, align them and use a whip stitching method with a tapestry needle to join the shoulders. This method is seamless and keeps the clusters perfectly lined up.
Step 3: Seaming Sides and Adding Borders
Next, whip stitch the sides of the panels together, making sure to leave enough space at the top for the armholes. It is helpful to try the sweater on at this stage to ensure the armhole size is comfortable. Once seamed, turn the garment right side out and add a half double crochet border to the collar and the bottom hem.
To make the transitions smoother, perform a half double crochet decrease at the points where the panels connect. Two rows of half double crochet typically provide a clean, finished look for these borders.
Step 4: Working the Sleeves and Final Touches
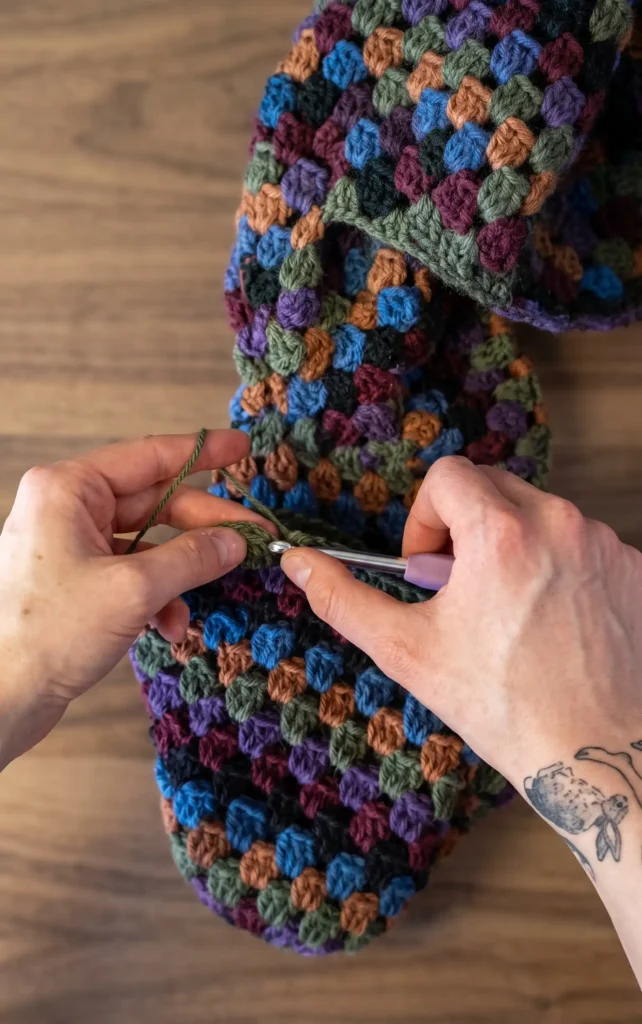
Attach your yarn directly into the armpit area to work the sleeves in the round, which eliminates the need for further sewing.
You will continue the granny stitch clusters by alternating between two row patterns to maintain the circular shape. Once the sleeves reach your desired length, you can cinch the cuffs by performing half double crochet decreases in every fourth stitch, then every second, and finally every third stitch over three rows. Finally, wet blocking the finished sweater is highly recommended to enhance the drape of the yarn and professionalise the final result.
Video Credits: Hannah Drapinski
2. Crochet Striped Sweater Pattern
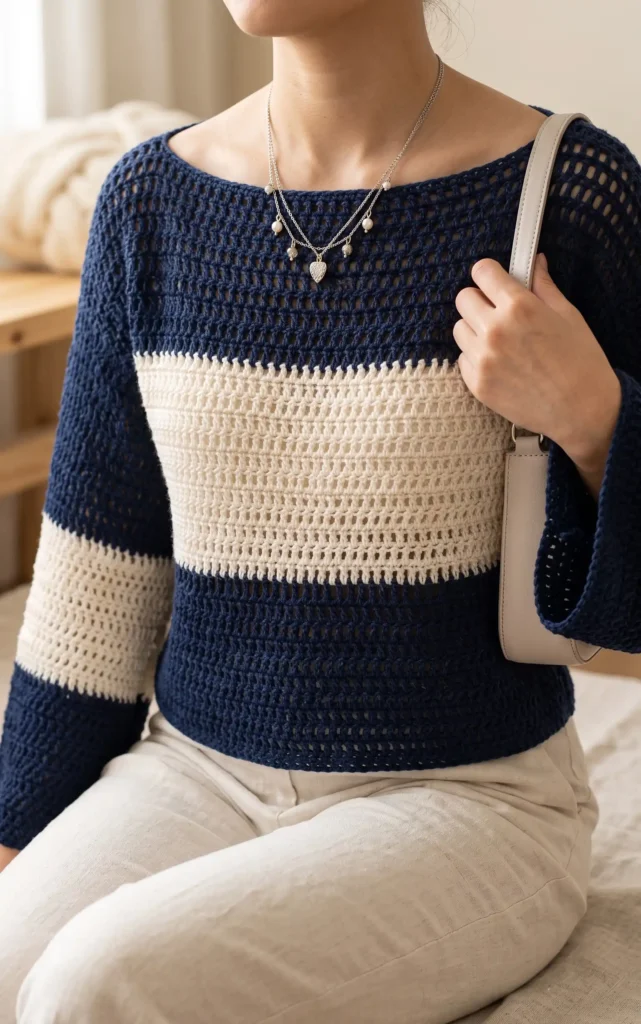
This made to measure crochet project is designed to be completely customisable, allowing you to create a sweater in any size and fit. Because it is made to measure, you can use any yarn or hook size you prefer, though a mohair or wool blend is recommended to achieve a soft, fluffy, knit-like appearance. You will also need two colours of yarn for the stripes, stitch markers, a tapestry needle, and scissors.
Step 1: Crafting the Front and Back Panels
The construction begins with two identical rectangular panels for the front and back. To start, you can use the Foundation Double Crochet method, which is faster and stretchier, or the standard chain and double crochet method if you are an absolute beginner. For every row after the initial one, you must work double crochets into the front loops only to create the desired texture.
To create the striped pattern, alternate colours after a set number of rows, such as every eight rows. Ensure that both panels have the exact same measurements, stitch counts, and number of rows.
Step 2: Assembling the Body
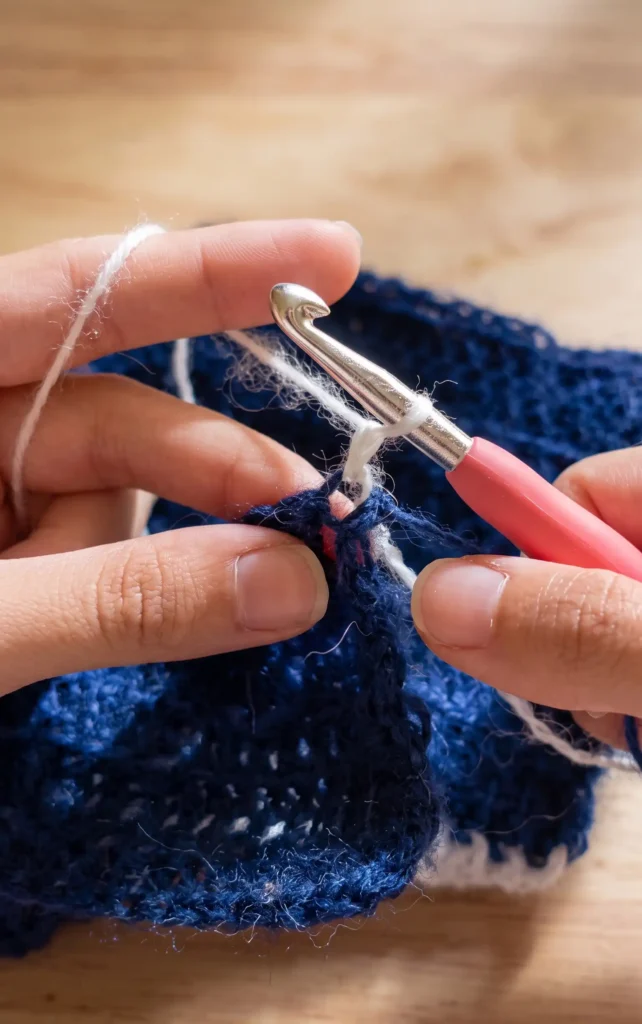
Once your panels are complete, lay them flat on top of each other to begin assembly. Use stitch markers to define the neck hole at the top and the armholes on the sides. Sew the top edges together to form the shoulders, leaving the marked central space open for your head.
Next, sew the sides of the panels together starting from the bottom and stopping at the armhole markers. It is best to do all sewing on one side of the fabric so that you can later flip the garment inside out for a cleaner finish.
Step 3: Crocheting the Sleeves in Rounds
The sleeves are crocheted directly into the armholes in rounds, which eliminates the need for extra sewing later. Attach your yarn at the bottom of the armhole and double crochet all the way around the opening.
To keep the sleeves identical, you must maintain the same stitch count for both. At the end of each round, join with a slip stitch, chain two, and turn your work before starting the next round. Just like the body panels, continue working into the front loops only to maintain a consistent texture.
Step 4: Completing Stripes and Finishing
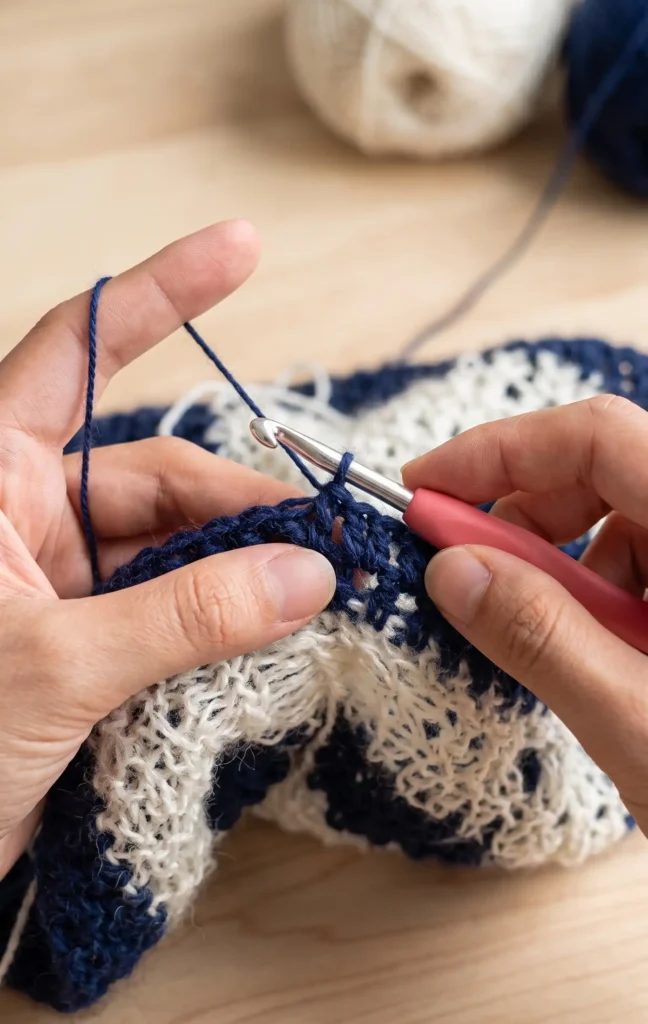
Continue adding rounds to your sleeves until they reach your preferred length. Remember to change yarn colours for the sleeve stripes to match the thickness used in the main body panels. When the sleeves are finished, fasten off the yarn and use a tapestry needle to weave in all loose ends securely to ensure the sweater does not unravel.
Finally, turn your work inside out so that the neater side of your sewing is on the exterior.
Video Credits: mahum
3. Crochet Mesh Sweater Pattern
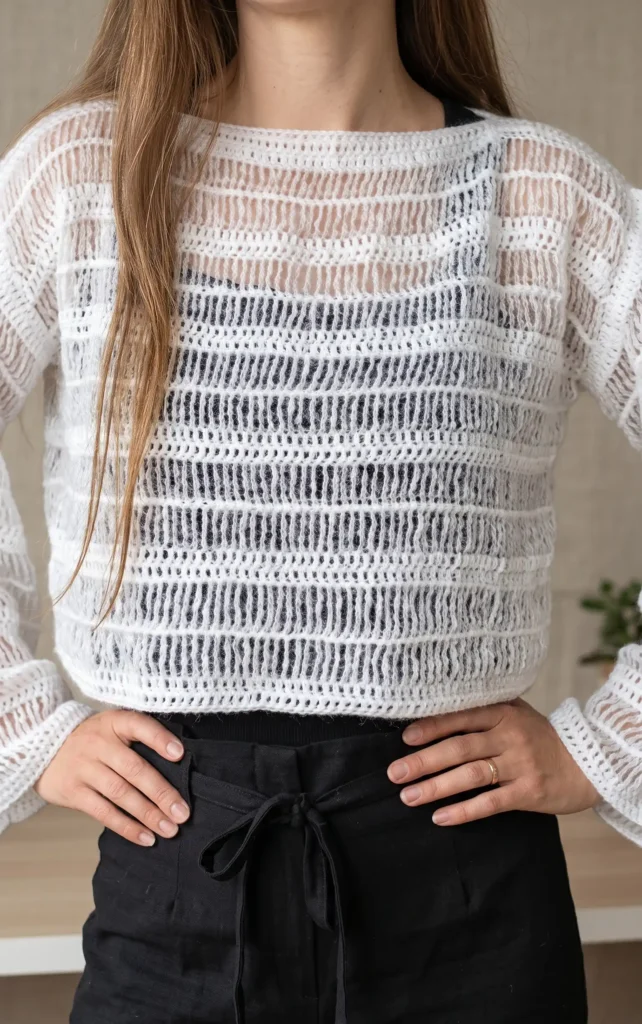
This beginner-friendly sweater uses a combination of cotton and mohair yarn to create a beautiful, airy mesh design that is perfect for summer or layering. By following these four steps, you can create a custom-fit top tailored to your measurements.
Essential Materials
Before starting, gather the following supplies:
- 4-ply cotton yarn: Approximately four skeins.
- Mohair blend yarn: Approximately two skeins.
- 3.5 mm crochet hook.
- Scissors.
- Stitch markers (optional but recommended for assembly).
Step 1: Crochet the Four Main Panels
You will need to create four separate panels: one for the front, one for the back, and two for the sleeves. Start by creating a slip knot and chaining a length that fits around your bust (for body panels) or your arm (for sleeve panels).
The first two rows consist of double crochets using the cotton yarn. For the third row, switch to the mohair yarn and work treble treble crochets by yarning over four times for each stitch to create the long, mesh effect. The fourth row switches back to cotton yarn for a row of single crochets to stabilize the fabric, followed by another row of mohair treble treble crochets for the fifth row.
Step 2: Reach Desired Length and Fasten Off
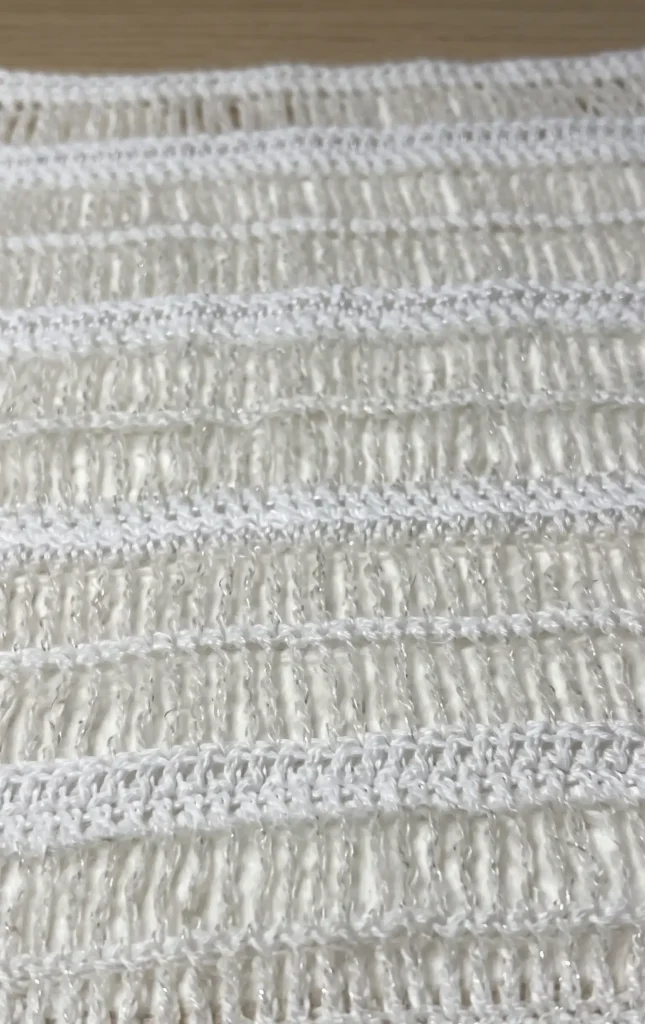
Continue repeating the sequence of rows one through five until your panel reaches the desired length. To ensure a clean finish and easier assembly, it is recommended to end each panel with two rows of double crochet to mirror the beginning of the work.
Once a panel is complete, fasten off by chaining one, cutting the yarn, and pulling the tail through the loop to secure it. Repeat this process until you have two identical body panels and two identical sleeve panels.
Step 3: Connect Shoulders and Sleeves
Lay your panels out to prepare for assembly. Using the cotton yarn and a slip stitch method, join the shoulder sections of the front and back panels together. Make sure to leave an equal amount of space on both sides and a large enough opening in the center for the neck.
After the shoulders are secure, attach the sleeves to the sides of the body panels. Use stitch markers to find the center of the sleeve and the center of the body side to ensure the connection is even.
Step 4: Final Seaming and Finishing Touches
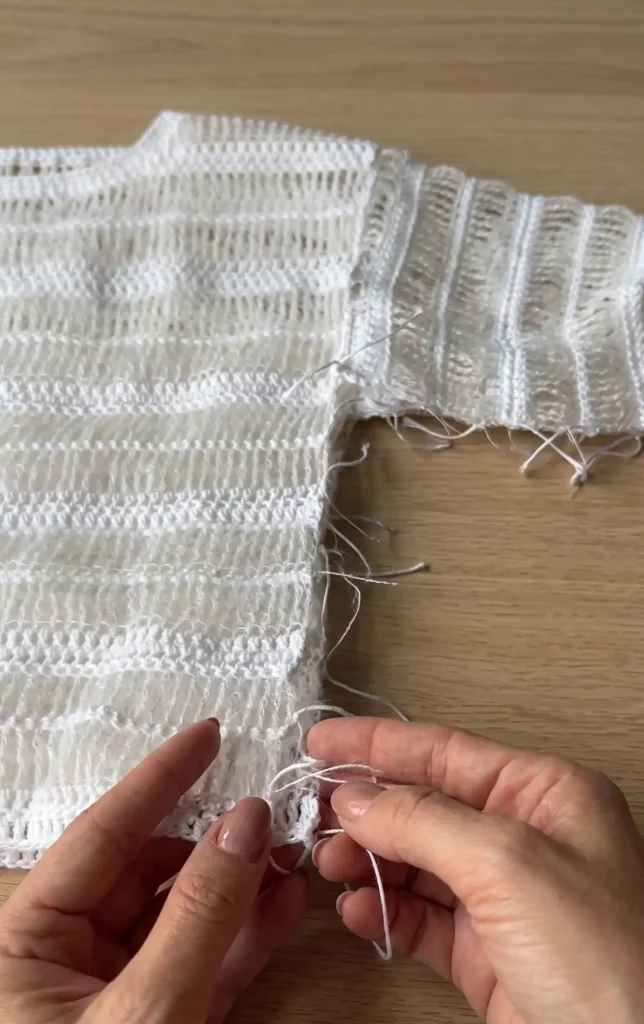
With the right sides of the panels facing inward, use slip stitches to seam the bottom of the arm panels and the sides of the body panels.
Carefully match corresponding rows as you work from the wrist down to the armpit and then down the side of the torso. Once all four panels are fully connected, the final step is to weave in all loose ends using a crochet hook or a darning needle to hide them within the stitches. Turn the garment right side out to complete your mesh sweater.
Video Credits: by Kristine
4. Crochet Hexagon Sweater Pattern
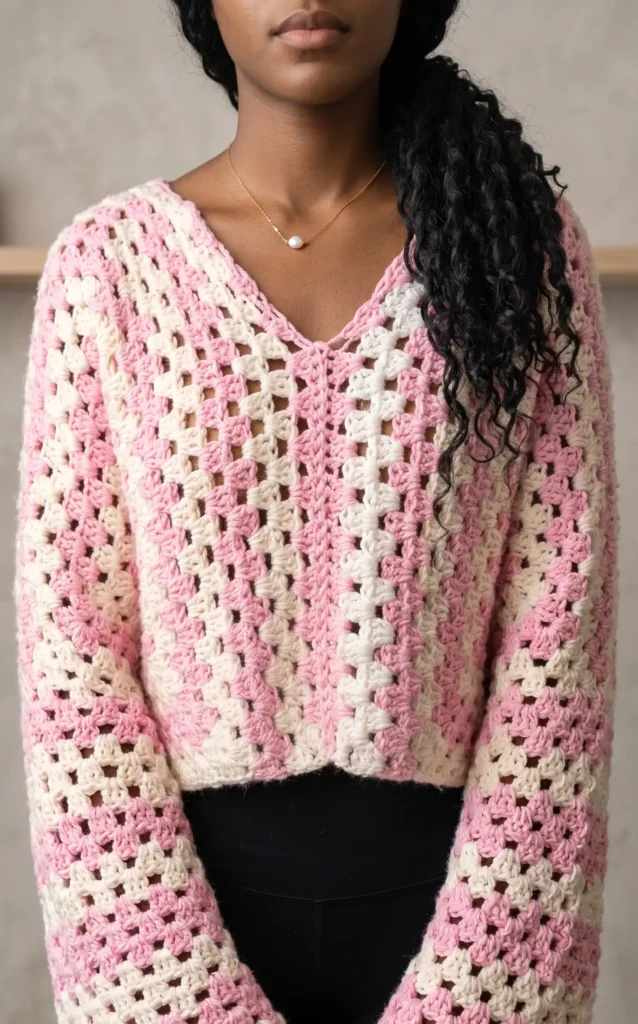
This trendy and comfortable pullover is constructed using two large crochet hexagons that fold into an “L” shape to form the body and sleeves. By using a larger hook, you can create a chunky effect that works up quickly and uses less yarn.
Essential Materials
Before beginning, gather the following supplies:
- Yarn: Weight 4 acrylic yarn (Hobby Lobby “I Love This Yarn” is recommended for its softness).
- Hooks: A 5.75 mm hook for the main body and a 5 mm hook for the ribbing.
- Tools: A tapestry needle for sewing and a pair of scissors.
Step 1: Crafting the Hexagon Foundation
To begin, create a magic ring. Chain 3 (this counts as your first double crochet) and work 2 double crochets into the ring, followed by a chain 1. Repeat the pattern of 3 double crochets and a chain 1 until you have six clusters total, then pull the tail to close the ring and slip stitch to the top of the initial chain 3.
For the second round, work a corner cluster (3 double crochets, chain 1, 3 double crochets) into each chain space. In all subsequent rounds, work 3 double crochets in the side gaps and corner clusters in the corner gaps. Continue until you have completed 14 rows total.
Step 2: Seaming and Extending the Sleeves
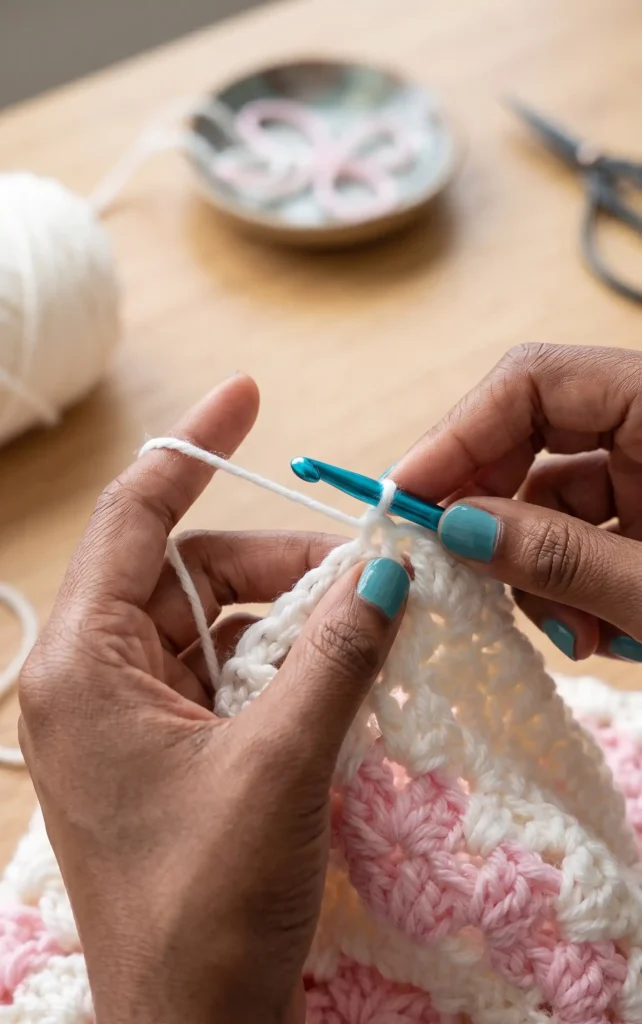
Fold your hexagon so that it forms an “L” shape, which creates the sleeve and half of the body. Turn the piece wrong side out and single crochet along the top edge to seam the sleeve and shoulder together. After seaming, do not cut the yarn; instead, feed the yarn ball through the sleeve to bring it to the wrist opening.
Reattach the yarn at the sleeve opening and work rounds of 3 double crochet clusters to add length. Complete approximately 13 rows for the sleeve extension or until it reaches your desired length.
Step 3: Adding Ribbed Cuffs
Switch to a 5 mm hook to ensure the ribbing looks neat. First, work a single crochet decrease round (SC2TOG) all the way around the sleeve edge to narrow the opening. Chain 6 and work a single crochet in the second chain from the hook and each remaining chain.
Slip stitch into the next two stitches of the sleeve edge, turn your work, and crochet back up the ribbing using back loop only (BLO) single crochets to create the ribbed texture. Continue this vertical ribbing all the way around the cuff. Once finished, use a tapestry needle to sew the final ribbing seam closed.
Step 4: Final Body Length and Assembly
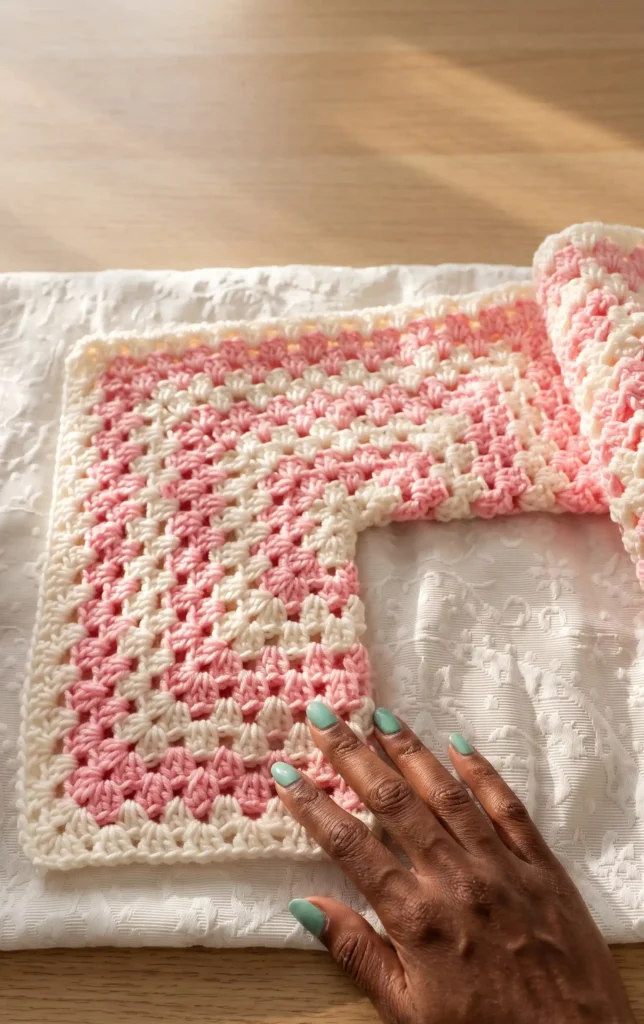
To add extra length to the body so the sweater is not too cropped, attach your 5.75 mm hook to the bottom edge of the panel. Work rows of 3 double crochet clusters back and forth along the bottom and center edges. Complete about five rows of these clusters for each of your two panels.
Finally, place both panels together with the wrong sides facing out. Single crochet the back seam completely. For the front seam, single crochet up from the bottom but leave a 13-stitch opening at the top for the head. Turn the sweater right side out and weave in all loose ends to finish.
Video Credits: Azariah Crochets
5. Color Block Crochet Sweater Pattern
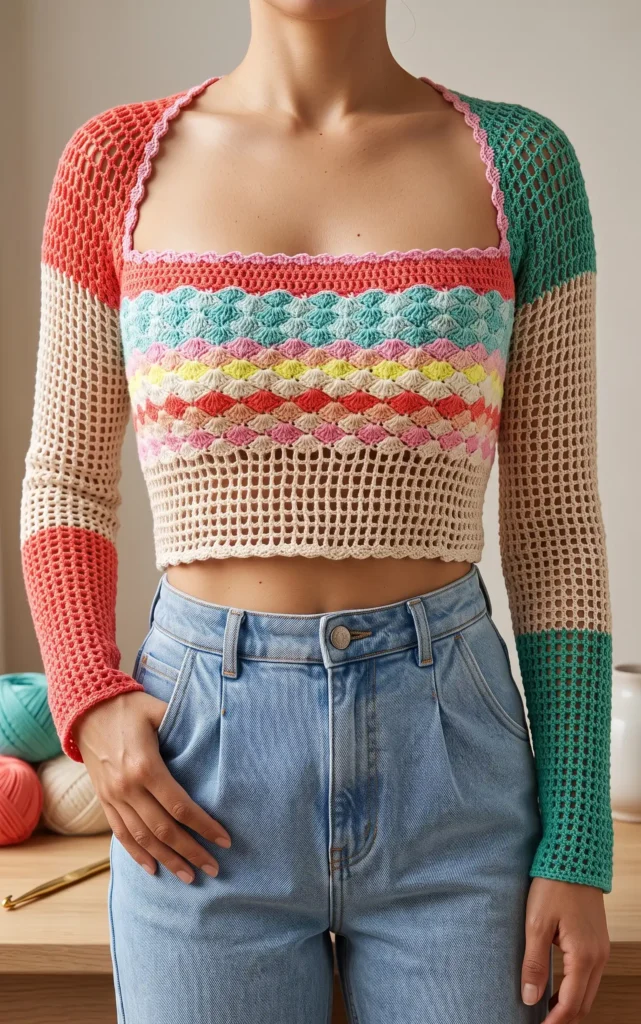
This vibrant, youth-focused top is a seamless, one-piece construction that is perfect for using up leftover yarn scraps. The design is worked from sleeve to sleeve, allowing for easy color changes and a custom fit. You can use either thin or semi-thick yarn to achieve the desired texture.
Materials and Sizing
To begin, you will need yarn in various contrasting colors and stitch markers to track your increases and decreases. For a size small, start with 55 chains; for a size medium or large, start with 61 chains.
Step 1: The First Sleeve and Gradual Increases
Begin by creating a chain for your size and joining it with a slip stitch to form a ring, ensuring the chain is not twisted. Work one row of single crochet in each stitch. Transition to the “window stitch” by crocheting a double crochet, one chain, skipping one space, and then another double crochet.
Work 22 rows straight without any changes. Starting at row 23, perform an increase every six rows. To increase, simply add an extra double crochet and chain into a single window space. Continue this pattern until you reach the armpit, which typically takes about 49 rows in total.
Step 2: Shoulder Shaping and the Back Panel
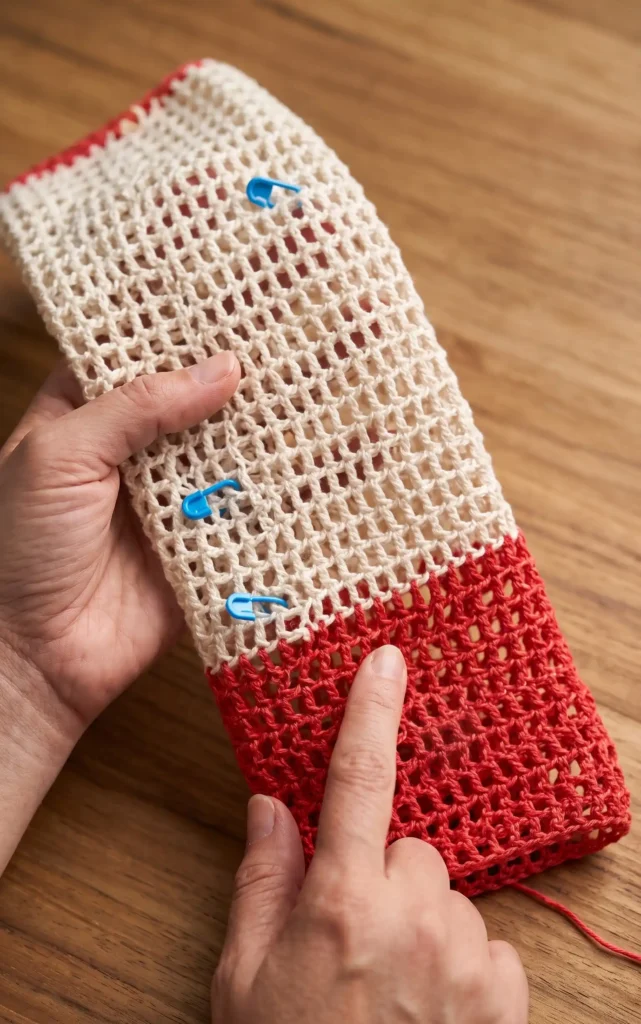
Once the sleeve is long enough to reach the armpit, switch to a new contrasting color. Work three rows straight. To shape the shoulder, you will begin decreases on one side only for the next 10 rows. This creates a triangular slope for the neckline.
After the shaping is complete, work 12 to 15 rows straight to create the width of the back panel, depending on your measurements. To finish this section, you must mirror the first shoulder by performing 10 rows of increases on the same side where you previously decreased.
Step 3: Second Sleeve Construction
Close the armpit opening and begin working in the round to start the second sleeve. This sleeve is worked in “mirror image” to the first one. You will work three rows in your current color and then switch back to the colors used in the first sleeve.
Instead of increases, you will now perform decreases every six rows to taper the sleeve back down to the cuff. Use your stitch markers from the first sleeve as a guide to ensure both sleeves are identical in length and shape. Finish the cuff with a row of single crochet.
Step 4: Connecting the Body and Decorative Edging
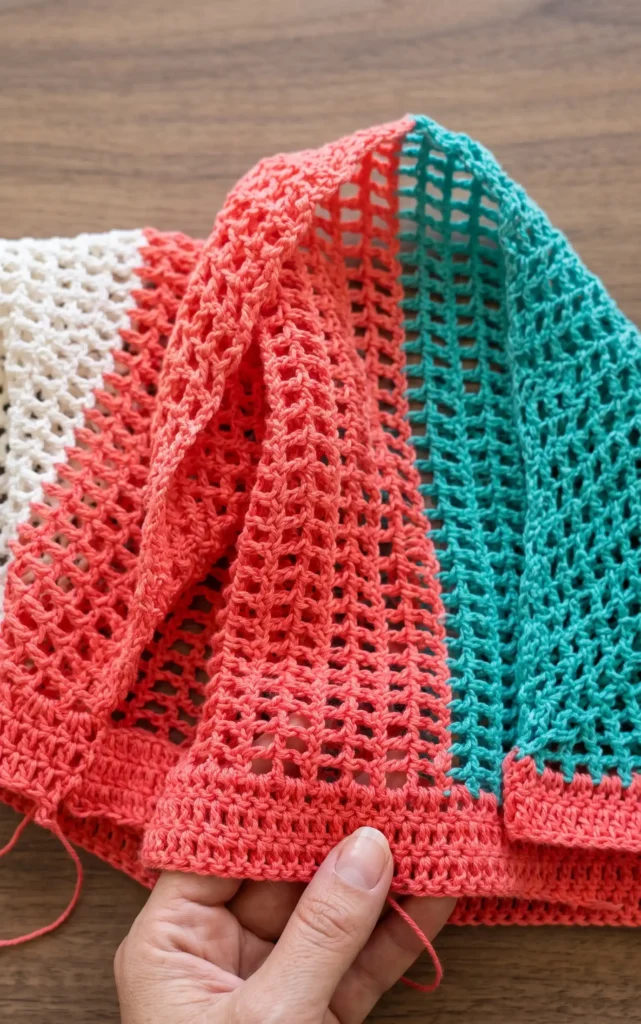
To form the front of the top, join your yarn at the armpit and create a chain of approximately 55 to 60 stitches (measure this against your chest for the best fit) to connect to the other armpit. Crochet rounds of double crochet or the window stitch around the entire circumference of the body, including the new front chain and the back panel.
Work at least three to four rows for the body, or more if you prefer a longer top. For a decorative finish, you can add fan or shell stitches to the bottom edge. A popular option is a six-double crochet shell followed by a point of attachment every three spaces. Finally, add a simple border of three double crochets in each space around the neckline for a polished look.
Video Credits: Maricel Romina
6. Chunky Crochet Sweater Pattern
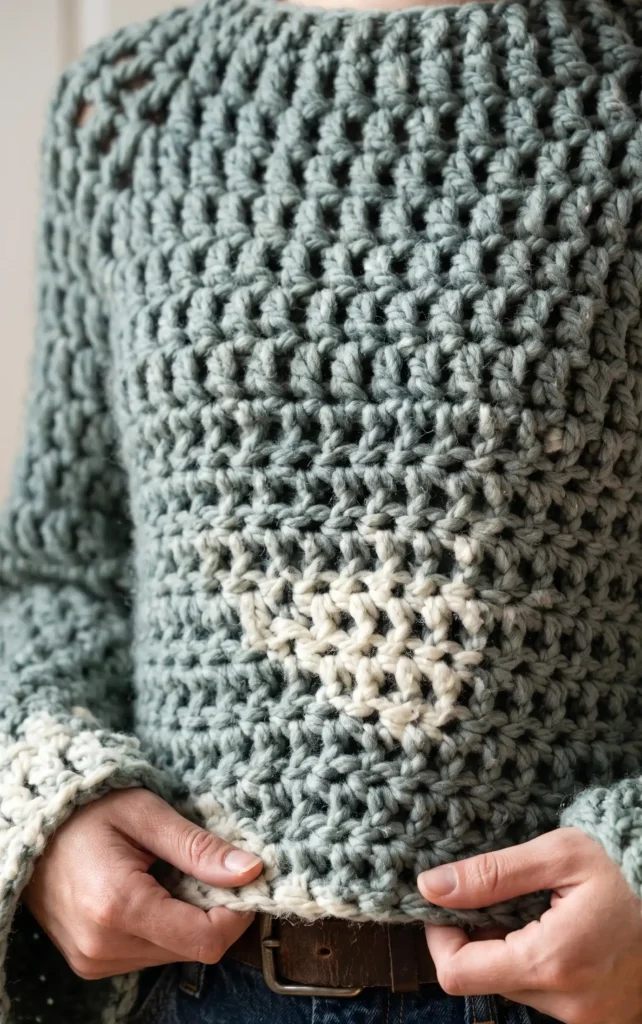
To create this comfortable top-down sweater, you will need a crochet hook, chunky yarn, a measuring tape, stitch markers, and scissors. This construction method allows you to customise the fit as you go by trying the garment on at various stages.
Step 1: Foundation Chain and Initial Markers
Begin by making a slip knot and creating a foundation chain that fits comfortably over your head. Join the ends of the chain with a slip stitch to form a loop, then work one double crochet into every stitch all the way around.
After completing the first row, lay the circle flat and use a measuring tape to place stitch markers 2 inches from the corners on both the front and the back. These markers will serve as the four points for your raglan increases.
Step 2: Working the Raglan Increases
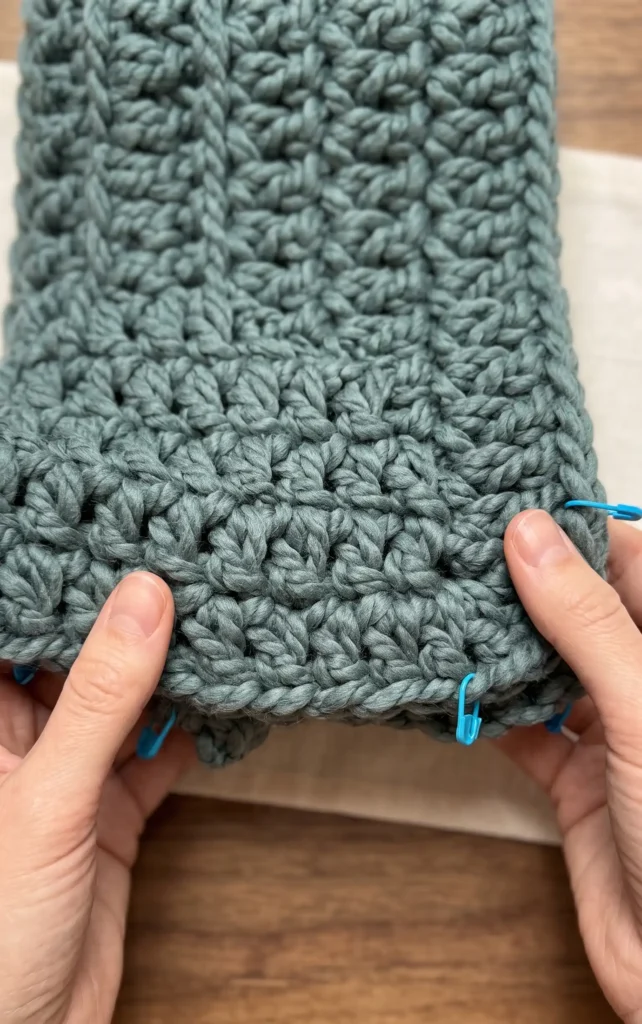
Continue the pattern by placing one double crochet in each stitch until you reach a stitch marker. In every marked space, you must work an increase by placing one double crochet, a chain one, and a second double crochet into that same spot.
Move the stitch marker up into the new chain one space for every subsequent row. Repeat this process until the piece is long enough to reach the top of your armpits, which typically requires about seven rows of growth.
Step 3: Constructing the Sleeves
Once the yoke reaches your armpits, tie off the yarn and prepare to work on the sleeves. Attach your yarn to a chain one space at the armpit and create a chain of about seven stitches (or more for a baggier fit) before connecting it to the opposite marker to form the arm opening.
Work double crochet stitches in rounds around this opening to build the length of the sleeve. Continue until the sleeve reaches your wrist, then repeat the exact same process for the second sleeve.
Step 4: Finishing the Body
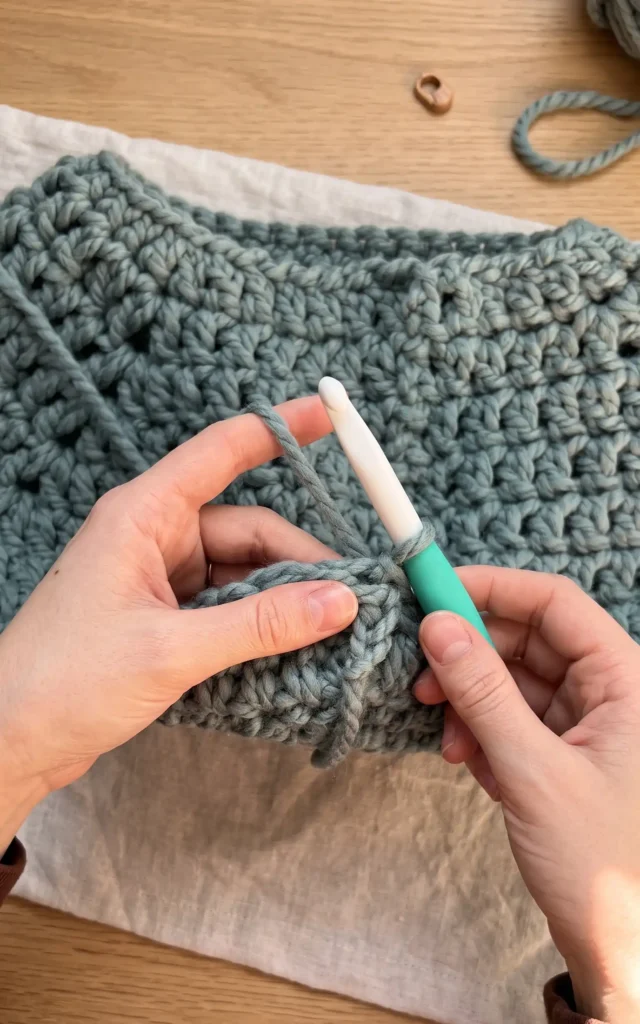
To complete the body, attach your yarn to a stitch in the middle of the back and work double crochet stitches around the entire torso. Be sure to work double crochets into the chains you created under the arms to bridge the gap between the front and back panels.
Continue working rounds of double crochet until the sweater reaches your preferred length. Finish the project by slip stitching to secure the final row and weaving in any remaining tails of yarn.
Video Credits: Kayla
Which Sweater Will You Make?
Six patterns, six different vibes, and not a bad choice in the bunch. Whether you want the quick simplicity of granny stitch or the custom fit of a made to measure design, fall has you covered this year.
Pick the one that matches your skill level and your yarn stash, then cast on. Tag your finished sweater so the rest of us can admire your work and get inspired for our next project.