4 Halloween Amigurumi Crochet Free Patterns for Spooky Fun
Halloween is the one time of year your hook can go a little wild, and these four amigurumi patterns are proof of it. A posable Frankenstein monster, a pumpkin man with dangling limbs, a tiny broomstick-toting witch, and a grinning skeleton skull all come together with clever, mostly seamless construction. No sewing marathons required.
Each pattern uses smart shaping tricks like back loop rows, in-the-round color changes, and direct joins to cut down on finishing work. Whether you want a shelf full of spooky characters or a single standout centerpiece, these free patterns deliver serious Halloween charm without eating up your whole October.
1. Crochet Frankenstein Halloween Amigurumi Pattern
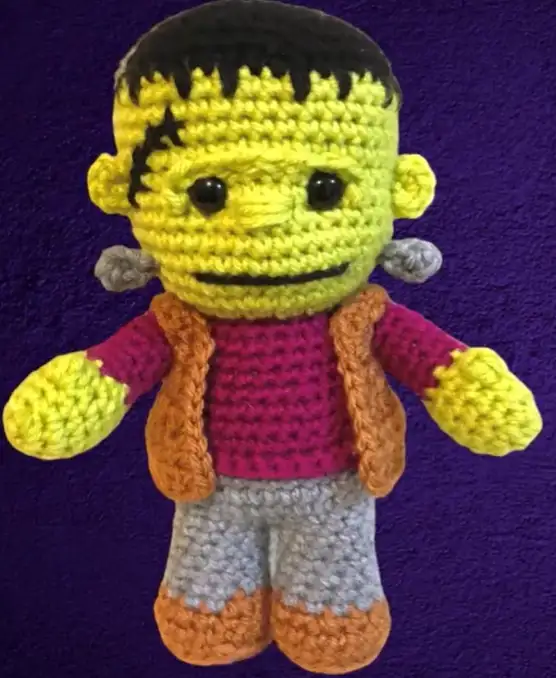
The Crochet Frankenstein Halloween Amigurumi is a festive and beginner friendly project constructed in a nearly seamless, no-sew fashion. Unlike traditional amigurumi patterns that require extensive sewing of individual limbs, this pattern is worked from the bottom up, joining the arms and legs directly into the body as you crochet. This design creates a charming, posable little monster that is perfect for Halloween decorating.
Essential Materials
Before beginning, gather the following supplies:
- Medium weight yarn: The tutorial uses number four medium weight yarn in green for the skin, black for the hair, brown for the shoes, grey for the trousers, sparkly grey for the neck bolts, and custom colors for the shirt and vest.
- Crochet hook: Size G or 4.25 mm.
- Safety eyes: One pair of 12 mm safety eyes.
- Tools and filling: Polyester stuffing, a yarn needle for embroidery and assembly, scissors, pins for positioning, and a stitch marker.
Step 1: Crochet the Arms and Legs
The limbs are worked first as separate pieces so they can be seamlessly joined to the body later on. You begin the arms with a loop of six single crochets, increasing to twelve, and then working a three double crochet cluster stitch to create a distinct thumb.
After shaping the hands, you will change colors to the shirt and crochet the remaining length of the arm before stuffing and crocheting the ends closed. The legs start similarly with a shoe color, transitioning to a back-loop-only row to give the feet a flat bottom. Once you work the trouser section, you will finish the first leg with a slip stitch and keep the second leg active so you can immediately join them.
Step 2: Join the Legs and Crochet the Body
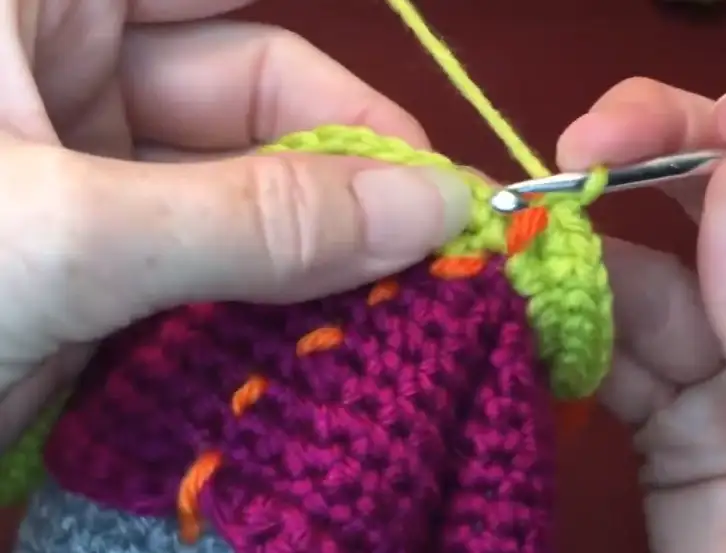
The body is constructed by directly joining the two legs with single crochets to form a continuous round of twenty-four stitches. After establishing this base, you will work rows of single crochets and increases to expand the body.
When transitioning to the shirt, you will work one row in the front loops only and the next in the back loops only to create a clean, raised hem ridge for the t-shirt. As you work up the torso, you will introduce decreases before aligning the stuffed arms on either side. To attach the arms, you will simply crochet through the stitches of both the arm and the body simultaneously, completing the seamless attachment before changing back to the green yarn for the head.
Step 3: Crochet and Stuff the Head
The head is worked directly from the neck by performing consecutive increases to widen the face to forty-two stitches. After working several plain rows, you will switch to black yarn and use a single crochet drop stitch pattern to create a textured, jagged hairline.
At this stage, you must stuff the body and head firmly. Before completing the head decreases, insert the 12 mm safety eyes between rows five and six of the green section, placing them four stitches apart. You will then continue with decrease rounds to taper the top of the head. Finish by weaving your yarn tail through the remaining six stitches to pull the head closed, and use the leftover tail to sew up the small gap between the legs.
Step 4: Sculpt the Face and Craft the Vest
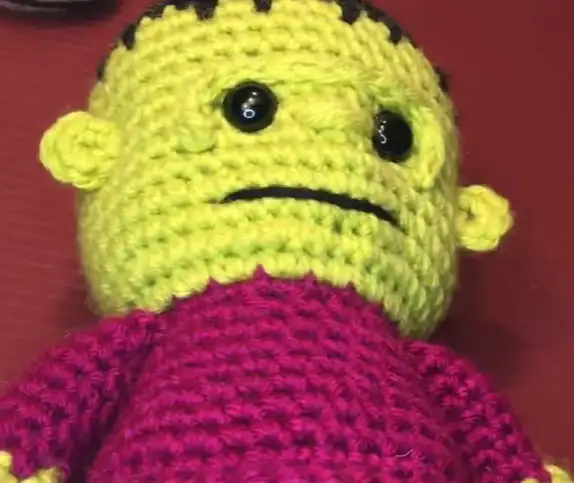
The final step is to bring your monster to life with facial details and a stylish accessory. Use yarn tails to pull the arms inward and sculpt the eye sockets for a classic, expressive look. You will embroider a nose, a simple mouth, and a scar using black yarn, and crochet simple ears to sew onto the sides of the head.
For his neck bolts, you will crochet tiny chains featuring three double crochet clusters in sparkly grey yarn. To complete the project, crochet a separate vest starting with a chain of twenty-three. You will work single crochets, create armholes by skipping stitches, and transition to half double crochets with subtle increases at the hems to ensure the vest sits perfectly over his shoulders.
Video Credits: Rhonda Butler
2. Halloween Jack o Lantern Pumpkin Crochet Pattern
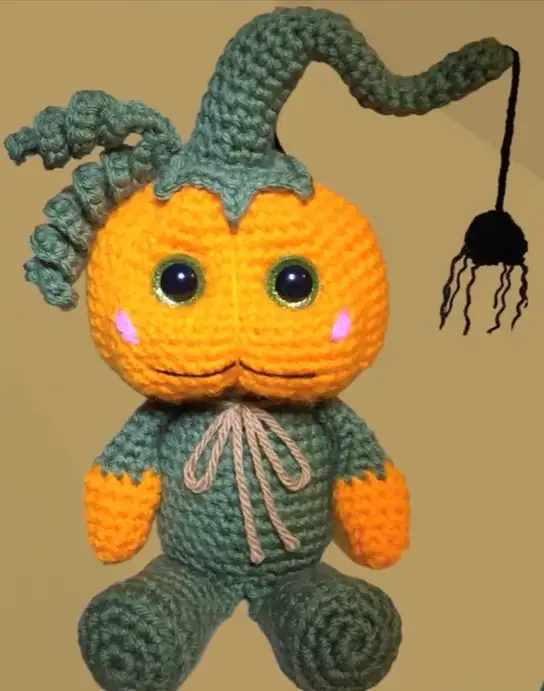
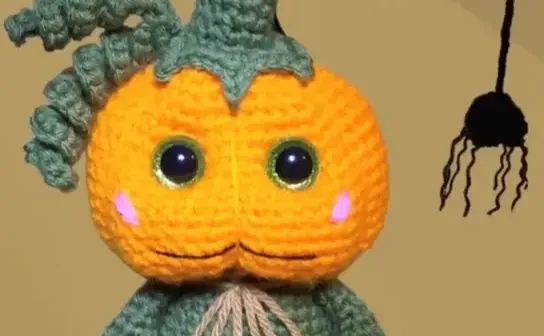
The Halloween Jack o Lantern Pumpkin Crochet is a beginner-friendly project constructed mostly as a continuous piece from the stem down to the body. Unlike traditional multi-piece amigurumi, this clever design allows you to crochet the vine, head, arms, body, and legs sequentially to minimise sewing. This pattern can be styled as a simple decorative pumpkin or completed as a whimsical pumpkin man with dangling limbs.
Essential Materials
Before beginning, gather the following supplies:
- Yarn: Orange yarn for the pumpkin head, green yarn for the stem and limbs, brown yarn for the body, pink yarn for the cheeks, and a dark yarn for the spider.
- Crochet hook: An appropriate size for your chosen yarn, preferably one size smaller than standard if you tend to have loose tension, to keep the stuffing from showing.
- Safety eyes: A pair of plastic safety eyes with secure backings.
- Support wire: Garden tying wire or a pipe cleaner to help the stem keep its shape.
- Tools: A yarn needle for weaving in ends, a pair of scissors, stitch markers, pins for planning, and Mod Podge or fabric glue to secure the spider’s legs.
- Stuffing: High-quality polyester fiberfill stuffing.
Step 1: Crochet the Stem and Pumpkin Head
Start by making the stem with green yarn, beginning with a loop and working six single crochets. Work in the round with gradual increases up to round 25, then work a decorative fringe in the front loops only for round 26 to create peaks.
After fastening off the green yarn, attach your orange yarn to the remaining back loops of the stem. Work circular rows of increases to expand the head to 48 stitches, crochet nine rounds of plain single crochet, and then work systematic decreases down to 18 stitches.
Step 2: Add the Internal Wire, Safety Eyes, and Hanging Accessories
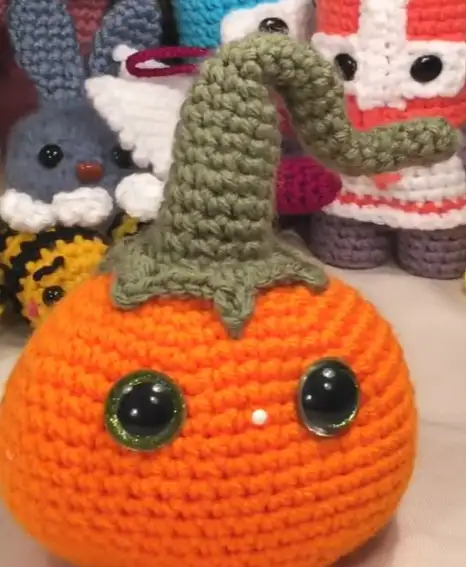
Insert a length of twisted garden wire or pipe cleaner into the stem to make it poseable. Stuff the bottom half of the head with fiberfill, ensuring the stitches do not stretch. Insert the safety eyes between the rounds of the head, locking the backings securely into place. Next, crochet a curly green vine by chaining 20 and working three single crochets into each chain.
Attach this vine to the top of the pumpkin. You can also crochet a tiny hanging spider by working eight single crochets into a magic loop, working a few rounds, and adding thread legs stiffened with Mod Podge.
Step 3: Crochet the Limbs and Build the Body
To make the pumpkin man, crochet two identical arms and two identical legs using green and orange yarn. Stuff only the hands and the very bottom of the feet, keeping the rest of the limbs flat so the character sits upright. Resume the main body by changing colors to brown at the neck.
Work across the neck while joining the arms directly to the body with three single crochets on each side, eliminating the need to sew them on later. Work rows of increases and plain rounds for the body, then attach the flat legs directly to the lower front of the body during round 32.
Step 4: Close the Body and Sculpt the Face
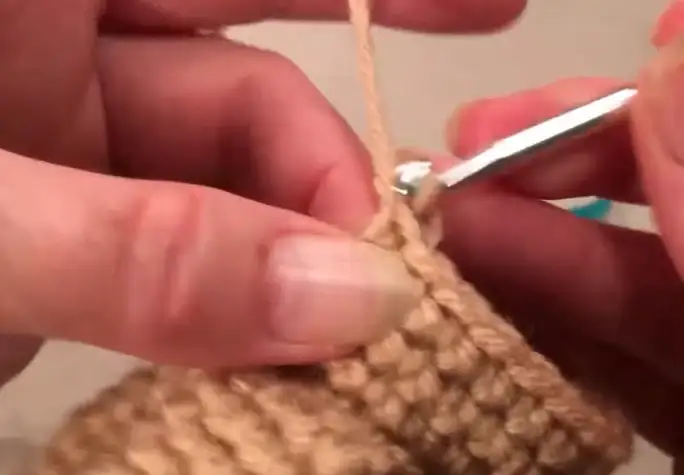
Decrease the remaining body stitches to close the bottom, adding extra stuffing to the sides of the base before executing the final decreases to help the pumpkin sit flat. Fasten off and weave in all yarn tails securely.
To give your Jack o’ Lantern character, use a long orange yarn tail to pull the safety eyes downward and inward, creating realistic face indents. Optionally, wrap orange yarn around the pumpkin to create segmented indents. Finally, stitch diagonal pink cheeks below the eyes and hang your tiny crochet spider from the stem.
Video Credits: Rhonda Butler
3. Crochet Witch Amigurumi Mini Halloween Pattern
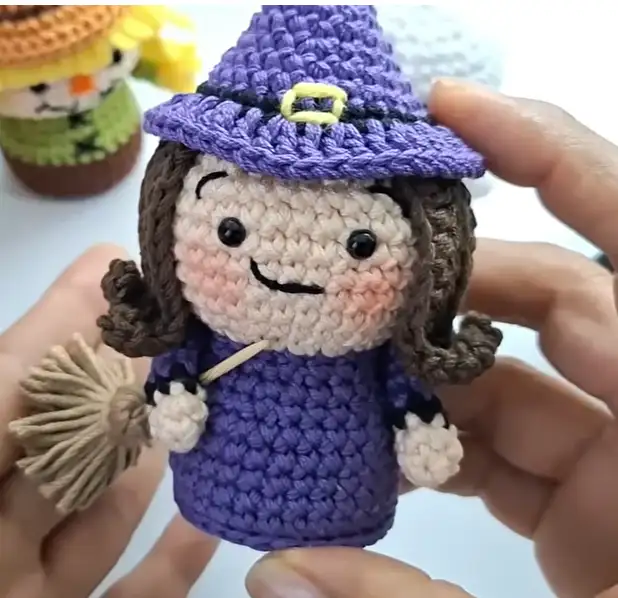
The Crochet Witch Amigurumi is a charming, beginner-friendly project that stands approximately 12 cm tall from her base to the tip of her pointed hat. Perfect as a festive decoration or a pocket-sized gift, this mini witch is the final addition to a delightful Halloween collection featuring a vampire, a ghost, a devil, and a scarecrow. Utilizing simple stitches and clever structuring, this pattern is worked from the bottom up to create a sturdy, flat-bottomed figure.
Essential Materials
Before beginning your magical creation, gather the following supplies:
- Yarn: 100% cotton yarn with a 2 mm thickness (or acrylic yarn of equivalent thickness) in purple (base color), khaki, dark brown, skin tone, and small amounts of black and yellow.
- Crochet Hook: Size 2 mm metal crochet hook.
- Safety Eyes: One pair of 5 mm safety eyes with backings.
- Stuffing and Base: Synthetic fiberfill stuffing, and a small piece of cardboard or plastic bottle cap to stabilize the flat base.
- Tools and Notions: Stitch marker, tapestry needle, scissors, hot or cold silicone glue, wooden toothpick, lighter, and pliers.
Step 1: Crochet the Flat Base, Body, and Head
The witch is worked as a continuous piece starting from the bottom of her purple dress up to the top of her head.
- The Flat Base: Begin with a magic ring of 6 single crochet (sc) stitches in purple. Work concentric increase rows up to 30 stitches. At this stage, trace the outline of your circular piece onto your cardboard or plastic cap. To create a distinct edge for the flat bottom, work the next round of 30 stitches strictly in the back loops only (BLO).
- The Dress Body: Continue crocheting standard rows until you reach Row 10. Fold the piece along the BLO edge and glue your pre-cut plastic or cardboard circle inside to keep the base completely flat. Work decrease rows to taper the body down to 18 stitches.
- The Head: Transition to skin-toned yarn on Row 15, increasing the stitch count to 36 to form the head. Crochet seven rounds of even stitches. Secure the 5 mm safety eyes between rows 2 and 3 of the head, leaving five stitches of separation. Melt the posts of the safety eyes slightly with a lighter and press down with the base of the lighter to create a secure, flat backing. Pack the body firmly with fiberfill.
- Closing the Head: Switch to dark brown yarn for the top of the head. Decrease down to 6 stitches, remembering to firmly stuff the head before closing. Use your tapestry needle to weave in and out of the remaining 6 front loops in a zigzag pattern, pulling tight to close.
Step 2: Craft and Style the Hair and Face Details
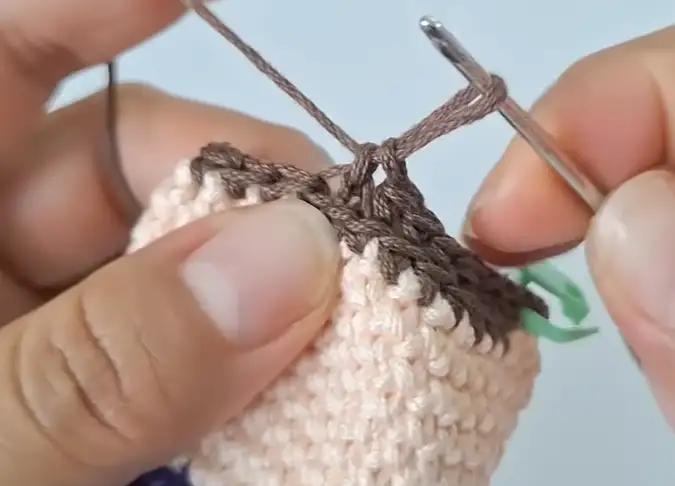
The hair is crocheted directly into the remaining front loops on the head, creating a seamless, natural-looking hairline.
- Crocheting the Hair Strands: Locate the front loops left from the transition to the dark brown rows, starting two stitches behind the right eye. Attach your dark brown yarn and chain 15. Work double crochet (dc) stitches back down the chain, starting in the fourth chain from your hook, to create a textured strand. Slip stitch into the second front loop on the head, skipping one loop in between, and repeat the process. Repeat until you have 10 strands ending two stitches before the left eye.
- Styling the Hair: Arrange the strands evenly around the face with pins to cover the back of the head. Apply silicone glue along the upper portion of the strands, leaving the tips free for realistic movement.
- Embroidering the Face: Split your black yarn to use three plies. Embroider a small, two-stitch-wide mouth one row below the eyes. Create diagonal eyebrows one row above the eyes. Finish the face by gently brushing a small amount of cosmetic blush onto her cheeks in circular motions.
Step 3: Construct the Arms and Wooden Broomstick
Simple components bring the witch to life, adding character through her miniature accessories.
- The Arms: To make the two arms, begin with a magic ring of 6 sc in skin-toned yarn. After two rounds, transition to black yarn for the cuffs. Finally, switch to purple yarn and work four more rounds of 6 sc. Rather than stuffing the arms with fiberfill, simply tuck the yarn tails inside to act as a lightweight stuffing. Flatten the open ends and slip stitch to finish, leaving a long tail for sewing.
- The Mini Broomstick: Wrap khaki yarn several times around the width of four fingers, then cut the bundle. Wrap a separate 30 cm strand of khaki yarn tightly around the bundle, approximately 1 cm below the top fold, to bind the bristles together. Trim one of the sharp ends off a wooden toothpick, insert the remaining pointed end deep into the yarn bundle, and secure it with a drop of silicone glue. Wrap the khaki yarn around the neck of the bristles and trim the bottom edges evenly.
Step 4: Crochet the Witch Hat and Final Assembly
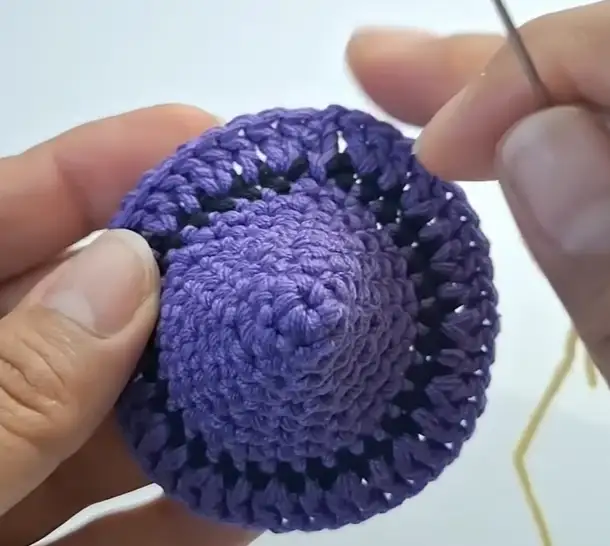
The final step is to create the iconic pointed hat and assemble all the elements.
- The Pointed Hat: Start with a magic ring of 6 sc in purple yarn. Alternate between rows of even stitches and increase rows to gradually flare the cone shape. For Row 10, switch to black yarn and work 30 sc to create the hatband. Switch back to purple and work a round of double crochet increases (alternating 1 dc and 1 dc increase) to form the wide brim. To finish the hat, embroider a square yellow buckle over the black band.
- Final Assembly: Sew the flattened tops of the arms to the sides of the body, aligning them with the outer edges of the eyes. Stuff the pointed hat lightly with fiberfill, apply silicone glue along the inner black band, and press it firmly onto the witch’s head with the yellow buckle centered. Finally, apply a drop of silicone glue to the inside of one hand, tuck the broomstick under her arm with the handle resting near her neck, and hold it in place until the glue dries.
Video Credits: Patoys
4. Crochet Skeleton Amigurumi Halloween Pattern
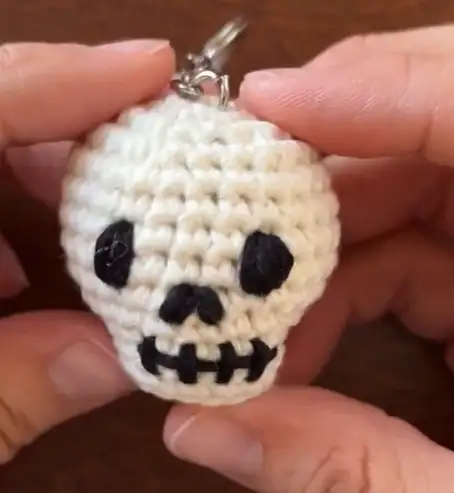
The Crochet Skeleton Amigurumi Halloween project is a beginner friendly pattern constructed in continuous rounds to create a spooky skull. Unlike flat crochet projects, this design is worked in three dimensions, using strategic increases to shape the cheeks and jaw of the skull. This tutorial is perfect for beginners looking to practice basic amigurumi techniques like working in rounds, placing stitch markers, and embroidering facial details.
Essential Materials
Before beginning, gather the following supplies:
- Crochet yarn: Standard amigurumi yarn in white or cream for the skull base, and black for the facial embroidery.
- Crochet hook: An appropriate hook size to match your chosen yarn.
- Stitch markers: The tutorial uses a simple piece of thread, but any standard stitch marker will work.
- Tools: A sewing needle for embroidering the facial features, a pair of scissors, and optional keychain attachments.
Step-by-Step Tutorial
Step 1: Build the Skull Base (Rounds 1 to 4)
The skull starts at the top, working in continuous rounds to establish the base shape. While the specific stitch patterns for the first three rounds are not detailed in the available video excerpts, Round 4 is completed with a total of 14 stitches. This base forms the crown of the skull before you begin the cheek increases. Make sure to keep your stitches tight to prevent any stuffing from showing through.
Step 2: Shape the Cheeks (Rounds 5 and 6)
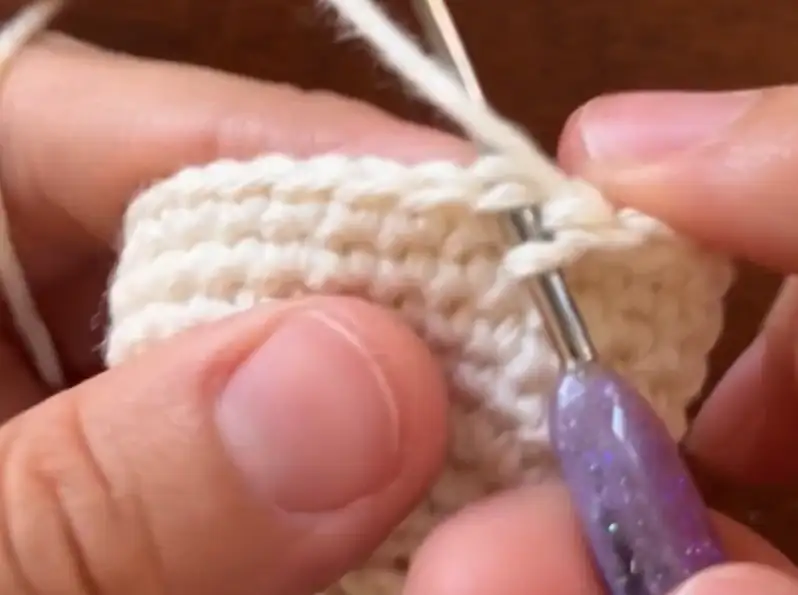
To give the skull its classic jawline, you will work a series of increases to widen the cheeks.
- Round 5: Work three increases (two single crochets into each of the next three stitches), then work eight single crochets. Place a stitch marker (such as a thread) at the last increase. Work another three increases to finish the round with 20 stitches.
- Round 6: Work a repeating pattern of one single crochet and one increase a total of three times. Next, work eight single crochets. To finish the round, work a pattern of one increase and one single crochet three times. This round will leave you with a total of 26 stitches.
Step 3: Crochet the Head Height (Rounds 7 to 11)
With the cheek shaping complete, you will now work even rounds to build the height of the head. From Round 7 through Round 11, work exactly 26 single crochets per round. This means for these five rounds, you will make one single crochet in each stitch from the previous round. These rounds create the vertical face section of the skull. Once you finish Round 11, you can remove your stitch markers because they are no longer needed.
Step 4: Embroider the Spooky Facial Features
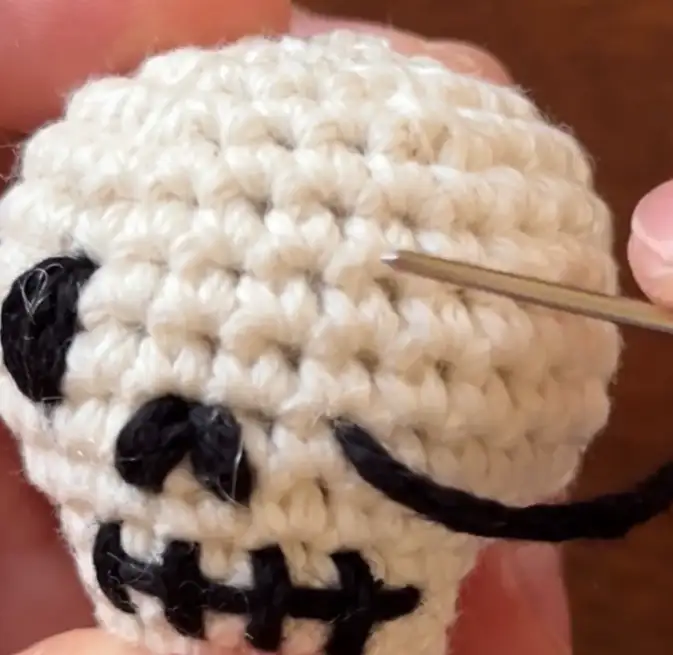
The final step is to bring your skull to life by embroidering the teeth, nose, and eyes.
- Teeth: Use your sewing needle and black yarn to embroider the teeth. Go up one or two rounds from the bottom of the skull, working the needle in and out of the stitches horizontally.
- Nose: Move your needle one stitch up from the teeth to the middle of the face to embroider the nose. Sew a small triangle shape and fill it in with multiple stitches to make it bold.
- Eyes: From the top of the nose, skip one stitch to the side and come out with your needle to make the first eye. Embroider the eye so it is one to two rows high, sewing a couple of times to make it bold. Repeat this process on the other side of the nose to complete your Halloween skull.
Video Credits: Creando Con Musa
Which Halloween Character Is Your Favorite?
Four spooky characters, four completely different skill sets to practice. Whether you’re drawn to Frankenstein’s clean limb joins, the pumpkin man’s continuous construction, the witch’s tiny styled details, or the skeleton’s simple shaping, there’s a pattern here that fits your mood this season.
Pick one to start, or challenge yourself to crochet the whole crew before Halloween night. Either way, you’ll end up with amigurumi that looks far more impressive than the stitch count suggests.