5 Kawaii Crochet Keychain Free Patterns You Need to Try
Keychains are the most underrated crochet project out there. They use up scraps, work up fast, and people genuinely lose their minds over them at markets. I have sold more tiny dinosaurs and jellyfish charms than any blanket or bag I have ever made.
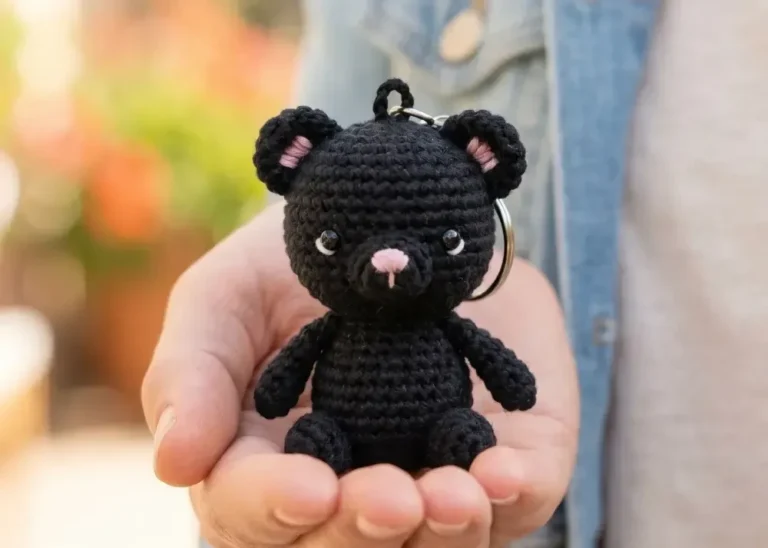
The kawaii style specifically hits differently because the proportions are just ridiculous in the best way. Big heads, tiny bodies, little safety eyes staring into your soul. These five patterns cover everything from no-sew ocean creatures to a duck so round it barely looks real.
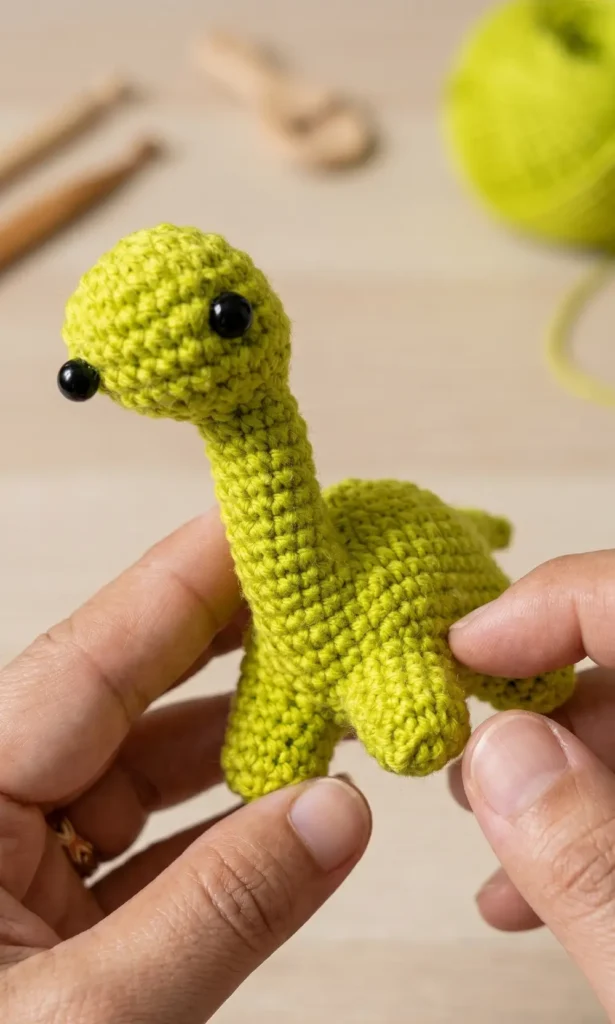
1. Crochet Dinosaur Keychain pattern
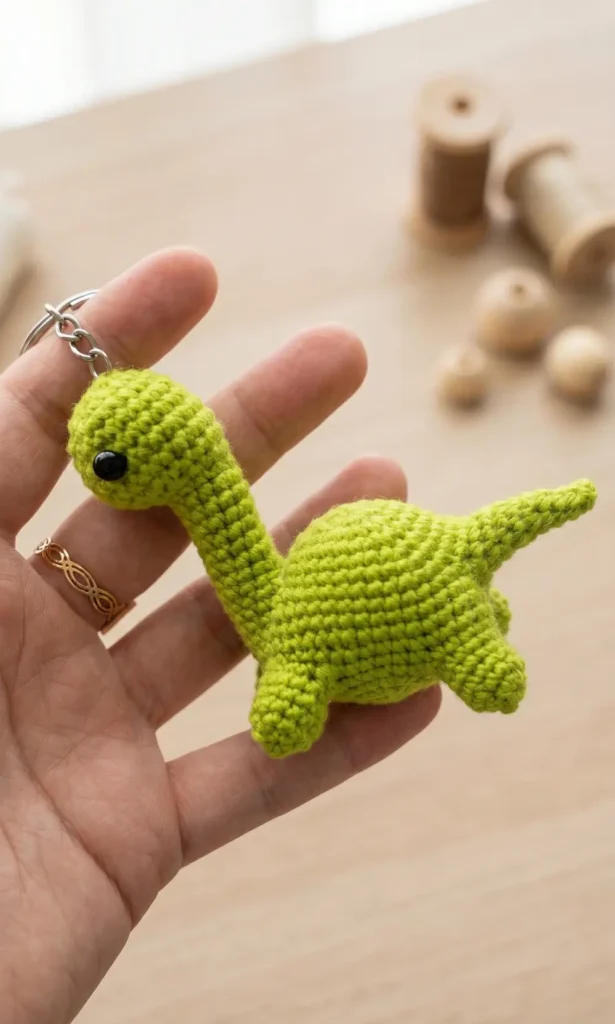
This beginner friendly project allows you to create a mini dinosaur keychain that is perfect for bags, charms, or handmade gifts. The tutorial provides a step by step guide to crafting the head, neck, and body of the dinosaur.
Materials Required
To begin this project, you will need the following supplies:
- Crochet Hook: 2.5mm size.
- Yarn: 3 ply wool in your chosen colour.
- Safety Eyes: To be assembled during the head construction.
- Stitch Markers: Used to indicate eye placement and round starts.
Creating the Head
The dinosaur is started from the head using a magic ring.
- Round 1: Create a magic ring, work one chain, and then make 6 single stitches into the ring. Join with a slip stitch.
- Round 2: Chain one and increase every stitch around. This will give you a total of 12 single stitches.
- Round 3: Chain one and follow a pattern of 2 single stitches in the first space followed by 1 single stitch in the next. Repeat this around to reach 18 single stitches.
- Round 4: Chain one and work 2 single stitches in the first space, then 1 single stitch in each of the next two spaces. Repeat this to reach 24 single stitches.
- Round 5: Work 8 single stitches, then place a stitch marker for the first eye. Work 1 single stitch, place a second marker for the other eye, and then work another 8 single stitches to finish the round.
- Round 6 to 8: Work 24 single stitches in each round without any increases.
- Assembly: Remove the markers and assemble the eyes into the marked positions.
- Round 9: Work 6 single stitches, perform 6 decreases, and then work another 6 single stitches.
- Round 10: Work 3 single stitches, perform 6 decreases, and finish with 3 single stitches.
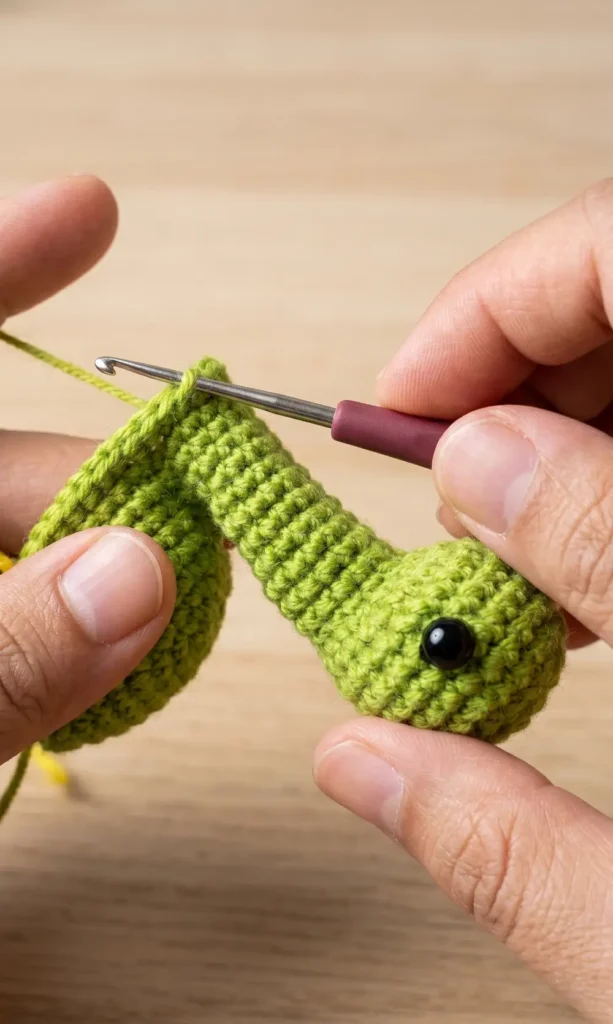
Constructing the Neck
The neck consists of 12 single stitches and is worked over several rounds to give the dinosaur height.
- Rounds 11 to 19: Work 12 single stitches for each round. You will complete a total of 10 rounds for the neck in this manner. Once finished, cut the thread to prepare for the body.
Building the Body
The body is started separately and then joined to the neck.
- Round 1: Start with a magic ring and work 6 single stitches.
- Round 2: Increase every stitch to reach 12 single stitches.
- Round 3: Follow a pattern of 2 single stitches in one space and 1 in the next to reach 18 stitches.
- Round 4: Work 2 single stitches in one space and 1 in each of the next two spaces to reach 24 stitches.
- Round 5: Work 2 single stitches in one space followed by 1 single stitch in each of the next five spaces. This results in a total of 28 single stitches.
Joining and Final Body Shaping
After completing the initial body rounds, you must join it to the neck.
- The Join: Use a slip stitch to join the body to the neck.
- Body Round 1: Work 8 single stitches, then 1 increase. Work 4 single stitches, 1 increase, 4 more single stitches, and another increase. Follow this with 8 single stitches. When you reach the neck, work 11 single stitches around it.
- Body Round 2: Work 8 single stitches followed by an increase. Work 5 single stitches, 1 increase, 5 more single stitches, and another increase. Finish with 20 single stitches to reach a total of 44 stitches.
- Body Round 3: Work 44 single stitches all the way around.
- Body Round 4 (Tail Hole): Work 13 single stitches, then create 6 chains. Skip 6 stitches on the main body to create a hole for the tail, and continue working single stitches for the rest of the round.
- Body Round 5 and 6: Continue working single stitches in every stitch, including over the chains created for the tail hole, maintaining a count of 44 stitches.
- Body Round 7: Work 17 single stitches and continue the pattern around the body.
Video Credits: Easy Crochet
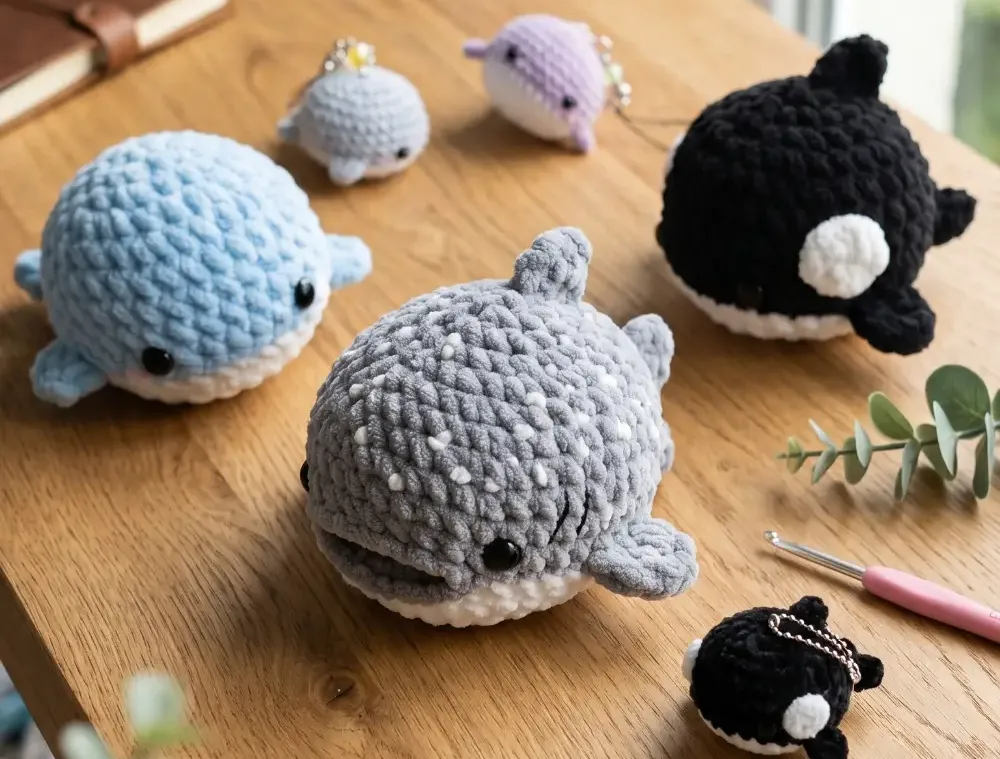
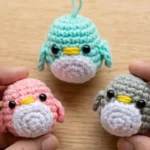
2. Crochet a Whale, Shark and Orca Keychain Plushie
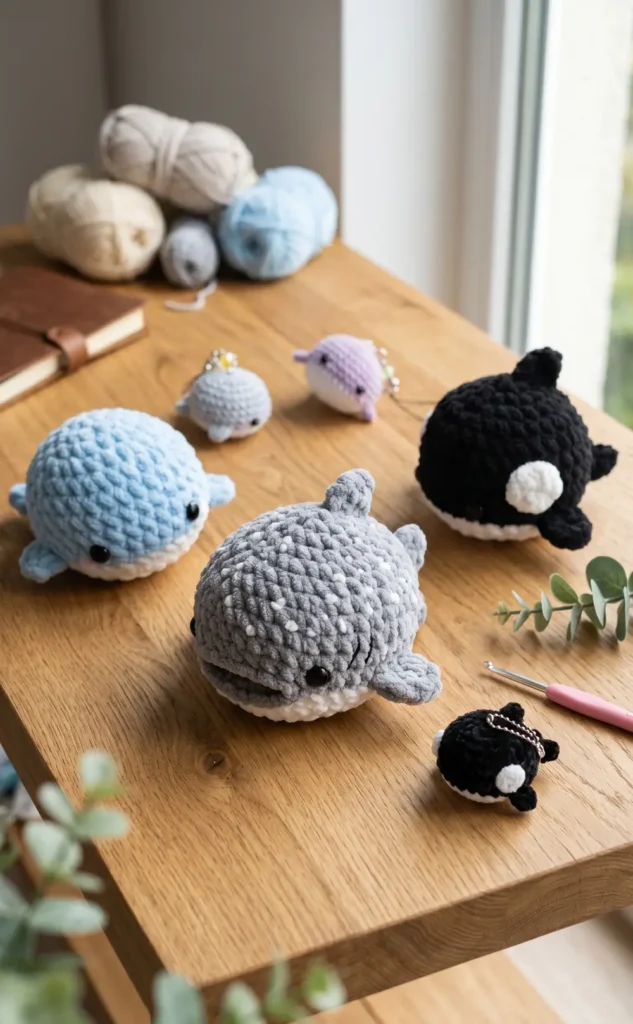
This versatile pattern allows you to create three different aquatic friends: a whale, a shark, or an orca, using the same base design. By simply changing your yarn colors and adding specific fins or tails, you can customize your plushie into your favorite sea creature.
Materials Needed
To begin your aquatic buddy project, gather the following supplies:
- Yarn: Use blue for a whale, gray for a shark, and black for an orca. You will also need white yarn for the belly and specific details like eye patches.
- Crochet Hook: Choose a size appropriate for your chosen yarn.
- Safety Eyes: These will be attached during the assembly of the body.
- Stuffing: To give your plushie its shape.
- Stitch Marker: Essential for keeping track of the start of each round.
- Needle: For sewing the final pieces together and embroidering details.
Creating the Base Body
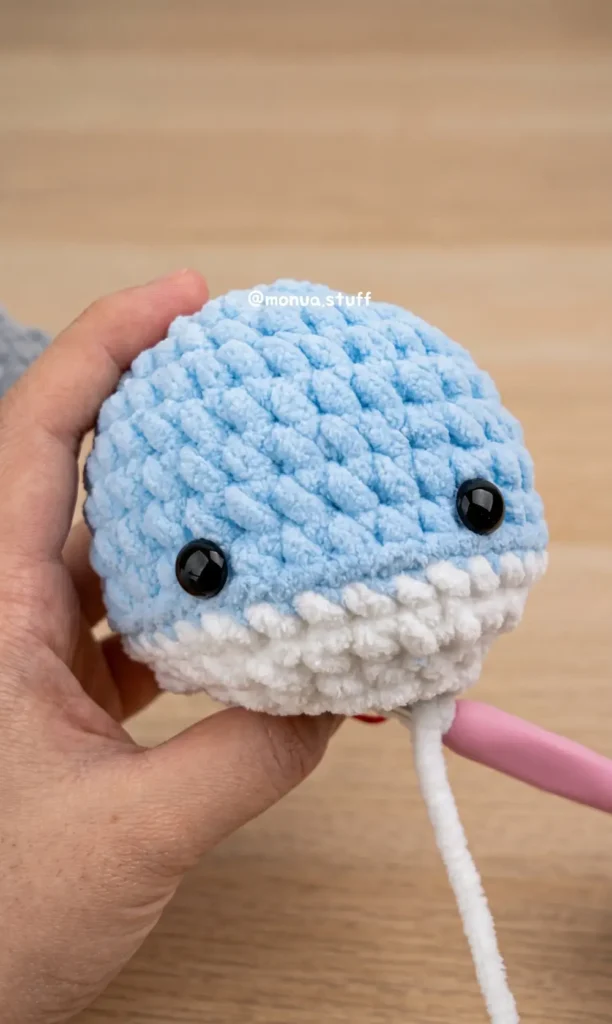

The body is the same for all three animals, starting with your primary color (blue, gray, or black).
- Round 1: Create a magic ring and crochet 6 single crochets (sc) into it. Pull the tail to close the ring (Total: 6 stitches).
- Round 2: Make 6 increases (inc) by crocheting 2 sc into each stitch (Total: 12 stitches).
- Round 3: (1 sc, 1 inc) repeated 6 times (Total: 18 stitches).
- Round 4: (1 sc, 1 inc, 1 sc) repeated 6 times (Total: 24 stitches).
- Round 5: (3 sc, 1 inc) repeated 6 times (Total: 30 stitches).
- Rounds 6 to 9: Sc in every stitch (Total: 30 stitches).
- Round 10: Switch to white yarn. Working in the back loops only (BLO), sc in every stitch (Total: 30 stitches).
- Round 11: (3 sc, 1 invisible decrease) repeated 6 times. To make an invisible decrease, insert your hook into the front loops of the next two stitches, yarn under, and pull through both front loops, then yarn over and pull through both loops on the hook (Total: 24 stitches).
- Round 12: (1 sc, 1 decrease, 1 sc) repeated 6 times (Total: 18 stitches).
- Finishing the Body: Attach safety eyes on Round 9, roughly 5 stitches apart. Stuff the body firmly.
- Round 13: (1 sc, 1 decrease) repeated 6 times (Total: 12 stitches).
- Fastening Off: Cut a medium tail, fasten off, and use a needle to sew the remaining hole closed.
Adding Fins and Tails

Each animal requires different attachments to give it its unique look.
Side Fins
For all three creatures, create two side fins by making a magic ring and crocheting 6 sc into it. Leave a tail for sewing.
The Tail
- Whale and Orca: Using blue or black yarn, create a slip knot and chain 4. In the third chain from the hook, make a double crochet (dc). Sc in the next chain. Repeat these steps to make the other side of the tail and sc into the first chain to connect the two parts.
- Shark: The shark uses a different tail orientation during assembly rather than a different pattern.
Dorsal Fin (Shark and Orca)
Using gray or black yarn, create a slip knot and chain 3. Sc in the second chain from the hook, then make a dc in the next chain. Chain 1 and leave a tail for sewing.
Orca Eye Patches
Using white yarn, create a magic ring and crochet 6 sc into it. Make a slip stitch to close the circle and leave a tail. Repeat for a second patch.
Final Assembly and Details
Once all your pieces are crocheted, it is time to sew them together to bring your buddy to life.
- Tails: For the whale and orca, sew the tail horizontally at the back between Round 9 and Round 10. For the shark, sew the tail vertically over Round 8 and Round 9.
- Dorsal Fin: For the shark and orca, sew the dorsal fin onto the top of the body, aligned vertically with the tail, spanning from Round 1 to Round 3.
- Orca Details: Sew the white eye patches onto Rounds 7 and 8, one stitch away from each eye.
- Shark Details: Embroider shark gills on Round 7 and Round 8, one stitch apart from the eyes.
- Finishing Touches: Sew the side fins onto the sides of the body. You can also embroider small blush marks for an extra cute look.
Video Credits: Monua DIY
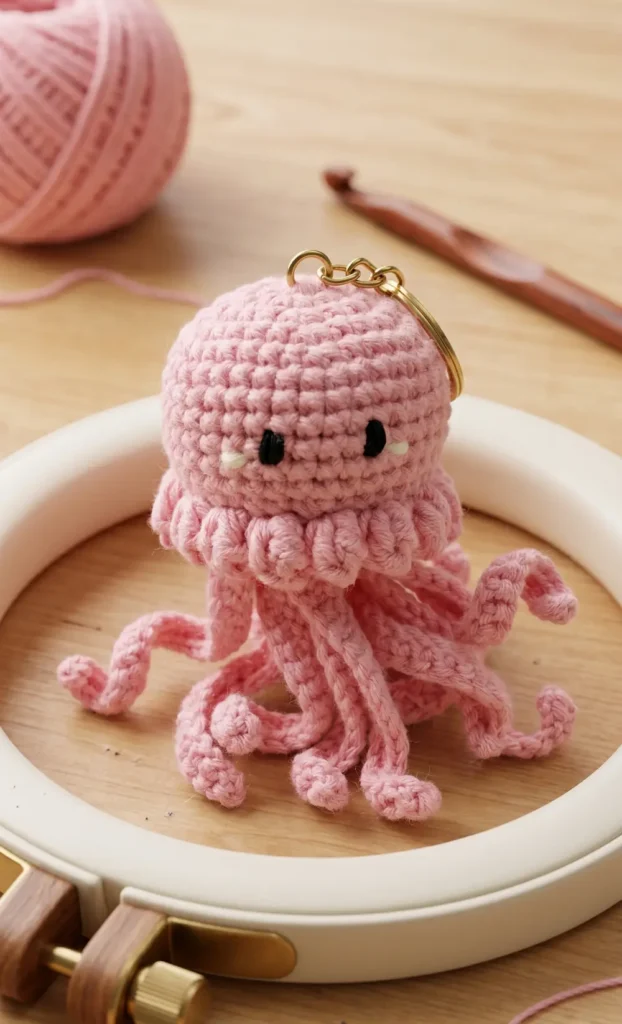
3. Crochet No-Sew Jellyfish and Octopus Keychain Plushie
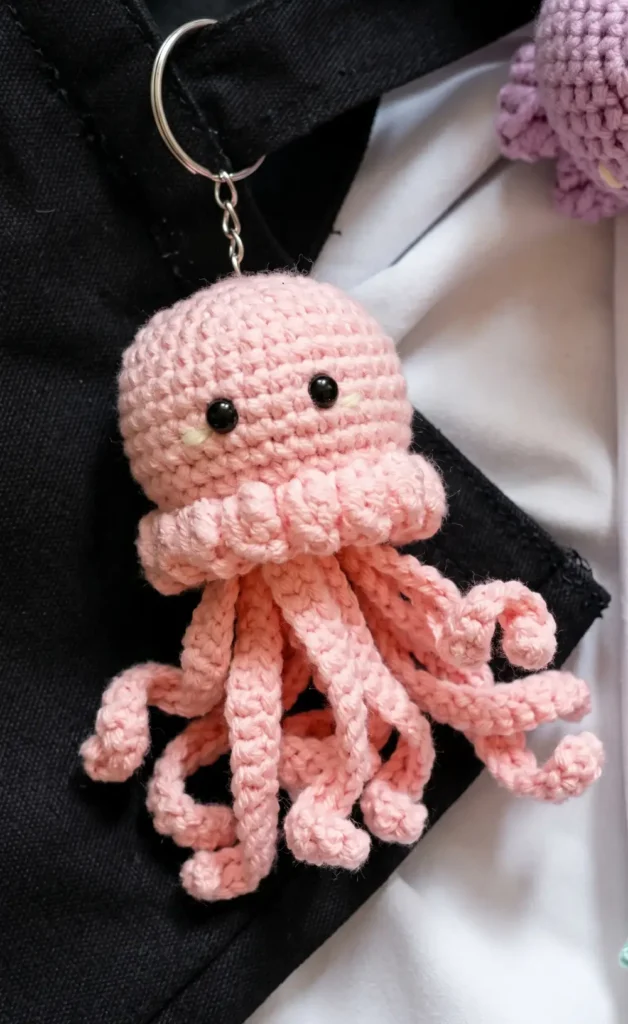
Creating these adorable ocean themed bag charms is a fun project that requires no sewing between the body and the tentacles. By using specific stitching techniques like working in the back loops, you can create a seamless transition from the head to the decorative ruffles and limbs.
Materials and Tools
To get started on these plushies, you will need the following supplies:
- Yarn: Any kind of yarn you prefer.
- Crochet Hook: A hook size appropriate for your chosen yarn.
- Stuffing: Fiber filling or even yarn scraps to give the plushie its shape.
- Stitch Marker: Essential for keeping track of your rounds.
- Eyes: Amigurumi safety eyes or embroidery thread to sew them on.
- Keychain Hardware: A keychain ring or strap to finish the project.
Building the Base Body (Rounds 1 to 12)
Both the jellyfish and the octopus start with the same head structure. Begin with a magic ring and crochet six single crochets into it for round one. For round two, perform an increase in every stitch to reach 12 stitches.
The expansion continues as follows:
- Round 3: One single crochet followed by an increase, repeated six times for 18 stitches.
- Round 4: Two single crochets and an increase, repeated for 24 stitches.
- Round 5: Three single crochets and an increase, repeated for 30 stitches.
- Round 6: Four single crochets and an increase, repeated for a total of 36 stitches.
- Rounds 7 to 12: Crochet one single crochet in every stitch for these six rounds to build the height of the head.
Shaping and Closing (Back Loop Only)
Starting from round 13, you will begin decreasing to close the body. Round 13 consists of four single crochets followed by a decrease, repeated six times to reach 30 stitches.
From round 14 onwards, you must work in the back loop only (BLO). This is crucial because it leaves the front loops available for attaching the tentacles and ruffles later without sewing.
- Round 14: Three single crochets and a decrease in BLO for 24 stitches.
- Round 15: Two single crochets and a decrease in BLO for 18 stitches.
- Round 16: One single crochet and a decrease in BLO for 12 stitches.
At this stage, fill the project firmly with fiber filling. It is important to fill it a lot so the plushie maintains a good shape and does not look wonky. Finally, for round 17, perform six decreases in BLO to close the base.
Crafting the Jellyfish Details
If you are making a jellyfish, you will work into the spiral of front loops left exposed from the previous rounds.
The Tentacles: Start by making 21 chains. Skip the first chain and make 20 single crochets back down the chain. Secure this to the body with a slip stitch in the front loop, then make three more slip stitches along the front loops before starting the next tentacle. Repeat this until you have eight to ten tentacles.
The Ruffle: Move to the last round of front loops to create the decorative ruffle using a popcorn or bubble stitch. Chain two, then make four double crochets in the same front loop. Remove your hook and insert it into the first double crochet, grabbing the active loop and pulling it through. Chain one, skip one stitch, and repeat this pattern around the circumference.
Crafting the Octopus Details
To make the octopus, follow the same body rounds (1 to 17). After closing the base, slip stitch up through the rounds until you reach the first round of front loops.
The octopus legs are made using a larger bubble stitch pattern:
- Make three double crochets in one stitch.
- Make two double crochets in the next stitch.
- Make three more double crochets in the third stitch.
- Join them into a bubble by slip stitching through the very first double crochet made in that sequence.
Repeat this pattern seven times, skipping one stitch between each leg. For the final two stitches, make four double crochets in each and close them with a reverse slip stitch to finish the round.
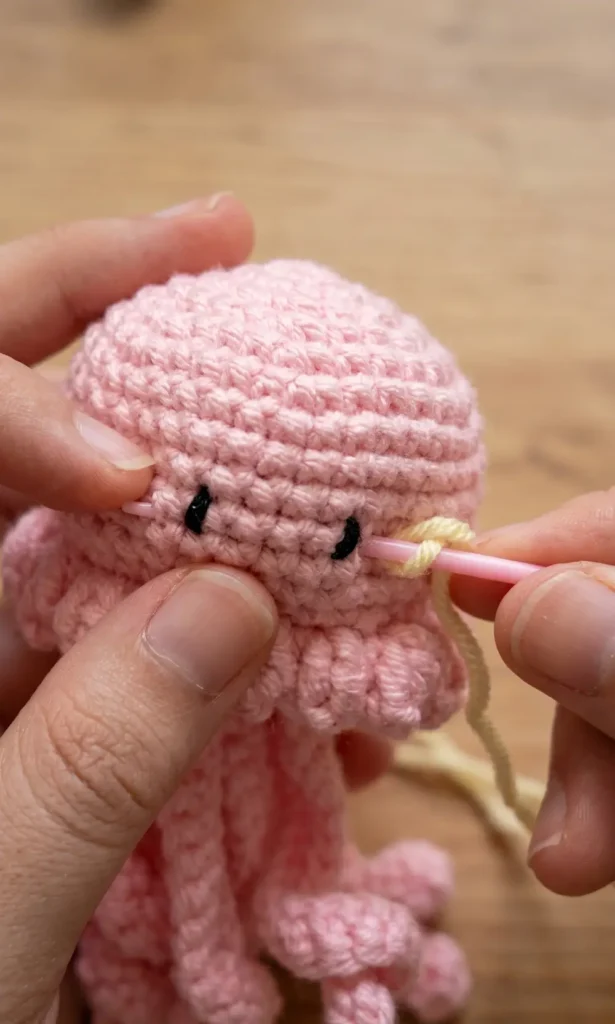
Final Touches and Assembly
Once the crochet work is done, weave in any remaining yarn tails by hiding them inside the main body. If you are using amigurumi safety eyes, place them on the fourth round above the ruffle, spaced about three stitches apart. You can also embroider the eyes and add a tiny horizontal line next to them for a blush effect. To complete your charm, attach a keychain ring or strap to the top of the head.
Crochet Credits: ETM’s Studio
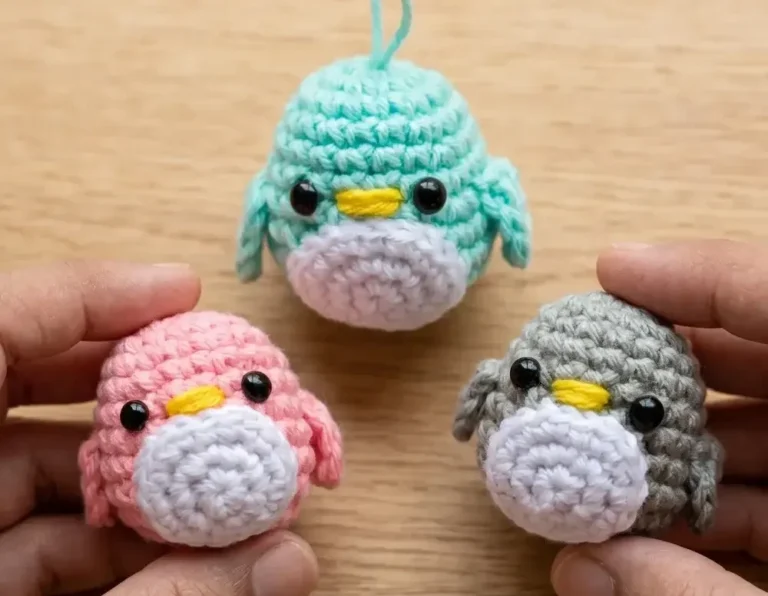
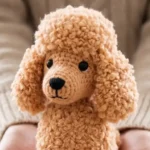
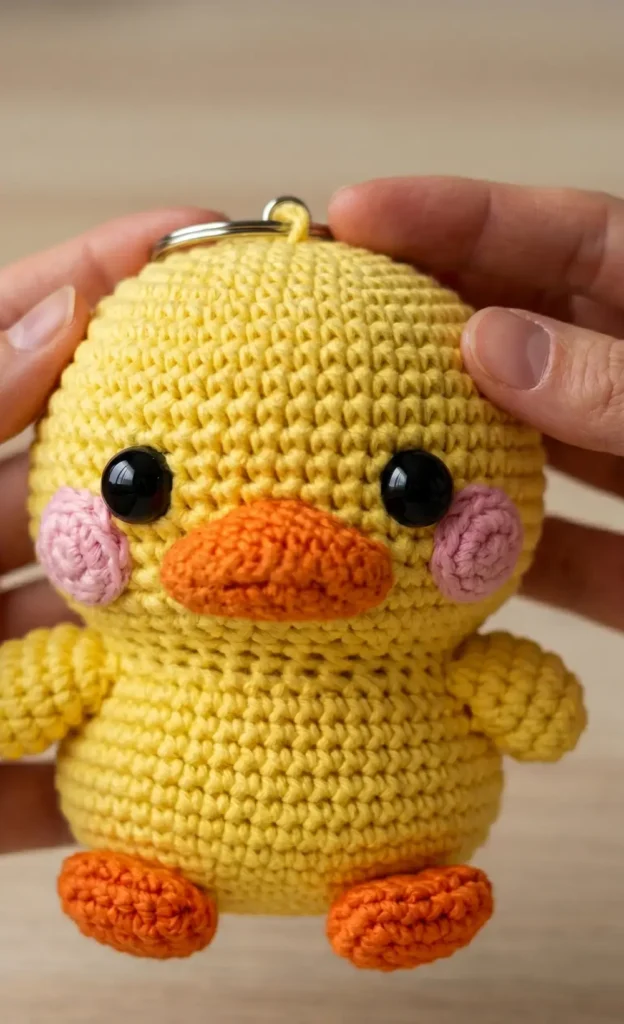
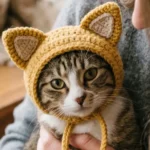
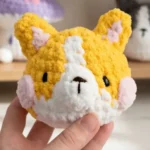
4. Crochet Kawaii Duck Keychain Plushie

Creating an adorable amigurumi accessory is a rewarding way to transform simple yarn into a piece full of personality. This kawaii duck keychain is approximately 8 cm tall and serves as a perfect handmade gift or a cheerful companion for your daily routine.
Essential Materials and Abbreviations
To begin this project, you will need the following supplies:
- Yarn: Acrylic or cotton amigurumi yarn in yellow (for the body, head, and wings) and orange (for the beak and feet).
- Crochet Hook: 2.5 mm or a size compatible with your chosen yarn.
- Eyes: 6 mm safety eyes.
- Filling: Synthetic fiber stuffing.
- Tools: Scissors, a yarn needle, and a keychain ring.
Abbreviations Used:

- pb: Single crochet (punto bajo).
- AUM: Increase (2 single crochets in the same stitch).
- DISM: Decrease (2 single crochets together).
- r: Fasten off while leaving a long tail for sewing.
Step by Step Pattern Instructions
Body and Head (Yellow Yarn)
- R1: 6 pb in a magic ring (6).
- R2: 2 pb in each stitch (12).
- R3: [1 AUM, 1 pb] repeated 6 times (18).
- V4 to V5: pb in each stitch (18).
- V6: [1 DISM, 4 pb] repeated 3 times (15).
- V7: pb in each stitch (15).
- V8: [1 DISM, 3 pb] repeated 3 times (12). Add a small amount of stuffing to the body here.
- V9: pb in each stitch (12).
- V10: [1 DISM, 2 pb] repeated 3 times (9).
- V11: AUM in each stitch (18).
- V12: [1 AUM, 2 pb] repeated 6 times (24).
- V13 to V16: pb in each stitch (24). At round 14, insert the 6 mm safety eyes, leaving approximately five stitches between them.
- V17: [1 DISM, 2 pb] repeated 6 times (18). Add more stuffing to firmly shape the head.
- V18: [1 DISM, 1 pb] repeated 6 times (12).
- V19: 6 DISM (6). Fasten off, leaving a long thread for the keychain attachment.
The Beak (Orange Yarn)
- V1: 6 pb in a magic ring (6).
- V2: [1 pb, 1 AUM] repeated 3 times (9).
- V3 to V4: pb in each stitch (9).
- Finishing: Fasten off and leave a long tail for assembly.
Wings (Make Two in Yellow Yarn)
- V1: 4 pb in a magic ring (4).
- V2: [1 AUM, 1 pb] repeated 2 times (6).
- V3 to V5: 1 pb in each stitch (6).
- Finishing: Fasten off, leaving a margin for sewing.
Feet (Make Two in Orange Yarn)
- V1: 6 pb in a magic ring (6).
- V2 to V4: 1 pb in each stitch (6).
- V5: pb while flattening the piece (approximating 2 pb across) to close it.
- Finishing: Fasten off and leave a long tail.
Assembly and Finishing Touches
To complete your duck, follow these construction steps:
- Beak: Center the beak on the face, positioned just below the safety eyes.
- Wings: Sew the wings to the sides of the body at the midpoint, angling them slightly outward to simulate a flying posture.
- Feet: Attach the feet to the lower front part of the body, aligning them with the base.
- Details: You may optionally embroider small eyebrows or rosy cheeks using fine red or pink thread.
- Final Step: Use a yarn needle to hide any remaining threads and insert the keychain loop through the top of the head using the tail left from round 19.
Remember to stuff the piece firmly so it maintains its shape, but avoid overfilling to prevent deforming the duck. Once finished, you will have a handmade work of art ready to decorate your bag or backpack.
Video Credits: Patrones de amigurumi gratis
5. Crochet mini chicken Keychain Plushie
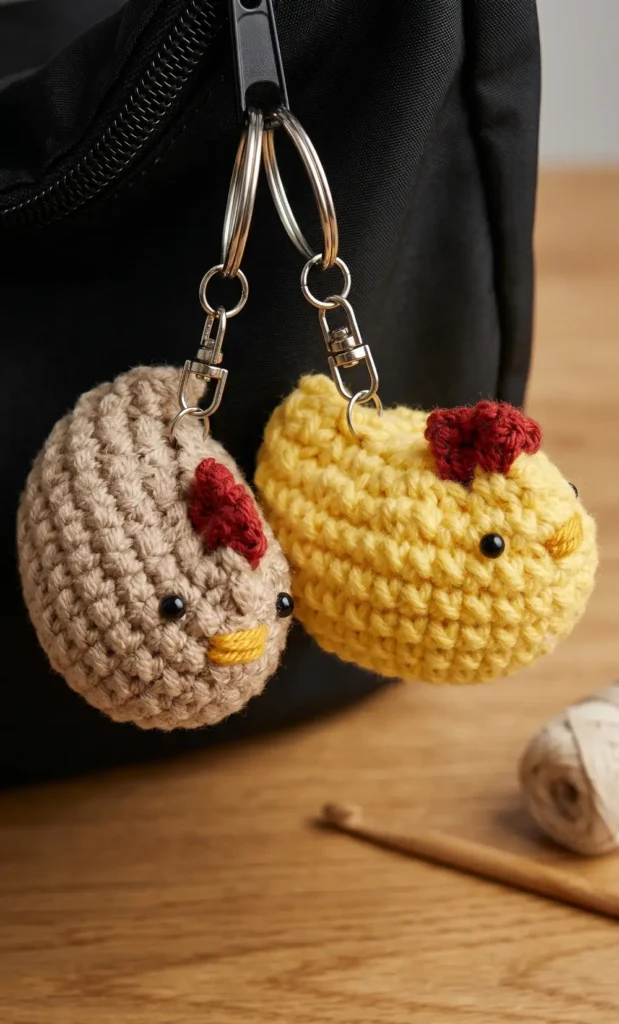
This easy amigurumi project is perfect for crochet markets or as a thoughtful handmade gift. The tutorial provides a simple way to create a tiny chicken that can be used as a charming keychain.
Materials Needed
Before starting, gather the following essential materials from the tutorial:
- Yarn in your chosen colors.
- 4 mm plastic eyes.
- Stuffing material.
- A crochet hook.
- A needle for sewing and weaving in ends.
Step-by-Step Crochet Instructions
The project begins with the main body of the chicken, worked in rounds.
- Round 1: Start with a magic ring and make eight single crochet stitches into the ring. Pull the yarn to close the ring once finished.
- Round 2: Make an increase in each stitch by placing two single crochet stitches into every stitch from the previous round.
- Round 3: Follow a pattern of one single crochet followed by one increase for the entire round.
- Round 4: Follow a pattern of two single crochet stitches and then an increase.
- Rounds 5 to 9: For these rounds, simply make one single crochet for each stitch.
- Round 10: Begin decreasing the shape by following a pattern of two single crochet stitches and one decrease. To make a decrease, insert the hook into the front loop of the next two stitches, yarn over, and pull through.
- Round 11: For the final round, follow a pattern of one single crochet and one decrease.
Assembly and Stuffing

Once the rounds are complete, you can begin assembling the features.
- Adding Eyes and Stuffing: Add stuffing to the body. If you are using safety eyes, insert the 4 mm plastic eyes between round 9 and round 10.
- Closing the Body: Cut the yarn, leaving a long tail for sewing. Use the tail to sew the bottom hole shut and secure the yarn.
Adding the Comb and Details
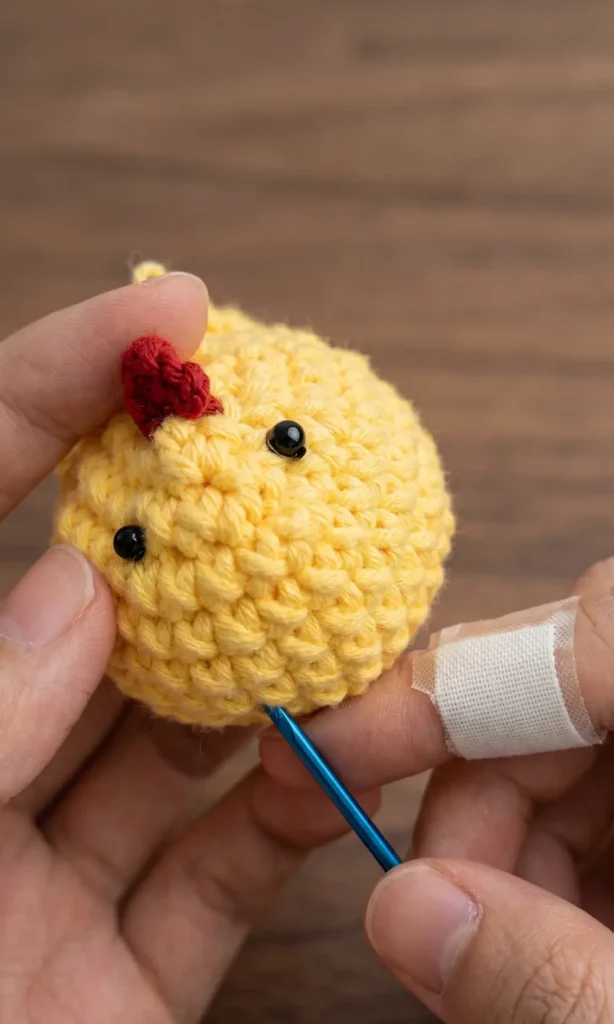

The final touches give the chicken its personality.
- The Comb: Start with a slip knot and insert the yarn into the second hole from the left side of the top. Chain two, then make a half double crochet in the same stitch. Chain two again and make a slip stitch into that same stitch. Move to the next stitch and repeat the sequence: chain two, half double crochet, chain two, and a slip stitch.
- The Mouth: Add the final detail by stitching a small mouth onto the face.
After weaving in any remaining ends, your mini chicken keychain is complete.
Video Credits: from littlespot
Ready To Crochet Something Cute?
Five patterns, endless color combos, and zero excuses not to start one tonight. Keychains are my favorite quick project because you can finish one in a single sitting and actually feel accomplished.
Pick the one that jumped out at you first. That instinct is usually right.