5 Halloween Crochet Clothing Patterns for a Festive Look
Halloween does not have to mean a costume you will only wear once. With the right hook and a little imagination, your closet can turn spooky this October. Crochet gives you the power to wear the season instead of just decorating for it.
These five patterns prove that handmade Halloween pieces can be just as wearable as they are festive. From a glow-in-the-dark ghost sweater to a princess cloak fit for a fairytale villain, each design brings its own personality to your yarn stash. Grab your hook and let’s get spooky.
1. Halloween Ghost Crochet Sweater Full Pattern
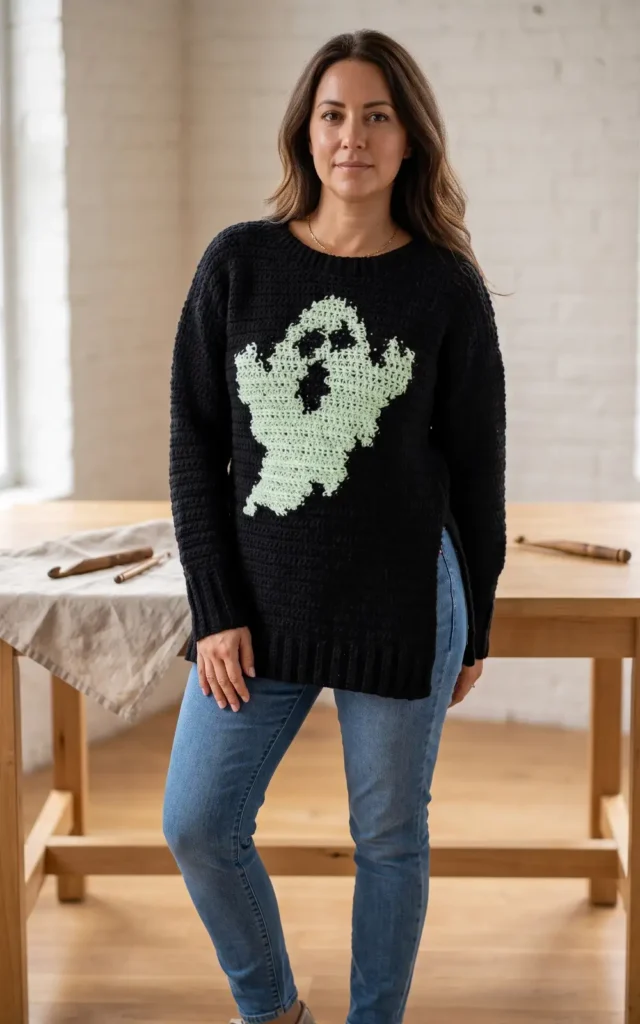
To create this spooky and glowing garment, you will need Red Heart Super Saver yarn in black and Hombre glow-in-the-dark yarn. The project requires a 5.5 mm crochet hook, stitch markers, a tapestry needle, and a pair of scissors. This pattern is beginner friendly and can be adjusted to fit all sizes by changing the initial chain counts.
Step 1: Crocheting the Body Panels
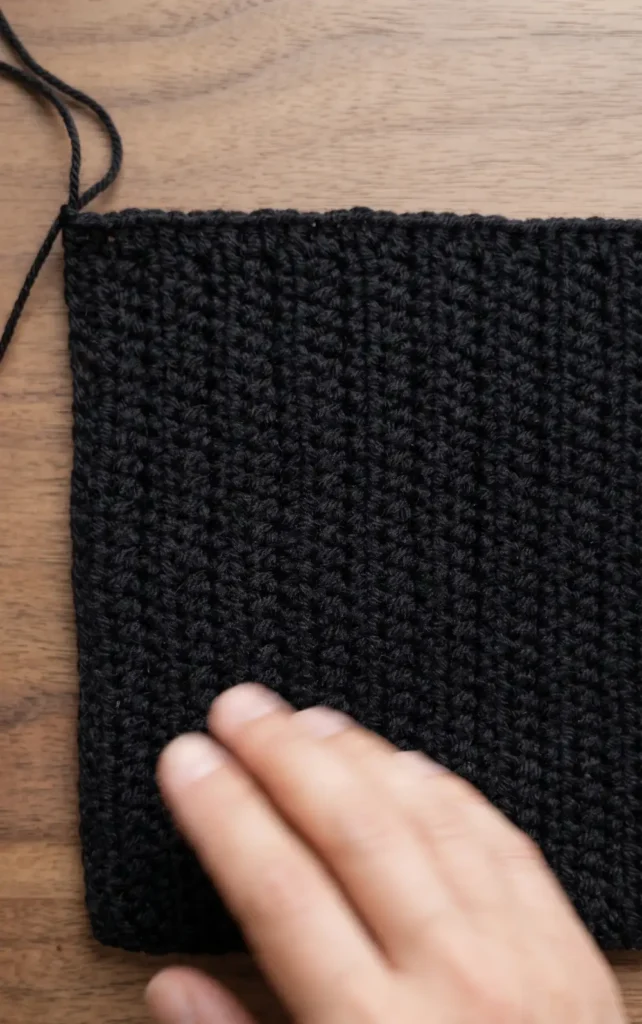
The back panel of the sweater is worked from the top down, starting with a chain that matches your chest width, such as 54 chains for a size small. You will work rows of half double crochet (HDC) stitches until the panel reaches your waist.
After completing the main body of the back panel, you will add a 20-chain ribbing to the bottom, which creates a stylish slit at the side. The front panel is worked in the opposite direction, starting from the bottom ribbing and working upwards using the same HDC technique.
Step 2: Creating the Glow-in-the-Dark Ghost
The highlight of this sweater is the ghost design, which is incorporated into the front panel using glow-in-the-dark yarn. To achieve a clean look, you should use the float method to carry the yarn across the back of your work, picking it up every few stitches to keep it neat.
When working on the ghost pattern, use the back loops only on the right side and the front loops only on the wrong side to make the design pop. Always change your yarn colour on the final pull through of the stitch immediately before the colour change.
Step 3: Crafting the Sleeves and Cuffs
The sleeves are worked to the length of your arm, minus approximately 14 cm for the cuffs. You will use HDC stitches for the main sleeve body until it reaches your preferred arm width.
Once the main sleeve is finished, you will work single crochet stitches into the row posts to start the cuff. The cuffs are created using single crochet back loop stitches for 20 rows, which provides a ribbed texture and a narrower fit at the wrist.
Step 4: Final Assembly and Finishing
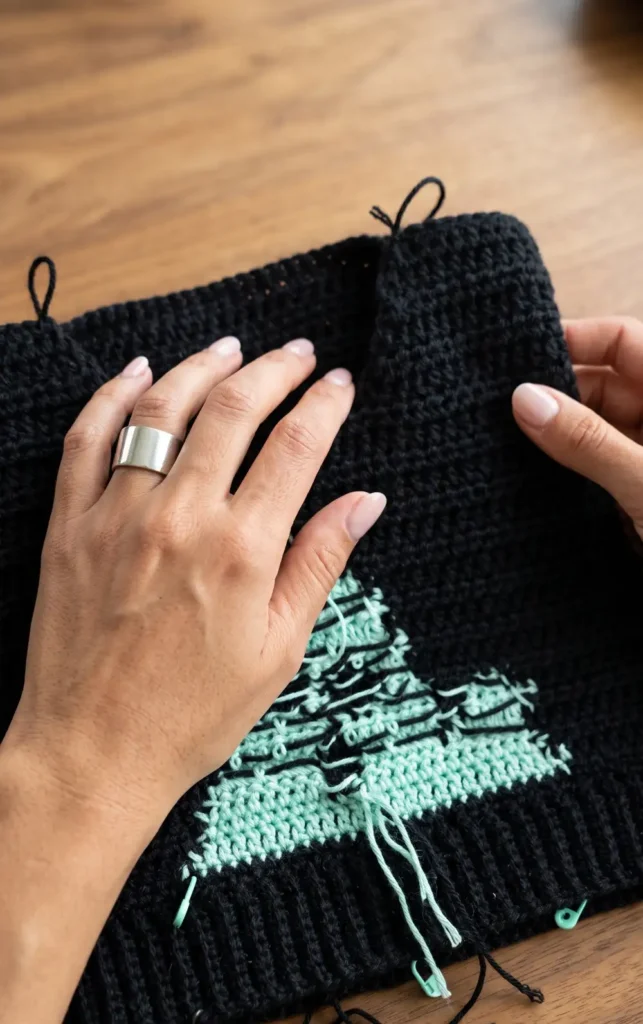
To assemble the sweater, place the body panels with the wrong sides facing outwards and secure them with stitch markers at the shoulders and sides. Join these pieces using single crochet stitches through both layers. Next, fold the sleeves and join them along the seam before inserting them into the armholes to be crocheted in the round.
The final touch involves working three rows of single crochet stitches around the neckline to provide a clean, finished edge. Once complete, weave in all loose ends and expose the sweater to light to activate the glow.
Video Credits: TheKnottyLace
2. Spider Web Top Crochet Pattern
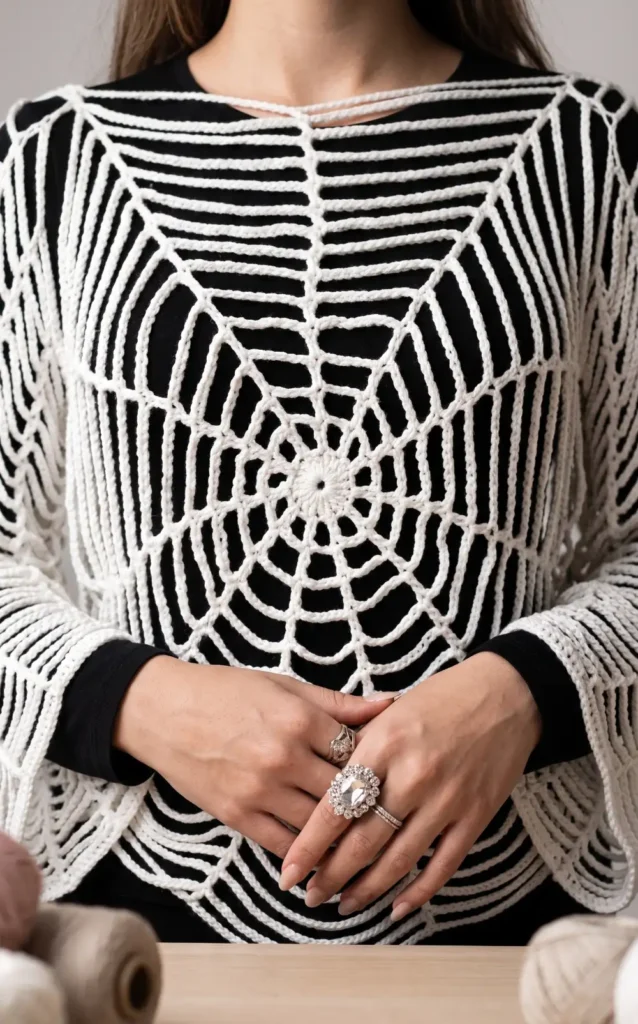
This trendy and customisable spider-web top is created by crocheting two symmetrical circular panels and joining them to form a flowy, lightweight garment.
To achieve the best results, it is recommended to use a thin, flimsy yarn like Alise Golden Cotton and a size 3 crochet hook,. You will also need stitch markers to keep track of your rows and help with assembly.
Step 1: Constructing the Circular Web Panels
The foundation of the top consists of two identical circular webs. Start by creating a magic circle. In the first row, crochet 12 sets of double crochets and chain ones into the circle, then slip stitch to close. For every subsequent row, you will increase the number of chains between each double crochet by two.
For example, the second row uses three chains between double crochets, and the third row uses five,. Continue this pattern until you reach your desired measurement. A typical small or medium size requires approximately 16 rows, ending with about 33 chains in each space.
Step 2: Measuring and Mapping the Top
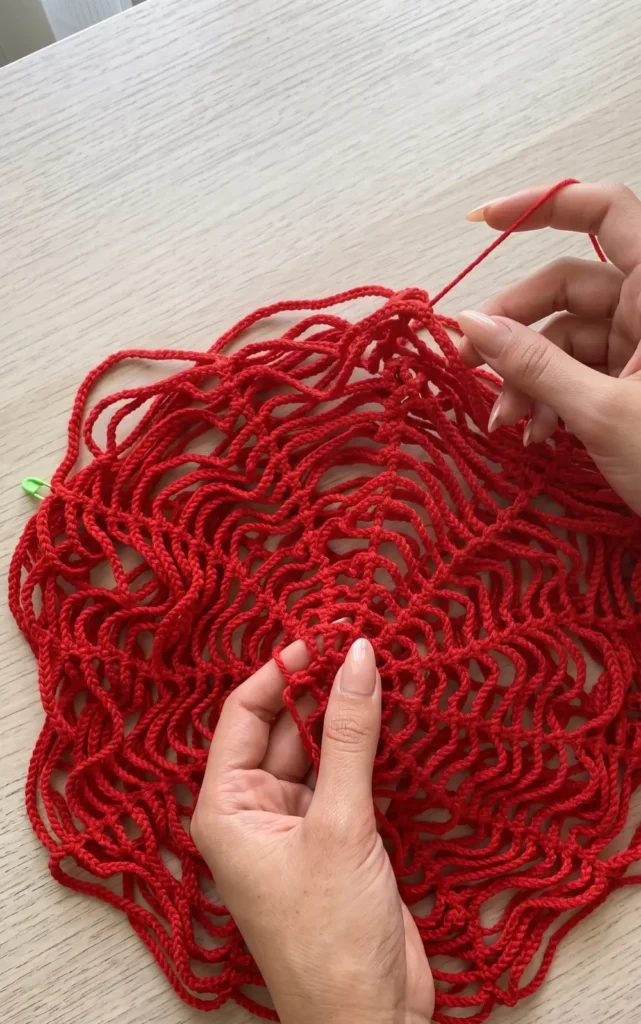
Once you have two finished panels, you must map out where the neck, arms, and sides will be located. Lay the panels together and use stitch markers to section off the openings based on your specific body measurements. A common layout involves leaving a two-column gap for the neck.
For the armholes, measure the circumference of your arm and mark the appropriate number of web columns (often one and a half columns for a loose fit). Ensure the bottom opening is wide enough to fit comfortably over your hips.
Step 3: Joining the Panels
With your sections marked, you can begin assembling the garment. It is often easier to stitch the sides together before moving on to the sleeves. Using a yarn needle and a length of matching yarn, align the chains of the front and back panels.
Join them using a zigzag formation, threading the needle back and forth through the corresponding chains until you reach the marker for the armhole. Remember to weave in your loose ends as you go to avoid confusion later.
Step 4: Adding the Customised Sleeves
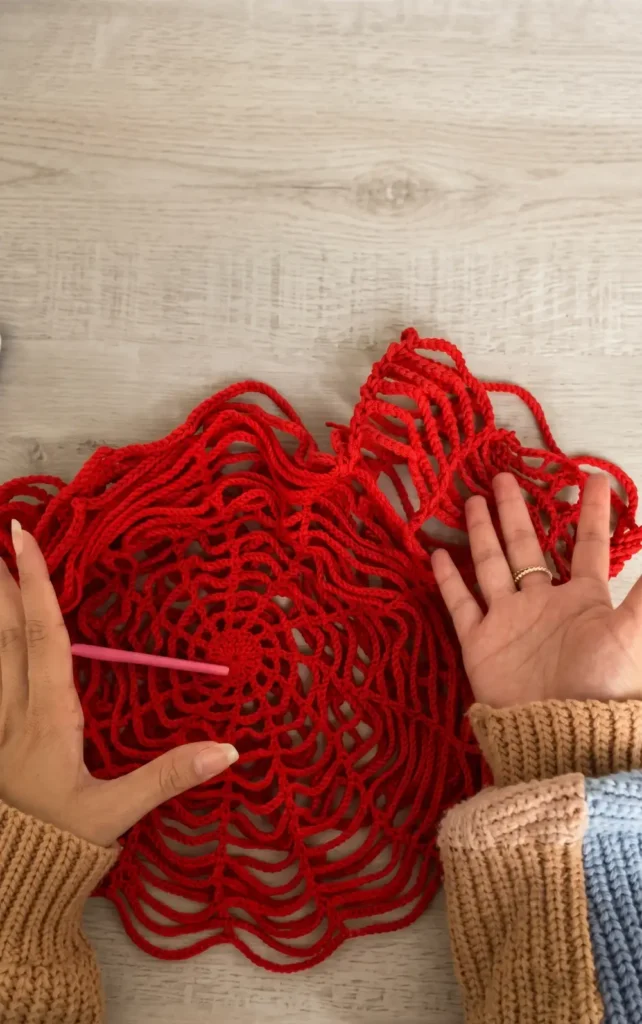
To create the sleeves, attach your yarn at the shoulder join near the neck hole. You will create new “hoops” by crocheting chains that are roughly half the length of your final panel row. If your last row had 33 chains, you would chain 16 and then double crochet into the existing web,. Repeat this process around the armhole to create six hoops that form the base of the sleeve.
You can continue adding rows of these hoops to reach your preferred length, whether that is a short sleeve or a full-length look. Periodically stretch the chains as you work to account for how the weight of the yarn will naturally pull the stitches down when worn.
Video Credits: threaderie by m.
3. Wednesday Crochet Vest Pattern
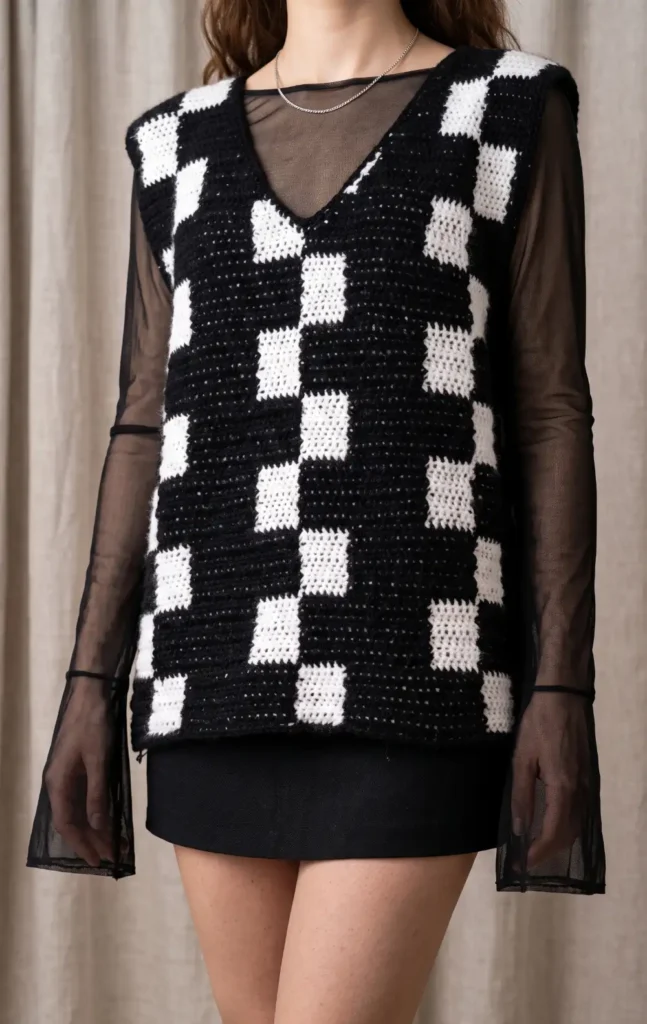
Inspired by the iconic vest worn in episode five of the Netflix series Wednesday, this crochet project uses a checkerboard pattern to recreate the look. While the original vest is black and white, this tutorial uses brown (Color A) and pink (Color B) to make the stitches easier to see during the process.
Materials and Preparation
To begin this project, you will need DK yarn in two colors. It is highly recommended to choose a yarn that is not heavy. You can check the label to ensure it provides approximately 280 to 320 meters per 100 grams, as a lighter yarn will make the large vest more comfortable to wear.
You will also need a 4mm crochet hook, scissors, a yarn needle, and two stitch markers, which are especially helpful for beginners to track the first stitch of every row.
Step 1: Foundation and Initial Rows
The process starts with a foundation chain that must be kept slightly loose. Once the chain is complete, work a half double crochet into the second chain from the hook and into each subsequent chain across.
As you work, it is important to mark your first stitch with a stitch marker to ensure an accurate stitch count. For row two, continue with Color A for a specific number of stitches before preparing to switch colors.
Step 2: Creating the Checkerboard Pattern
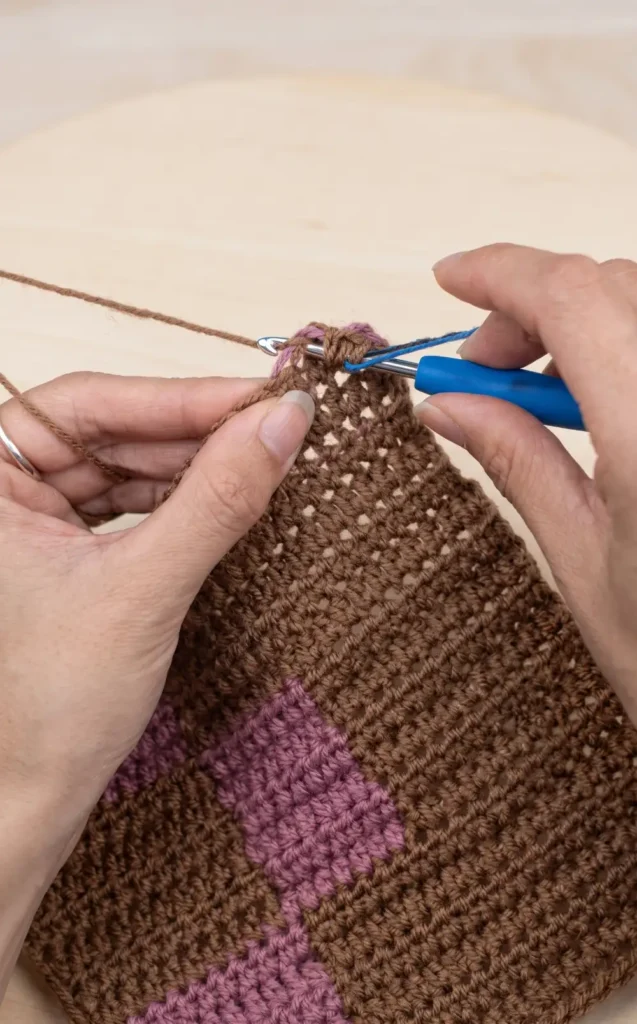
To create the checkerboard design, you must switch colors using an undone half double crochet. This is done by starting a stitch with Color A, but instead of finishing it, you drop Color A and pull through the final loops with Color B.
While working with one color, the resting yarn is carried along the foot of the stitches so it can be picked up later. The pattern involves working blocks of color that shift every several rows to create the characteristic geometric look.
Step 3: Shaping the Underarms and Neckline
After completing the main body, the vest is shaped for the underarms by decreasing stitches at the beginning and end of rows, which is achieved by skipping stitches. Once the underarm shaping is complete, the front panel is split into two sections to create the V-neckline and shoulders.
Each shoulder is worked separately, continuing the checkerboard rhythm while decreasing stitches along the neckline edge until the desired height is reached and the yarn is bound off.
Step 4: Assembly and Final Touches
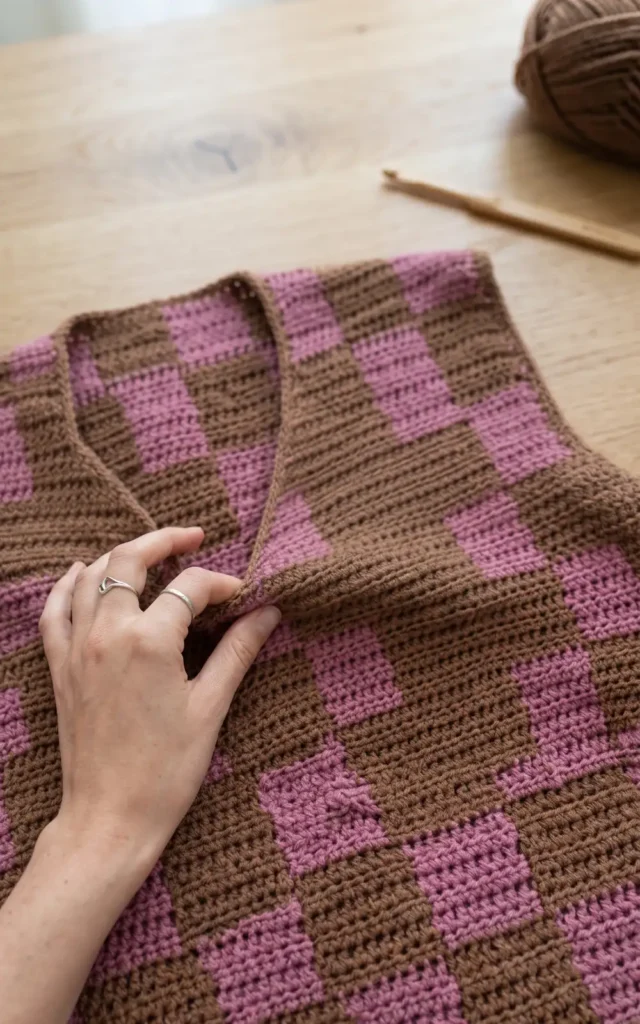
The back panel is constructed similarly to the front but without the deep neckline. To assemble, use an invisible sewing technique with a yarn needle to join the shoulders together side-by-side.
The sides of the vest are then joined using single crochet stitches on what will become the wrong side of the garment. Finally, add a professional finish by working a round of single crochet edging around the neckline and both armholes before weaving in all remaining yarn tails.
Video Credits: ABoC Studio
4. Crochet Princess Cloak Pattern
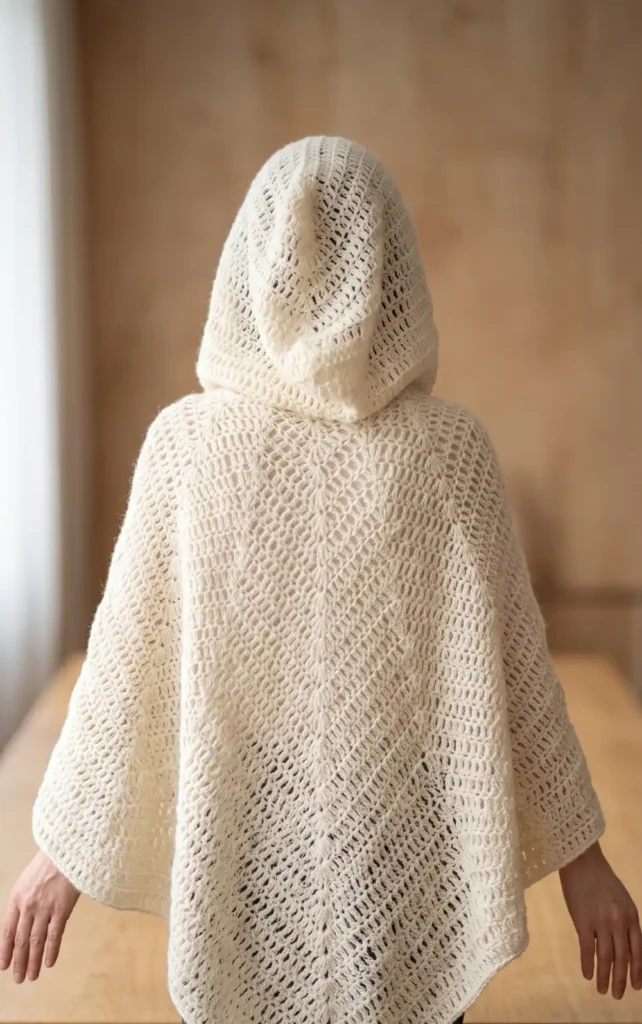
This princess cloak is a feminine, magical addition to any outfit, especially during the spring season when the weather is still a bit cool. It is designed with a delicate wave pattern and a cozy hood, making it both stylish and functional. While mohair or wool yarn is recommended for warmth, you can use any yarn you prefer, such as cotton or acrylic.
Materials and Preparation
To create this cloak, you will need approximately 10 skeins of mohair yarn, such as Hobby Alpaka Blaze (25 g and 225 m each). The project is worked with two strands of yarn held together using a 6 mm crochet hook. You will also need a stitch marker to help with the hood shaping and a pair of scissors for finishing.
The 4 Step Crochet Process
Step 1: Establishing the Neckline and Wave Pattern
Begin by creating a foundation chain of 49 stitches or any number divisible by 8 plus one extra stitch. For the first row, crochet double crochets while incorporating a pattern of decreases (three double crochets together) and increases (three double crochets into one stitch) to create a wave effect.
If you find you are missing a stitch at the end of the row, you can simply add an extra double crochet into the last stitch to avoid unraveling your work.
Step 2: Growing the Body of the Cloak
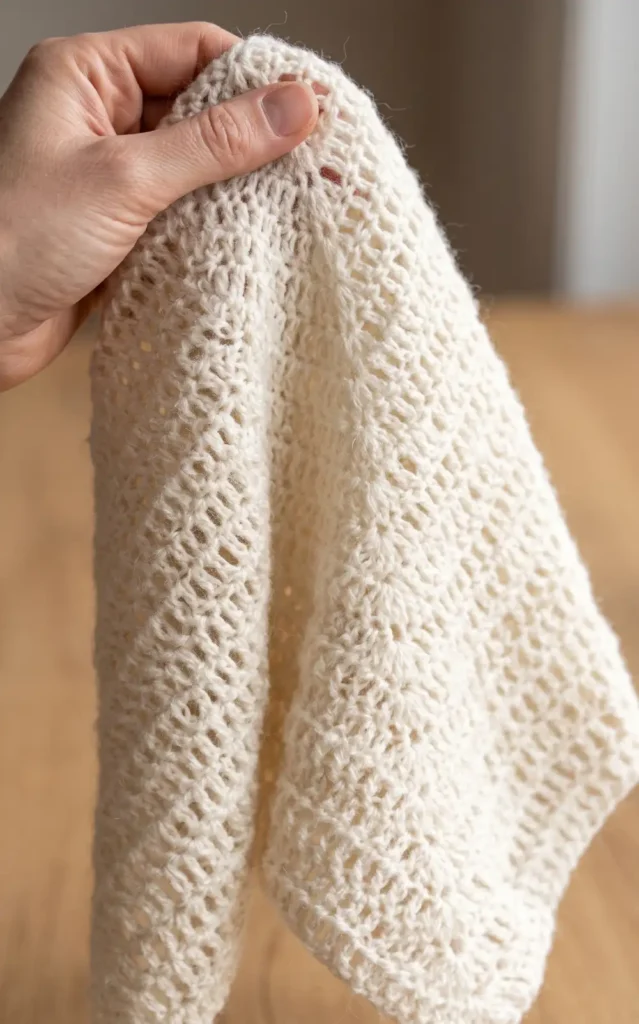
As you move into the subsequent rows, the number of double crochets between your increases and decreases will go up by one each time. For example, the second row uses five double crochets for the increases at the peak of each wave. Continue this pattern for 23 rows or until the cloak reaches your desired length.
To finish the body, crochet two rows of plain double crochets without any increases or decreases, followed by a final row with small increases at the top of each wave to soften the edges.
Step 3: Shaping and Rounding the Hood
Attach your yarn to the neckline and work 13 rows of double crochets, making an increase of three stitches in the exact center of every row to create volume. After reaching the desired height, begin closing the hood by performing center decreases for 11 rows.
To ensure the hood is not too bulky, use specific rounding decreases at the edges of the final rows before closing the top seam with slip stitches.
Step 4: Adding Ties and Finishing Edges
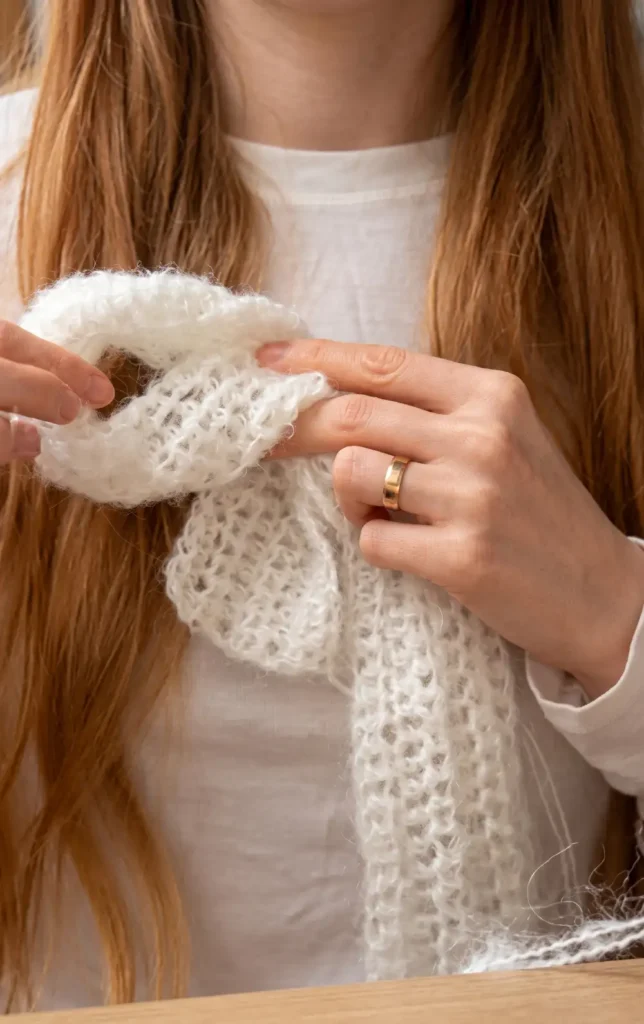
Neaten the entire perimeter of the cloak and the hood by crocheting rows of single crochets and slip stitches. For the ties, create a chain of 81 stitches and work six rows of half double crochets, though you can adjust the width and length to your preference.
Finally, sew the ties onto the neckline of the cloak to complete your fairytale inspired garment.
Video Credits: WONDER NETTING
5. Crochet Princess Costume Skirt Pattern
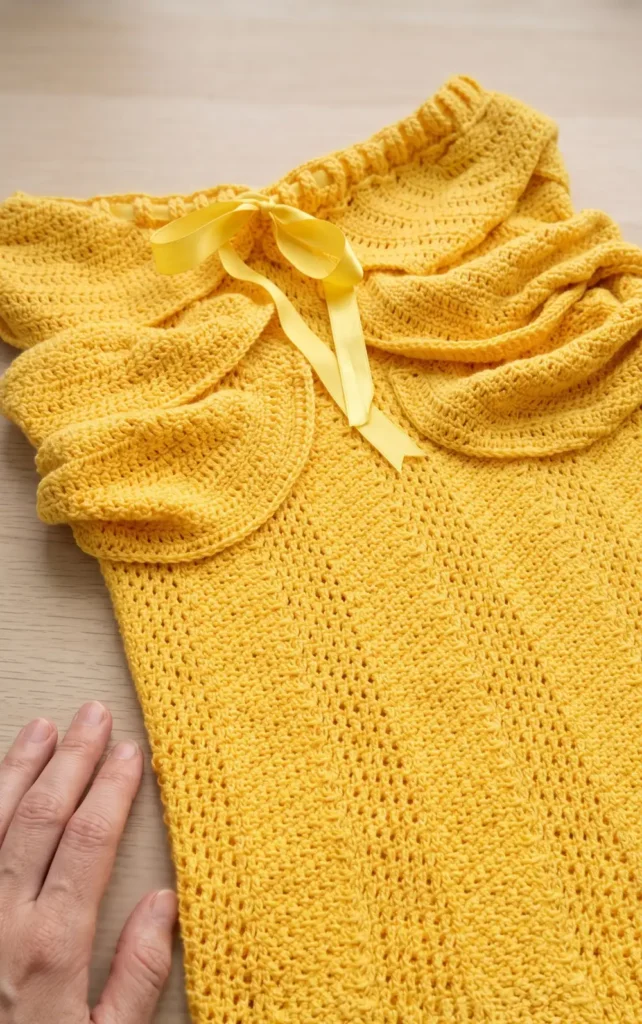
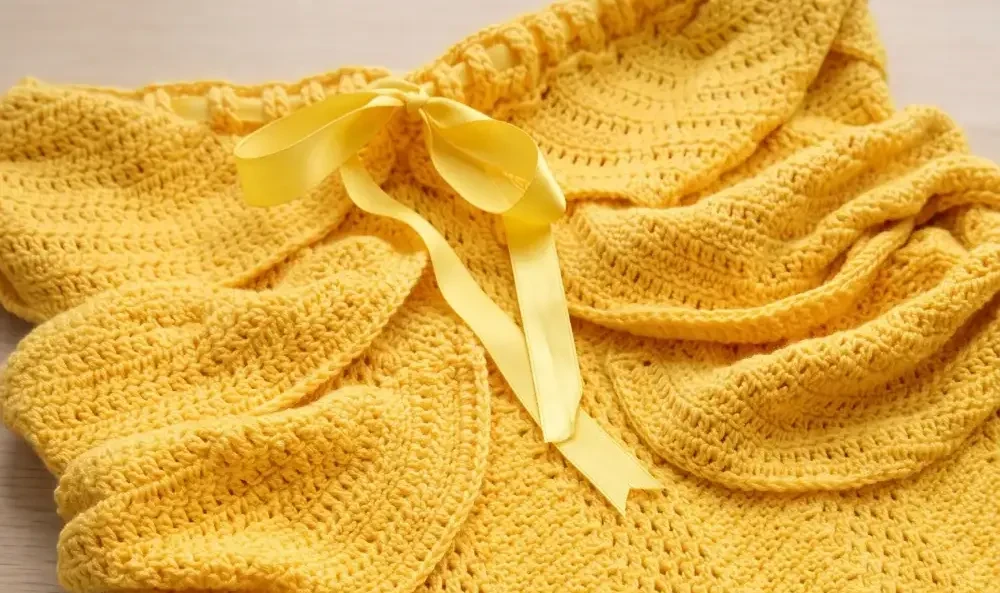
This beautiful princess skirt is a versatile project that can be adapted into a maxi skirt, a mini skirt, or even a simple shell without embellishments. To create the full costume version, you will need 10 skeins of Lion Brand Modern Baby yarn in yellow, an I-size (5.5 mm) crochet hook, a 7/8 inch yellow ribbon, a yarn needle, and scissors,,. The design is worked in multiples of 14 stitches, allowing you to easily adjust the size to fit your hip measurement.
Step 1: Crocheting the Chevron Skirt Body
The foundation of the skirt is a large tube worked in continuous rounds to avoid visible seams,. Start by creating Foundation Double Crochets in a multiple of 14; for a standard maxi skirt, the tutorial uses 140 stitches.
After joining the foundation row into a circle, follow a Chevron pattern repeat: double crochet in the next five stitches, place three double crochets in the following stitch to create a peak, double crochet in the next five stitches, and then work a double crochet three together to create a valley,. Repeat this sequence for as many rounds as needed to reach your desired length, such as 65 rows for a long skirt,.
Step 2: Adding the Edging and Treble Waistband
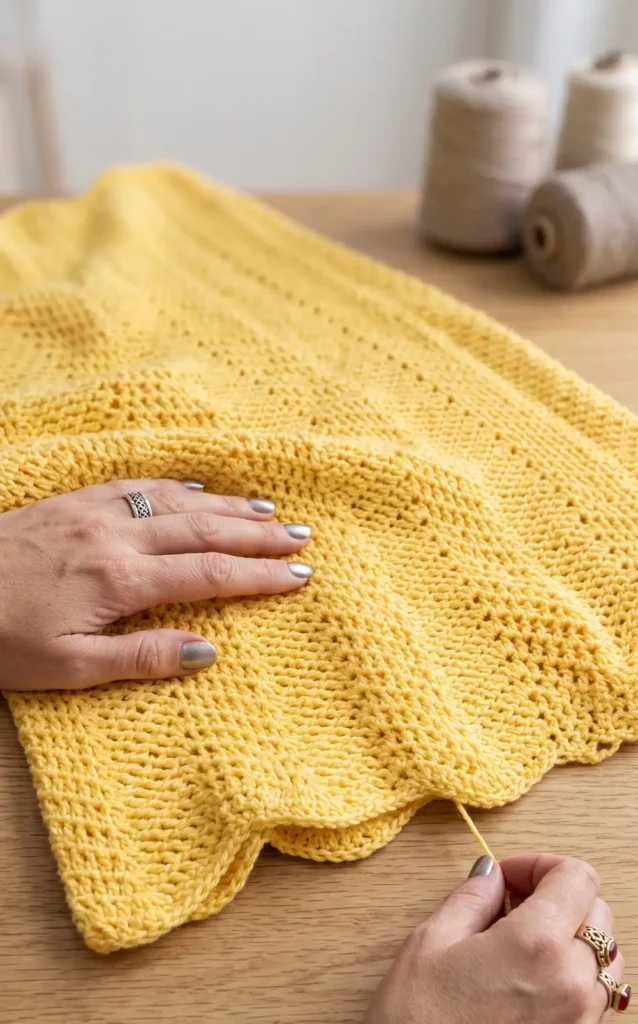
Once the main body is the correct length, finish the bottom with a scalloped edge. This is done by single crocheting in a stitch, skipping one, placing five double crochets in the next to form a shell, and skipping another stitch before repeating.
For the top of the skirt, you must create a waistband that can accommodate a wide ribbon. Work a round of treble crochets into the starting foundation row,. These taller stitches act as belt loops, providing ample space for the ribbon to be woven through,.
Step 3: Crafting the Decorative Side Panels
To achieve the classic princess look, you will need to crochet six half circle panels. Each panel begins with a ring and expands through 16 rows of double crochets, using a specific increase pattern on every even row to maintain the half circle shape.
By the final row, each panel should have 90 double crochets. When fastening off these pieces, leave a long tail of yarn, which will be used to sew the panels directly onto the skirt body.
Step 4: Final Assembly and Embellishments
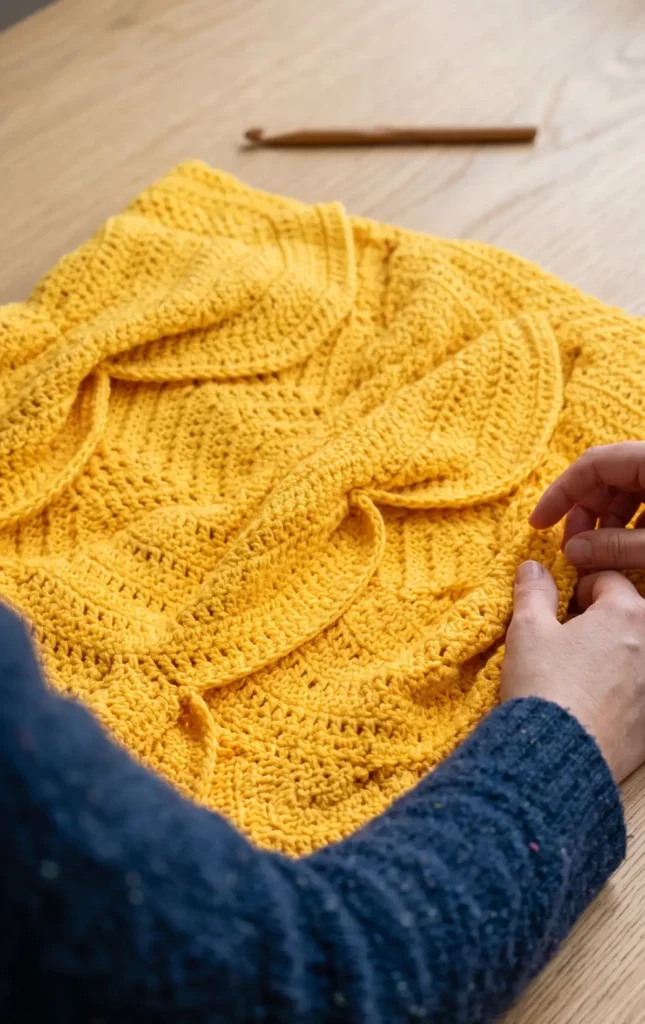
Lay your skirt flat and identify the side hip areas. Sew three overlapping half circles onto each side, starting from the front center and moving toward the back,. For added volume, you can optionally rouch the panels by weaving a strand of yarn vertically through the center of each half circle and pulling it tight to create a cinched, gathered effect.
Complete the costume by weaving your 7/8 inch ribbon through the treble crochet waistband and tying it into a decorative bow,.
Video Credits: Fuad Azmat / YARNutopia by Nadia
Ready for Halloween Crochet?
Five patterns, five different Halloween moods. Whether you want a glowing ghost sweater or a delicate princess cloak, there is a project here for your skill level. Pick your favorite and start crocheting today.
Halloween crafting does not have to end with decorations. These wearable pieces let you carry the spooky spirit all season long. Cast on, grab your hook, and make this your most creative Halloween yet.