5 Practical Crochet Back-to-School Free Patterns You’ll Love
Back-to-school season means one thing for us hookers: it’s time to make something useful. Forget boring plastic pencil cases from the store. With just a hook and some scrap yarn, you can create pieces that actually hold up to daily use in a backpack.
These five patterns cover everything from a pencil-shaped case to a padded laptop sleeve. Each one uses simple stitches you probably already know, like single crochet and double crochet. Grab your hook, because your school supplies are about to get a serious upgrade.
1. Crochet Pencil Case Shaped Like a Pencil
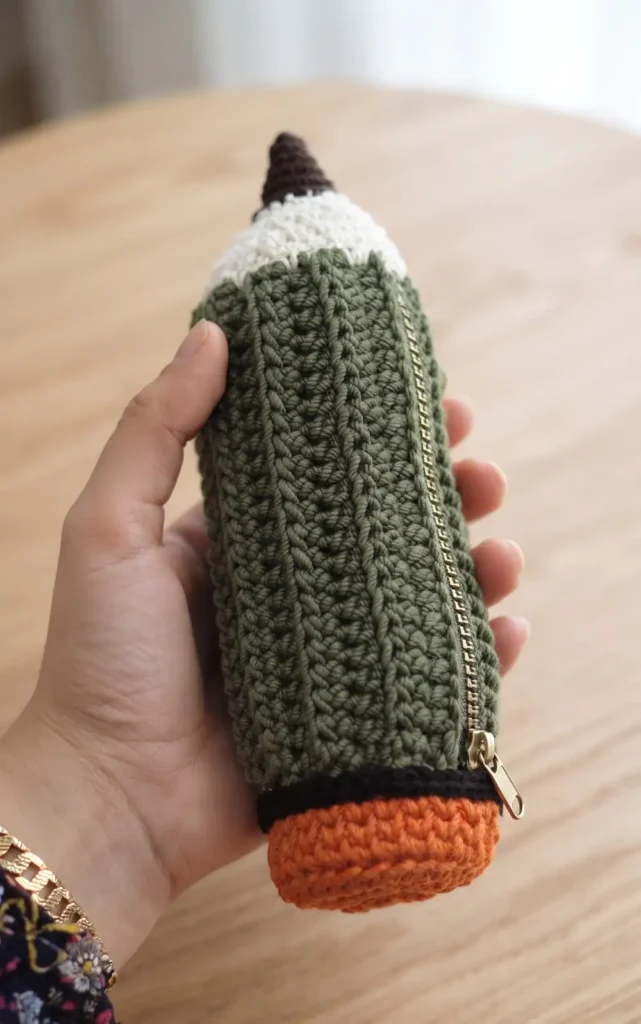
Creating a pencil-shaped crochet case is a fun and practical project that is perfect for back-to-school preparations. This design is versatile enough that you can even utilize leftover yarn from previous projects.
Materials Needed
To complete this project, you will need the following supplies:
- Yarn: 100% cotton macramé yarn (2.5 mm thickness) in four colors: one for the eraser, one for the body, a light color for the wood, and a dark color for the pencil tip.
- Hook: A 5 mm crochet hook.
- Additional Tools: A zipper and a sewing needle.
Step 1: Crafting the Eraser Base
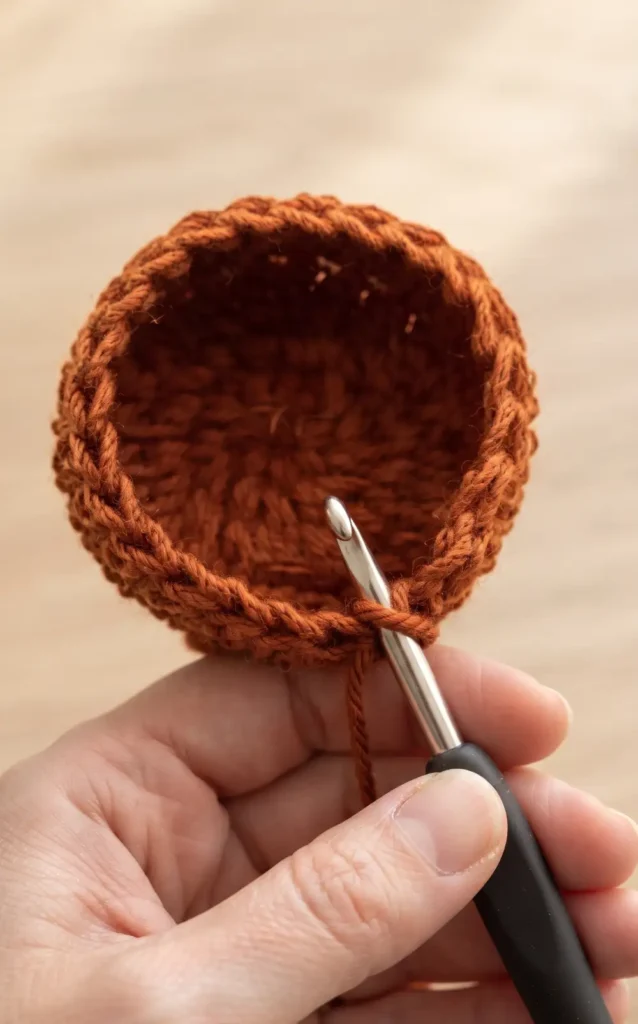
The project begins with the eraser portion of the pencil. Start by making a magic ring and working 6 single crochets into it. You will use the waistcoat stitch for the subsequent rounds. In round 2, increase in every stitch to reach 12 stitches, and continue increasing in following rounds until you have a total of 24 stitches. For round 5, work 24 single crochets into the back loops only to help define the shape. Complete the eraser by working two steady rounds of 24 stitches in the waistcoat stitch for a total of seven rounds.
Step 2: Creating the Main Pencil Body
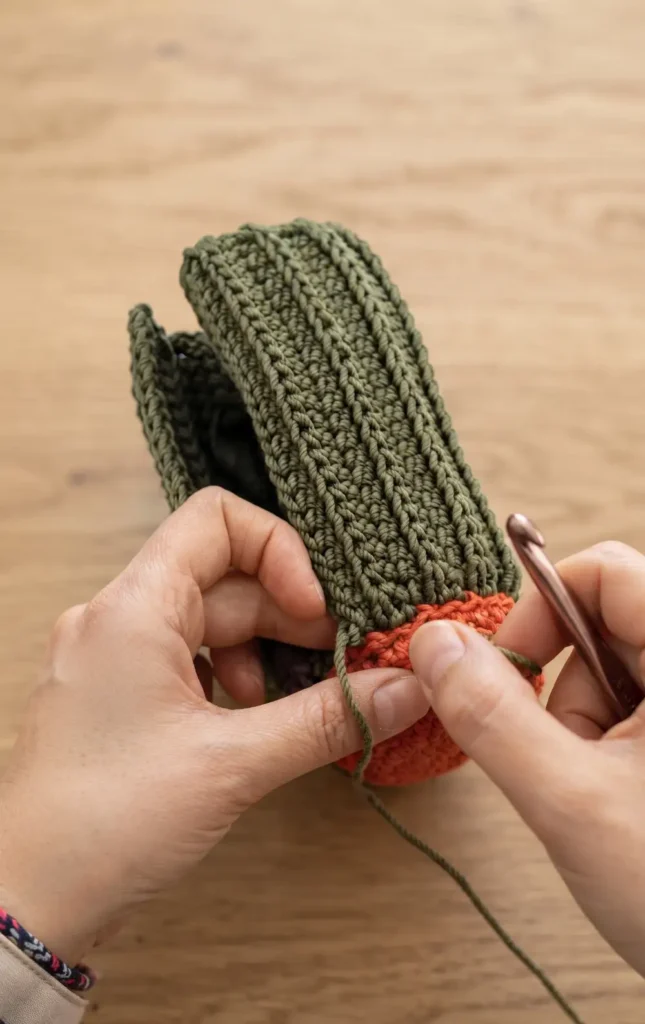
Once the eraser is finished, attach the yarn for the pencil body. Chain 23 stitches, or adjust the chain length based on how long you want your case to be. Starting from the second chain, work 22 half double crochets. At the end of the row, work two slip stitches and then a chain 1 before turning. Continue working 22 half double crochets in the back loop only for each row. You will repeat this process until you have completed 21 rows. At this stage of the project, you should sew the zipper into place.
Step 3: Shaping the Wooden Transition
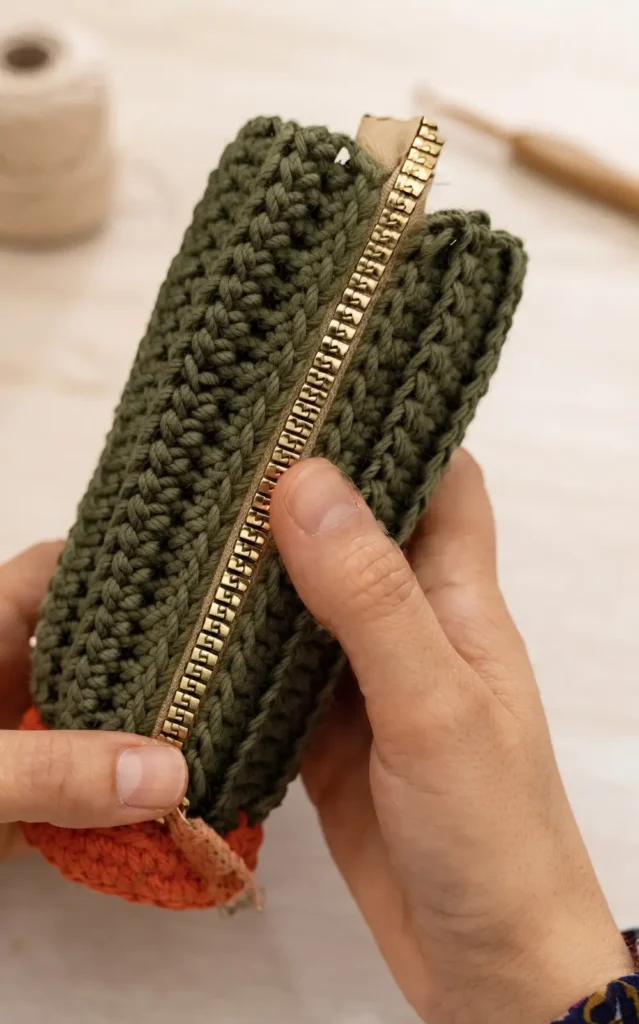
Switch to your light-colored yarn to represent the wooden part of the pencil. Begin by working one single crochet into each row of the body for a total of 21 stitches. Chain 3 before closing the round so you can transition back into the waistcoat stitch. To create the tapered shape of a sharpened pencil, work a round of 2 single crochets followed by a decrease, repeated 6 times. Follow this with a steady round of 18 stitches. Continue tapering by working a round of 1 single crochet followed by a decrease, then a steady round of 12 stitches.
Step 4: Finishing the Tip and Edges
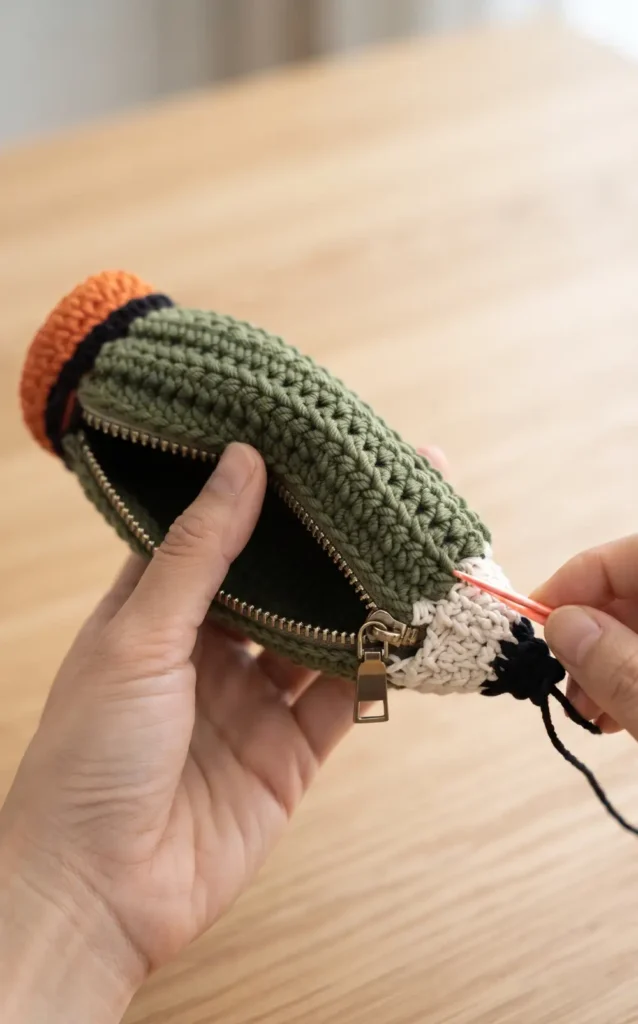
For the final portion, switch to your dark-colored yarn for the pencil lead. Work a round of 6 decreases to bring your stitch count down to 6. Complete the shape with a final steady round of 6 single crochets. As a last optional step to give the case a polished look, you can work slip stitches all the way around the edge of the finished piece.
Hey there! Some links on this page may be affiliate links which means that, if you choose to make a purchase, I may earn a small commission at no extra cost to you.
Video Credits: Amena Crochet Bags
2. Crochet Back to School Pencil Case Makeup Bag
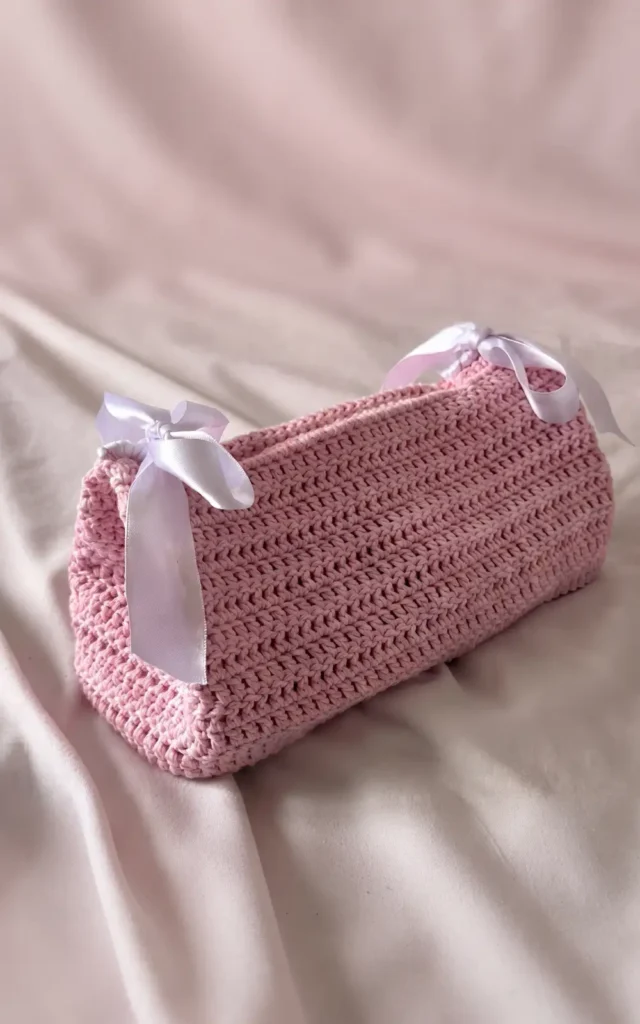
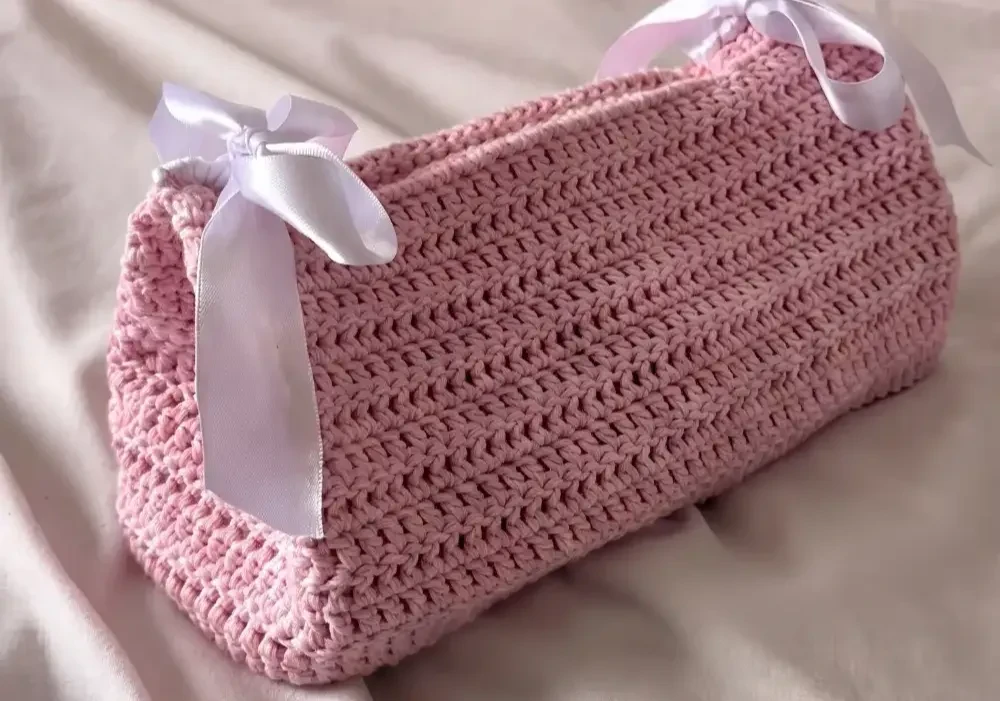
This stylish and functional crochet project is perfect for keeping pens, highlighters, or makeup organized. By using a unique stitch for the base and a sturdy construction for the body, you can create a durable accessory that is both aesthetic and practical.
Essential Materials
To complete this project, you will need the following items:
- Yarn: Approximately 150 grams of super fine 100 percent cotton yarn (the tutorial uses two strands held together).
- Crochet Hook: A 3.5 mm hook.
- Hardware: Two magnetic buttons for the closure.
- Decorative Notions: Ribbon for adding a decorative bow.
- Tools: Stitch markers, a darning needle for weaving in ends, and a pair of scissors.
Step 1: Create the Thermal Stitch Base
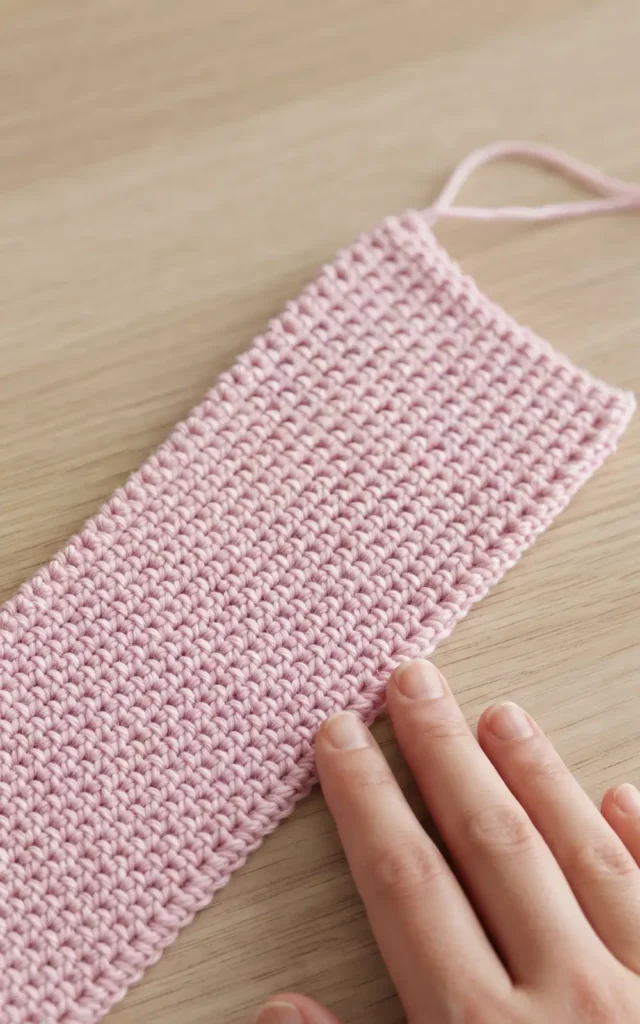
Begin by making a slip knot and chaining 16. For the first row, skip the first back bar and make 15 single crochets across the back bars of the chain. For the second row, chain one, turn, and make 15 single crochets in the back loops only.
From row three through row 79, you will work the thermal stitch. This is done by chaining one, turning, and inserting your hook into the back loop of the stitch and the loop directly below it from the previous row. Repeat this process until your base is approximately 22 cm (8.5 inches) long.
Step 2: Build the Pouch Body
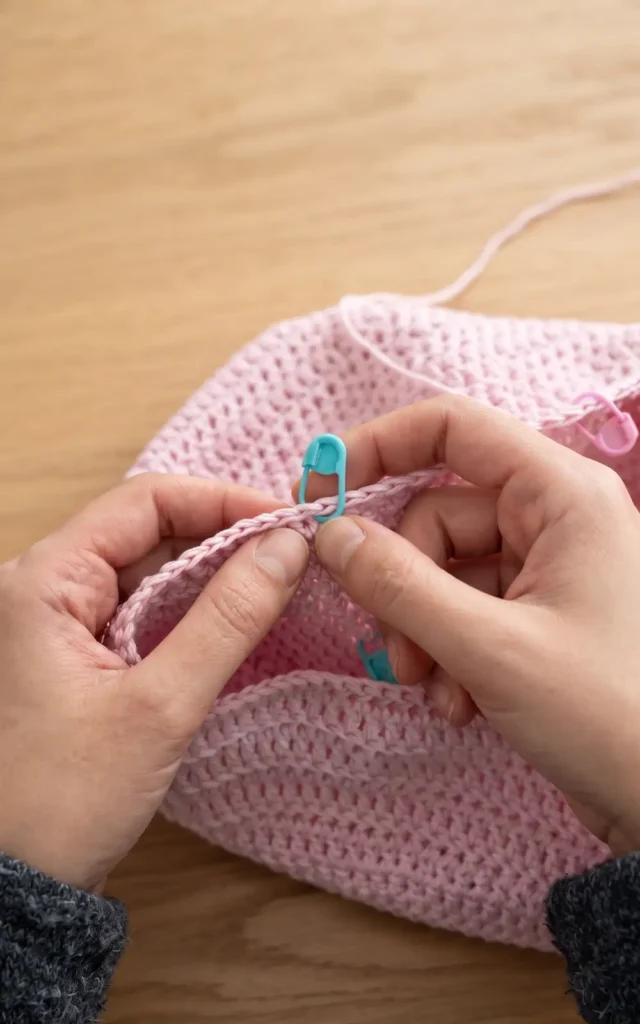
Once the base is complete, crochet single crochets around the entire perimeter to build the pouch upwards. Work 41 stitches on the long sides and 15 stitches on the short sides for a total of 112 stitches. Slip stitch to the first stitch to join the round.
Next, complete 15 rounds of double crochet. For each round, chain two and turn your work; this ensures the texture remains consistent. To avoid changing your stitch count, skip the two chains and the slip stitch from the previous round, and place your first double crochet directly into the first stitch of the round.
Step 3: Shape the Sides and Add Top Flaps
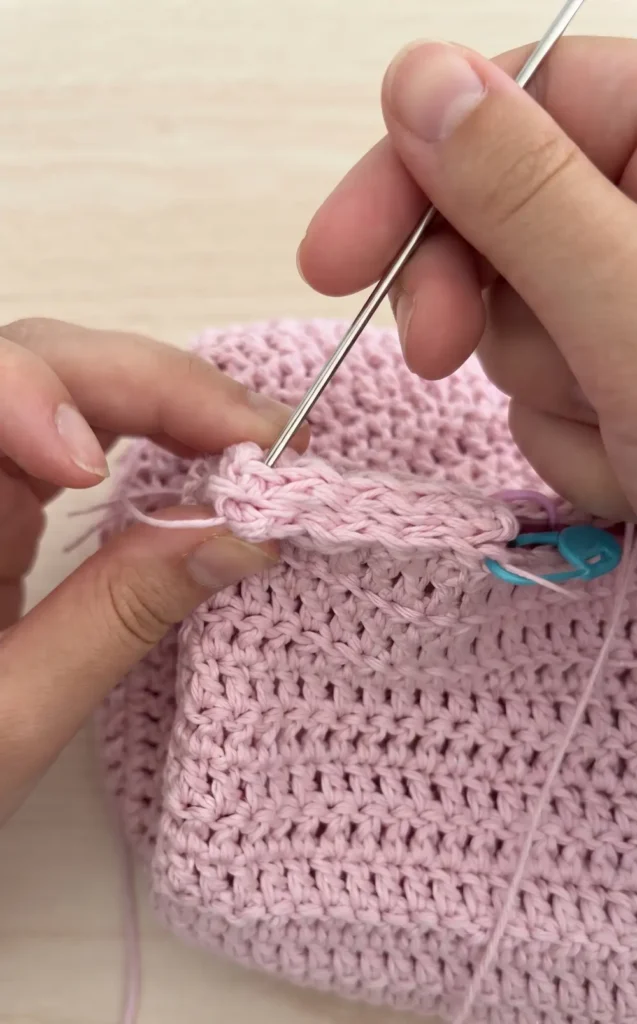
To give the bag its boxy shape, use stitch markers to identify where to fold the corners. Using a darning needle and a meter long tail of yarn, sew the folded sections together by passing the needle through eight stitches on each side of the fold.
After the sides are secured, you will create top flaps to help close the bag. Attach your yarn to the top opening and crochet four rows of 24 single crochets on each side. These flaps will eventually be folded inside the pouch for a clean, professional finish.
Step 4: Install Closures and Decorative Accents
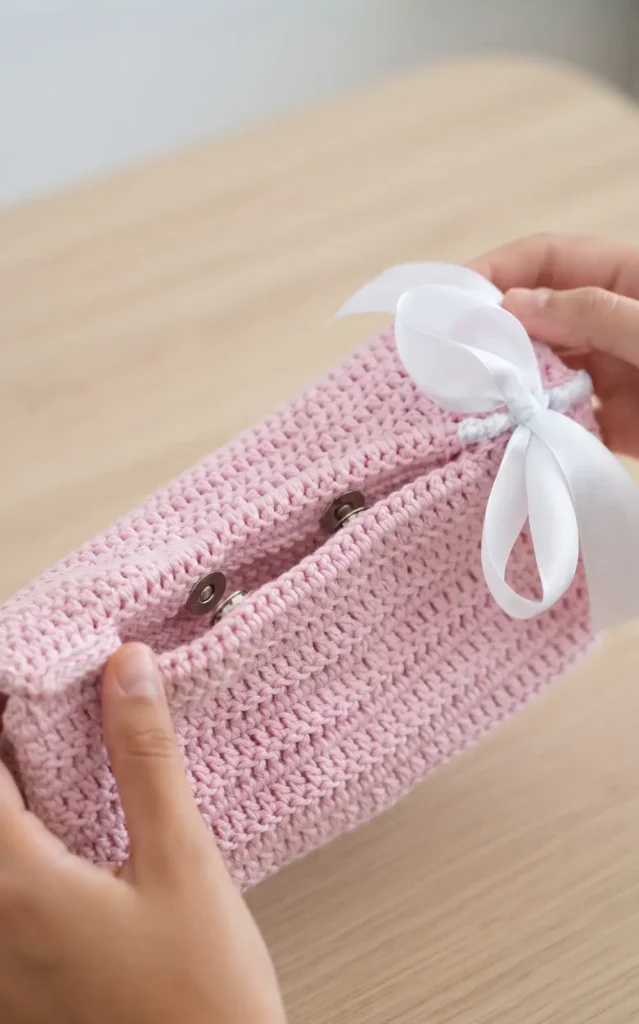
Sew the magnetic buttons onto the inner flaps. To ensure they are centered, count five stitches in from each side before attaching the buttons. Once the buttons are secured, fold the flaps into the bag and snap them together.
Finally, add a decorative touch by threading a ribbon through the stitches at the top corners. Use a large needle to weave the ribbon through, then tie it into a bow in the center. Weave in any remaining yarn tails to complete your pencil case or makeup bag.
Video Credits: crochet daniela
3. Crochet Notebook Cover
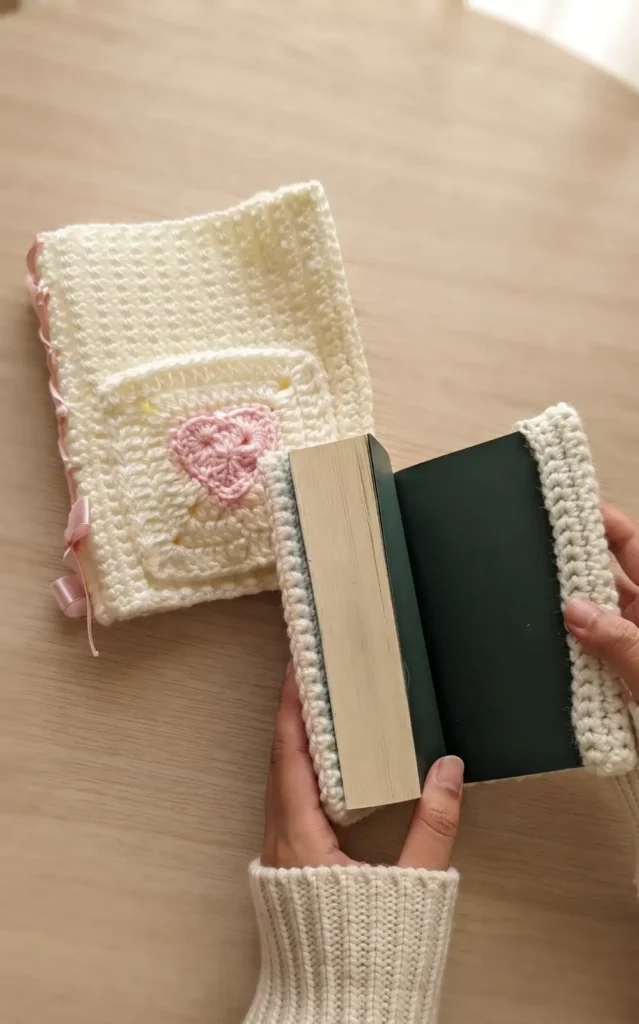
Customising your notebooks with a crochet cover is a wonderful way to add a personal touch to your journals, sketchbooks, or diaries. These covers can be made for any size of book, whether it is a paperback or a hardback, as long as the spine is not too thin.
Materials Needed
To complete this project, you will need a 4.5 mm crochet hook and medium weight acrylic yarn. While you can use different combinations, it is recommended to use yarn that works well with a 4 mm, 4.5 mm, or 5 mm hook to ensure the cover is sturdy and not too flimsy. You will also need a sewing needle that can fit your yarn and optionally some ribbon or decorative elements like crochet roses.
Step 1: Measuring and Starting Your Base
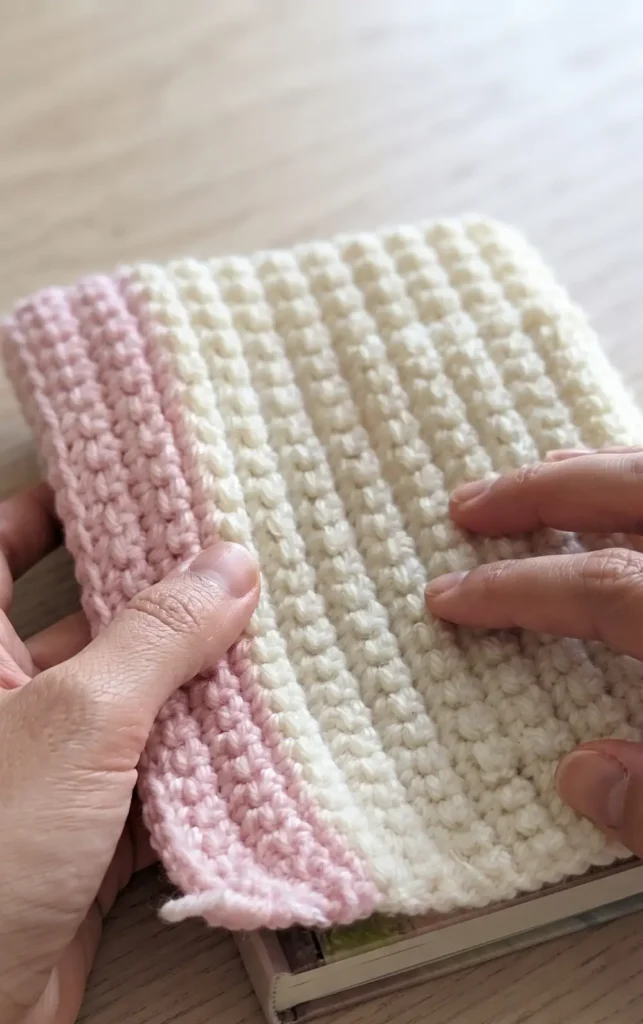
The first step is to determine the size of your notebook so you can create a base row that matches its length. You can start by making a slip knot and then either chaining until the length fits your book or using the foundation single crochet method. The foundation method is often preferred because it creates a neater border from the very first row. Regardless of the method, ensure this first row is exactly as long as your notebook.
Step 2: Working the Main Panel
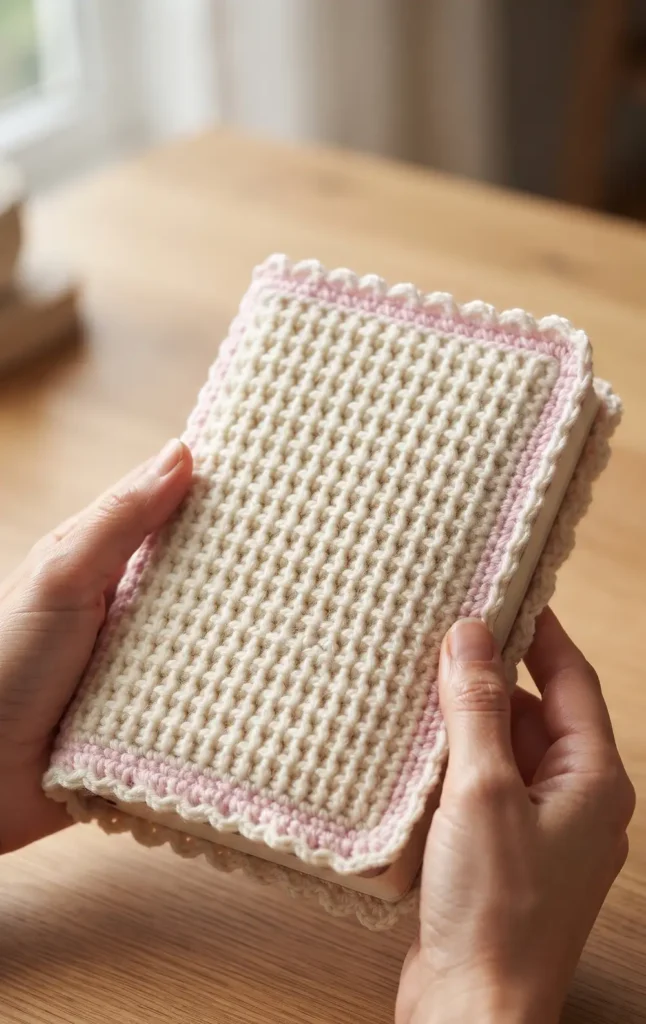
You will now crochet a long rectangle that is large enough to wrap around the front, spine, and back of your notebook, with enough extra length to fold under the covers. Use single crochet rows for the entire panel. To achieve straight, neat edges, turn your work without a starting chain and insert your first stitch directly into the first stitch of the previous row. It is vital to count your stitches in every row to ensure the panel remains a consistent size and does not become uneven.
Step 3: Adding Spine Details and Borders
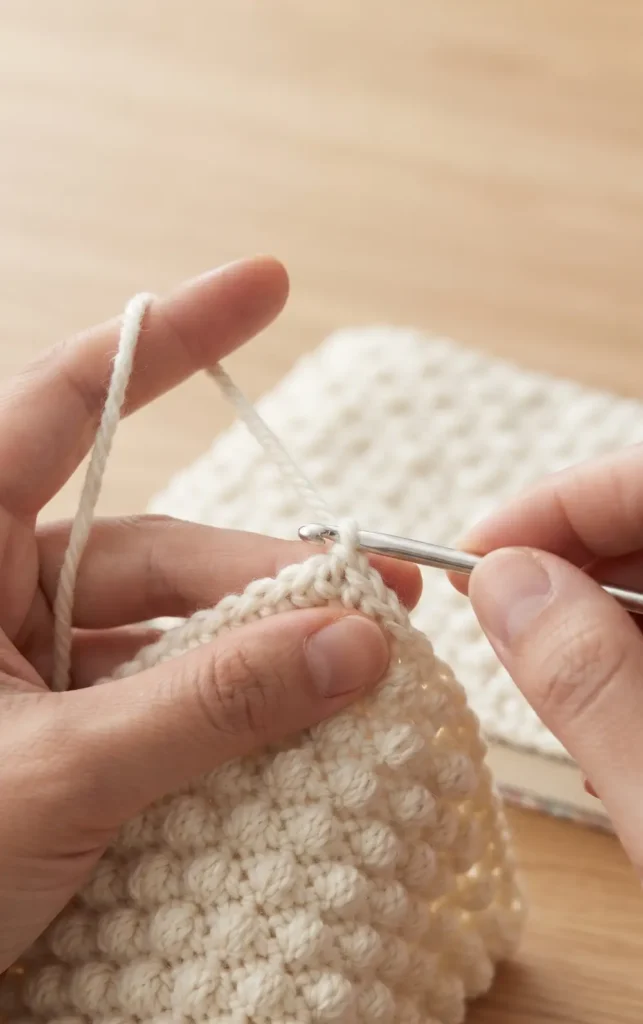
If you want to add a ribbon detail to the spine, use back loop only (BLO) single crochet for the first and last rows of the spine section to create loops for threading the ribbon. You can also add a decorative border by making loose slip stitches all the way around the edges of your panel. When working on the border, ensure the stitches remain loose to prevent the cover from bunching up. You may also choose to change yarn colours at this stage to make the spine or border stand out.
Step 4: Final Assembly and Decorations
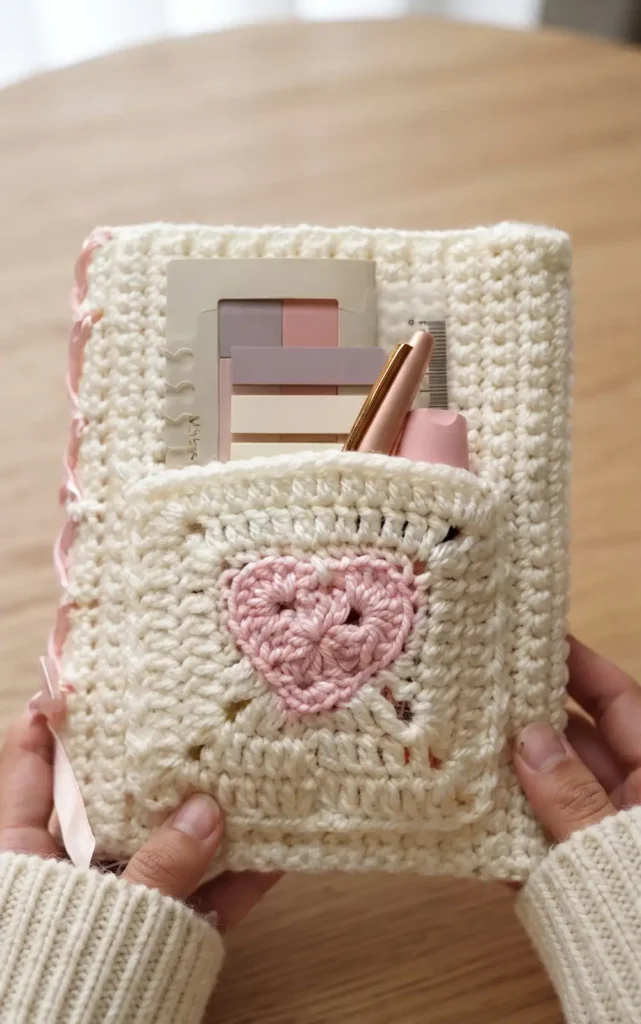
To finish the cover, fold approximately four rows inward on each side to create the internal flaps. Use your sewing needle and yarn to sew the top and bottom edges of these folds together, creating pockets that the notebook covers can slide into. Once the assembly is secure, you can decorate the exterior with crochet roses and leaves or even sew on a granny square to act as a pocket. Finally, slide your notebook into the openings to complete your custom creation.
Video Credits: mahum
4. Crochet Laptop Sleeve
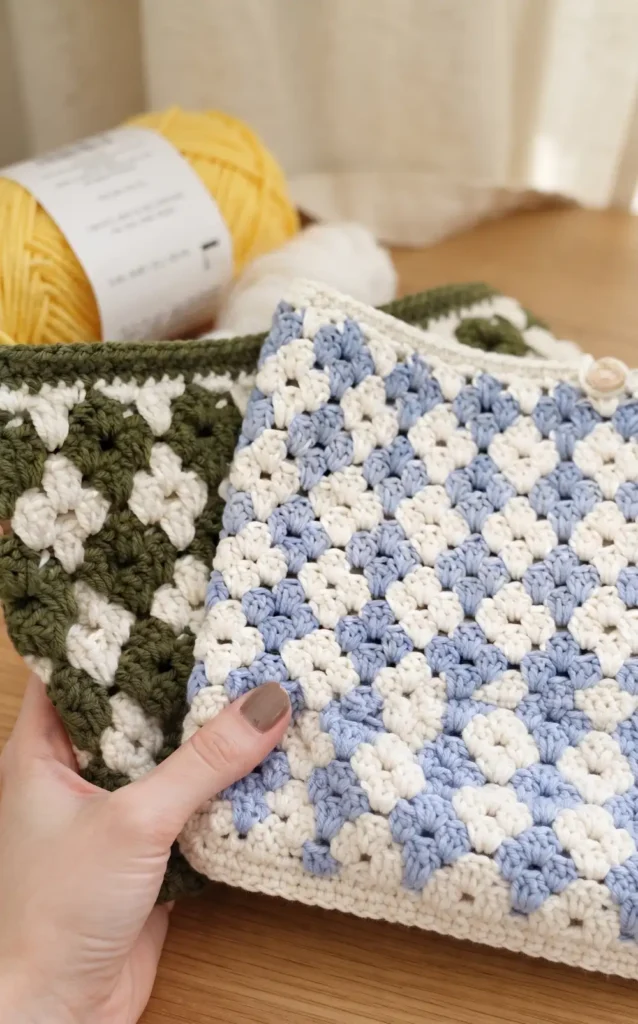
This charming sleeve, known as the Stacy because of its distinctive flower patterns, provides a stylish way to protect your electronics. The project is designed to be worked in the round to create a seamless fit for your device.
Essential Materials
To begin this project, you will need medium weight yarn for the best protection and a faster crochet time, though lightweight yarn is also an option. You will also require a 5 mm crochet hook, scissors, a yarn needle, and a button. Using a stitch marker is recommended to help keep track of your rows.
Step 1: Foundation and Base
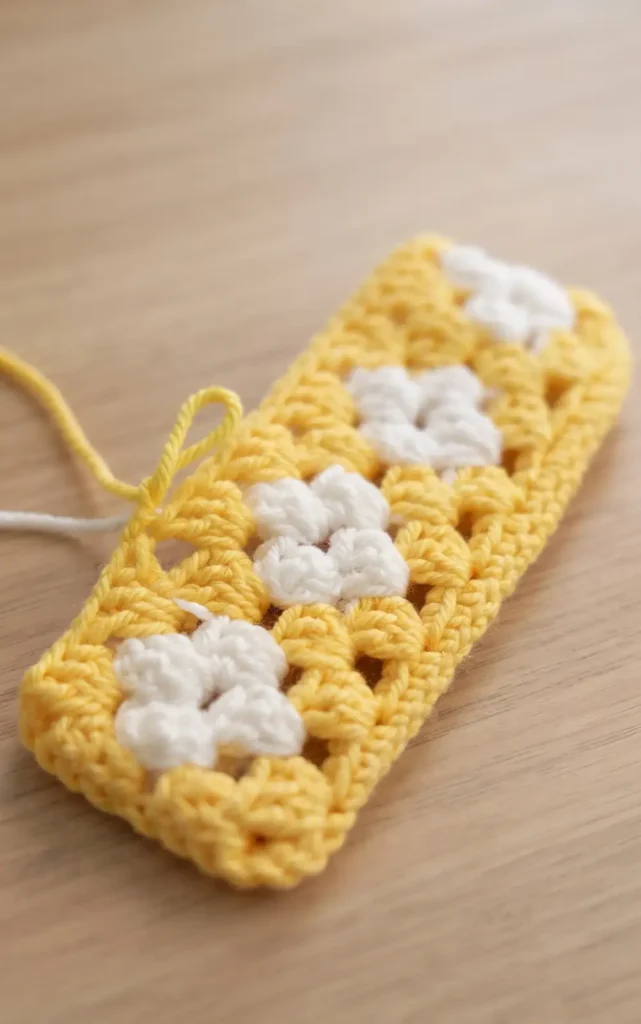
Start by making a slip knot and creating a foundation chain that is a multiple of six to fit your specific device. For example, a standard iPad may require 24 chains while a MacBook Pro typically needs 42 chains. Add one extra turning chain and then single crochet into the little bumps on the back of the chain across the first row. Once you reach the end, turn the work upside down to continue single crocheting into the bottom of the V-shape stitches to begin working in a round. Finish the base by inserting your hook into the first stitch and making a slip stitch.
Step 2: Building the Body Pattern
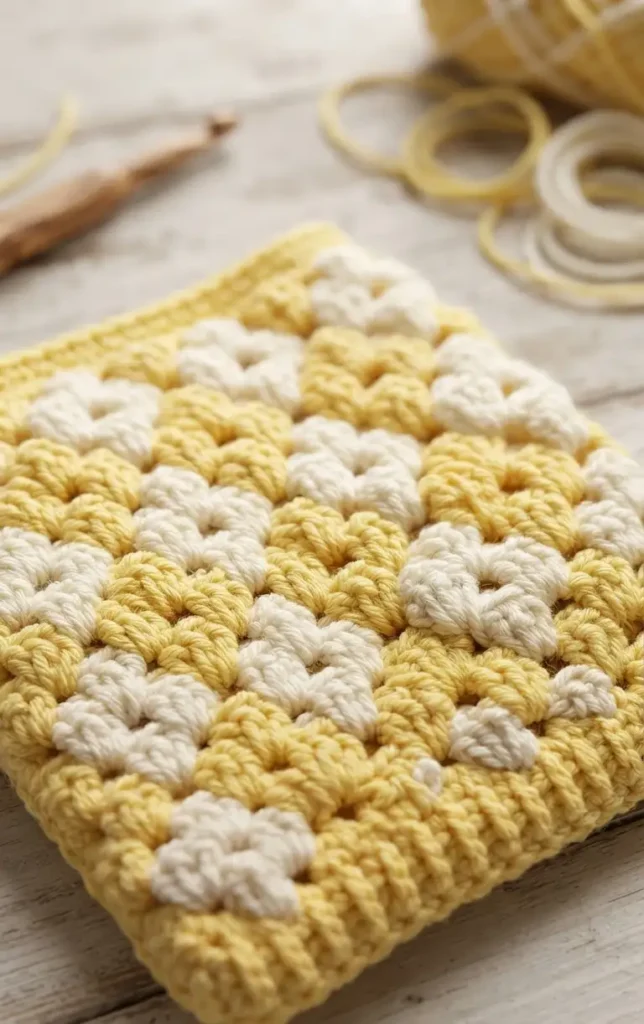
For the second row, chain three and work three double crochet stitches into that same base stitch. Skip two stitches and then work three double crochet stitches into the third stitch. Continue this pattern of skipping two stitches and placing three double crochets in the next stitch all the way around the row. To complete the row, skip the final two stitches and slip stitch into your first stitch. This creates the initial cluster structure that will support your floral pattern.
Step 3: Creating the Daisy Design
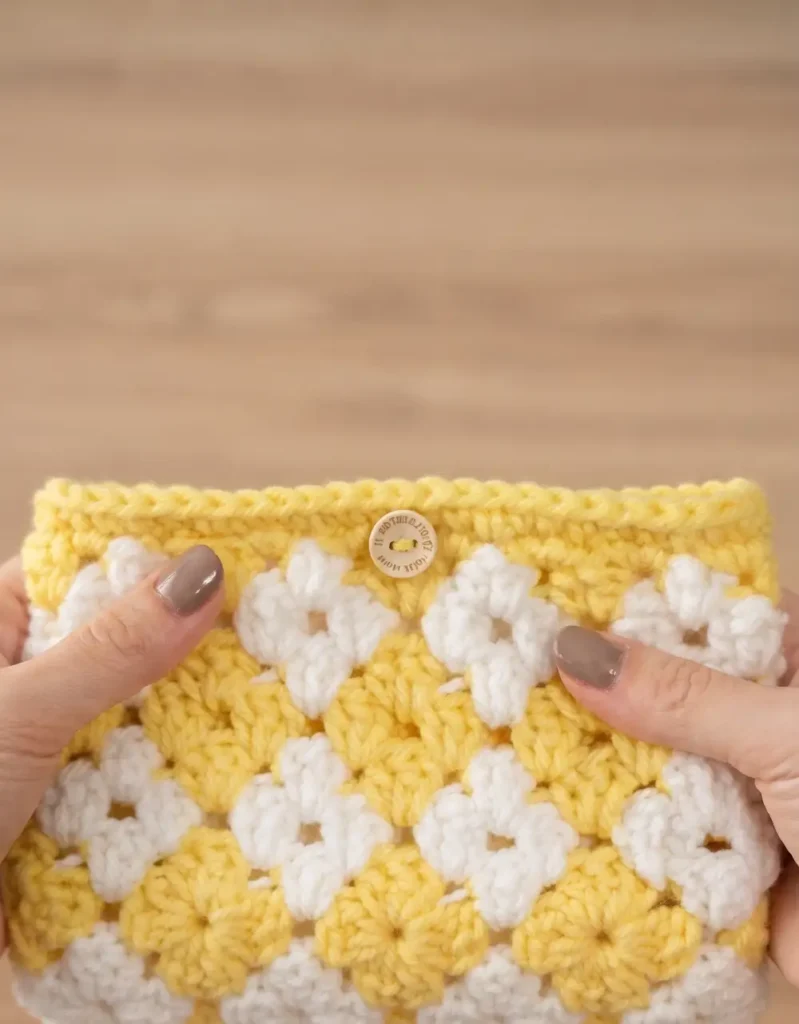
The daisy pattern is formed by alternating colors between yellow and white over the next several rows. In Row 3, you will switch yarn colors by dropping the current color at the last two loops of a double crochet and pulling the new color through. You will alternate between yellow and white clusters, then work Row 4 entirely in white, Row 5 with color changes again, and Row 6 entirely in yellow. Repeat the sequence of Row 3 through Row 6 until the sleeve is approximately 1 to 2 centimeters shorter than your desired final height.
Step 4: Final Touches and Fastening
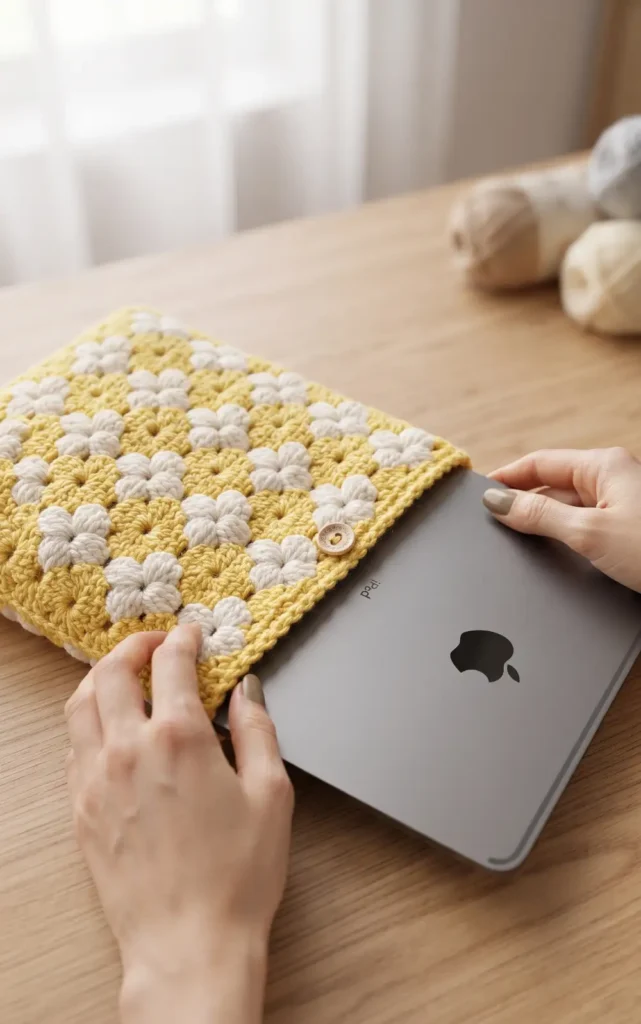
To finish the top edge, work two rows of single crochet using your preferred color. In the first finishing row, place three single crochets into each space between the clusters. For the second finishing row, place one single crochet into every stitch around the top before cutting the yarn and weaving in the tails with a needle. Finally, find the center point of one side to sew on your button. On the opposite side, create a closure by crocheting a chain of about 12 stitches and sewing it into the center to act as a button loop.
Video Credits: ii studiox ♡
5. Crochet Roll-Up Pencil Case
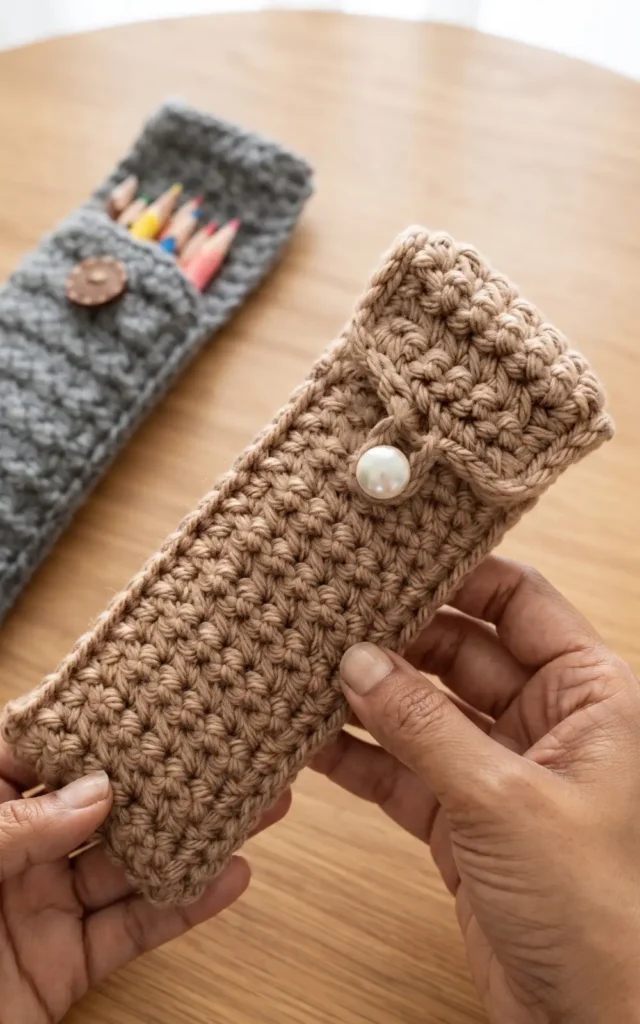
This versatile crochet pattern is perfect for beginners and intermediate crafters alike, resulting in a textured pouch that can store pencils, crochet hooks, or even reading glasses. Because it is highly customizable, you can easily adjust the width or length to suit your specific needs.
Essential Materials
To begin this project, you will need the following supplies:
- Medium 4 weight yarn in your choice of colour.
- A 5.5 mm crochet hook, or the size recommended for your chosen yarn.
- A pair of scissors and a darning needle to weave in ends.
- A button for the closure.
Step 1: Foundation and Initial Row
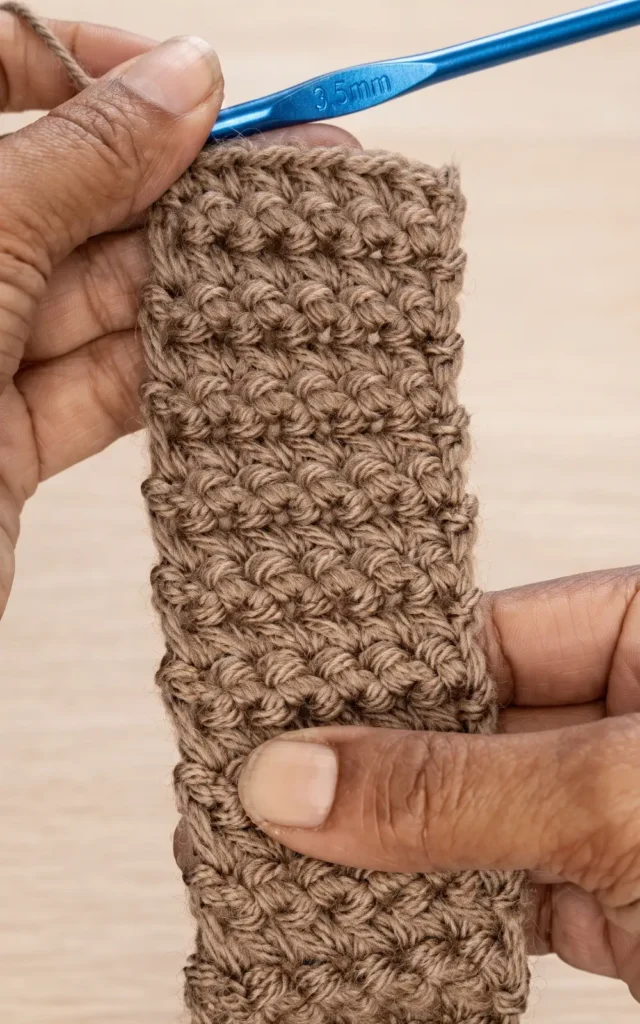
Start by creating a slipknot and chaining seven stitches to set the width of your pouch. If you prefer a wider pencil case, you can increase this initial chain count. To begin the first row, skip the very first chain from the hook and insert your hook into the second chain. Pull up a loop, then insert the hook into the next stitch and pull up another loop so that you have three loops on your hook. Yarn over and pull through all three loops to complete a single crochet two together (sc2tog) stitch.
Step 2: Building the Textured Body
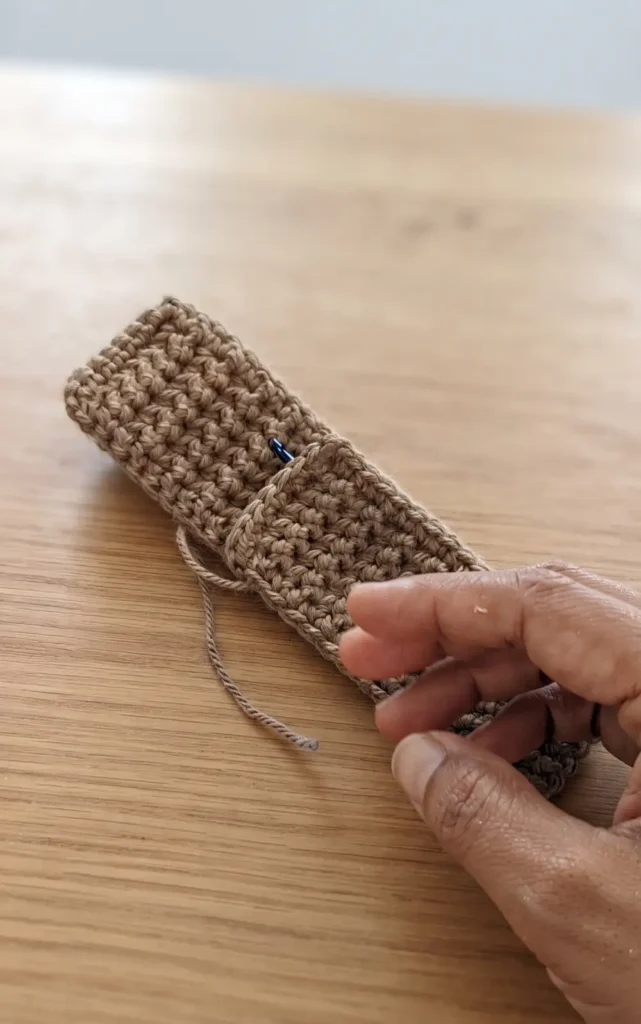
The unique texture of this case comes from a modified sc2tog pattern. For every subsequent stitch, insert your hook back into the stitch you just finished, pull up a loop, insert into the next stitch, and pull up another loop before finishing the stitch. Continue this across the row, but always finish the very last stitch with a normal single crochet.
For every following row, chain one and turn your work. Repeat the sc2tog pattern across the row and finish with a single crochet at the end. Continue these rows until your strip measures approximately 14 inches or 36 centimetres.
Step 3: Adding a Professional Border
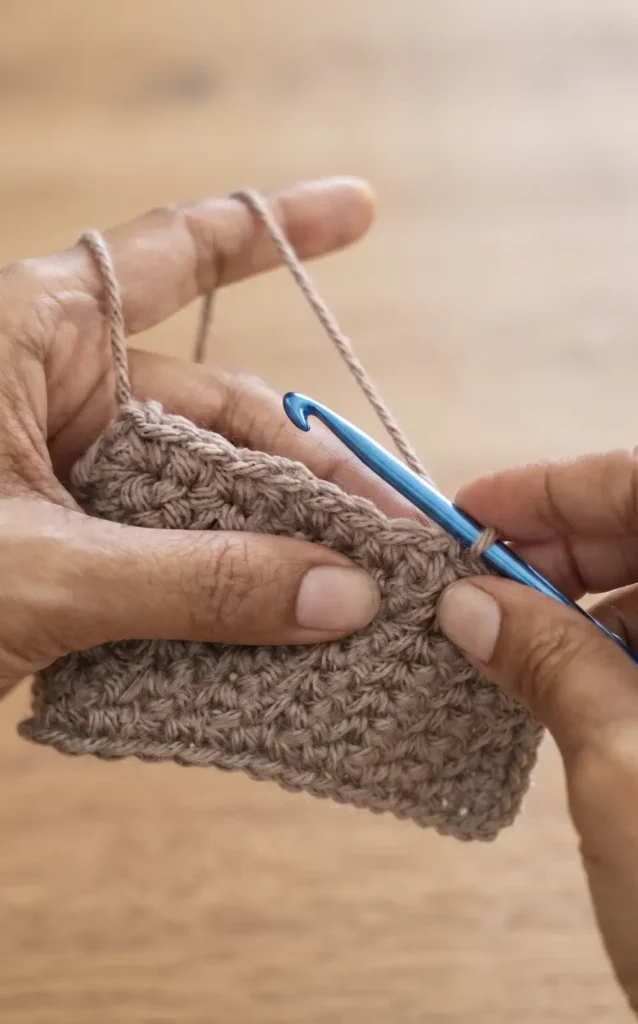
Once your strip is the desired length, you must create a border to ensure even edges for assembly. Work one single crochet into every gap around all four sides of your rectangle. To ensure the corners are nicely curved and sit flat, place three single crochets into each corner stitch. Once you have worked around the entire piece, slip stitch into the first border stitch to join and then cut your yarn.
Step 4: Assembly and Buttonhole
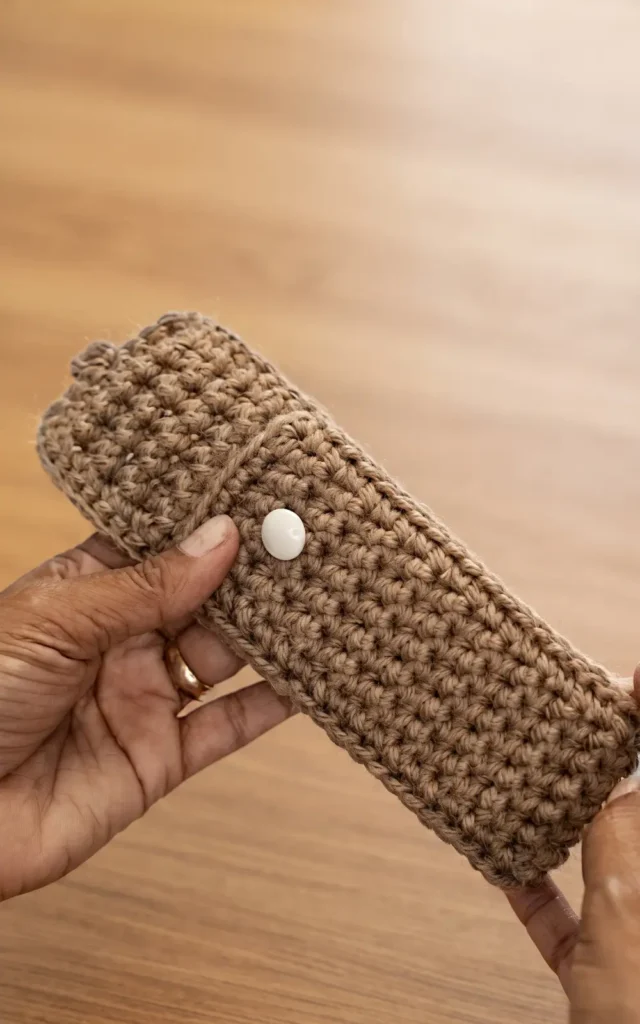
Fold the bottom of your strip upwards to create the pouch pocket, leaving enough length at the top to act as a flap. Using a slip stitch, join the two sides together by working through both layers of the fabric. Continue slip stitching along the edge of the flap until you reach the exact centre.
At the centre point, chain five and slip stitch back into the same spot to create a buttonhole loop. Finish slip stitching the remainder of the flap and the opposite side of the pouch. Finally, sew your button onto the main body of the case and weave in all loose ends with your darning needle.
Crochet Pattern Credits: Hopeful Turns
Which Back-to-School Project?
There you have it, five practical crochet patterns to make this school year a little more organized. Whether you need a sturdy pencil case, a padded laptop sleeve, or a custom notebook cover, each project puts your hook to good use. Pick the one that fits your skill level and start stitching.
Grab your yarn and give one of these a try before the first day of class. Once you finish, you will have something both handmade and genuinely useful. Happy crocheting, and here’s to a great school year ahead.