5 Crochet Bat Free Patterns Perfect for Beginners
Bats get a bad reputation, but crocheters know better. These little creatures are proof that even the spookiest Halloween icon can be turned into something soft, sweet, and totally huggable. Grab your hook, because these five bat patterns are about to change how you see them.
Whether you love amigurumi shaping, wire-posed legs, or no-sew quick makes, this roundup has something for every skill level. Some use classic magic rings and stuffing techniques, while others skip the sewing altogether for a faster finish. Pick your favorite and let’s get those wings crocheted before Halloween arrives.
1. Crochet Bat Amigurumi Halloween Pattern
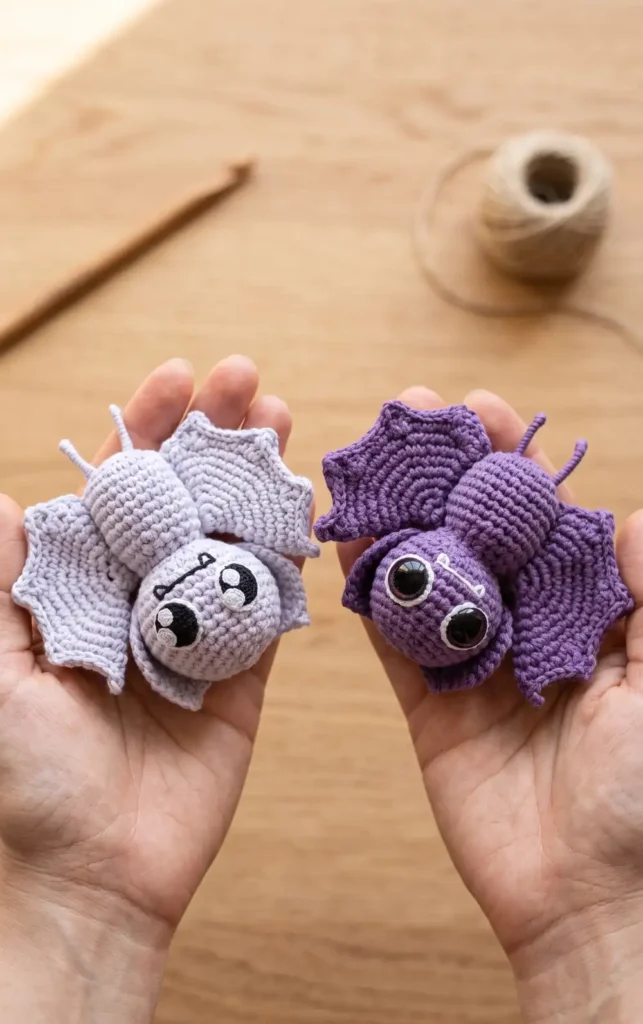
This adorable amigurumi bat project is inspired by real-life encounters with these often misunderstood creatures. To begin your project, you will need cotton yarn, a size 2 crochet hook, a tapestry needle, a stitch marker, and silicone fiberfill for stuffing. For the bat’s features, prepare some felt or fabric for the eyes, white yarn to embroider the fangs, and a small piece of wire or a pipe cleaner to create the legs.
Step 1: Crocheting the Head and Body
Crafting the Head
Start the head with a magic ring of 6 single crochets (sc). Increase in every stitch to reach 12, then follow a pattern of 1 sc and 1 increase, 2 sc and 1 increase, 3 sc and 1 increase, and finally 4 sc and 1 increase. After completing these increases, work 4 rounds of only single crochets. To close the head, reverse the pattern with rounds of 4 sc and 1 decrease (dec), then 3 sc and 1 dec. Work 2 rounds of only sc before continuing with 2 sc and 1 dec, then 1 sc and 1 dec. Fill the head with fiberfill before finishing with continuous decreases and sewing the small remaining hole shut with a tapestry needle.
Constructing the Body
The body also begins with a magic ring of 6 sc, followed by a round of increases to 12. Work rounds of 1 sc and 1 increase, then 2 sc and 1 increase. Next, crochet 7 rounds of only single crochets. Begin narrowing the body with a round of 2 sc and 1 dec, followed by 1 sc and 1 dec. Finish the body with one final round of single crochets before cutting the yarn and adding the stuffing.
Step 2: Shaping the Ears and Wings
Pointed Bat Ears
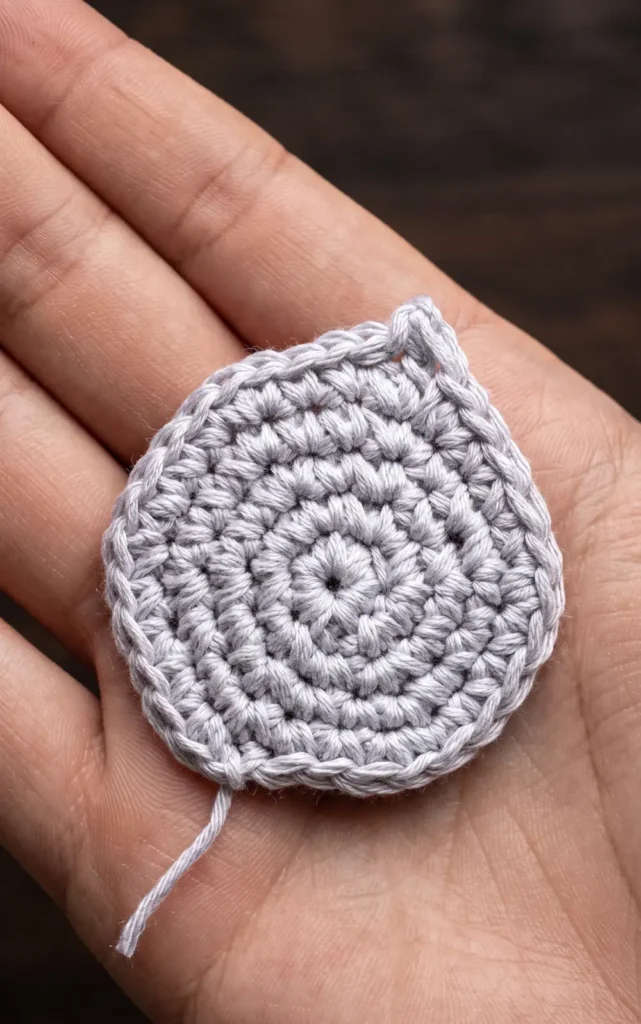
Create two ears starting with a magic ring of 6 sc, increasing until you have a round of 2 sc and 1 increase. To give the ear its signature point, work 3 sc and 1 increase until you reach the halfway mark. In the next stitch, work 1 double crochet, 1 chain, and then a slip stitch into the previous stitch before making another double crochet in that same base stitch. This creates a sharp peak. Continue the 3 sc and 1 increase pattern to the end and finish with a slip stitch.
Detailed Bat Wings
The wings are worked in a spiral up to a round of 4 sc and 1 increase, followed by one round of plain sc. To create the “spikes” on the wing’s edge, crochet 4 sc, then work a special point: 1 double crochet, 2 chains, a slip stitch in the previous stitch, and 1 more double crochet in the same base. Repeat this across the edge. Once the points are formed, finish the entire border of the wing with slip stitches (or dwarf stitches) to give it a clean look, adding a chain at each peak to maintain the sharp shape.
Step 3: Facial Details and Wire Legs
Embroidering the Face
For the eyes, you can use safety eyes, but felt or fabric circles give the bat a unique look. To embroider the fangs and mouth, use white yarn to create two small “V” shapes roughly level with the bottom of the eyes. Connect these with a horizontal line to form the mouth, then hide the yarn tails inside the head.
Adding Posable Legs
Before fully sealing or attaching the body, insert a piece of wire or pipe cleaner through the lower part of the body. Fold the wire in the center to secure it so it does not slide. Once the wire is in place, you can finish stuffing the body. To finish the legs, tie your yarn to the wire and wrap it tightly all the way down, securing the end with a knot and hiding the tail inside the amigurumi.
Step 4: Final Assembly
Joining the Parts
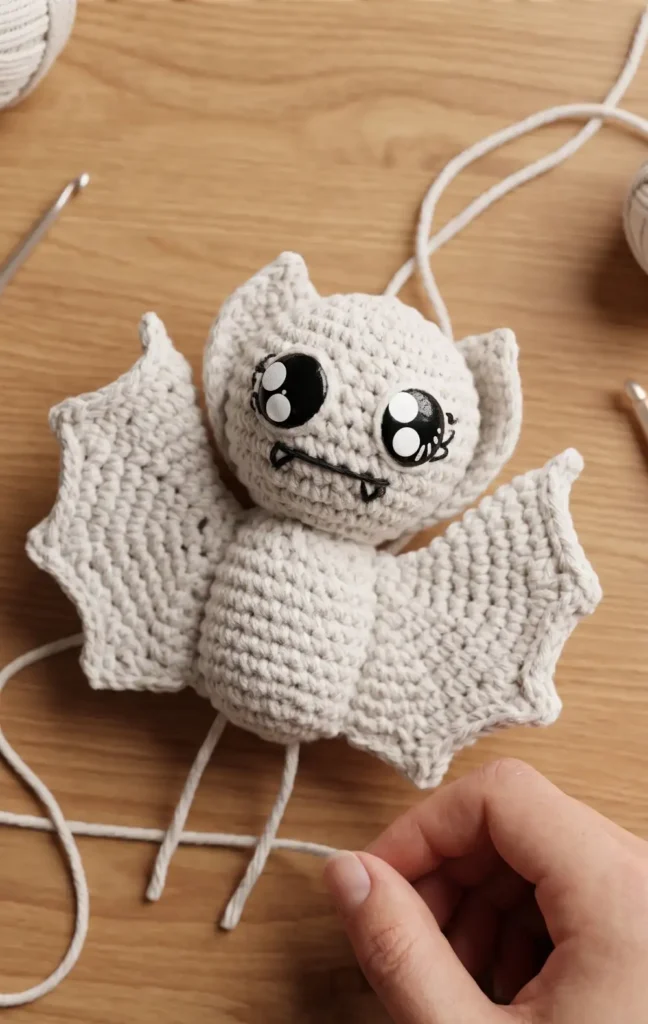
Sew the head securely to the body using a tapestry needle. When attaching the ears, position them so the pointed detail faces outward and only sew the bottom portion, leaving the top free. Finally, attach the wings to the back of the body. Position the wings with the main point facing upward and the flatter, squared edge facing down. Once everything is sewn together, your Halloween bat is ready.
Video Credits: Crochet con May
2. Mini Amigurumi Bat Crochet Pattern
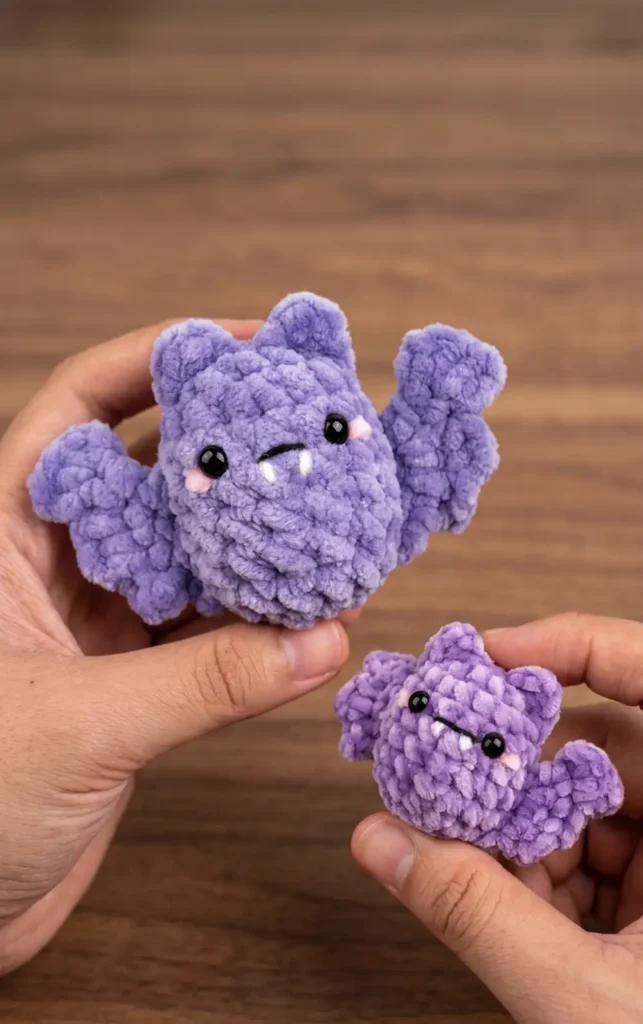
Creating this adorable mini bat is a perfect project for Halloween or for anyone who loves “pocket” sized plushies. This no-sew design uses simple stitches to create a seamless body with attached wings and ears.
Materials Needed
To complete this project, you will need the following materials based on the tutorial:
- Purple yarn for the main body, wings, and ears.
- White yarn to embroider the tiny teeth.
- Black yarn for the mouth detail.
- Pink yarn to add a soft blush effect.
- Crochet hook suitable for your yarn weight.
Step 1: Crochet the Main Body
Begin by making a slip knot with your purple yarn and chaining five. Starting from the second chain from the hook, make three single crochets. In the very last chain, work three single crochets into that one stitch. Turn your work to crochet along the other side of the chain, making two single crochets and ending with an increase in the last chain for a total of 10 stitches.
For the second round, follow a pattern of one increase followed by one single crochet, repeating this five times. From rounds three through seven, simply place one single crochet in every stitch. Finally, for round eight, decrease in the first stitch and single crochet in the next, repeating this five times to shape the head.
Step 2: Add the Bat Ears
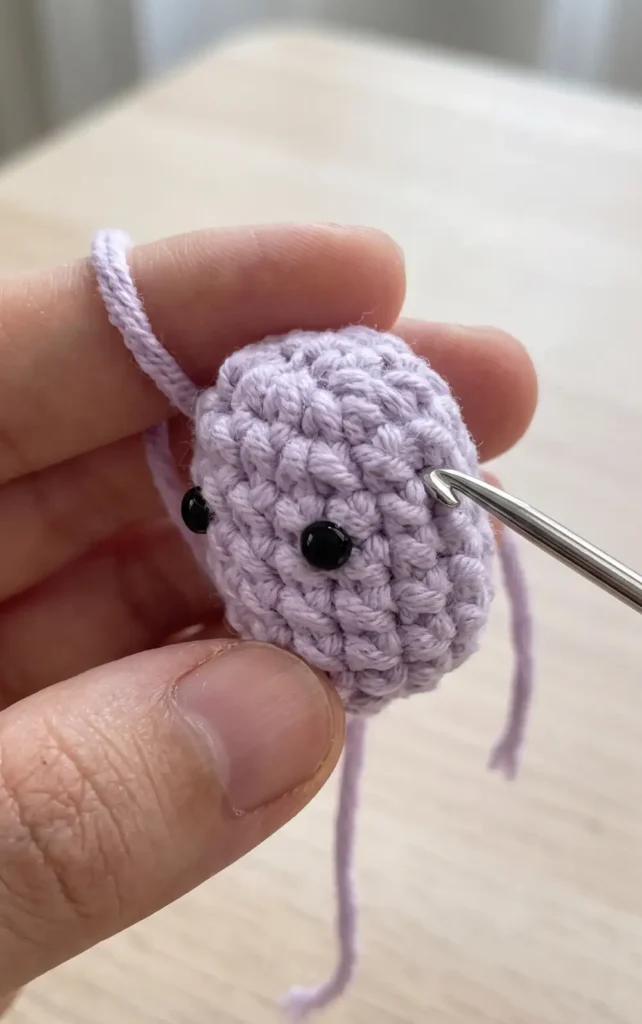
To create the left ear, take a strand of purple yarn and insert your hook into the body at round two. Pull the yarn through and chain two. Make one half double crochet into the first chain you made, then slip stitch back into round one to finish the shape. Cut your yarn and weave in the ends to secure it. You will repeat these exact steps on the other side of the head to complete the second ear.
Step 3: Form the Wings
For the left wing, grab your purple yarn and insert the hook into the body at round seven. Chain one, then work upward by making one single crochet into round six, one into round five, and one into round four. Chain one and turn your work.
For the second row of the wing, make an increase in the first stitch followed by two single crochets. Chain one and turn for row three, making two slip stitches, a chain, and then a single crochet into that second slip stitch. Follow this with one single crochet in the next stitch and an increase in the final stitch. For the final row, make an increase and then a single crochet. Repeat this entire process on the opposite side of the body for the right wing.
Step 4: Embroider the Face
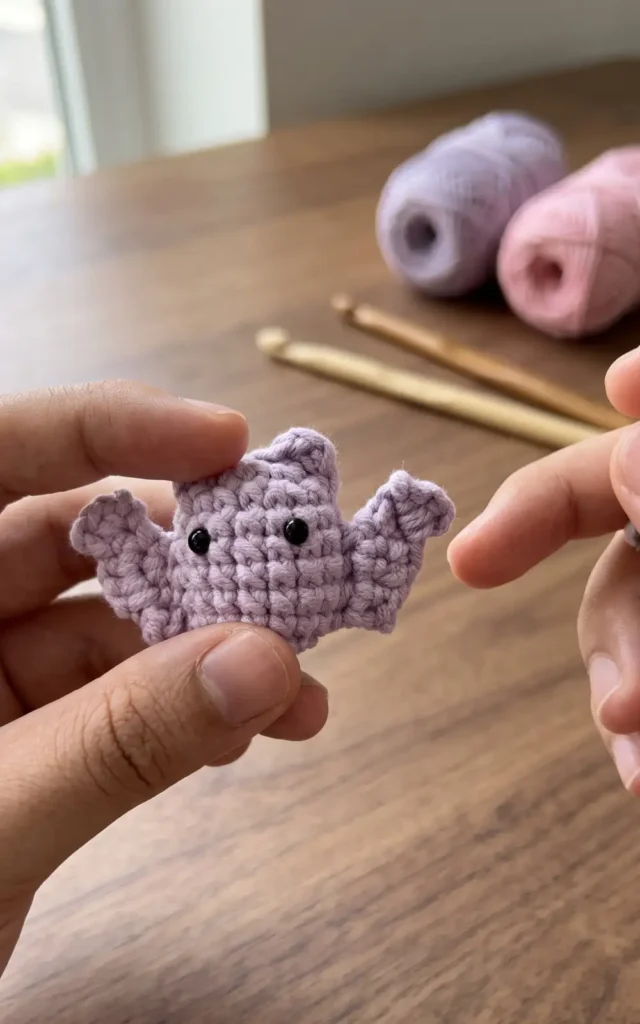
The final step is adding the character details that bring the bat to life. Use your white yarn to embroider two small teeth at round four of the body. Next, take your black yarn to stitch a mouth between rounds three and four. To give the bat a cute expression, use pink yarn to add blush marks near the eyes to finish your creation.
Video Credits: Monua DIY
3. Halloween Spooky Bat Crochet Pattern
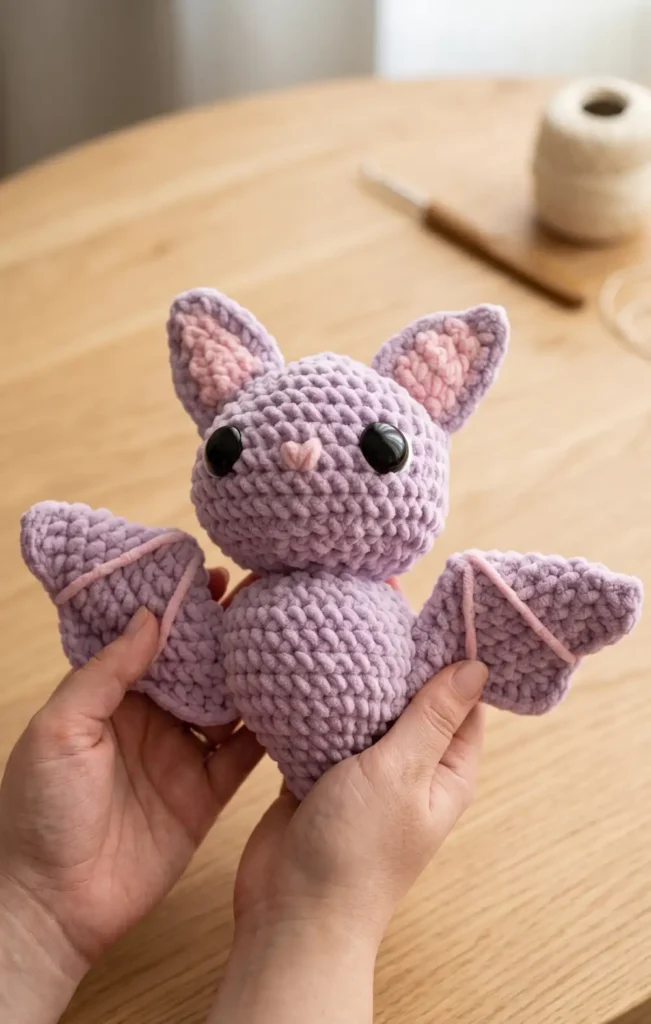
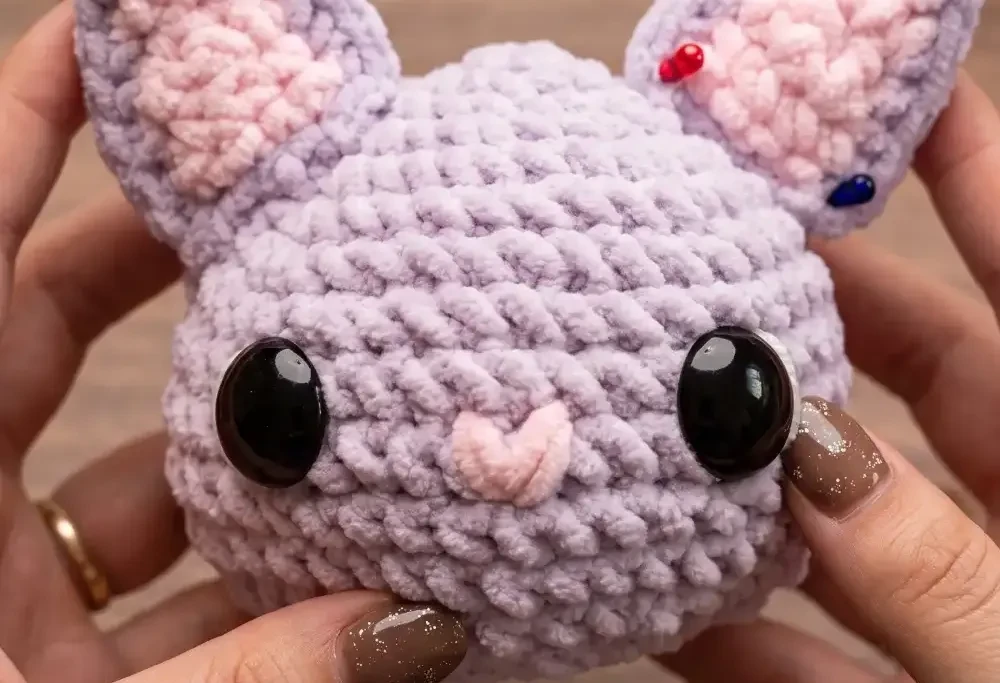
Get ready for the Halloween season by crafting this beginner friendly amigurumi bat using US crochet terms. This project involves creating separate parts for the wings, body, head, and ears before assembling them into a cute spooky plushy.
Materials and Tools Needed
To complete this project, you will need the following items:
- Yarn in your choice of main color, plus pink and purple for details.
- Crochet hook suited for your yarn weight.
- Stitch markers to track your rounds.
- Darning needle for sewing parts and adding facial details.
- Scissors.
- Polyfill or scrap yarn for stuffing the body and head.
- Safety eyes.
- Pins to help with part placement during assembly.
Step 1: Crafting the Scalloped Wings
Begin by creating a magic ring and single crocheting (sc) five stitches into it. Continue working in rounds, increasing your stitch count in each round until you reach a total of 35 single crochets by the end of round seven.
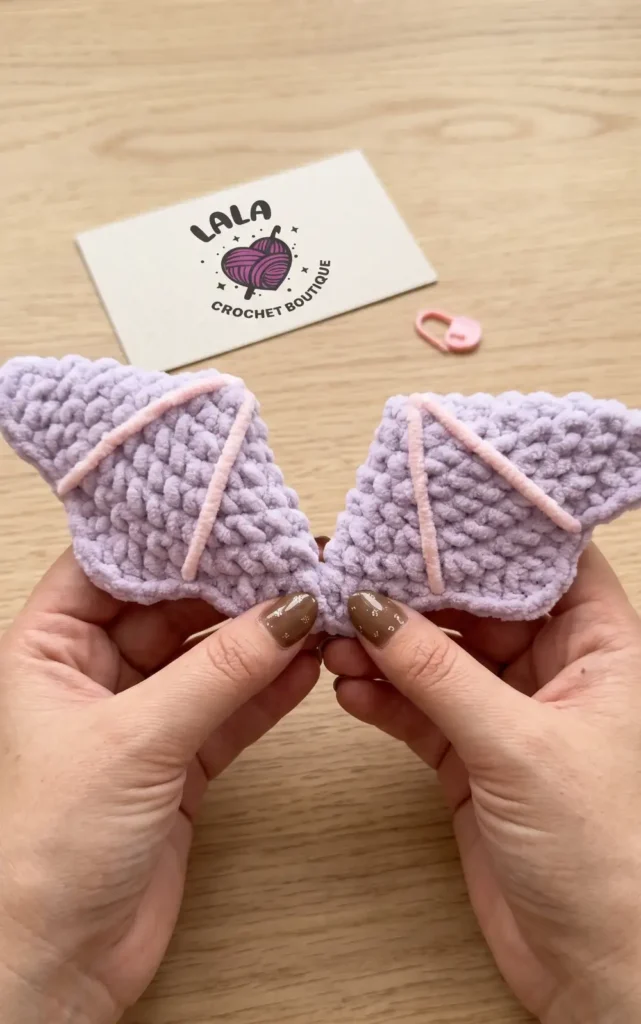
To give the wing its signature shape, fold the piece in half and stitch the two edges together using a specific sequence of stitches:
- Work a combination of double crochets (dc), half double crochets (hdc), and single crochets across the folded edge to create three distinct points.
- After finishing the crochet work, use a darning needle and pink yarn to add decorative lines from the wing’s edge to the center of the magic ring.
- Repeat these steps to create a second identical wing.
Step 2: Crocheting the Body
The body starts with a magic ring of four single crochets. You will gradually increase the number of stitches across several rounds until you have 30 single crochets in round seven. From round eight to round eleven, simply single crochet in each stitch around.
In round twelve, begin the shaping process by working a pattern of three single crochets followed by an invisible decrease. To perform an invisible decrease, insert your hook into the front loops only of the next two stitches before completing the sc. Once the body is partially closed, fill it firmly with polyfill and complete the final round with twelve decreases before fastening off.
Step 3: Creating the Head and Ears
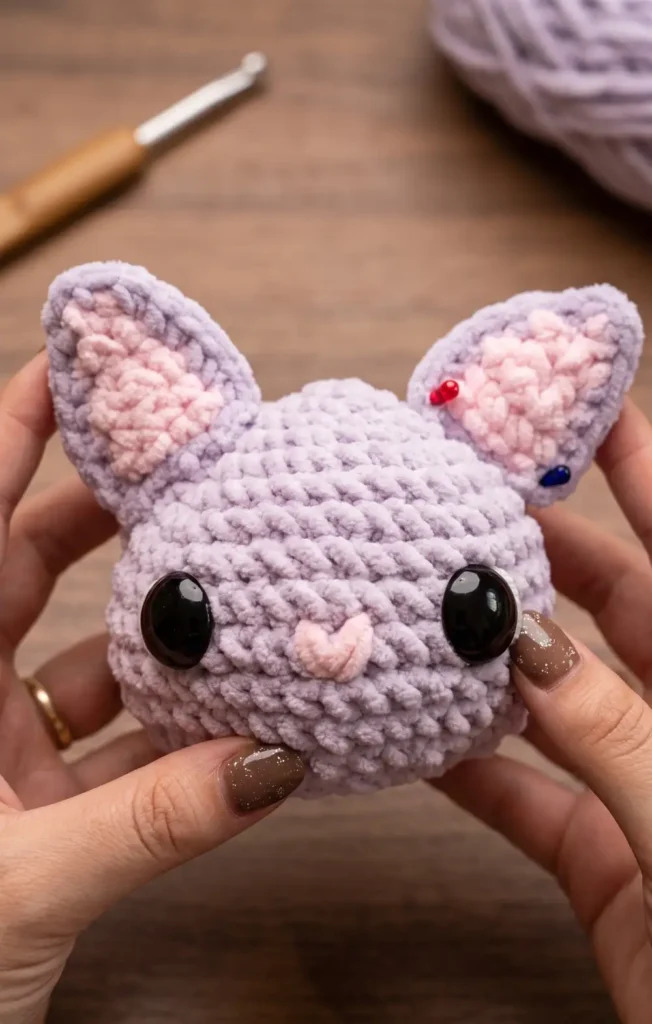
For the head, start with a magic ring of six single crochets and increase until you have 40 stitches. Crochet four rounds evenly before starting your decrease rounds. Before closing the head:
- Insert safety eyes between rounds nine and 10, spaced seven stitches apart.
- Use pink yarn to embroider a cute heart-shaped nose four stitches apart from each eye.
- Stuff the head with polyfill and finish with a round of twelve decreases.
The ears are made by crocheting two separate panels: one in the main color and one in pink. Single crochet these two panels together to create a sturdy ear. Once you have two ears, sew them to the head between rounds three and eight.
Step 4: Final Assembly and Details
The final step is to join all your pieces together. Start by attaching the head to the body. Both the top of the body and the bottom of the head should have 12 stitches; use a darning needle to sew through the front loops of both parts to create a clean seam.
Finally, attach the wings to the sides of the body between rounds seven and ten. Because the wings can be heavy, it is recommended to pull the yarn tails through the body and tie them together in a knot to keep the wings secure. Once all ends are woven in, your spooky bat is ready for Halloween.
Video Credits: LalaBeCrocheting
4. Simple Crochet Bat Pattern Beginner-Friendly
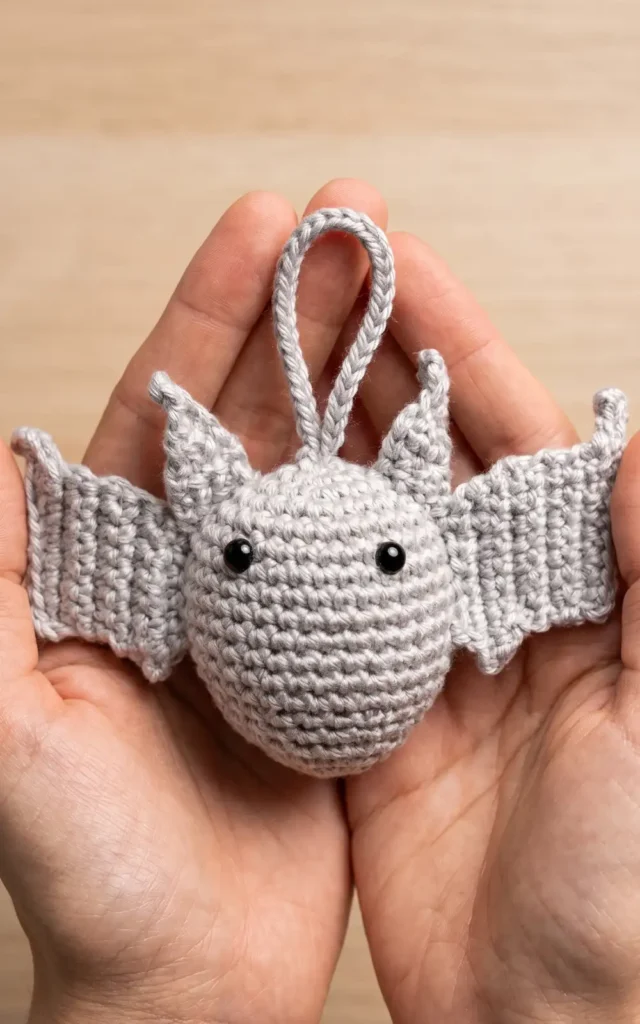
If you are looking for an easy Halloween DIY project, this handcrafted amigurumi bat is a perfect choice for beginners. Follow these four steps to create your own spooky companion.
Essential Materials
Before starting, gather the following supplies:
- 3mm and 2mm crochet hooks
- Grey acrylic yarn
- Snap-on eyes
- Stuffing
- Stitch marker, tapestry needle, and scissors
Step 1: Starting the Body with Increases
To begin the body, use your 3mm hook and grey yarn to create a magic circle, working six single crochets into it. In the second round, place an increase in every stitch to grow from 6 to 12 stitches. Continue increasing every other stitch to reach 18, and then every two stitches to reach 24. For the final round of increases, work one increase every three stitches until you have a total of 30 stitches.
Step 2: Building and Stuffing the Body
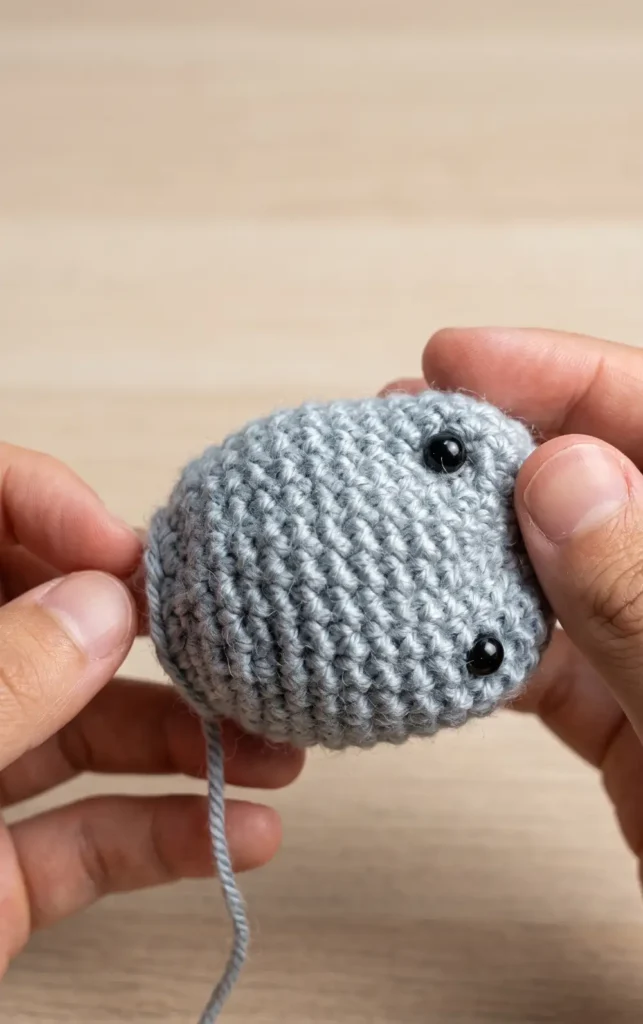
Once you have 30 stitches, work eight rounds without any further increases to build the height of the body. Use a stitch marker to keep track of your starting point; you can crochet over the marker to ensure you do not lose your place.
After completing these rounds, begin decreasing every two stitches. At this point, attach the snap-on eyes and firmly stuff the body with your filling. Continue decreasing every other stitch until the body is closed off completely.
Step 3: Crocheting the Ears
For the ears, switch to the smaller 2mm hook and make two identical pieces. Start by creating a knot and chaining four. Skip the first chain and work single crochets across the row, then chain one and turn your work. Continue working rows of single crochets while incorporating decreases to taper the piece into a pointed ear shape before pulling the yarn through to finish.
Step 4: Crafting the Wings
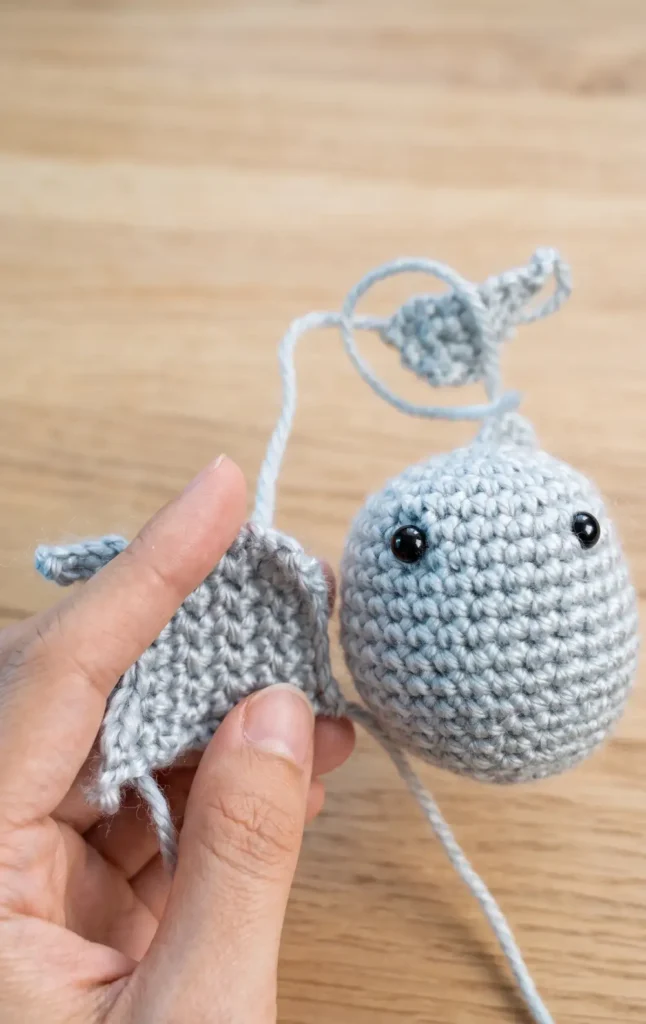
Switch back to the 3mm hook to create the wings. Begin by chaining seven, then skip the first chain and work six single crochets back across. To give the wings their distinct shape, use a series of slip stitches, chains, and increases over the subsequent rows.
For example, you will chain two and slip stitch into the same stitch to create texture, eventually finishing with a chain of three or four to define the wing tips. Once both wings are complete, they are ready to be attached to the body.
Video Credits: DynamisCreations
5. Crochet Plush Bat Amigurumi Pattern
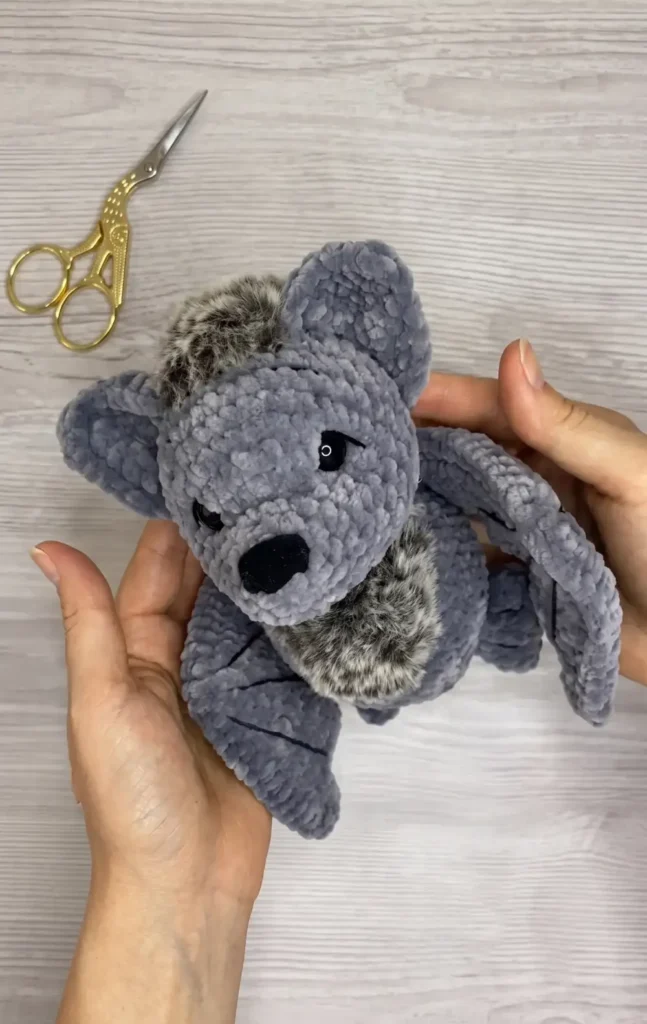
This tutorial provides the necessary steps to complete the limbs and decorative features of a plush bat using chenille and fluffy yarn with a 4.5 mm crochet hook.
Step 1: Crafting the Legs
To begin the legs, use chenille yarn to create a slip knot and chain seven. In the second chain from the hook, make an increase of two single crochets, followed by one single crochet in the next four chains. In the very last chain, work three single crochets into the same space, then work five single crochets down the other side of the foundation chain.
For the next two rounds, crochet one single crochet in each stitch for a total of 14 stitches per round. In the following round, decrease twice at the beginning, work three single crochets, and then decrease twice again. The final round consists of one single crochet in each of the remaining 10 stitches. Fasten off and leave a long tail for sewing, then repeat these steps to make a second leg.
Step 2: Shaping and Joining the Wings
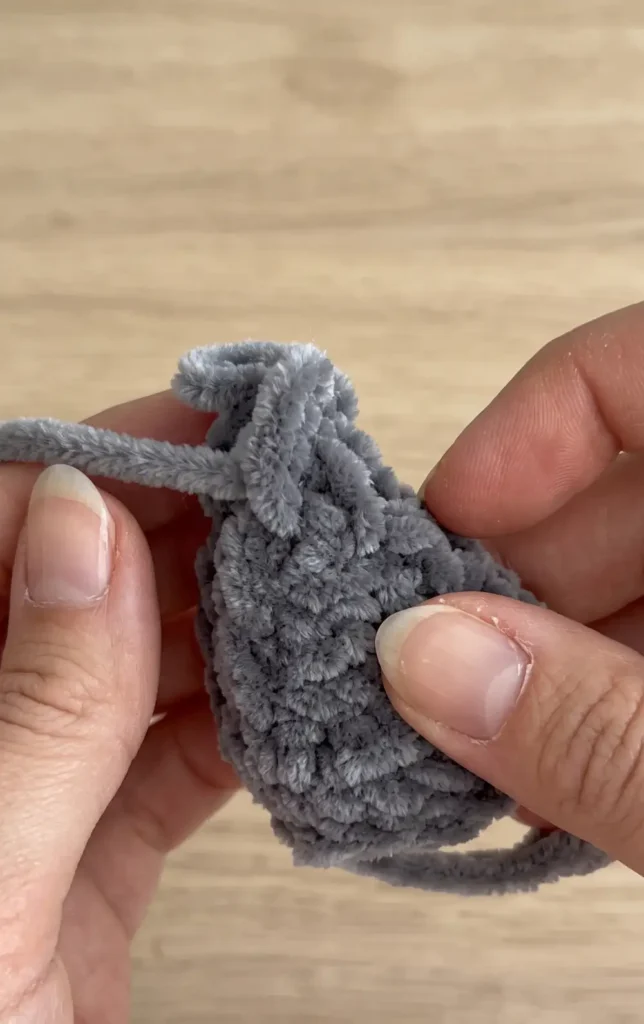
The wings require four layers in total, as each of the two wings is made by joining two layers together. Start each layer by chaining 17 and working two rows of 16 single crochets. To shape the wing, use slip stitches at the beginning of specific rows to create a tiered effect:
- Row 3: Make three slip stitches, then 13 single crochets.
- Row 4 through 6: Work 12 single crochets, skipping the previous slip stitches.
- Row 7: Make three slip stitches, then eight single crochets.
- Row 8 through 10: Work eight single crochets.
- Row 11: Make four slip stitches, then three single crochets.
- Final Rows: Decrease the remaining stitches until you have a small point.
To finish, place two layers together and join them by crocheting single crochets through both layers around the edges, placing two single crochets in each corner for a smooth turn.
Step 3: Creating the Triangular Ears
Each ear is constructed from two layers joined together, requiring four layers total for the project. Start with a chain of seven and work two rows of six single crochets. To achieve a triangle shape, start every subsequent row in the second stitch from the hook rather than the first.
Continue this decreasing pattern until you reach a single stitch at the top point. Once you have two matching layers, join them using single crochets along the two slanted sides, but do not join the bottom edge. Leave a long yarn tail to facilitate sewing the ears onto the bat’s head.
Step 4: Adding Fur and Hair Details
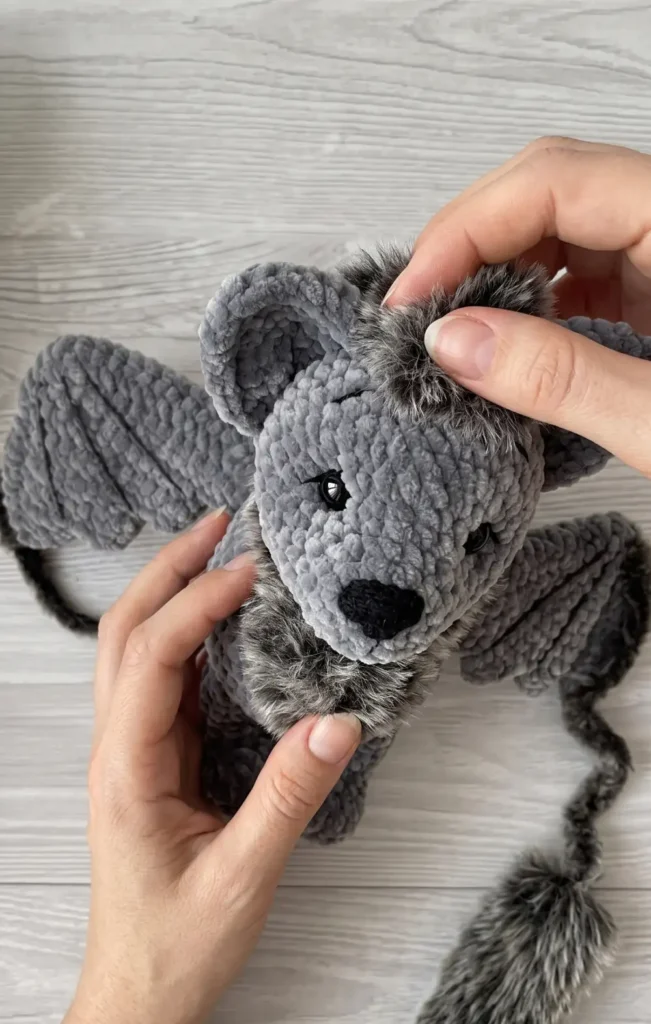
For the final decorative touches, switch to fluffy yarn. To make the neck fur, chain five and work a row of four single crochets. Shape this into a triangle by starting in the second stitch of each row until only one stitch remains. This piece should be sewn under the bat’s neck with the pointed corner facing downward.
To create the hair, chain five and crochet a small rectangle consisting of three rows of four single crochets. Once finished, place this rectangular piece between the ears and sew it securely to the top of the head using a yarn needle.
Video Credits: Tommy’s sheep crochet and knitting
Now Pick Your Favorite and Get Hooking
There’s a bat here for every skill level and every yarn stash situation. Some have wire-posed legs, some have big fluffy layered wings, and each one nudges you toward something new when it comes to shaping amigurumi. Just pick your favorite and go.
No matter which one you land on, you’ll finish with a plushie that’s honestly embarrassingly cute for something meant to be spooky. Keep these patterns close for next Halloween too, because bats have a way of becoming a year-round obsession. Happy crocheting, and soak up every bit of the season.