6 Crochet Pet Bandana Free Patterns You Can Make in an Afternoon
Pet bandanas are one of those crochet projects that never get old. They’re quick, satisfying to make, and your dog or cat actually gets to wear something you created with your own hands.
In this post, I’ve rounded up six free crochet pet bandana patterns that range from simple triangles to granny stitch designs. Whether you’re a beginner or just looking for a fast weekend project, there’s something here for every skill level and every pet.
1: Crochet Pet Bandana

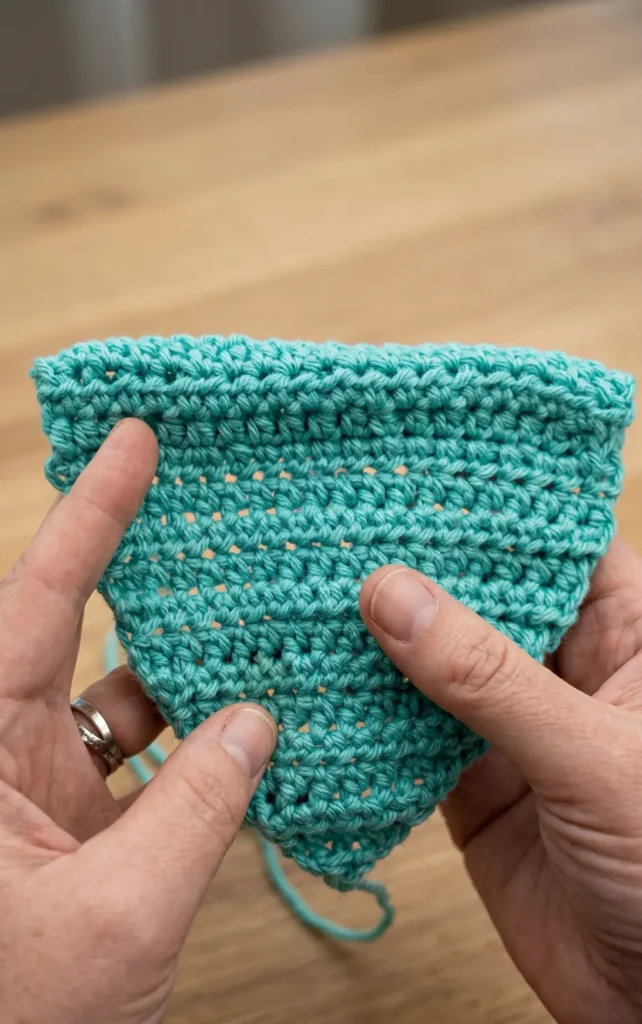
This easy, one piece pet bandana is worked in a triangle shape and includes a built-in casing designed to slide directly onto your pet’s collar. The pattern is versatile enough for both dogs and cats and can be adjusted for five different sizes.
Essential Materials and Tools
To begin this project, you will need the following items:
- Crochet Hook: A 5 mm (US H) hook is recommended.
- Yarn: A number 4 medium weight yarn works best. Using a low pill fiber yarn is ideal as it will hold up well to frequent washing and the wear and tear of an active pet.
- Measuring Tape: This is necessary to ensure the collar casing reaches the correct length for your specific size.
- Tapestry Needle and Scissors: These are used for weaving in yarn tails and finishing the project.
- Stitch Markers: Optional locking stitch markers can help you keep track of decrease rows.
Sizing and Initial Chains
The pattern provides specific foundation chain counts for five different sizes:
- Small: Chain 20
- Medium: Chain 24
- Large: Chain 30
- Extra Large: Chain 34
- Extra Extra Large: Chain 36
Creating the Collar Casing
The first section of the bandana forms the casing that your pet’s collar will slide through.
- Foundation Row: Start by making a half double crochet (HDC) into the second chain from the hook and continue HDC in every chain until the end of the row.
- Building Height: Turn your work, chain one, and HDC into every stitch across. Repeat this row until the piece reaches the required measurement for your size.
- Small: 2.25 inches (approximately 6 rows).
- Medium and Large: 3 inches (approximately 8 rows).
- Extra Large: 3.5 inches (approximately 11 rows).
- Extra Extra Large: 4 inches (approximately 12 rows).
- Sealing the Casing: Fold the crochet piece up so the foundation row meets your current row. Chain one, then HDC across the row by inserting your hook through both the current stitch and the corresponding stitch on the foundation row. This creates a tube.
Shaping the Triangle Bandana
After completing the casing, you will begin decreasing stitches to create the triangle point.
- Transition Row: HDC across all stitches for one row to establish the base of the triangle.
- Initial Decreases: For the next four rows, chain one and HDC across until only two stitches remain, then perform a decrease (pull up a loop in each of the last two stitches, yarn over, and pull through all loops).
- Main Body Decreases: Continue by decreasing at both the beginning and the end of every row. This consistent reduction will naturally form the point of the bandana.
- The Final Point: Continue decreasing until only three stitches remain (or two stitches for the medium size). For the final row, perform a DEC 2, which involves pulling up a loop in each of the last three stitches and pulling through all four loops on the hook to finish the point.
Finishing and Customization
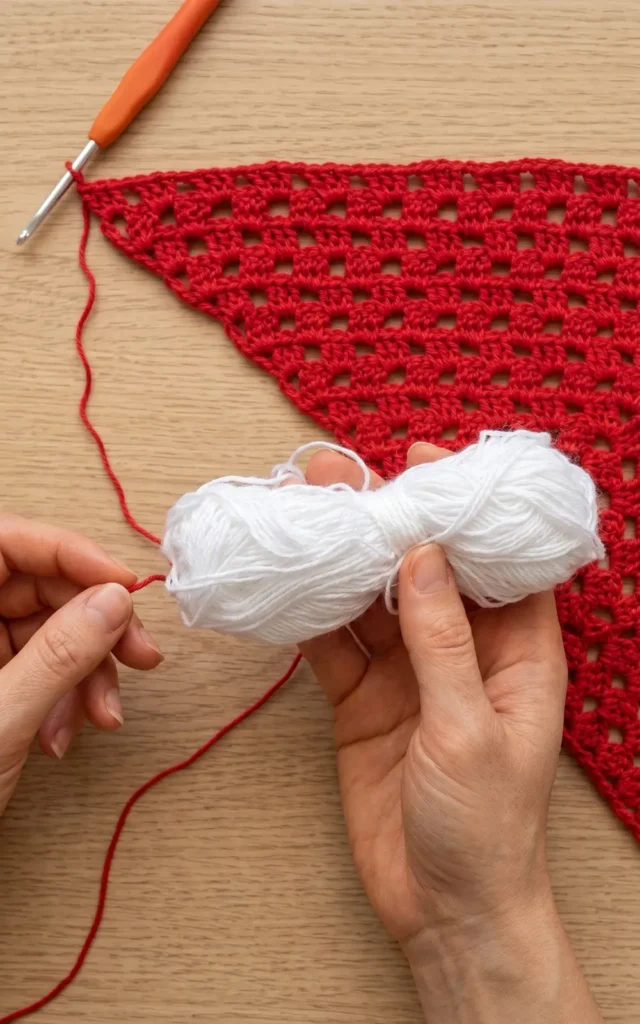
Once the crochet work is complete, fasten off the yarn and use your tapestry needle to weave in the remaining tails. You can customize the bandana by adding surface crochet designs, such as your pet’s name, initials, or festive patterns. Because these bandanas are made from washable yarn, they are easy to keep clean after your pet’s outdoor adventures.
Video Credits: GoodKnitKisses
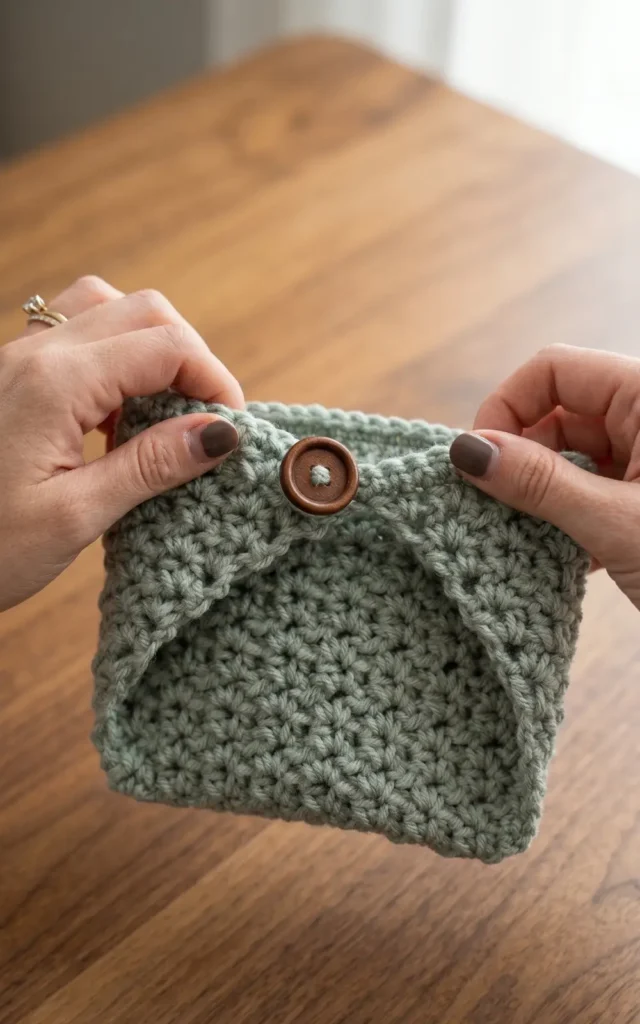
2: Easy Crochet Dog Bandana Step by Step Tutorial
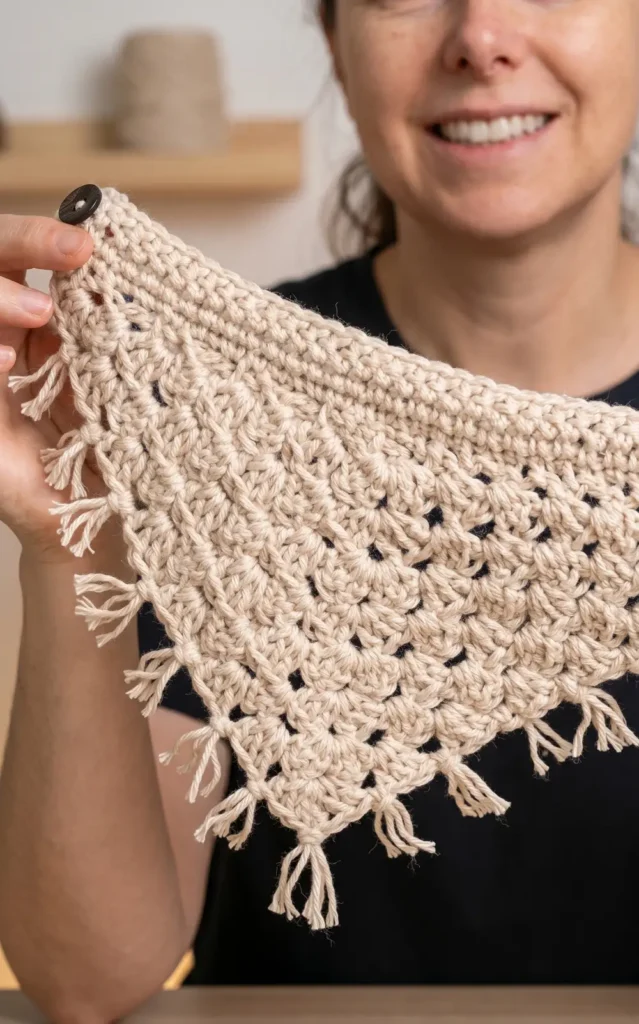
This adorable crochet bandana is a quick project that can be completed in less than an hour. It features an adjustable strap and button closure, making it easy to put on and fit securely on various pet sizes.
Materials You Will Need
Before you begin, gather the following supplies:
- Worsted weight yarn: A cotton or cotton and acrylic blend is recommended for durability.
- 5 mm crochet hook: A comfortable hook is essential for smooth stitching.
- Button: A half inch button is ideal as it must be small enough to fit through the double crochet stitches on the strap.
- Needle and thread: Use a regular needle and thread to sew on the button.
- Tapestry needle: This is used for weaving in your yarn ends.
Choosing the Right Size for Your Pet
The pattern is highly customizable. For a medium sized dog like a pug, the tutorial follows a nine row pattern. If you are making this for a cat or a very small dog, you should stop after five or six rows. For larger breeds, simply continue repeating the increase rows until the triangle reaches the desired size.
Step 1: Starting the Base

You can start the bandana using either a magic ring or a chain four method.
Magic Ring Method: Create a loop, chain three (which counts as your first double crochet), and make two double crochets into the ring. Chain one to create the corner, then work three more double crochets into the same ring. Pull the tail to close the ring, but do not tighten it excessively yet.
Chain Four Method: Slip knot and chain four. Work two double crochets into the first chain made. Chain one, then work three more double crochets into that same first chain.
Step 2: Building the Bandana Body
The body is built by repeating increase rows to form a triangle:
- Row 2: Turn your work and chain three. Double crochet into the very first stitch. In the corner space, work three double crochets, chain one, and three more double crochets. End the row with two double crochets in the top of the starting chain from the previous row.
- Row 3: Turn and chain three. Double crochet in the first stitch. Work three double crochets into the side space. In the corner, work three double crochets, chain one, and three more double crochets. Work three double crochets in the next side space and end with two double crochets in the top of the chain three.
- Continue: Repeat these steps, adding an extra three double crochet cluster into every new side space created, until you reach your desired number of rows.
Step 3: Creating the Adjustable Strap and Collar
Once the triangle is finished, you will create the top band:
- Chain the strap: Chain 21 (or more if you need a longer strap).
- First Row: Single crochet in the second chain from the hook and in each chain across. Continue by single crocheting evenly across the top edge of the bandana triangle.
- Second Row: Turn and chain three (counts as a stitch). Skip the first stitch and double crochet in every stitch across. This double crochet row creates the “holes” for your button, making the bandana adjustable.
- Third Row: Turn and chain one. Single crochet in each stitch across, including the top of the starting chain three. Fasten off.
Step 4: Adding the Decorative Border
There are several ways to finish the edges of your bandana.
The Scalloped Border: Attach yarn to the side of the bandana. Chain three and work two double crochets in the first space. Slip stitch into the middle stitch of the next cluster. Work five double crochets in the next space and slip stitch into the next cluster middle. At the bottom point (the corner), work seven double crochets to help the scallop fan around the edge. Continue the pattern up the other side, ending with three double crochets in the last space and a final slip stitch.
The Boho Tassel Border: Cut several pieces of yarn approximately the same length by wrapping yarn around your hand about 51 times. For each space along the bandana edge, take three strands of yarn. Thread the loops through the space, pull the ends through the loops, and tighten to create a tassel.
Finishing Touches
To finish, sew your button onto the side of the collar opposite the long strap. Ensure the button is centered so it aligns with the double crochet holes. When sewing, go through the yarn stitches several times to make it secure. Finally, weave in all remaining yarn tails with your tapestry needle to ensure a clean look.
Video Credits: Yarn Stash with Marching North
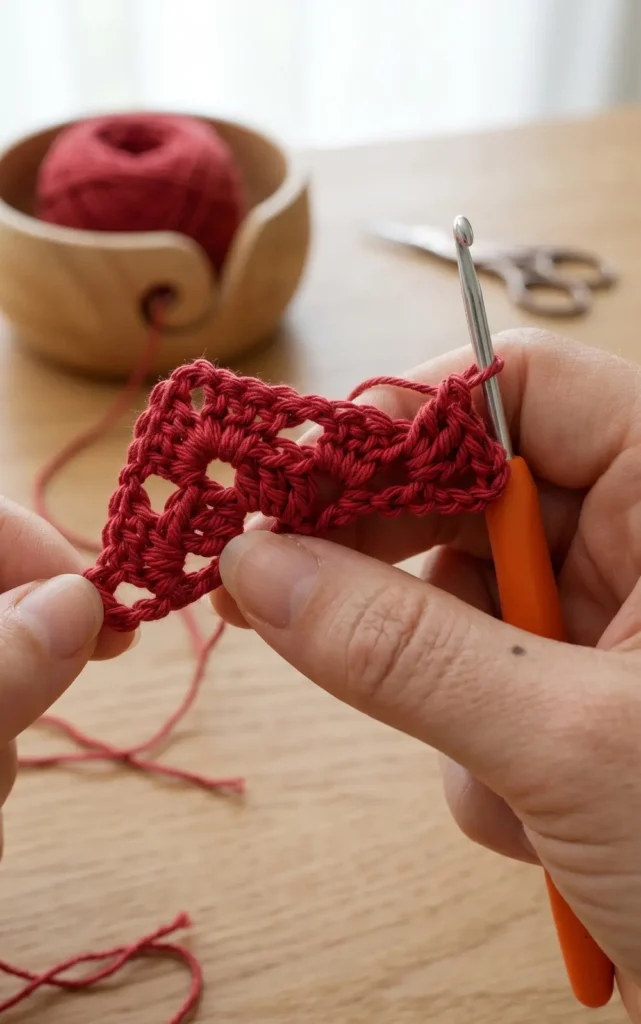
3: V Stitch Pet Bandana Crochet Tutorial
This tutorial guides you through creating a stylish pet bandana using a corner to corner style pattern with half double crochet V stitches. This versatile pattern can be adjusted for any furry friend, from cats to large dogs.
Materials and Tools Needed
To get started on this project, you will need the following items:
- Yarn: Your choice of yarn in a solid or variegated colour.
- Crochet Hook: A 5.5 mm hook, or the size appropriate for your chosen yarn.
- Measuring Tool: A tape measure to determine your pet’s neck circumference.
- Essential Notions: Scissors and a yarn needle.
- Fastener: One button, approximately the size of a quarter.
Before you begin crocheting, measure your pet’s neck exactly where their collar usually sits to determine the required width for the finished bandana.
Creating the Base Rows

The bandana is worked as an increasing triangle. Follow these steps to begin:
- Row 1: Start with a slip knot and chain four. In the fourth chain from your hook, work one half double crochet, chain one, and another half double crochet all in the same space to complete your first V stitch.
- Row 2: Chain three and turn your work. Skip the first half double crochet and work a V stitch (one half double crochet, chain one, one half double crochet) into the first chain space. Work a second V stitch into the starting chain three space.
- Row 3: Chain three and turn. Work a V stitch into the first chain space. Skip the next two stitches and work a V stitch into the next chain space. Finish the row with one more V stitch in the chain three space.
Increasing to the Correct Size
To grow the bandana, you will continue with a one row repeat. Each new row will contain one additional V stitch compared to the row before it.
Continue repeating this increase row until the longest edge of the triangle reaches the measurement you took of your pet’s neck,. For example, a small dog might require a 15 inch measurement from corner to corner.
Adding the Button Loop and Border
Once the bandana is the correct size, you will create a fastening loop and a clean finished edge:
- Create the Loop: Chain eight, or the number of chains necessary to fit snugly around your chosen button. Turn your work and slip stitch back into the stitch where you started the chain to form a loop.
- Finish the Edge: Single crochet in every stitch across the entire top length of the bandana. This provides a more polished look. Ensure you place your final single crochet into the top of the chain three from the previous row.
Final Assembly
After completing the border, chain one and cut your yarn. Leave a long tail to use for sewing on the button.
Thread the yarn tail through your needle and weave it over to the corner opposite your loop. Position your button and sew it securely onto the bandana using a cross or plus sign stitch pattern. Tie a knot to secure the button and weave in all remaining yarn ends to finish the project.
Video Credits: Rachel Riley Crochet
4: Crochet Christmas Dog Bandana Tutorial
This tutorial explains how to create a festive accessory for your pet that is perfect for Christmas parties. No pattern is needed to follow these instructions, and the project is considered very easy to complete. By following the steps provided by the sources, you can create a custom fit for any size dog.
Materials Needed
To begin this project, the sources recommend gathering the following items:
- 100% cotton yarn in size fine weight 2, using red for the main body and white for the trim.
- A 3mm crochet hook.
- Scissors.
- A tapestry needle for weaving in ends.
Creating the Bandana Body
The construction of the bandana begins at the middle part and works outward to make the triangle larger.
- Start with a slipknot and chain 6.
- For Row 1, work 3 double crochet stitches into the very first chain made. Chain 2, then work another 3 double crochet stitches into that same first chain. To finish the row, chain 1 and work one final double crochet in the same spot.
- To turn for Row 2, chain 5 and turn your work. Every subsequent row will start with a chain 5 turn.
- Work 3 double crochet into the first gap you encounter. For the edges, you will work clusters of 3 double crochet into the gaps, separated by a chain 1.
- The corner remains consistent throughout the project: work 3 double crochet, chain 2, and then 3 double crochet all into the same corner space.
- To finish every row, work 3 double crochet in the last gap, chain 1, and then work one final double crochet to create a new gap for the next row.
Repeat these steps until the bandana is the appropriate size for your pet. For reference, a bandana measuring approximately 35 cm across fits the dog featured in the tutorial.
Adding the Festive White Edge
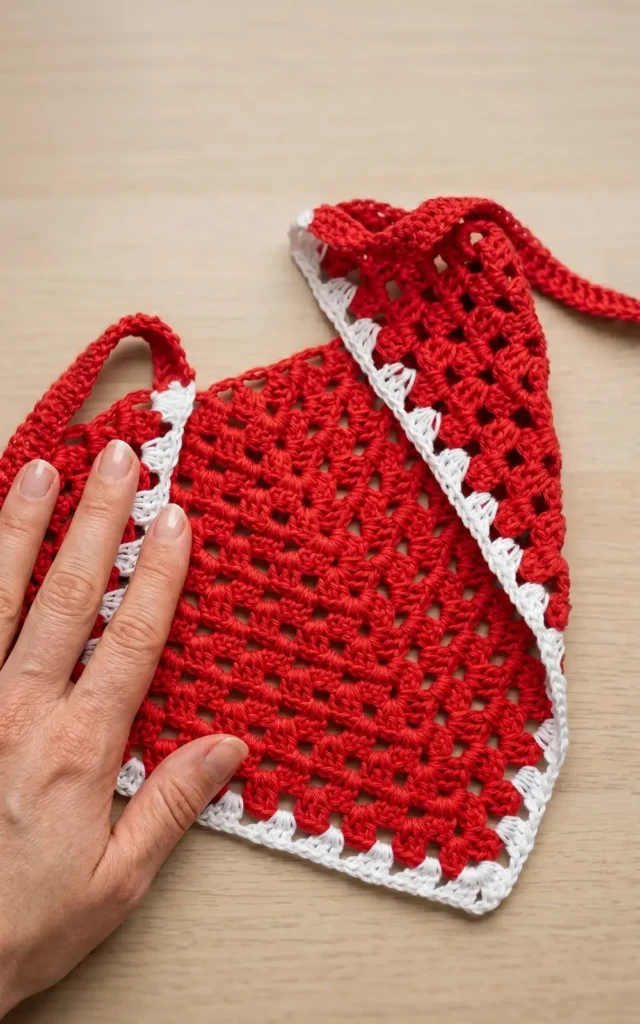
Once the red body is the desired size, you can add a decorative white edge to give it a finished look.
To change colors, start your final double crochet of the red row as usual, but perform the final pull-through with the white yarn. Do not cut the red yarn yet, as it will be needed later to create the straps. Work one full row in the white yarn following the established pattern of clusters and gaps. After finishing the white row, cut the white yarn and weave in the end.
Crafting the Straps
To secure the bandana, you will need to add red straps to the corners.
First, insert your hook into the corner of the bandana and pull up a loop of the red yarn you left hanging earlier. You may need to make some slip stitches to reach the very corner of the piece. Chain until the strap is long enough, which is approximately 14 cm in the provided example. To add thickness, chain 2 extra to maintain the length and then work one double crochet into each chain back toward the bandana. Repeat this process for the other side to create a matching second strap.
When putting the finished bandana on your pet, the sources remind you not to tie it too tightly around their throat.
Video Credits: Diving Ducks Crochet
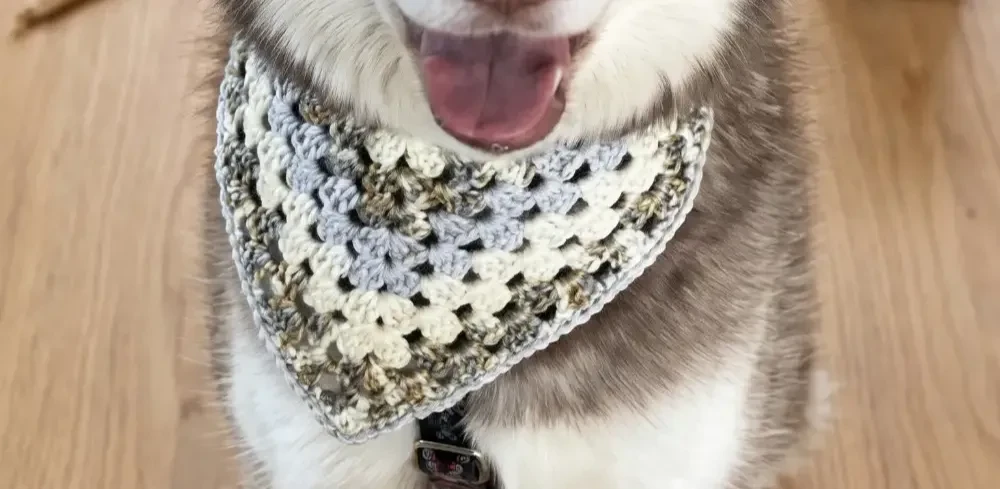
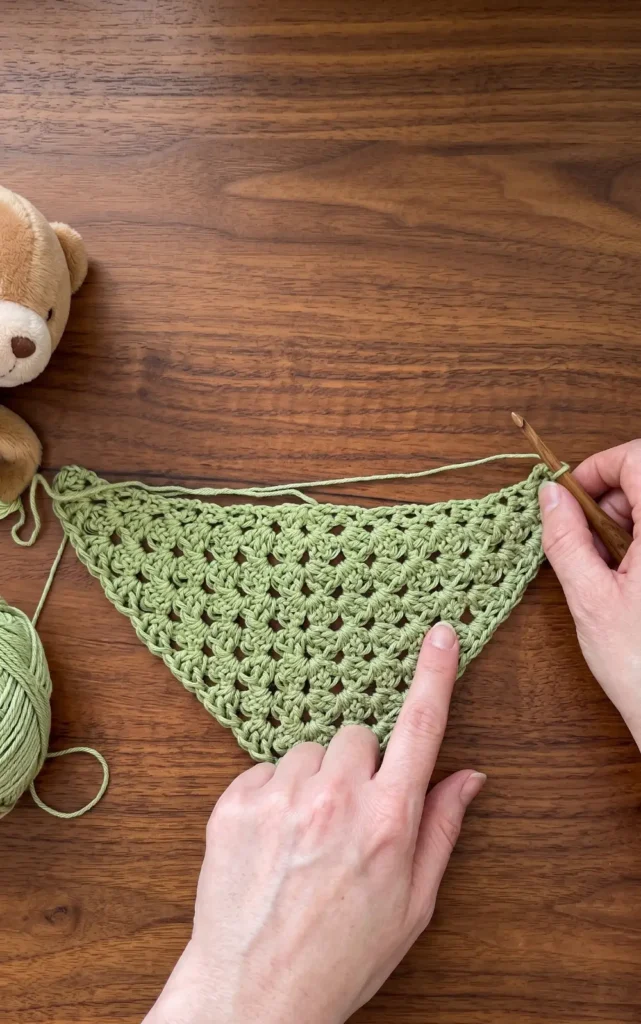
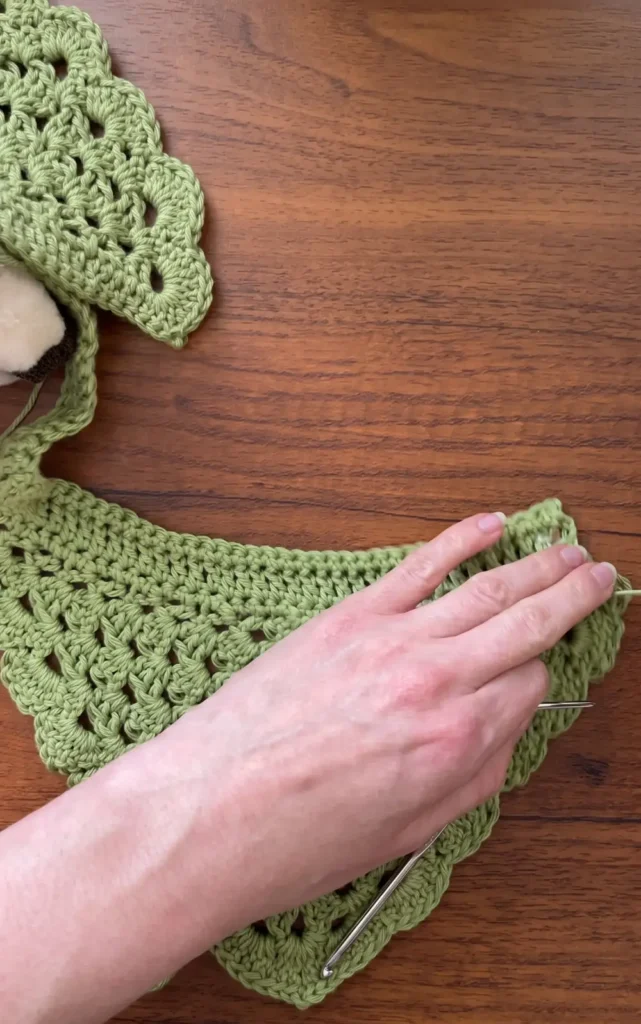
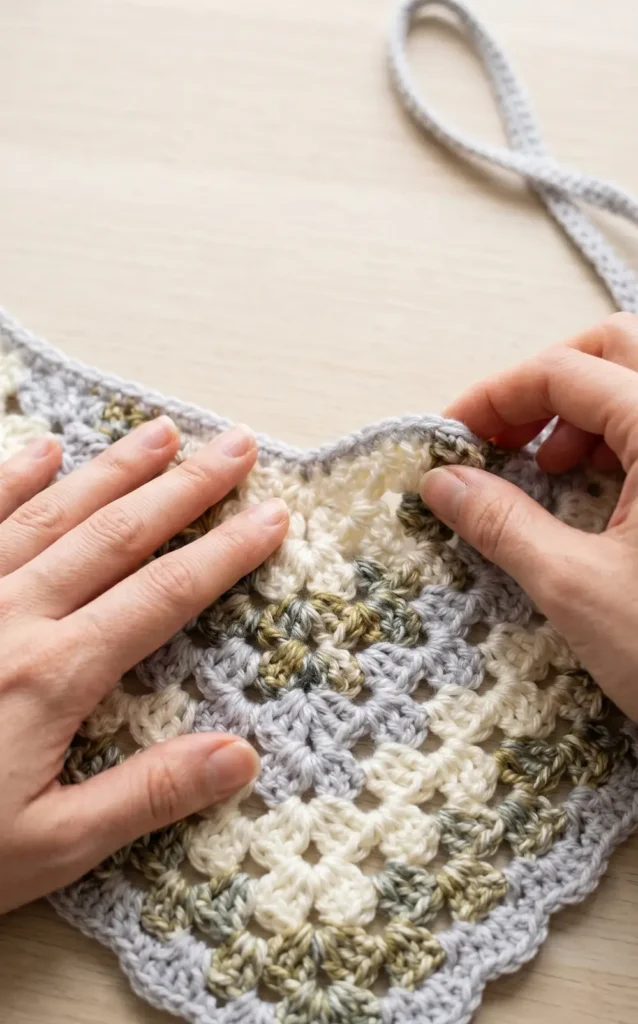
5: Crochet Granny Stitch Dog Bandana
This crochet dog bandana is an ideal project for using up scrap yarn because it can be adapted for any dog size and any yarn weight. Whether you have a tiny puppy or a large husky, you can adjust the number of rows to find the perfect fit.
Materials Needed
To begin this project, gather the following supplies:
- Yarn: You can use any yarn type, including worsted weight, chunky, or finer yarns. The tutorial specifically uses DK weight scrap yarn in multiple colors.
- Crochet Hook: Choose a hook size that complements your yarn. A G hook (4.25 mm) is used in the demonstration.
- Scissors: These are necessary for cutting yarn when changing colors or finishing the project.
- Yarn Needle: Required for weaving in ends once the bandana is complete.
Getting Started
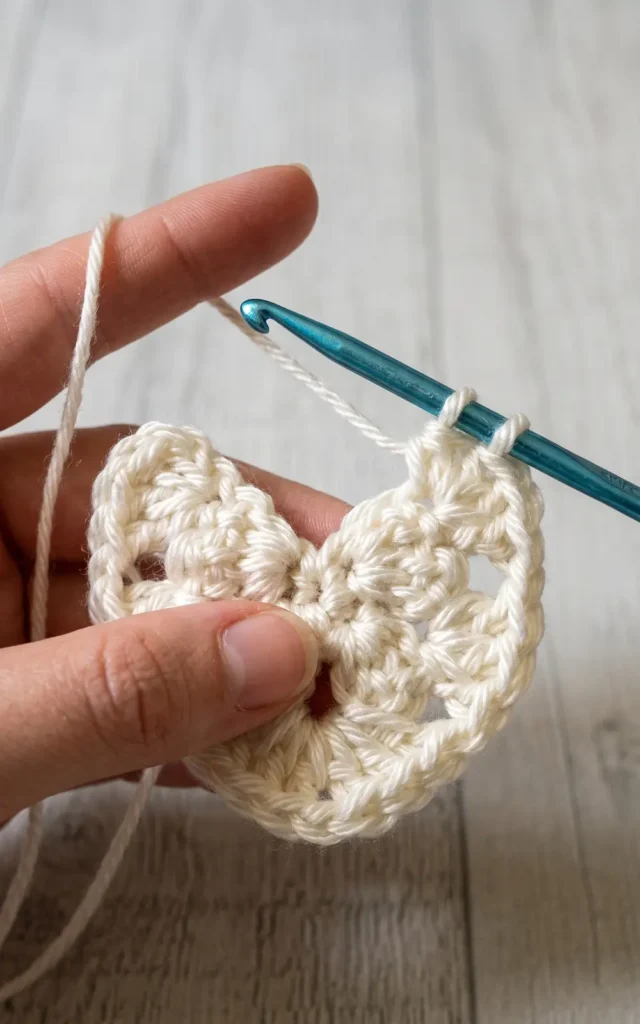
The construction begins at the top center of the bandana. Start by chaining two. In the second chain from the hook, work seven single crochet stitches to complete Row 1.
For Row 2, chain three to count as your first double crochet and turn your work. Work three more double crochet stitches into that very first stitch. Chain one, skip the next stitch, and work three double crochet into the next stitch. Chain one again, skip the next stitch, and work three double crochet into the next. To finish the row, chain one, skip the next stitch, and work four double crochet into the final single crochet.
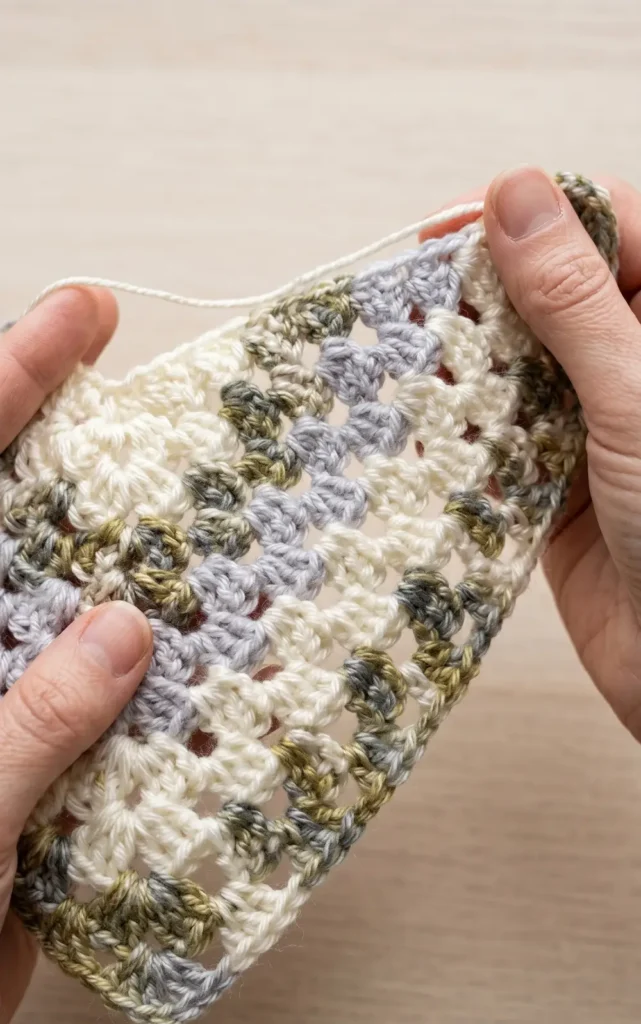
Building the Granny Stitch Pattern
Row 3 establishes the increase pattern that allows the bandana to grow. Chain three and turn, then work three double crochet into the first stitch. Chain one, skip the next three double crochet, and work three double crochet into the next chain space.
To create the point of the bandana, chain one and work a cluster of three double crochet, one chain, and three more double crochet all within the center chain space. Continue by chaining one, skipping three double crochet, and working three double crochet in the next chain space. Chain one and finish the row by working four double crochet into the top of the turning chain.
For Row 4 and all subsequent rows, repeat the process of working three double crochet into each chain space and the special cluster at the center point. Continue adding rows until the bandana reaches the desired size for your pet.
Creating the Decorative Border and Ties
Once the main body is the correct size, you can add a decorative edge. Chain one and turn, then work a sequence of one single crochet followed by one chain in each stitch across the bottom edge. This creates a slightly ruffled, decorative look.
When you reach the corner, begin the first tie by creating a long chain. For a medium sized dog, a chain of 65 is recommended to ensure it can be tied securely around their fur. You can add an optional decorative bobble at the end of the chain before slip stitching back across the length of the tie.
After finishing the first tie, single crochet evenly across the top edge of the bandana to reach the opposite corner. Repeat the chain and slip stitch process to create the second tie.
Finishing Your Project
To complete the bandana, cut your yarn and fasten off. Use a yarn needle to weave in all loose ends from color changes or the start and finish of the project. If the bandana is curling or needs more definition, you can block it to achieve a professional look.
Video Credits: The Pretty Stitch
6: Crochet Dog Bandana Using Moss Stitch
This project uses the moss stitch to create a stylish, custom-fit bandana for any dog. Because the pattern is worked from the bottom up and grows outward, it is easily adjustable based on your pet’s specific measurements.
Materials Needed
To complete this tutorial, you will need the following items:
- Acrylic yarn (the creator recommends acrylic for durability).
- 5.5 mm crochet hook.
- Scissors and a yarn needle.
- A 1 inch button.
- Tape measure to check your dog’s neck circumference.
Before starting, measure your dog where their collar usually sits. For a small dog, this might be approximately 16 inches.
Starting the Bandana
You can begin by chaining four and connecting it to make a circle, or you can use a magic ring. Once your ring is prepared:
- Chain three.
- Work a single crochet into the ring, then chain two.
- Work another single crochet, chain two, and a final single crochet into the ring.
- If you used a magic ring, pull the tail to tighten the center.
Row Instructions and the Moss Stitch

The bandana grows wider with each row by using the moss stitch, which is a sequence of single crochets and chain spaces.
For every row after the first:
- Chain three and turn your work.
- In every standard chain space, work a single crochet followed by a chain one.
- The Tip: In the center chain space (the tip of the triangle), work a single crochet, chain two, and single crochet. This extra chain creates the pointed shape.
- The End Space: The very last space of each row is always worked with a single crochet, chain two, and single crochet.
Continue repeating these rows until the top edge of the bandana matches the length of your dog’s neck measurement.
Creating the Button Hole
On your final row, you must create a loop to secure the bandana. Instead of the usual chain three at the start of the row, chain five (or a number that fits your specific button size). Check the fit by passing your button through the loop before continuing. After the loop, finish the rest of the row using the standard moss stitch pattern.
Finishing and Button Attachment
Cut your yarn, leaving a 12 inch tail to sew on the button. Thread your yarn needle and weave the tail through the stitches to your desired button placement, typically a bit inward from the edge.
To attach the button:
- Sew through the holes in a crisscross pattern at least twice to ensure it is secure.
- Tie a knot by looping the yarn under a stitch and pulling tight.
- Weave in the remaining tail by going back and forth through the single crochet stitches to prevent it from popping out.
Video Credits: Rachel Riley Crochet
Which Pattern Will You Crochet?
These handmade bandanas are practical for active pets and can be washed with regular laundry if they get dirty. While they can go in the dryer, air drying may help prevent the yarn from fraying over time.
These six bandana patterns cover just about every style and skill level you could need. Pick one that matches your yarn stash and your pet’s personality.
Once you make the first one, you won’t stop. They’re that quick and that addictive. Your pets are about to have the best accessory collection on the block.