5 Crochet Fall Blanket Free Patterns for Chilly Autumn Nights
Fall blankets are where crochet gets to show off. Big stitches, cozy yarn, and colors that actually look like October. If you have been waiting for the right project to kick off sweater weather, this is it.
I pulled together five patterns that cover every skill level and every kind of cozy, from a simple striped afghan you can finish in a weekend to a plaid-inspired throw with real texture. Grab your favorite mug of something warm and let’s get into it.
1. Simple Autumn Crochet Blanket Pattern
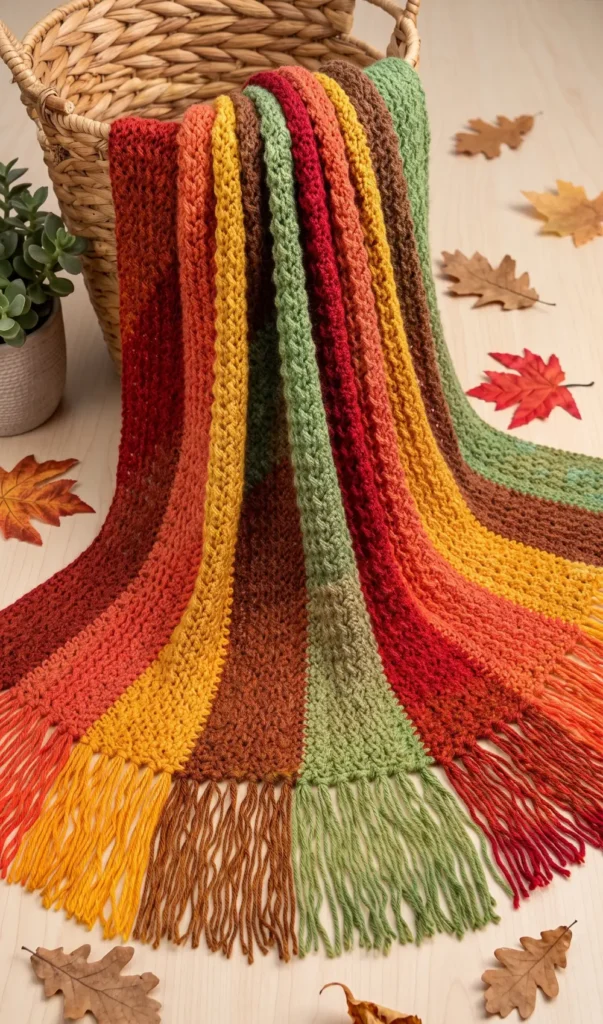
This beginner friendly striped crochet blanket is designed to be a simple, relaxing project that results in a cozy autumn themed afghan. The pattern features vibrant fall colors and a repetitive stitch structure that is perfect for any season.
Materials and Sizing
To begin this project, you will need size 4 medium yarn in various fall colors and a K hook. The finished blanket measures approximately 35 inches wide and 55 inches high, with the number of starting chains determining the height and the number of rows determining the width. An 8 inch object, such as a notebook, is also helpful for measuring tassel strands later in the process.
Step 1: Starting the Foundation and Row 1
Begin by making a slip knot with your first color, leaving an 8 inch starting tail to later incorporate into your tassels. For a full size blanket, chain 171.
To complete Row 1, single crochet into the second chain from the hook, working only into the top loops. Continue to single crochet in each chain all the way across. By the end of this row, you should have 170 stitches.
Step 2: Working the Textured Pattern (Rows 2 to 11)
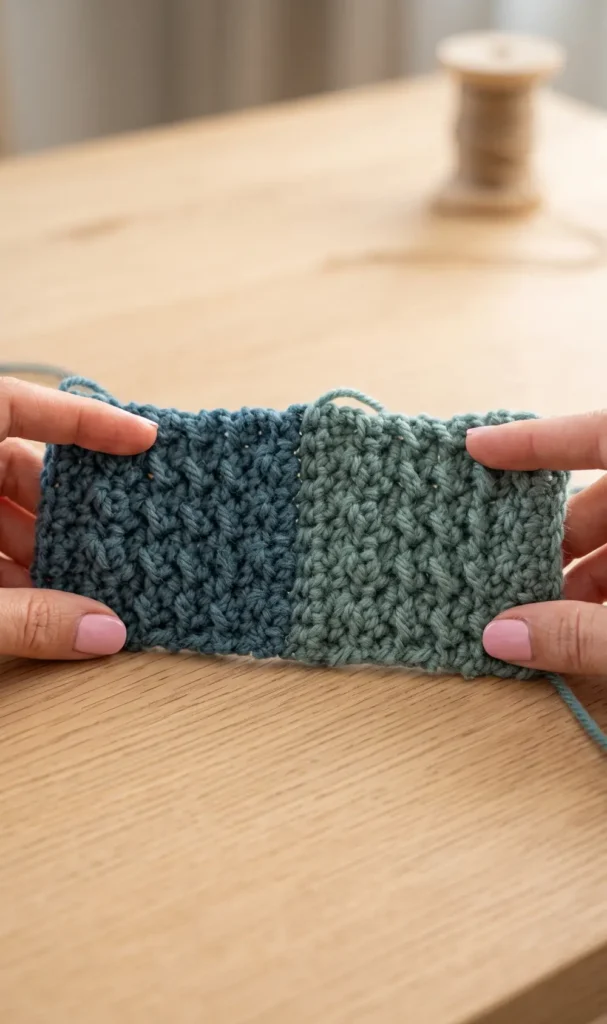
The texture of this blanket is created by alternating different stitches throughout each color section.
- Rows 2 and 3: Chain one and turn. Work a single crochet into the first stitch, followed by a double crochet in the next. Repeat this alternating pattern of single and double crochet across the entire row.
- Rows 4 through 9: Chain one and turn. In the first stitch, make a very loose slip stitch, then work a half double crochet in the next stitch. Continue alternating loose slip stitches and half double crochets across the row. It is vital to keep the slip stitches loose so you can work back into them in subsequent rows.
- Rows 10 and 11: Repeat the pattern from Row 2 by alternating single crochet and double crochet stitches across the row.
Step 3: Finishing the Color Section and Changing Colors
Row 12 marks the end of a color section. Chain one and turn, then single crochet in each stitch all the way across.
To change colors, pull the new color through the remaining loop of the old color at the very end of Row 12. Fasten off the old color and leave an 8 inch tail for both the old and new yarn. You will then repeat Rows 1 through 12 for every new color section, though you will now work Row 1 into actual stitches rather than the starting chain.
Step 4: Adding Tassels and Final Finishing
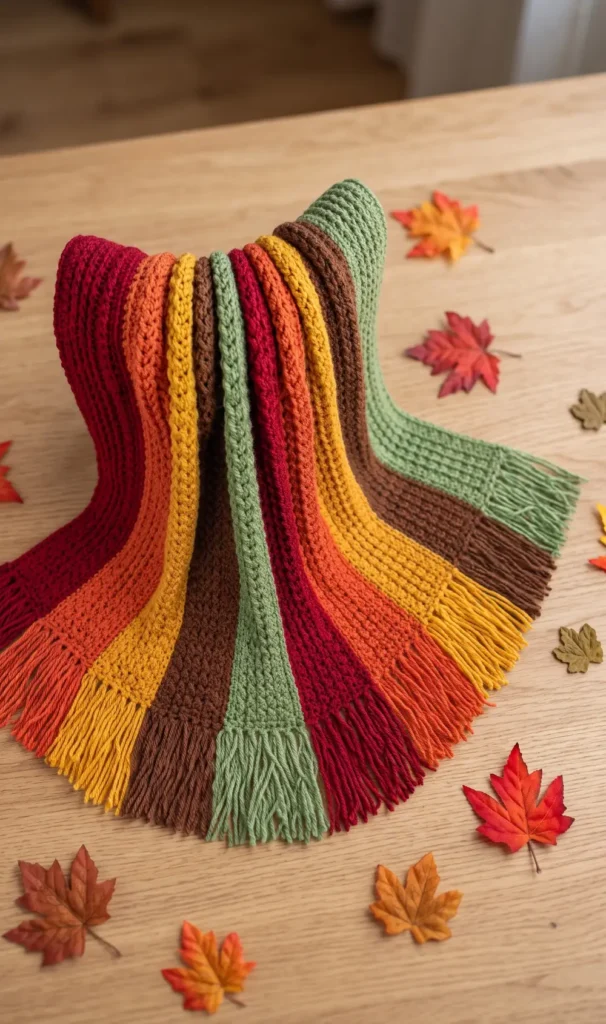
Once the blanket reaches your desired width, you may choose to block your finished work to ensure even edges before adding tassels. Each color section requires 14 tassels, with seven placed along the top and seven along the bottom.
To make the tassels, wrap yarn around an 8 inch object 28 times per section and cut them to create 16 inch strands. Use a crochet hook to pull two folded strands through the edge of the blanket to form a loop, then pull the ends through that loop to create a knot. Incorporate your 8 inch yarn tails into these knots to avoid weaving in ends. Finally, trim all tassels to a uniform length of 5 inches.
Video Credits: Jo to the World Creations
2. Heritage Plaid Crochet Blanket Pattern
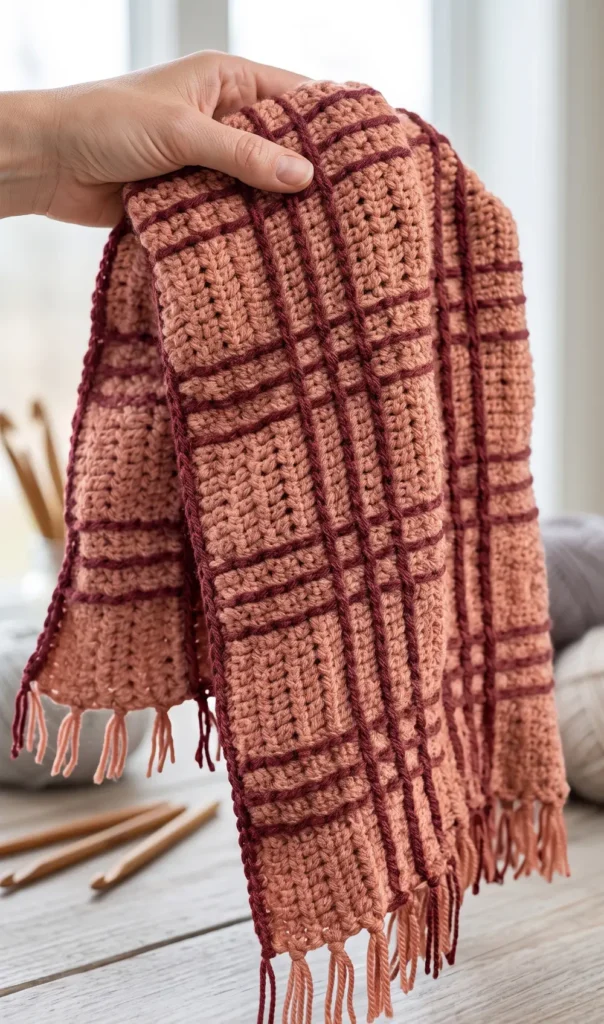
To create this beginner friendly heritage plaid blanket, you will need Lion Brand Hugh and Me yarn: nine balls of the main color (Rose Water) and four balls of an accent color (Love Song). Use an 8mm crochet hook, which is larger than recommended for this yarn, to ensure the blanket remains soft and not too stiff. The design uses a combination of extended single crochet stitches, slip stitch stripes, and a surface slip stitch technique to create the plaid pattern.
Step 1: Foundation and Initial Rows
Begin with your main color and create a slip knot. Chain 93 stitches total (92 for the pattern and one turning chain). Working into the bar behind the chain loops, work your first row of extended single crochet (esc). To perform an esc: insert your hook, pull up a loop, yarn over and chain one through only the first loop, then yarn over and pull through both remaining loops. This creates a taller stitch that looks similar to a knit stitch. Complete eight rows of the main color in the extended single crochet stitch, making sure to work into both loops of each stitch and counting to maintain a straight edge.
Step 2: Creating Horizontal Stripes
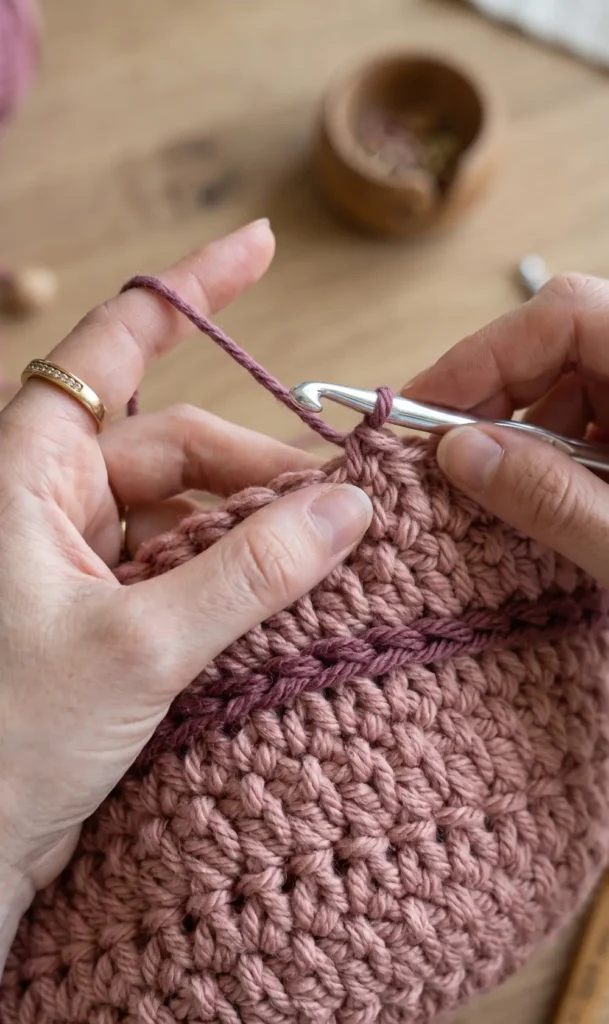
When you reach the end of the eighth row, switch to your accent color during the final pull through of the last stitch for a seamless transition. Work two rows of slip stitches across the blanket using the accent color. It is vital to keep these slip stitches very loose so the blanket does not cinch or lose its stretch: you may even want to go up to a 9mm or 10mm hook for these rows. After two rows of accent slip stitches, switch back to the main color and work two rows of extended single crochet into the main color stitches from the row below the slip stitches. The full horizontal sequence consists of eight main color rows, followed by a repeat of (two accent rows, two main color rows) three times, and finishing with another eight rows of main color.
Step 3: Vertical Surface Slip Stitches
The plaid effect is achieved by adding vertical surface slip stitches into the small gaps between your rows. Using the accent color, count eight stitches from the edge and insert your hook into the hole between the eighth and ninth stitches. Holding the working yarn underneath the blanket, pull up a loop and work a slip stitch into each hole moving up the blanket. Once you reach the top, work back down the same row by inserting your hook into the exact same holes on the opposite side of the first vertical line to create a double thick stripe. Secure the end by pulling the ball of yarn through the final loop. Repeat this process across the width of the blanket, placing a new vertical stripe every two stitches.
Step 4: Adding the Border and Fringe
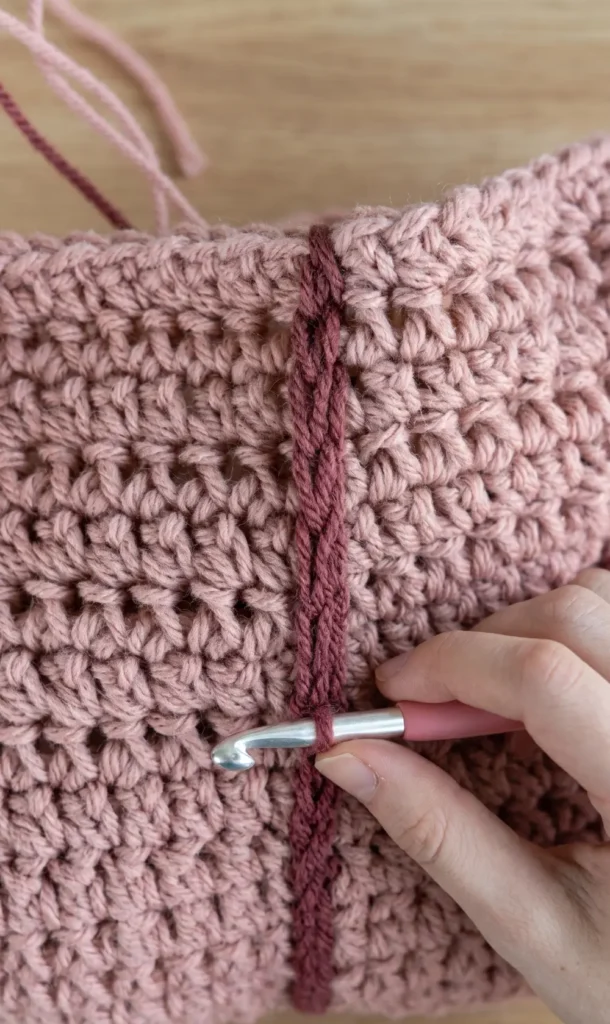
To finish the blanket, add a border to the top and bottom edges using the accent color. Join the yarn in the corner, work one row of single crochet across, then turn and work one row of slip stitches back. This border helps conceal the yarn strands carried up the sides during the vertical striping. For the sides, attach 10 inch strands of yarn as fringe into the ends of each row. Match the fringe color to the row color: use main color yarn for main color rows and accent color yarn for the accent stripes. Once all fringe is attached, trim the ends to an even length to give the blanket a polished, professional look.
Video Credits: Originally Lovely
3. Crochet Fall Throw Blanket Pattern
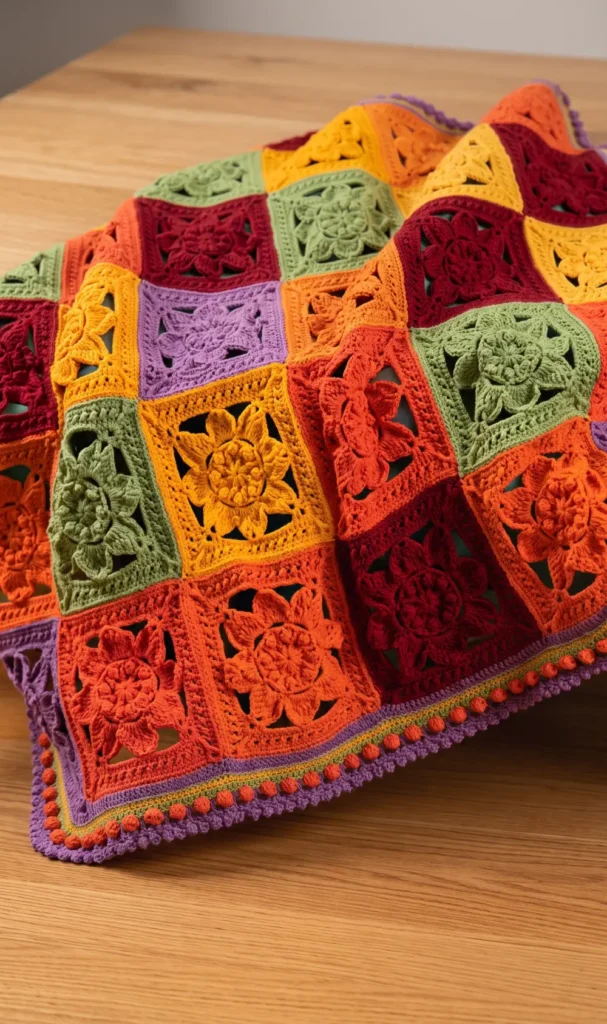
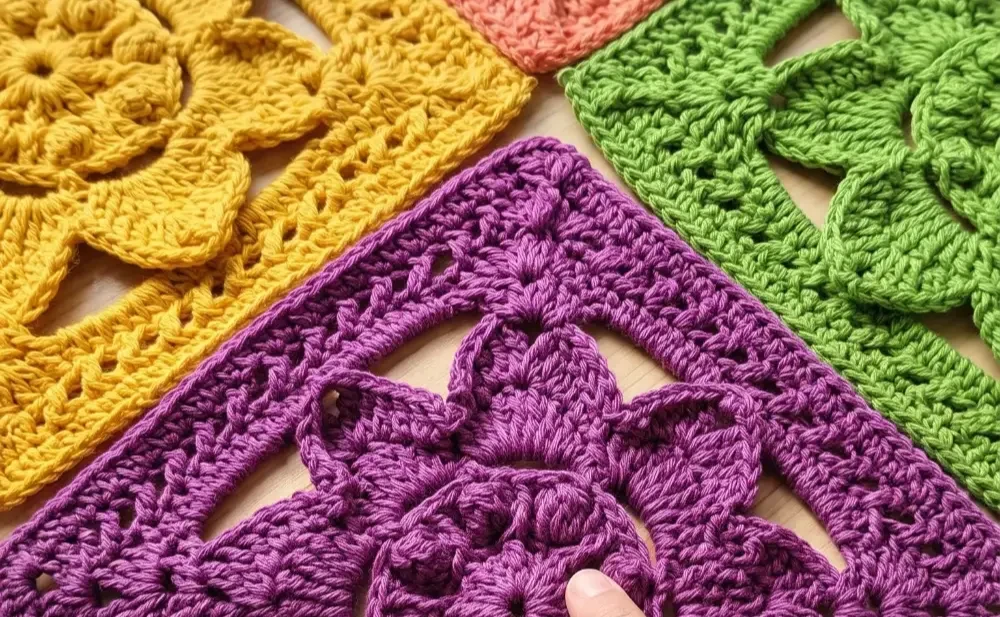
The Fabulous Fall Throw is an intermediate level project perfect for the autumn season. This design features a textured floral motif that is repeated and joined to create a beautiful, cohesive blanket. While the pattern is often worked in a single colour, you can easily customise the throw by changing the colours of the flowers or the interior sections.
Essential Materials
To complete this project, you will need the following items:
- Crochet Hook: A 5 mm (size H) crochet hook.
- Yarn: Red Heart Super Saver is recommended, though Caron One Pound is also a suitable alternative.
- Tools: A tapestry needle for weaving in ends, scissors, and a steamer for blocking the finished pieces.
Step 1: Crafting the Textured Motifs
The foundation of the throw consists of 30 individual motifs. Each motif begins with a magic ring containing 16 double crochets, which must be secured by weaving the tail back and forth three times with a tapestry needle. The texture is created in subsequent rounds using front post half double crochets and popcorn stitches. The floral petals are formed by working a specific sequence of one half double crochet, two double crochets, and three trebles into chain five spaces. Points are added to these petals in Round 7 by using treble clusters and chain two spaces.
Step 2: Squaring and Blocking the Squares
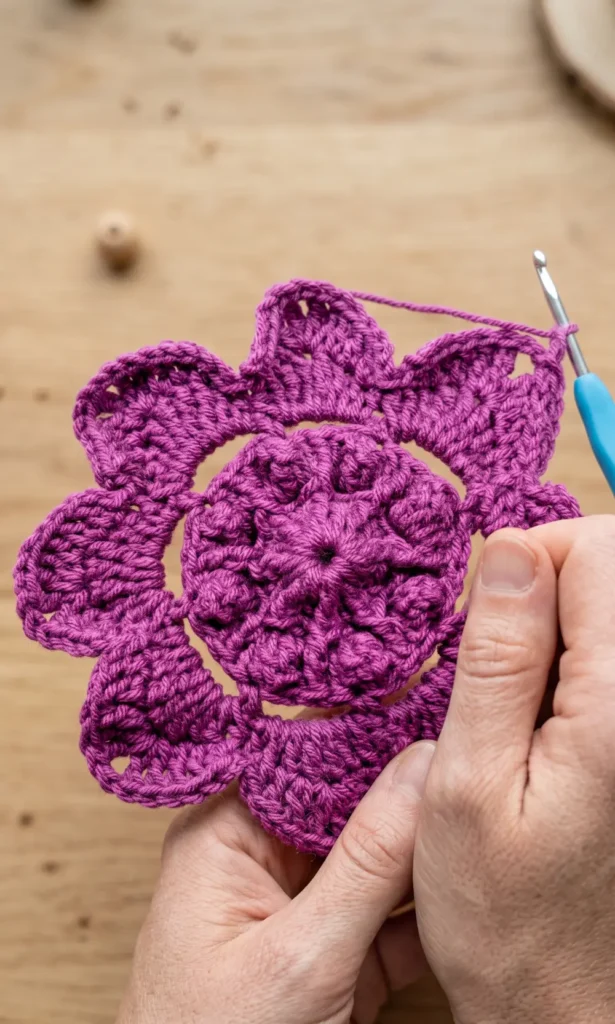
Once the circular floral motif is complete, you must transform it into a square shape starting in Round 8. This is achieved by working shells consisting of two double crochets, a chain one, and two more double crochets into every other petal point while using chain seven spaces to span the flat sides. Further rounds add half double crochets and a crisscross double crochet pattern for additional visual interest. After finishing the square, it is essential to block the piece using a steamer to ensure it sits flat and the design remains organised.
Step 3: Assembling the Throw
After completing all 30 squares, they are joined together using a whip stitch technique. It is recommended to work through the back loops only to create a join that remains perfectly flat. To maintain a professional look, you should use a yarn colour that matches at least one of the squares you are joining. Ensure the stitches are taut but not overly tight as you work across the edges and diagonally through the corners to secure the afghan.
Step 4: Finishing with the Decorative Border
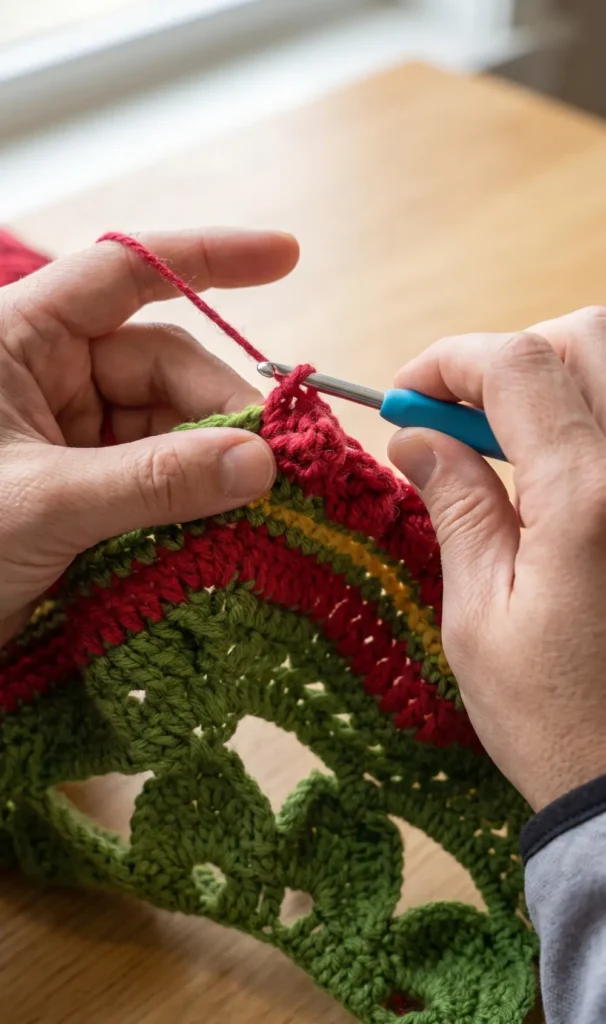
The project concludes with an eight round border that adds both structure and a decorative finish. The first round involves double crochets, with three double crochets worked into the corner joins to allow the border to expand properly. Subsequent rounds include single and half double crochets, followed by a textured round featuring popcorn stitches. The final round creates a frilly edge by chaining three, working a single crochet into the second chain from the hook, and slip stitching into the next stitch. Finally, weave in all remaining ends on the back of the project to complete your throw.
Video Credits: The Crochet Crowd
4. Beginner-Friendly Crochet Throw Blanket Pattern
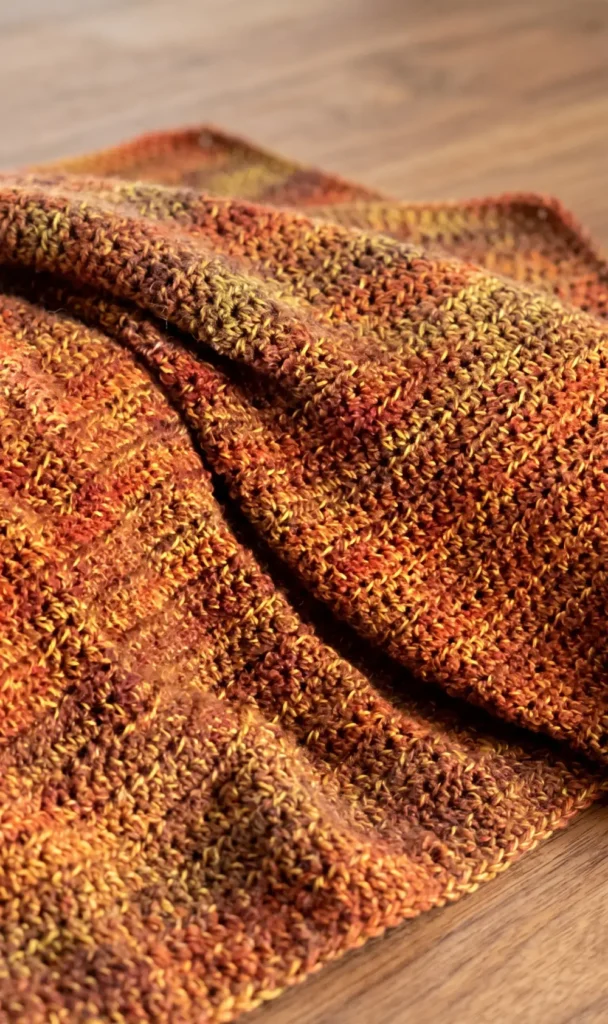
The Autumn throw blanket is a beginner friendly project that produces a thick, warm, and rich-looking fabric perfect for draping over furniture. By pairing a highly textured yarn with a smooth, non-textured yarn, you can easily see your stitches and create a beautiful “pop” of color.
Materials Needed
To create this blanket, you will need the following items:
- Size 5 textured yarn: Examples include original Home Spun or Yarn Bee Fireside.
- Size 4 weighted yarn: A non-textured yarn such as Caron Simply Soft or Yarn Bee Soft Secret.
- Crochet hook: Size P or 11.5 mm.
- Tools: Scissors and optional fabric glue to secure woven ends.
Step 1: Prepare the Foundation Chain
To start, you will pair the textured and non-textured yarns together and work with both strands at once. For a throw blanket approximately 56 inches wide by 66 inches long, you should create a foundation chain of 86 stitches. If you are having trouble seeing your chains because of the textured yarn, look at the bottom of the work for the solid color yarn to guide you.
Step 2: Complete the First Row
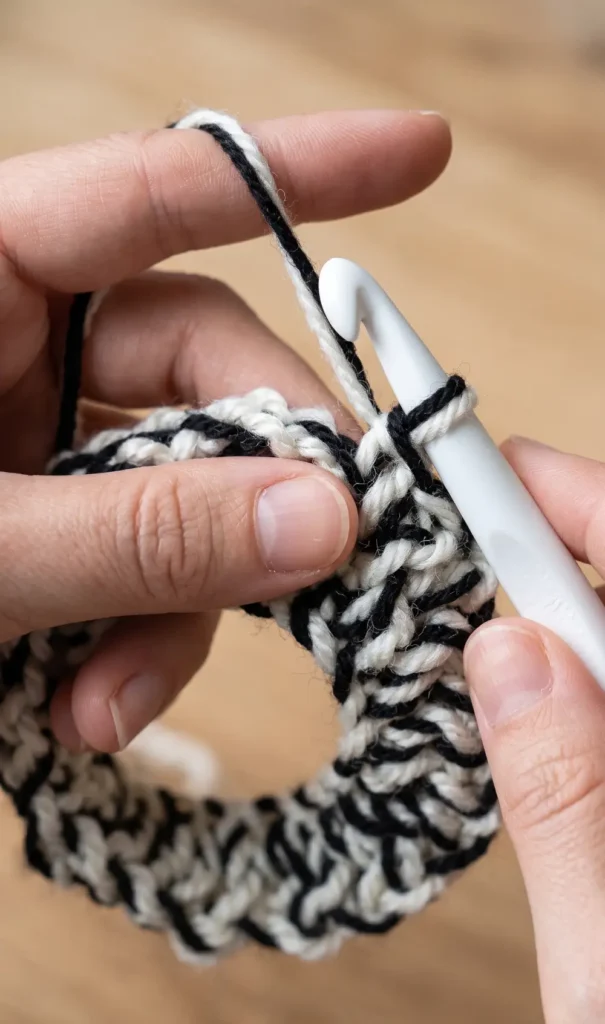
Once your foundation chain is ready, place one half double crochet in the second chain from your hook. Continue putting one half double crochet in every chain across the entire row. When you reach the end of this row, you should have one less stitch than your initial chain count (for example, 85 stitches if you started with 86) because the final chain acts as a turning chain.
Step 3: Build the Blanket Body
To begin the next row, chain two and turn your work. Work one half double crochet into every stitch across the row, ensuring you maintain the same stitch count to prevent the edges from flaring or caving in. For the specific dimensions of the Autumn throw, you will repeat this process from row 3 all the way through row 87. If you find you are short a stitch, you can add an “increase” by placing two half double crochets into the same stitch to get back on track.
Step 4: Join Yarn and Finish
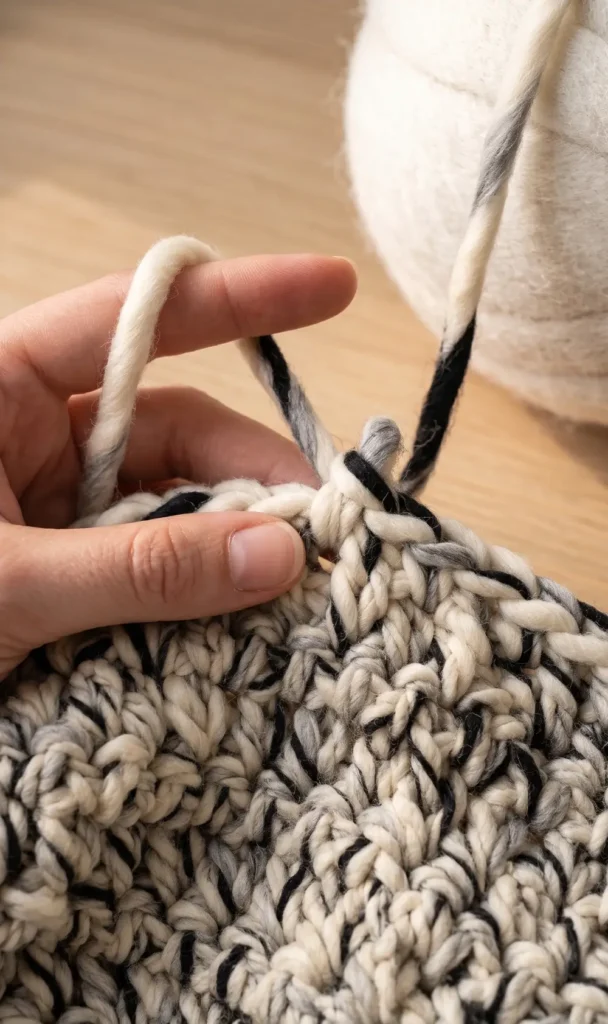
When you run out of yarn in the middle of your project, use the invisible knot technique to attach a new skein. This involves tying specific knots with the old and new tails, pulling them tight together, and trimming the ends very short so the join disappears into the textured fabric. Once you reach your desired length, weave in your beginning and end tails. Because the textured yarn bonds well with fabric glue, you can use a small amount for an extra secure, invisible finish. No border is required for this design.
Video Credits: Crochet With Tiffany
5. Chunky Sunflower Crochet Blanket Pattern
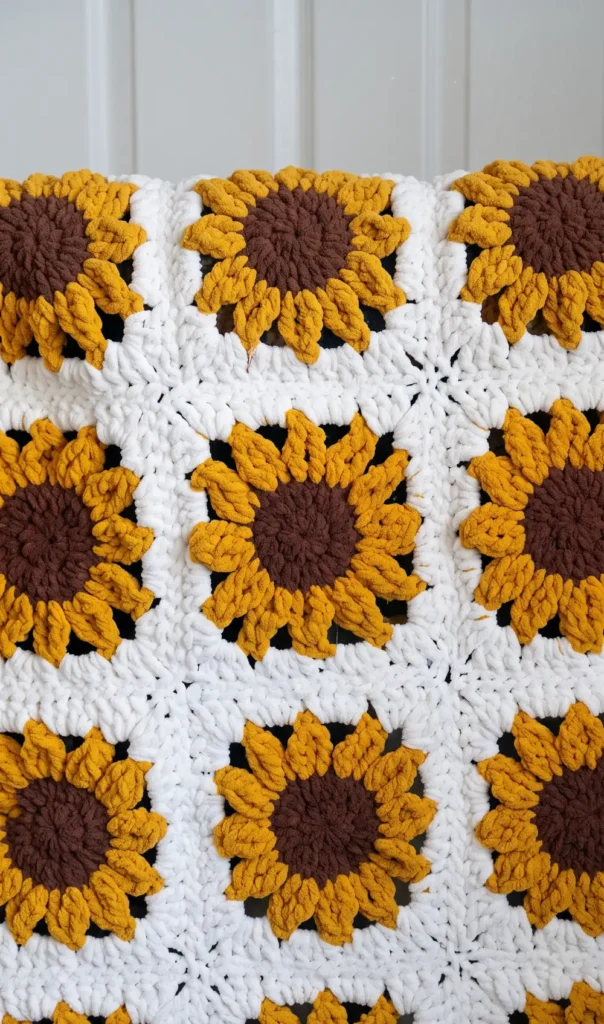
To create this squish blanket, you will need a 7 mm crochet hook and a super chunky Chenille yarn like Yarn Smith Snug as a Bug. You will also need a large blunt tapestry needle for joining the squares and weaving in your yarn tails.
Step 1: Create the Sunflower Center
Begin the square by wrapping your yarn twice around your first two fingers to create a double magic ring. For the first round, make a chain of one and then work 12 half double crochet stitches into the ring. Carefully pull the yarn tail bit by bit to close the magic ring without snapping the chenille yarn. In the second round, work two half double crochet stitches into every stitch around to reach a total count of 24 stitches.
Step 2: Crochet the Yellow Petals
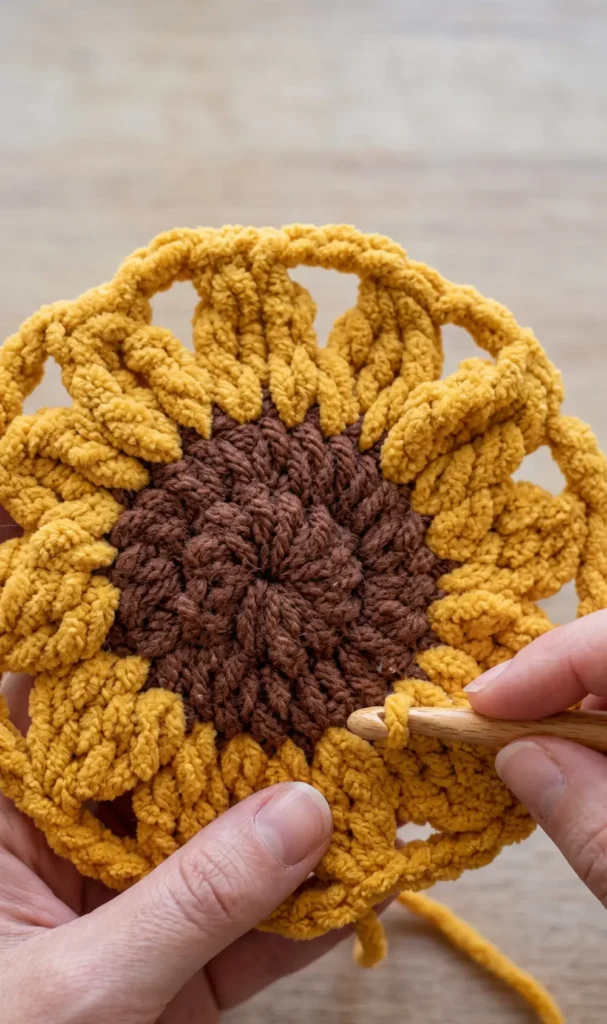
Join your yellow yarn into any stitch to begin the third round. The first petal consists of a chain of three followed by a two treble crochet cluster worked into the next stitch. For the remaining 11 petals, you will work three treble crochet clusters across two stitches, placing a chain of three between every petal. This round is complete when you have 12 petals and 12 chain spaces surrounding the brown center.
Step 3: Square Off and Join the Squares
Join white yarn to a chain space and work three double crochets, then groups of four and five half double crochets to create straight edges. Form the corners of the square by working three double crochets, a chain of one, and three more double crochets into the same space. Once you have made enough squares for your desired blanket size, hold the right sides together and use a whip stitch to sew them into strips and then into a full blanket.
Step 4: Add the Decorative Border
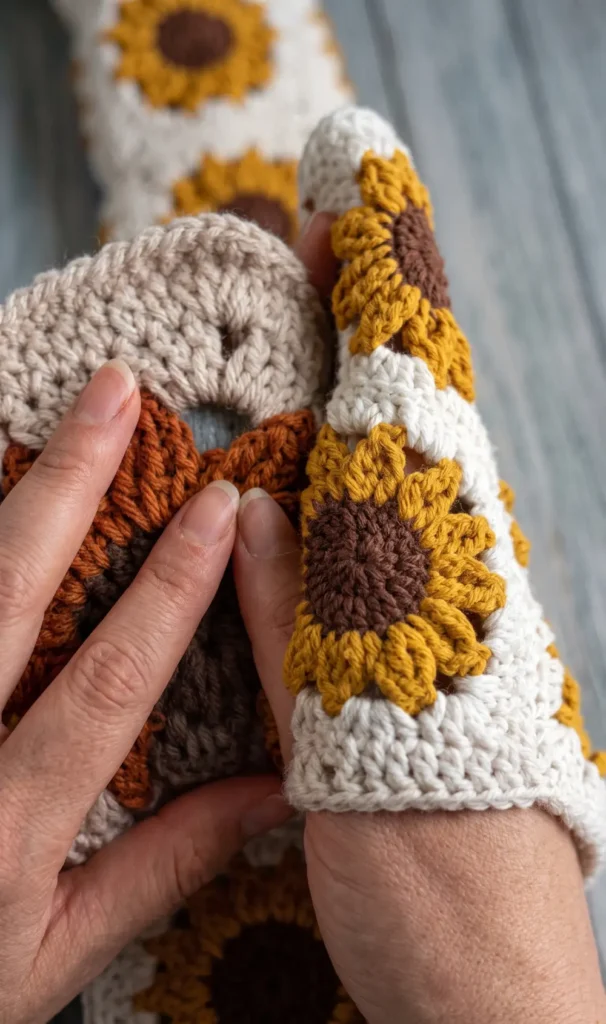
To start the border, join white yarn in a corner of the blanket and work three half double crochet stitches into that space. Work one half double crochet into every stitch and every join between squares along the sides of the blanket. For the final touch, work a round of crab stitch, also known as reverse single crochet, by crocheting from left to right instead of right to left. This technique creates a unique twisted cabled edging that beautifully finishes the project.
Pattern Credits: Meema Makes
Which Blanket Would You Crochet?
Five blankets, five different vibes, and one common goal: keeping you warm all autumn long. Whether you want something quick and simple or a project with real texture and detail, there is a pattern here for you.
Pick the one that speaks to your yarn stash and your skill level, then cast on. Before you know it, you will have a cozy new throw ready for chilly nights on the couch.