4 Toy Story Crochet Patterns Every Disney Fan Will Love
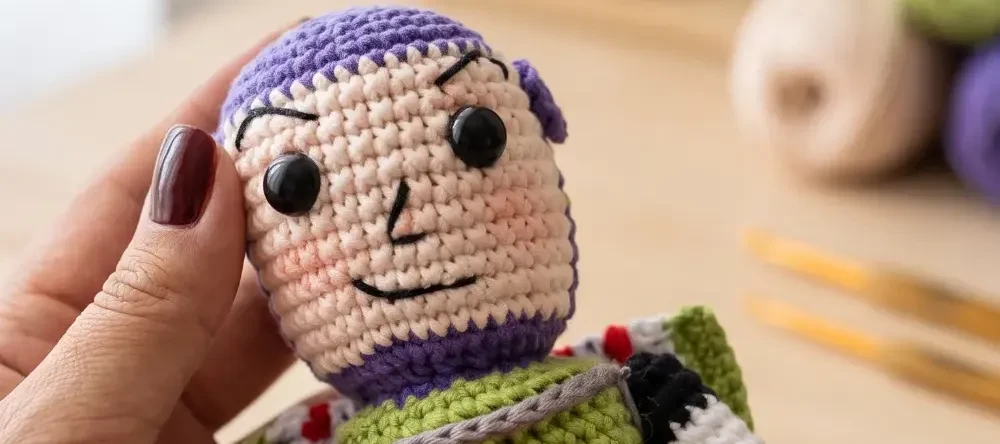
If you’ve ever wanted to bring Toy Story to life with a crochet hook, this post is for you. Jessie, Woody, Buzz, and Pooh waiting to be made by your own hands is the kind of project that never gets old.
These four patterns cover everything from beginner-friendly shaping to more detailed character work like color changes, embroidery, and poseable limbs. Whether you’re making them as gifts or keeping them for yourself, they’re worth every stitch.
1. Crochet Jessie Amigurumi Doll Pattern
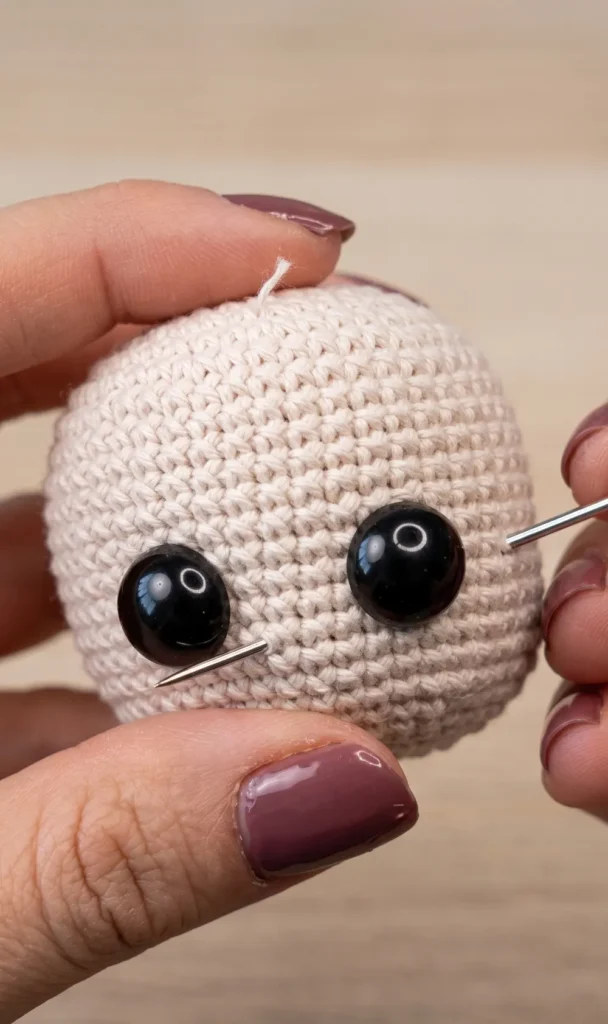
In this first part of the tutorial, you will learn how to crochet the head, facial features, and the signature red hair for a Jessie amigurumi.
Essential Materials
Before beginning, gather the following supplies mentioned in the tutorial:
- Yarn Colors: Skin-colored, terracotta (for hair and eyebrows), yellow (for the bow), and small amounts of green, white, and black thread for eye details.
- Safety Eyes: 12mm size.
- Tools: Crochet hook, tapestry needle, pins, scissors, and an elastic band.
- Assembly and Finishing: Fiberfill stuffing, liquid silicone or sewing supplies, and a little bit of blush.
Crafting the Head
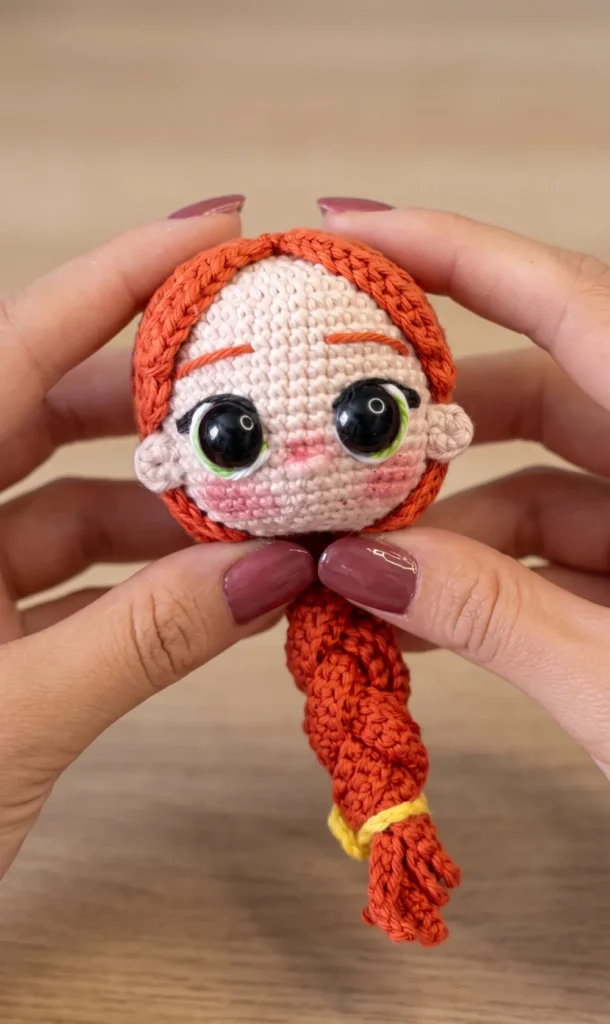
The head is worked in rounds starting with skin-colored yarn.
- Rounds 1 to 4: Start with a magic ring of 8 single crochet (sc) stitches. Increase in every stitch in round 2 (16 stitches). For round 3, follow a sequence of 1 sc and 1 increase (24 stitches). In round 4, work 3 sc and 1 increase repeated six times (30 stitches).
- Rounds 5 to 7: Continue increasing the circle. Round 5 uses a sequence of 4 sc and 1 increase (36 stitches). Round 6 uses 5 sc and 1 increase (42 stitches). Round 7 uses 6 sc and 1 increase (48 stitches).
- Rounds 8 to 20: Work these rounds even with 48 sc each.
- Eye Placement: Position 12mm safety eyes between rounds 15 and 16, spaced 7 stitches apart.
- Rounds 21 to 24: Begin decreasing. Round 21 uses 4 sc and 1 decrease (40 stitches). Round 22 uses 3 sc and 1 decrease (32 stitches). Round 23 uses 2 sc and 1 decrease (24 stitches). Before round 24, stuff the head firmly. Round 24 uses a sequence of 1 sc and 1 decrease to reach 15 stitches.
- Rounds 25 to 34: Round 25 is worked in the back loops only (15 stitches). Rounds 26 to 33 are worked even (15 sc each). Finally, round 34 consists of 1 sc and 7 decreases (8 stitches).
- Finishing the Head: Cut a long tail and use a tapestry needle to close the remaining 8 stitches. This narrow section is then tucked inside the head.
Facial Details and Embroidery
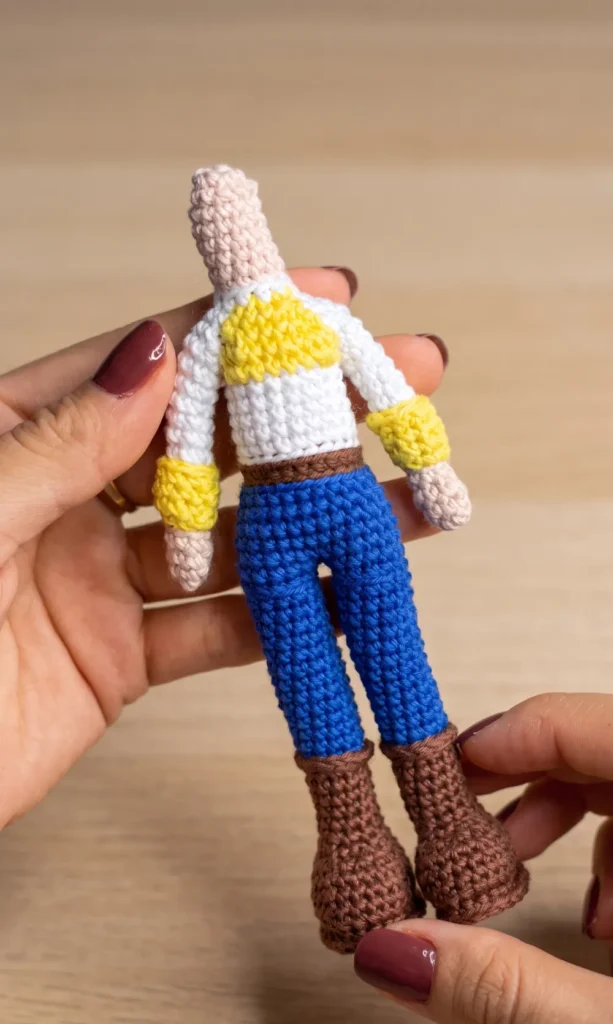
Once the head is formed, you can add Jessie’s expressive features.
- Nose: Use skin-colored yarn to embroider a small nose between rounds 17 and 18, spanning two stitches.
- Eye Details: Use green thread to add color around the safety eyes, then add a white highlight. Use black thread (split to be thinner) to create the eyeliner and lashes.
- Eyebrows: Use terracotta yarn to embroider eyebrows between rounds 10 and 11, roughly five stitches wide.
- Ears: Create two ears by making a magic ring with 6 sc. Sew them to the sides of the head, three stitches away from the eyes.
- Cheeks: Apply a small amount of blush to the cheeks and the nose for a finished look.
Creating the Iconic Hair
Jessie’s hair consists of a base cap with various lengths of strands.
- Hair Base: Using terracotta yarn, make a magic ring with 8 sc. Increase to 16 stitches in round 2, and 24 stitches in round 3.
- Strands: From the base, you will crochet several types of strands:
- Medium Strands: Chain 18 and work 17 sc back. Make 5 of these at the start and 5 at the end.
- Long Strands: Chain 47, slip stitch in the second chain, and work 44 sc back. Make 6 of these for the back.
- Front Strands: Chain 11 and work 10 sc back. Make 4 of these for the bangs.
Assembly and Braiding
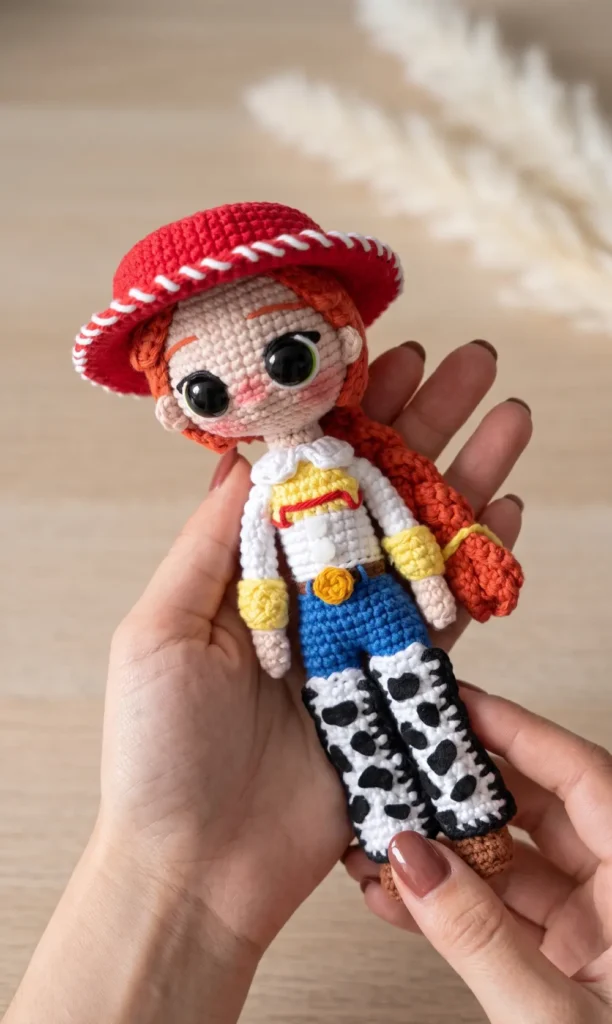
- Attachment: Use pins to position the hair on the head. The center of the hair base should align with the magic ring of the head. Glue or sew the strands down one by one, ensuring the front strands are styled over the ears.
- The Braid: Take the 6 long strands from the back and divide them into three groups of two. Braid them together and secure the end with an elastic band.
- Yellow Bow and Tie: Create a small bow using yellow yarn by working into a magic ring (Chain 3, 2 double crochet, chain 3, slip stitch, repeated for the second side). For the tie, chain 9. Tie the chain tightly around the end of the braid to replace the elastic, then glue the bow on top.
Hey there! Some links on this page may be affiliate links which means that, if you choose to make a purchase, I may earn a small commission at no extra cost to you.
Video Credits: Mundo Crochet
2. Crochet Winnie the Pooh Bear Pattern
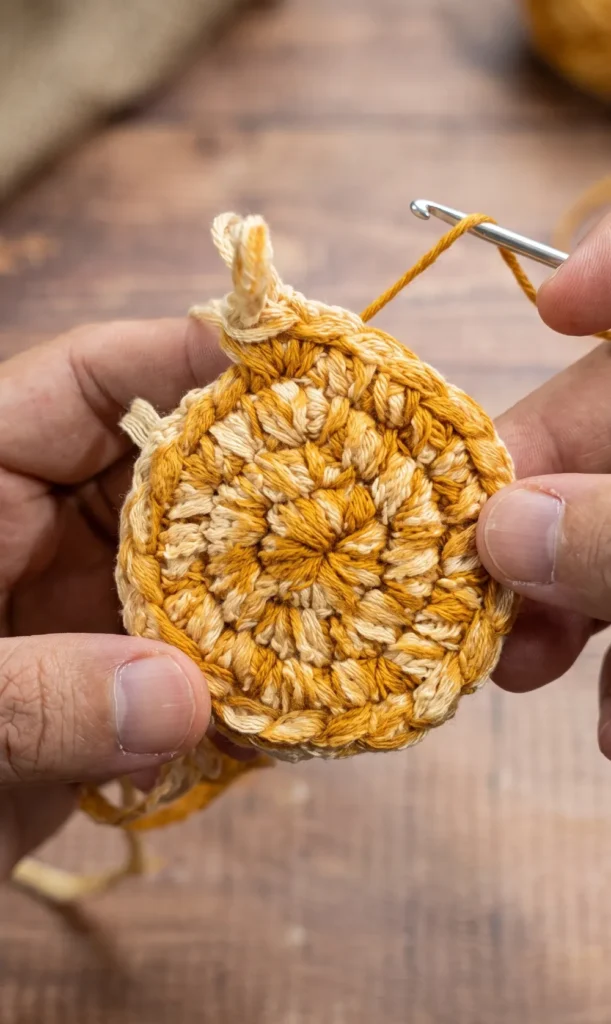
Creating your own Winnie the Pooh amigurumi is a delightful project that can be adapted into two different sizes using the same basic pattern. You can make a large version measuring approximately 24 centimetres in height or a smaller 11 centimetre version perfect for a keychain.
Materials and Specifications
The materials you choose will determine the final size of your Pooh bear.
- For the Keychain Version: Use amigurumi yarn with a 2.5 mm crochet hook. This version requires 8 mm safety eyes and an 8 mm wide safety nose.
- For the Large Plush Version: Use a velvet or chenille-style yarn with a 4.5 mm crochet hook. This version uses 12 mm safety eyes and a 15 mm wide safety nose.
- General Materials: You will also need fiberfill stuffing, a tapestry needle for assembly, and a bit of white thread for eye details and black thread for eyebrows.
Head Pattern Instructions
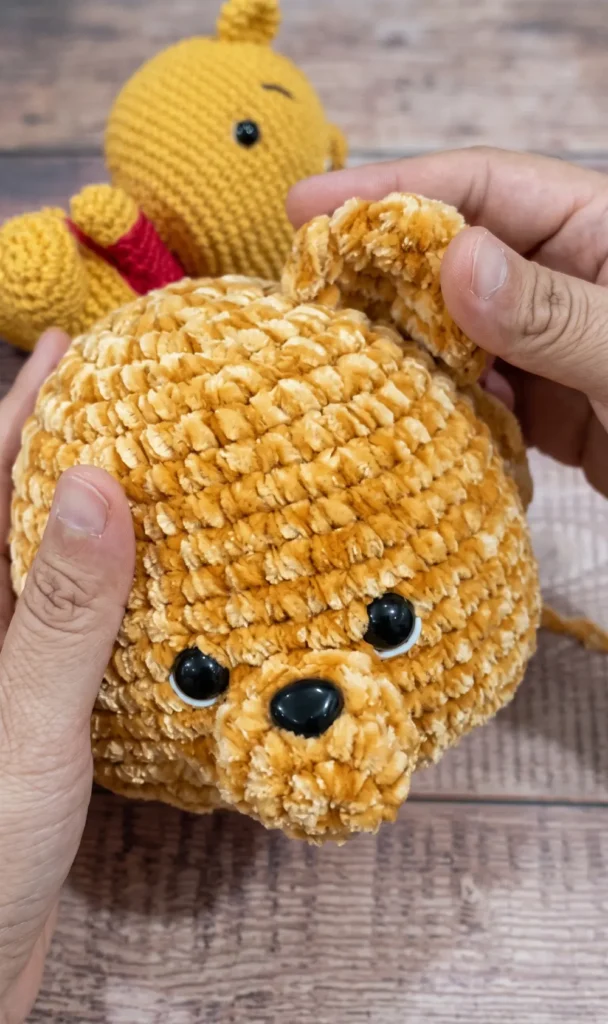
The head is worked from the top down in continuous rounds. You may wish to use a stitch marker to track the beginning of each round.
- Round 1: Start with a magic ring and work 7 single crochet (sc) stitches into the ring.
- Round 2: Work an increase in every stitch (14 sc).
- Round 3: (1 sc, 1 increase) repeated 7 times (21 sc).
- Round 4: (2 sc, 1 increase) repeated 7 times (28 sc).
- Round 5: (3 sc, 1 increase) repeated 7 times (35 sc).
- Round 6: (6 sc, 1 increase) repeated 5 times (40 sc).
- Rounds 7 to 9: Work 1 sc in each stitch (40 sc).
- Round 10: (9 sc, 1 increase) repeated 4 times (44 sc).
- Rounds 11 and 12: Work 1 sc in each stitch (44 sc).
- Round 13: (10 sc, 1 increase) repeated 4 times (48 sc).
- Rounds 14 and 15: Work 1 sc in each stitch (48 sc).
- Round 16: (15 sc, 1 increase) repeated 3 times (51 sc).
- Round 17: Work 1 sc in each stitch (51 sc).
- Round 18: (1 sc, 1 decrease) repeated 17 times (34 sc).
- Round 19: (2 sc, 1 decrease) repeated 8 times. Work 1 decrease over the remaining 2 stitches (25 sc).
Snout and Facial Details
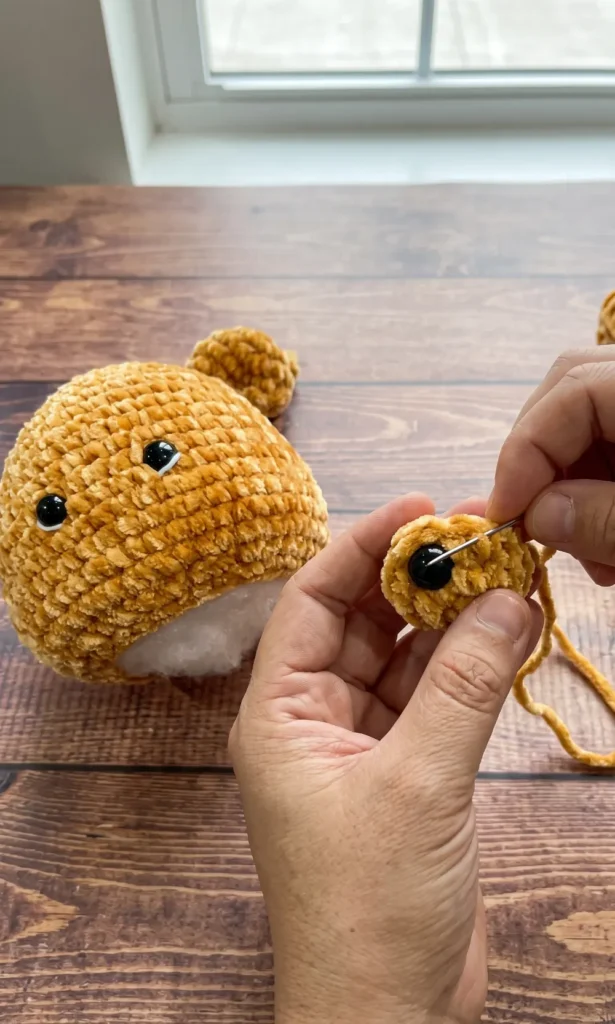
The snout is a separate piece that is sewn onto the head once the eyes are in place.
- Snout Round 1: Magic ring with 6 sc.
- Snout Round 2: 6 increases (12 sc).
- Snout Round 3: (5 sc, 1 increase) repeated 2 times (14 sc).
Safety Nose Tip: If the plastic post of the safety nose is too long, you can use a lighter to carefully melt and flatten the end against the safety washer to keep it from interfering with the stuffing.
Assembly and Finishing Touches
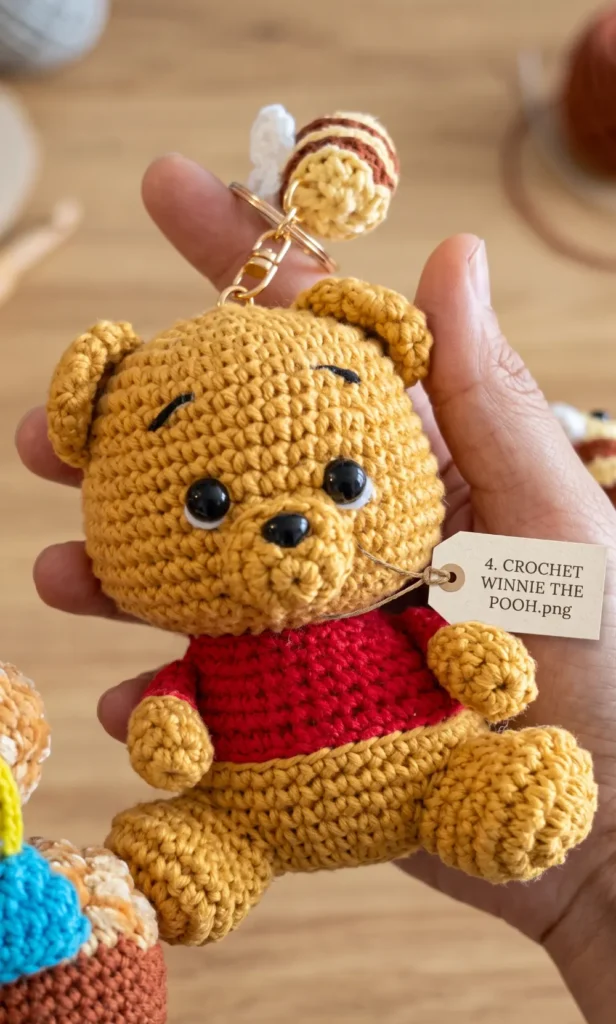
Proper placement of the features is essential for achieving Pooh’s classic expression.
- Eyes: Place the safety eyes between rounds 12 and 13, leaving a distance of 5 stitches between them.
- Snout Placement: Center the snout between the eyes. The top edge of the snout should also sit between rounds 12 and 13. Add a small amount of stuffing to the snout before finishing the sewing.
- Embroidery: Use white thread to stitch a small light reflection on the side of each eye. For the eyebrows, make small slanted lines on round 8, approximately 2 stitches wide.
- Stuffing: Ensure the head is firmly stuffed, particularly in the lower rounds, to provide a good base for sewing it to the body later.
Video Credits: Knitoys & Crafts
3. Crochet Toy Story Woody Pattern
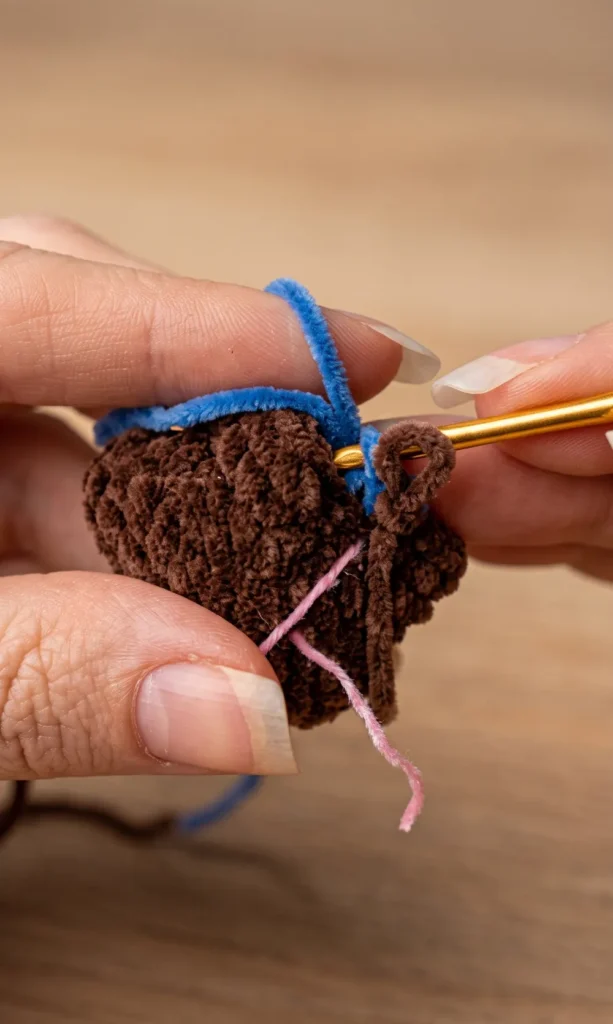
Creating your own Woody amigurumi inspired by Toy Story is a rewarding project for any crochet enthusiast. This finished cowboy stands approximately 19 cm tall when using the recommended materials. While his hat and jacket are optional and removable, this guide covers the core construction of his body.
Essential Materials and Tools
Before starting, gather the following supplies to ensure your Woody has the correct look and feel:
- Yarn: Use 2 mm thick chenille yarn for the main body. You will need dark brown (boots, hair, belt), blue (pants), mustard yellow (shirt), skin tone, red (scarf), white and black (vest details), and a small amount of bright yellow for the belt buckle.
- Thread: You will also need 1 mm thick thread in red (to create the grid pattern on the shirt) and black (for vest borders).
- Hook: A 2.5 mm crochet hook is recommended for a tight stitch that prevents stuffing from showing through.
- Safety Eyes: 10 mm safety eyes are used, though this may vary if you use different yarn weights.
- Stuffing and Stability: Plenty of fiberfill stuffing and hot silicone glue (or plastic/wood inserts) to flatten and harden the base of the boots.
- Optional Articulation: Caliber 22 floral wire and paper adhesive tape can be used to make the arms and neck poseable.
- Other Tools: Scissors, pins, a tapestry needle, and optional blush for his cheeks.
Crafting the Arms
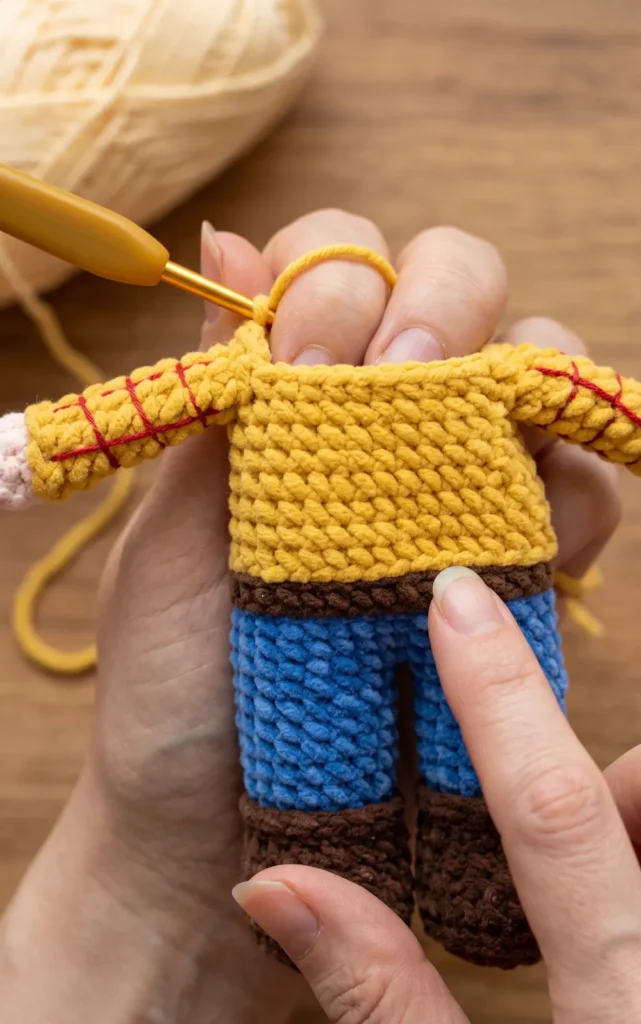
The arms are worked in a spiral starting with the skin tone yarn.
- Round 1: Start with a magic ring containing 6 single crochets (sc).
- Round 2: Repeat a pattern of (2 sc, 1 increase) twice to reach 8 stitches.
- Round 3: Crochet 8 sc.
- Round 4: Change to yellow chenille yarn. Work 8 slip stitches (sl st) in the back loops only (BLO).
- Round 5: Work 8 sc in the BLO.
- Rounds 6 to 12: Crochet 8 sc in each round. Fasten off with an invisible join.
- Shirt Detail: Use the 1 mm red thread to embroider a grid pattern over the yellow section of the arms to mimic Woody’s signature plaid shirt.
Constructing the Boots and Legs
Woody’s boots require a flat base for stability.
- Boot Base: Using dark brown yarn, start with a foundation chain of 6. Work around the chain starting in the second loop from the hook. Use a combination of sc and triple increases (3 sc in one stitch) to reach 14 stitches in Round 1.
- Expansion: In Round 2, follow a pattern of (4 sc, 3 increases) twice to reach 20 stitches.
- Heel and Shape: Round 3 uses reverse single crochet (or BLO) to create the edge of the sole. Round 4 is a simple round of 20 sc.
- Stability Tip: At this stage, it is highly recommended to pour hot silicone glue into the base of the boot and let it harden while flat on a table. This ensures the feet stay flat and the amigurumi can stand.
- Leg Tapering: Continue with decreases in Round 5 to reach 16 stitches, then work Rounds 6 through 8 in sc.
- Pants: Change to blue yarn in Round 9, working in the BLO. Continue with sc until Round 14.
- Boot Detail: Go back to the front loops left in Round 9 and work 16 slip stitches in brown to create the top edge of the boot.
Joining the Body and Arms
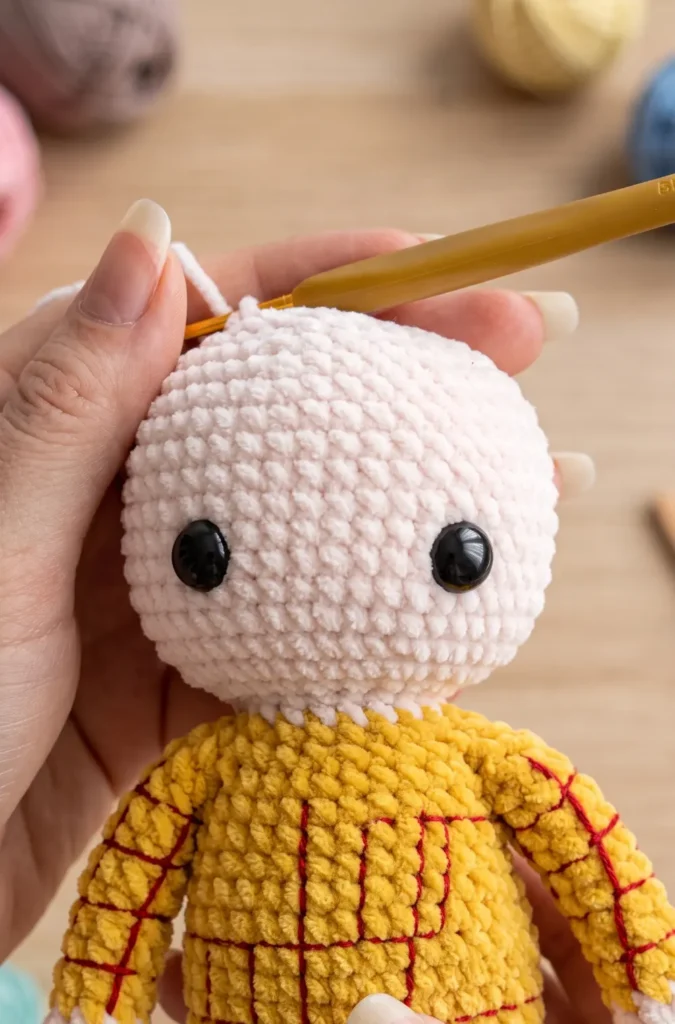
Once two legs are finished, they are joined together to start the torso.
- Joining Legs: Align the legs and join them with a 1 chain separation. This creates a base of 34 stitches for the body.
- The Belt: In Round 19, change back to brown yarn and work slip stitches in the BLO, followed by a round of sc in the BLO for Round 20.
- The Shirt: Change to yellow yarn in Round 21. Work Rounds 21 and 22 in the BLO to create a clean color transition, then continue with sc.
- Joining the Arms: In Round 28, crochet the arms directly onto the body by working 4 sc through both the arm and the torso on each side.
- The Shoulders: Continue decreasing in Rounds 30 and 31 to narrow the shoulders down to 18 stitches.
Creating the Head
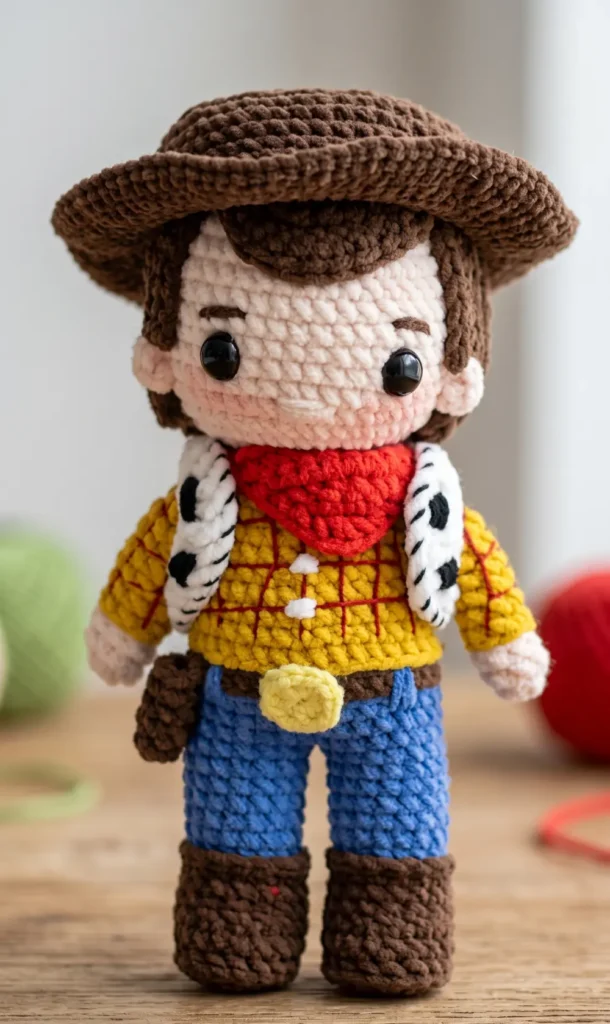
The head is built directly from the neck using the skin tone yarn.
- The Neck: Work Rounds 32 and 33 in skin tone. If you are using wire for stability, insert it now through the neck and into the arms.
- Head Expansion: In Round 34, work 18 increases in the front loops only to start the base of the head, reaching 36 stitches. Round 35 increases this further to 42 stitches.
- The Face: Work Rounds 36 through 45 with 42 sc each. Insert the 10 mm safety eyes between Rounds 39 and 40, leaving about 9 stitches of space between them.
- Closing: Begin decreasing from Round 46. Stuff the head firmly as you go, ensuring the stuffing reaches the bottom to maintain the shape.
- Final Closure: Once you reach Round 51, use a tapestry needle to pick up the front loops of the remaining 12 stitches and pull tight to close the head perfectly.
With the body complete, your Woody is ready for his final details like his hat and vest in the next stage of crafting.
Video Credits: GretaWings DIY
4. Crochet Buzz Lightyear Character Pattern
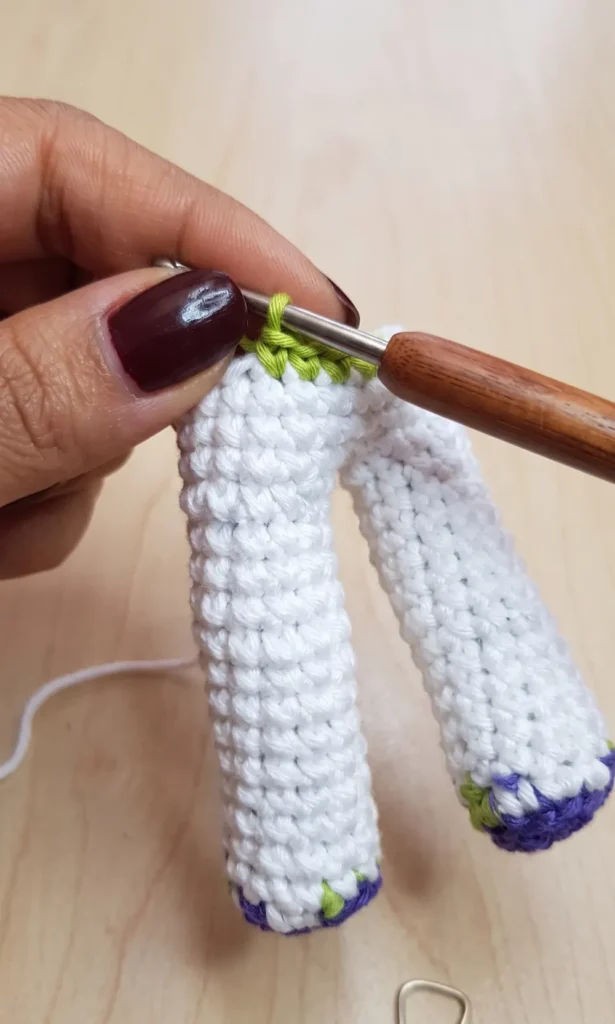
Creating your own Buzz Lightyear amigurumi is an exciting project for any Toy Story fan. This guide covers the first part of the construction, focusing on the legs, body, and head.
Materials and Tools Needed
To begin this project, you will need the following materials and tools:
- Yarn: Symphony brand yarn in purple, baby blue (or light purple), lemon green, white, black, red, grey, and skin colour.
- Hook: A number 2 crochet hook.
- Eyes: Number 8 safety eyes (number 10 can also be used).
- Other Tools: Stitch markers, scissors, a yarn needle, and black embroidery thread for facial details.
- Stability Inserts: Plastic bottle caps (from large water jugs) to provide a flat base for the feet and torso.
Constructing the Legs
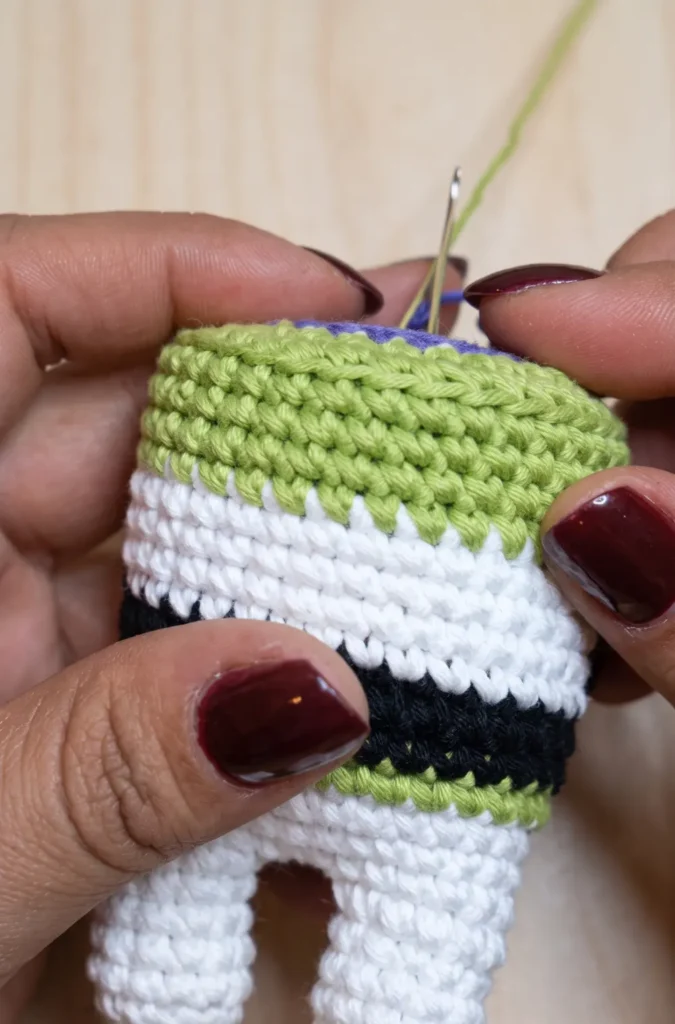
Start with the purple yarn to create the base of the foot.
- Round 1: Create a magic ring and work 6 points into it.
- Round 2: Work 6 increases in a spiral to reach 12 points. Before finishing the last point, change to white yarn.
- Round 3: Working only in the back loops (BLO), crochet 3 points in white. Change to green yarn and crochet 6 points (still in BLO). Change back to white yarn for the final 3 points.
- Rounds 4 to 13: Continue in white yarn, working through both loops. Crochet 10 rounds of 12 points each.
Pro Tip: For extra stability, cut a small circle from a plastic bottle cap and glue it inside the base of the foot before the leg gets too long. This helps the figure stand upright. Repeat these steps to create two identical legs.
Joining and Forming the Torso
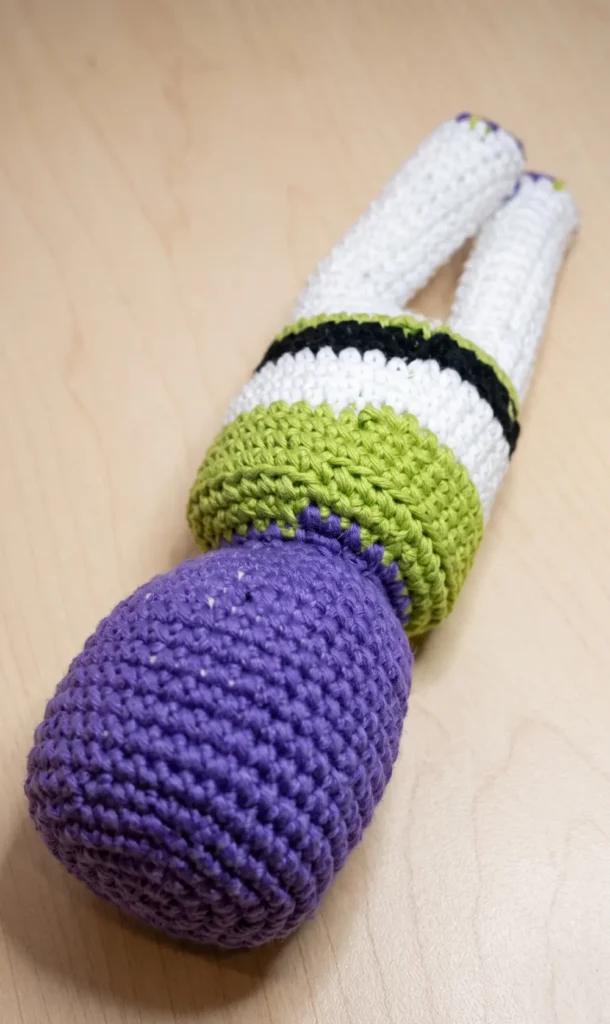
Once you have two legs, you will join them to begin the body.
- Joining: Position the legs facing forward. Use white yarn to make a slip knot and 3 chains to connect the inner central points of the legs. This results in a total of 30 points around the combined piece.
- Rounds 15 to 17: Crochet 3 rounds of 30 points in white.
- Round 18: Change to green yarn. Crochet 6 points, an increase, 14 points, an increase, and 8 points. The increases should be on the sides of the legs (32 points total).
- Rounds 19 to 20: Change to black yarn and work 2 rounds of 32 points.
- Round 21: Change to white yarn. Crochet 7 points, an increase, 15 points, an increase, and 8 points (34 points total).
- Rounds 22 to 24: Work 3 rounds of 34 points in white.
- Round 25: Change to green yarn. Crochet 8 points, an increase, 16 points, an increase, and 8 points (36 points total).
- Rounds 26 to 28: Work 3 rounds of 36 points in green.
Shaping the Upper Body and Neck
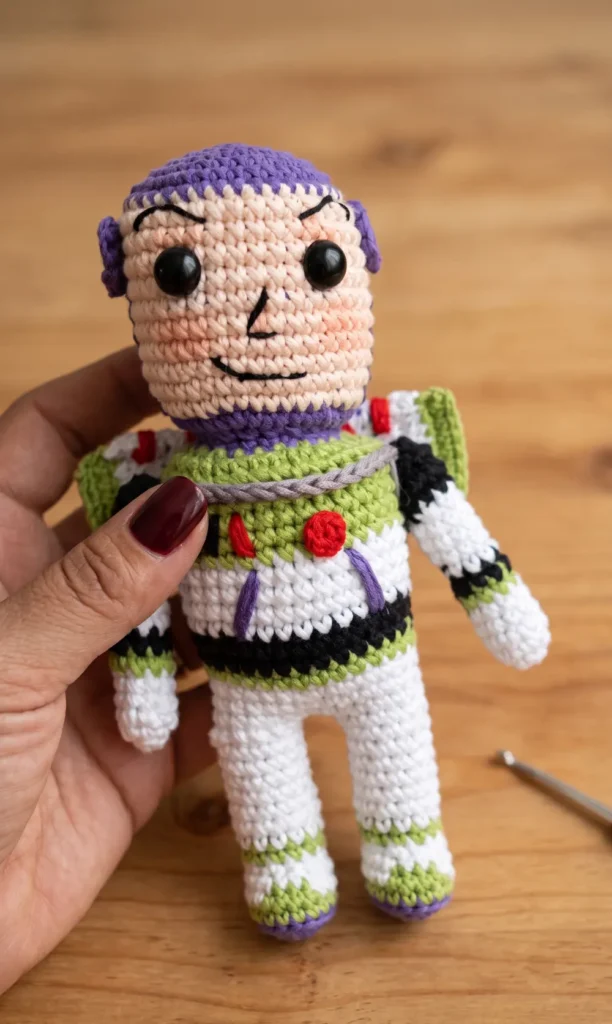
- Round 29: Still in green, work 1 round of 36 points in the back loops only.
- Round 30: Crochet a sequence of 4 points and a decrease around (30 points total).
- Round 31: Change to purple yarn. Crochet 3 points and a decrease around (24 points total).
- Round 32: Crochet 2 points and a decrease around (18 points total).
Internal Support: Before finishing the neck, stuff the body firmly. Insert a flat plastic circle (cut from a bottle cap) at the top of the torso to maintain a flat shape for Buzz’s chest area.
Shaping the Head and Face
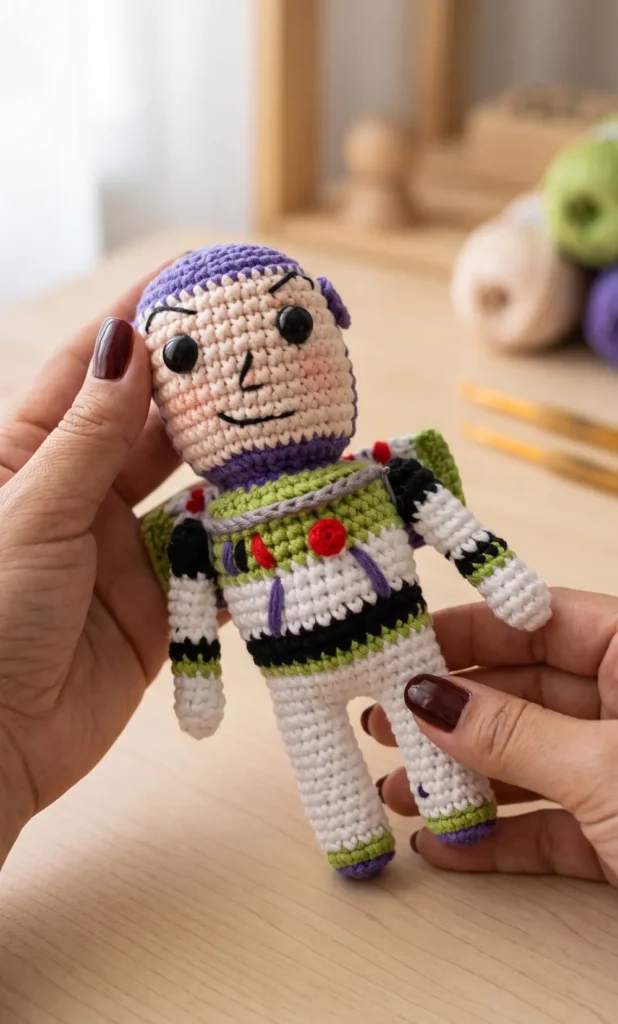
The head is worked directly from the neck, starting with the purple hood.
- Round 33: Work in the front loops only (FLO) of the previous round. Perform 18 increases to reach 36 points.
- Round 34: Crochet 5 points and an increase around (42 points total).
- Rounds 35 to 45: This section introduces the face. For these 11 rounds, use a colour-changing sequence: 16 points in purple, 19 points in skin colour, and 7 points in purple.
- Round 46: Cut the skin-coloured yarn and work entirely in purple. Crochet 1 round of 42 points.
- Closing the Head: Begin decreasing to close the top of the head.
- Round 47: 5 points, 1 decrease (36 points).
- Round 48: 4 points, 1 decrease (30 points).
- Round 49: 3 points, 1 decrease (24 points).
- Round 50: 2 points, 1 decrease (18 points).
- Round 60 (as labeled in source): 1 point, 1 decrease (12 points).
- Round 61: 6 decreases (6 points total).
Finishing the First Part
Fasten off and leave a tail for sewing. Use a yarn needle to pick up the front loops of the remaining 6 points and pull tightly to close the hole at the top of the head. Hide the thread inside the head. You now have the main body and head of your Buzz Lightyear ready for arms, wings, and facial detailing in the next stage.
Video Credits: GUMILUPIS CROCHET
Ready for More Amigurumi?
These four Toy Story crochet patterns are proof that amigurumi can be just as fun to make as they are to display. From Jessie’s braided hair to Buzz’s color-blocked suit, each one has its own personality and little details that make the finished piece feel truly special.
If you loved working through these, there are plenty more character patterns waiting for you. Grab your hook, pick your next favorite, and keep the magic going one stitch at a time.