6 Crochet Flower Bouquet Free Patterns You Can Make Today
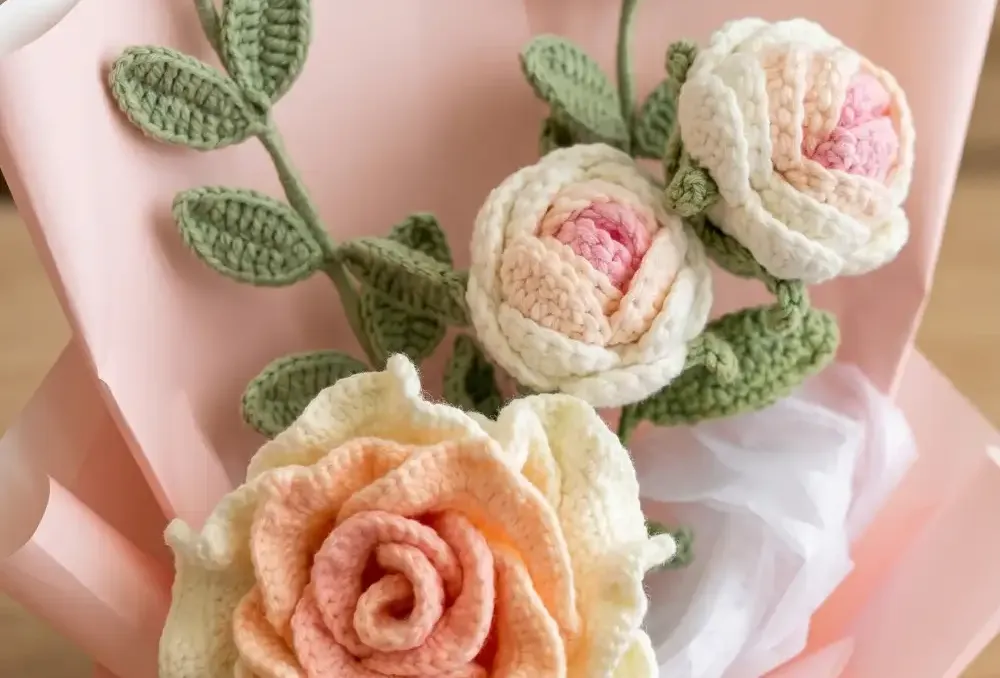
Silk flowers wilt. Plastic flowers crack. But a crochet bouquet? It lasts forever and nobody can tell you it needs water. These six patterns range from a beginner-friendly rolled rose to a wire-structured tulip with actual petals that hold their shape, so whether you are picking up a hook for the first time or you already have calluses on your fingers, there is something here for you.
The secret most crochet flower tutorials skip is the assembly. Getting the petals right is only half the job. This collection walks you through everything, from wrapping stems with floral tape to threading wire through leaves so they bend and stay where you put them. Pick one pattern or make all six and arrange them together into a bouquet that genuinely looks like it came from a flower shop.
1: Crochet Rose Bouquet Pattern
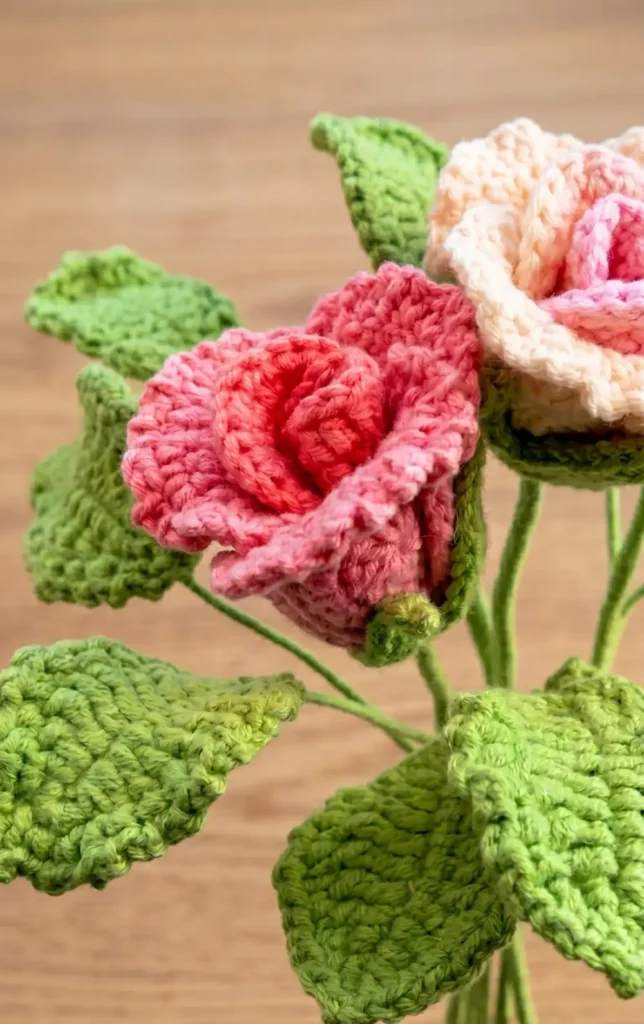
Creating a realistic rose can often feel like a daunting task, but this tutorial focuses on a cute mini version that is perfect for beginners. This “lazy” version simplifies the process by using only two small petals and three large petals while still maintaining a super cute and elegant appearance.
Essential Materials
To begin this project, you will need the following supplies:
- Yarn: Weight 2 yarn in your choice of flower and leaf colours.
- Crochet Hook: A 2.5 mm hook.
- Tools: A magic ring, stitch markers to identify stitches, and a pair of scissors.
- Assembly Supplies: Flower stems, glue, and wire for the leaves.
Crocheting the Small Petals (Make 2)
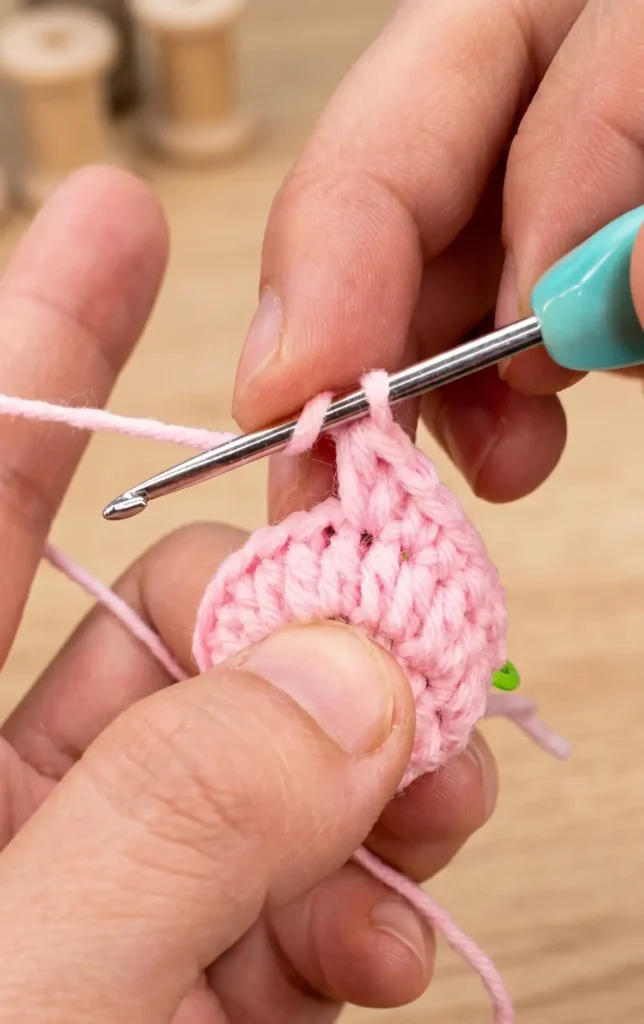
Each rose requires two small petals. The process begins with a magic ring.
- Round 1: Chain three (these do not count as a stitch) and crochet 10 double crochets into the ring. Pull the ring tight and slip stitch to join.
- Round 2: Crochet 10 half double crochet increase groups. This means you will work two half double crochets into every stitch from the previous round, resulting in 20 stitches.
- Round 3: Single crochet in the first 6 stitches. Then, perform 8 half double crochet increase groups (two half double crochets in each of the next 8 stitches). Finish the round with 6 single crochets in the remaining stitches. Slip stitch and cut the yarn.
Crocheting the Large Petals (Make 3)
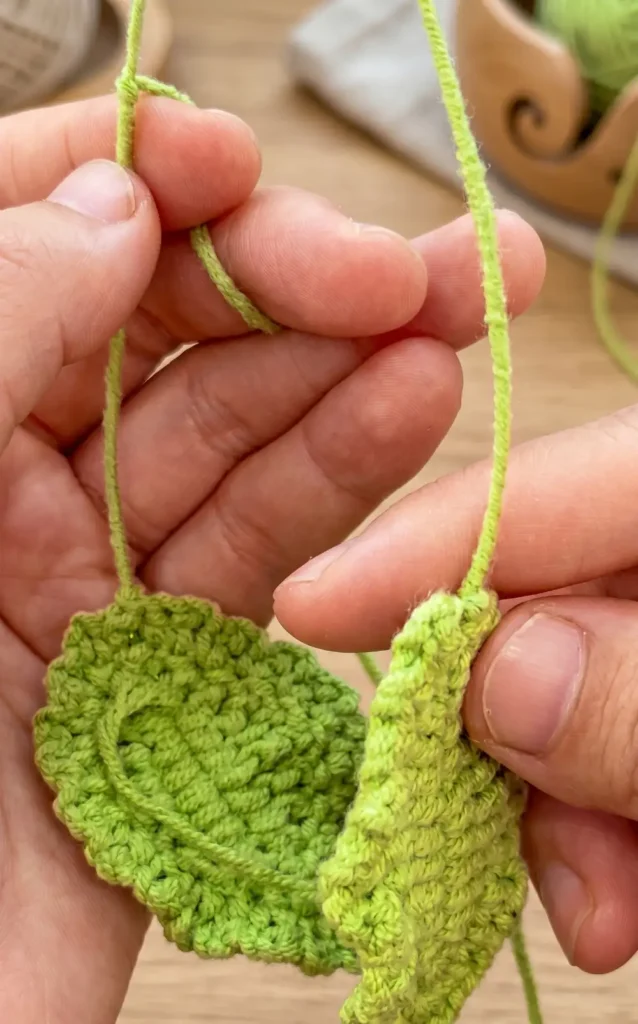
The large petals follow a similar foundation but add more volume and texture.
- Rounds 1 and 2: These are worked exactly the same as the small petal.
- Round 3: Single crochet one then single crochet increase in the next stitch. Repeat this pattern for a total of 10 groups.
- Round 4: Single crochet in the first two stitches, followed by a decrease. Single crochet in the next four stitches. To create the textured edge, repeat the following pattern 14 times: single crochet one, chain two. After these groups, single crochet four, perform a decrease, and finish with two single crochets.
Crafting the Calyx
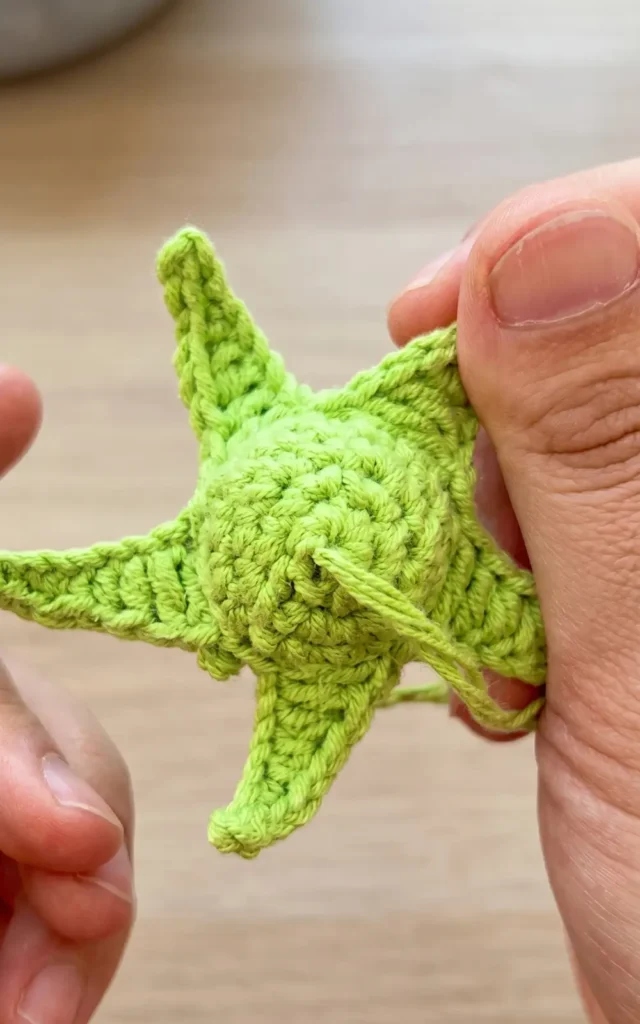
The calyx, or the green base of the flower, is worked in rounds starting with a magic ring.
- Round 1: Crochet 5 single crochets into the ring.
- Round 2: Work 5 single crochet increase groups for a total of 10 stitches.
- Round 3: Single crochet one, then single crochet increase. Repeat for 5 groups to reach 15 stitches.
- Round 4: Single crochet 15 without any increases or decreases.
- The Points: Chain nine, then starting from the second chain from the hook, slip stitch two, single crochet two, half double crochet two, and double crochet two. Skip two stitches on the base and slip stitch into the third. Repeat this pattern five times to create the five points of the calyx.
Creating the Realistic Leaves (Make 2)
The leaves are reinforced with wire to allow for shaping.
- Base: Start with 12 chains. Insert your hook into the second chain, start a single crochet, and add the wire before completing the stitch.
- Body: Work a sequence of one half double crochet, one double crochet, and four treble crochets. Follow this with one double crochet, one half double crochet, and one single crochet. In the top stitch, crochet three single crochets to turn.
- Symmetry: Work symmetrically down the other side of the chain, wrapping the yarn and wire together as you go.
- Border: To give the leaf a jagged, realistic edge, crochet a series of “single crochet one, chain two” groups around the leaf, including a picot stitch at the very top.
Assembling the Rose Bouquet
Once all components are crocheted, you can begin the assembly.
- Stem: Bend the top of a flower stem and thread it through the wrong side of the first small petal. Glue and fold the petal around the stem.
- Petal Layering: Glue the second small petal opposite the first. Gradually add the three large petals one by one, ensuring they overlap each other to create a full, blooming look.
- Final Touches: Thread the calyx through the stem and glue it to the base of the petals. Wrap the flower stem with green yarn, incorporating the two leaves as you move downwards. Secure the end with a small amount of glue.
Video Credits: Xúy Crochet
2: Crochet Beginner Easy Flower Pattern
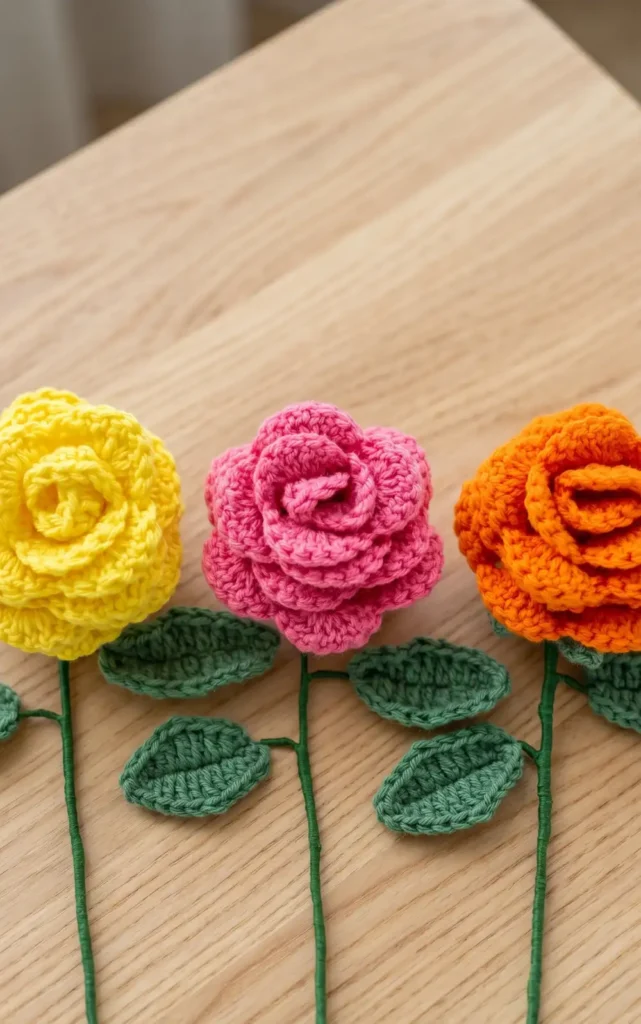
This crochet rose pattern is designed for beginners and results in a beautiful, realistic flower suitable for bouquets or embellishments.
Essential Materials
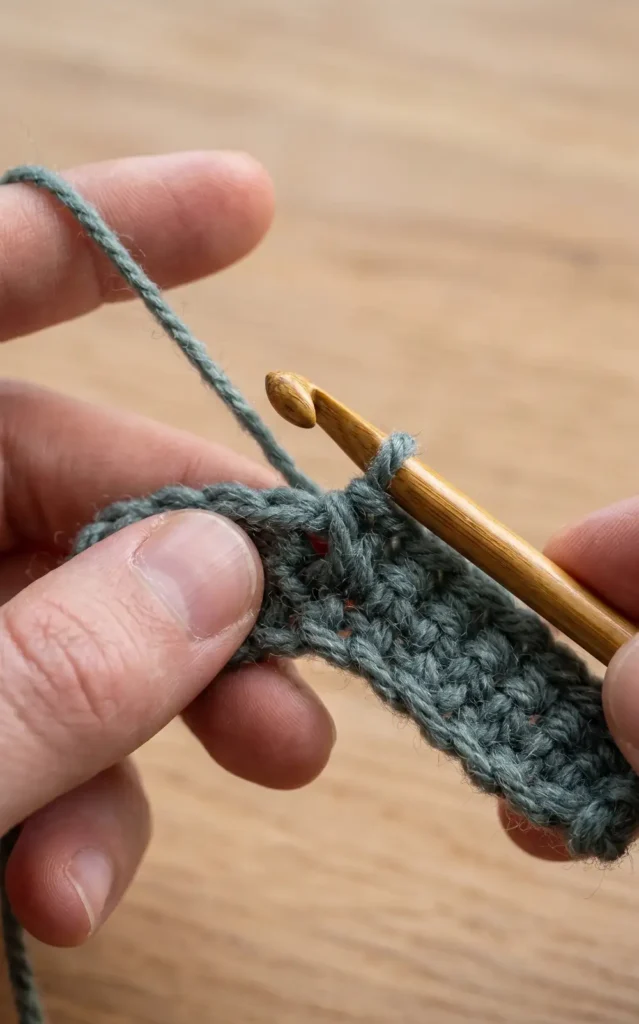
To begin this project, you will need approximately 100 yards of worsted weight yarn and a size H crochet hook. For the optional stem and leaves, you should gather 16 gauge green floral wire for the stem, 22 gauge green floral wire for the leaves, green floral tape, and a small amount of green yarn. A yarn needle is required for assembly, and hot glue can be used to provide extra security for knots and petals.
Crocheting the Rose Petals
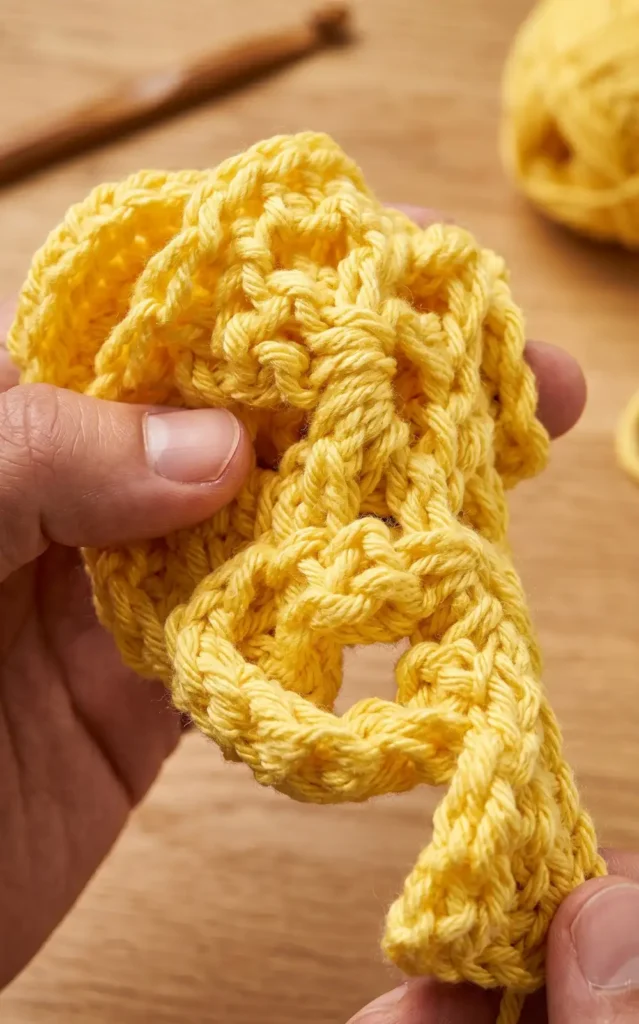
The main body of the rose is worked in three rows to create a long, ruffled strip of fabric.
- Foundation: Start with a slip knot and chain 66.
- Row 1: Skip the first five chains, then work one double crochet in the sixth chain from the hook. Skip the next two chains and work a V stitch, which consists of one double crochet, two chains, and one double crochet in the same space. Continue this pattern of skipping two chains and placing a V stitch in the next across the entire row.
- Row 2: Chain three and turn your work. In the first V space from the previous row, work one double crochet, three chains, and two double crochet stitches. In every remaining V space across the row, work two double crochet stitches, three chains, and two double crochet stitches.
- Row 3: Chain one and turn. In the first V space, work seven double crochet stitches. In the next available hole, work one single crochet. Repeat this pattern of seven double crochets in the V and one single crochet in the hole across the entire row.
Assembling the Flower
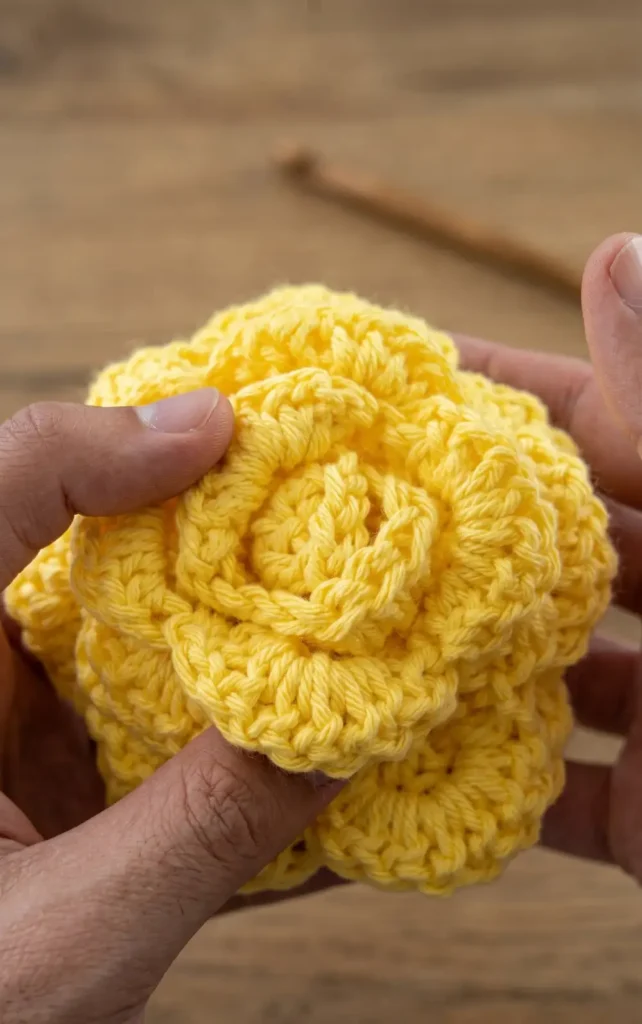
Once the crochet work is finished, cut a long tail and secure the yarn. Knot the two loose ends together. Starting from the end opposite the loose strands, wrap and roll the fabric over your finger to form the rose shape. Using a yarn needle, insert the needle through the center of the side of the flower and out the other side several times. This process holds the layers together so the rose does not unravel.
Creating the Sepal
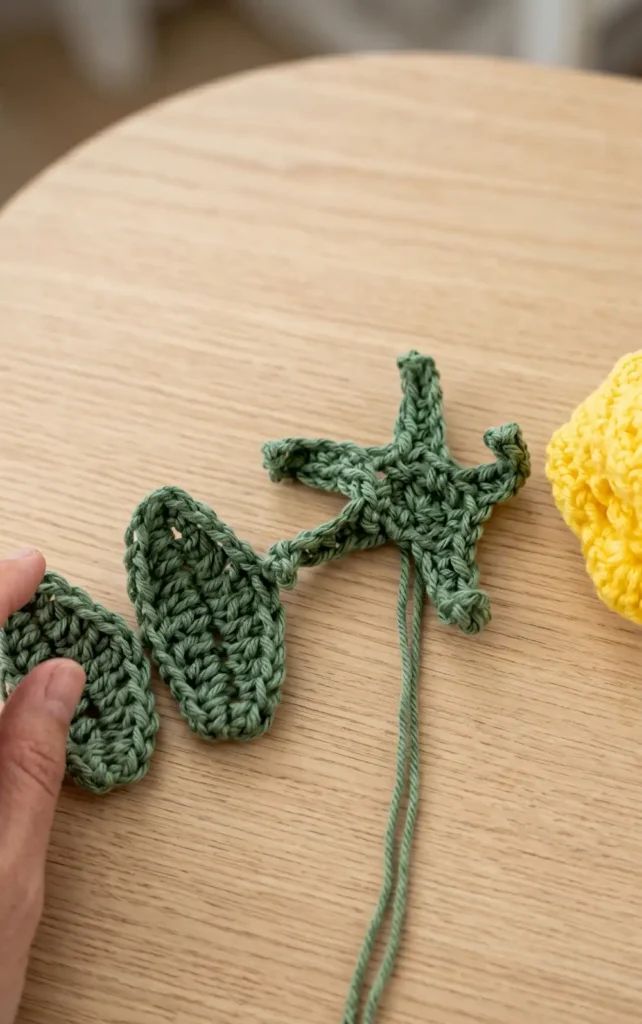
The sepal is the green base that sits under the flower petals.
- Form a magic ring, which is a loose slipknot, and chain one.
- Work five half double crochet stitches into the ring, tighten the string, and slip stitch to the first stitch.
- Chain six, skip the first chain, and work one single crochet in each of the next five stitches.
- Work one single crochet into the top of the next half double crochet from the ring.
- Repeat this process until you have five small green petals for the sepal.
Crafting the Leaves
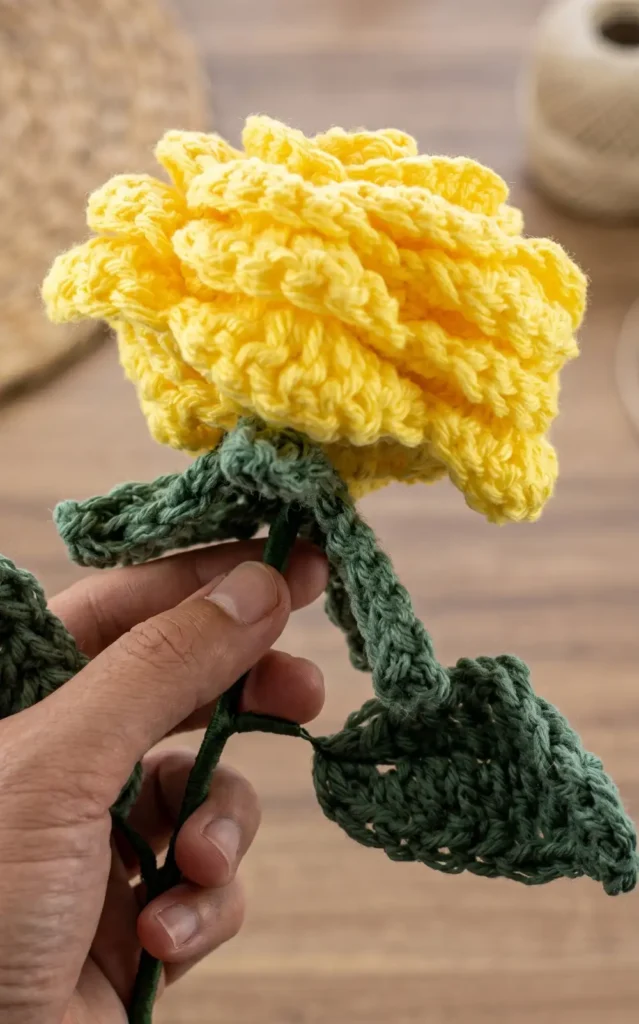
To make a leaf, chain 12 and skip the first chain. Work the following sequence along the chain: two single crochets, two half double crochets, one double crochet, one triple crochet, one double crochet, two half double crochets, and two single crochets. Pivot your work to the opposite side of the foundation chain and repeat the same sequence.
Stemming and Final Touches
To add a stem, fold an 18 to 20 inch piece of 16 gauge floral wire in half and insert the ends through the flower and then the sepal. Wrap the stem with green floral tape, stretching it slightly as you wrap to ensure it sticks. For the leaves, fold a 16 inch piece of 22 gauge wire in half and thread it into the crocheted leaf. Twist the wire at the bottom of the leaf, wrap it with floral tape, and then attach it to the main stem by wrapping them together. Finally, bend the bottom of the stem wire into a loop to prevent any sharp edges.
Video Credits: naztazia
3. Crochet Rose Flower Bouquet Pattern
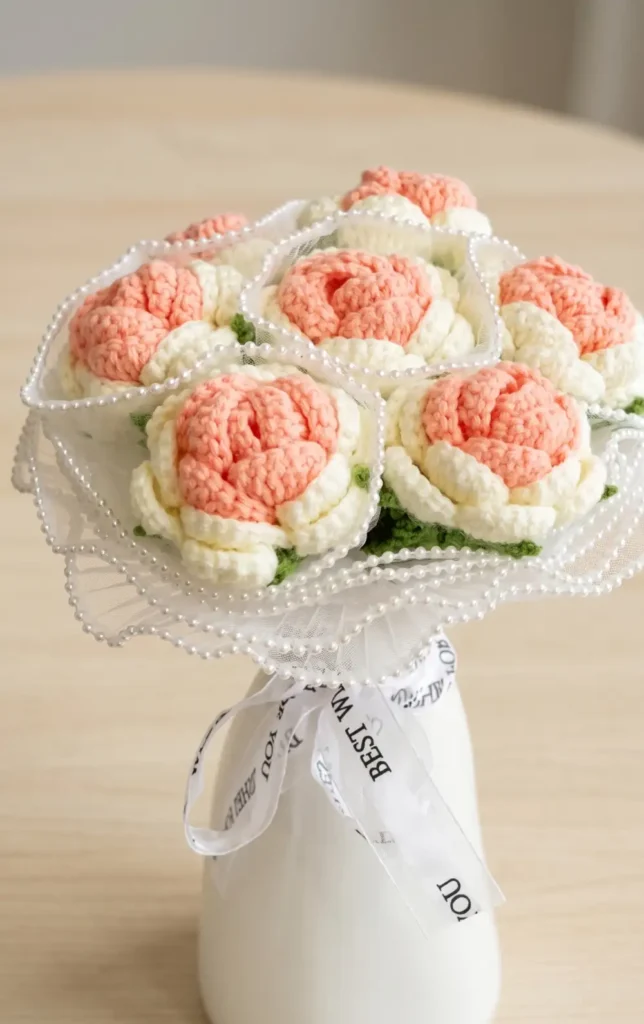
To create a handcrafted crochet rose, you will need pink and white yarn for the petals and green yarn for the base and leaves. Other essential materials include a crochet hook, a wire to provide structure for the leaf, and a pair of scissors.
Creating the Base Structure
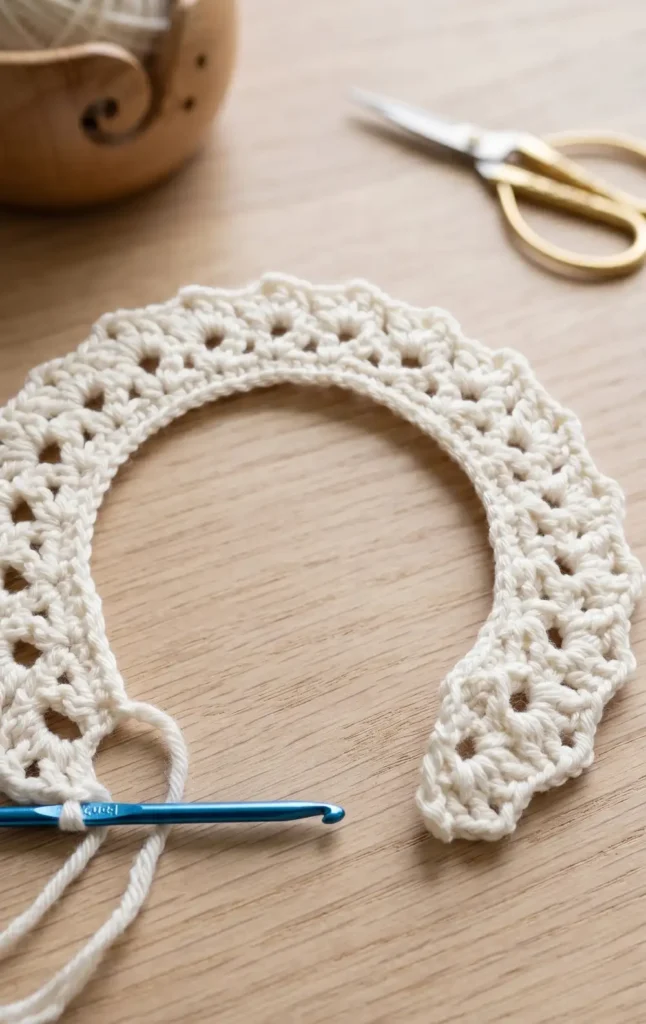
The first step is to crochet a long structure that will form the flower when it is wrapped together. Start by making a slip knot with the white yarn and creating a foundation chain of 53 stitches. For the first row, work one single crochet into the second space from the hook and continue with one single crochet in every space until you reach the end of the chain.
To begin the second row, chain five and turn your work. Work one double crochet into the current space to create a triangle shape. Continue the pattern by skipping two spaces and working a sequence of one double crochet, two chains, and another double crochet into the third space. Repeat this triangle pattern until you reach the end of the row.
For the third row, chain three and turn your work. In this row, you will work directly into the spaces created by the two chains in the previous row. In each of these spaces, work two double crochets, two chains, and then two more double crochets. Repeat this pattern across the entire row.
Crafting the Flower Petals
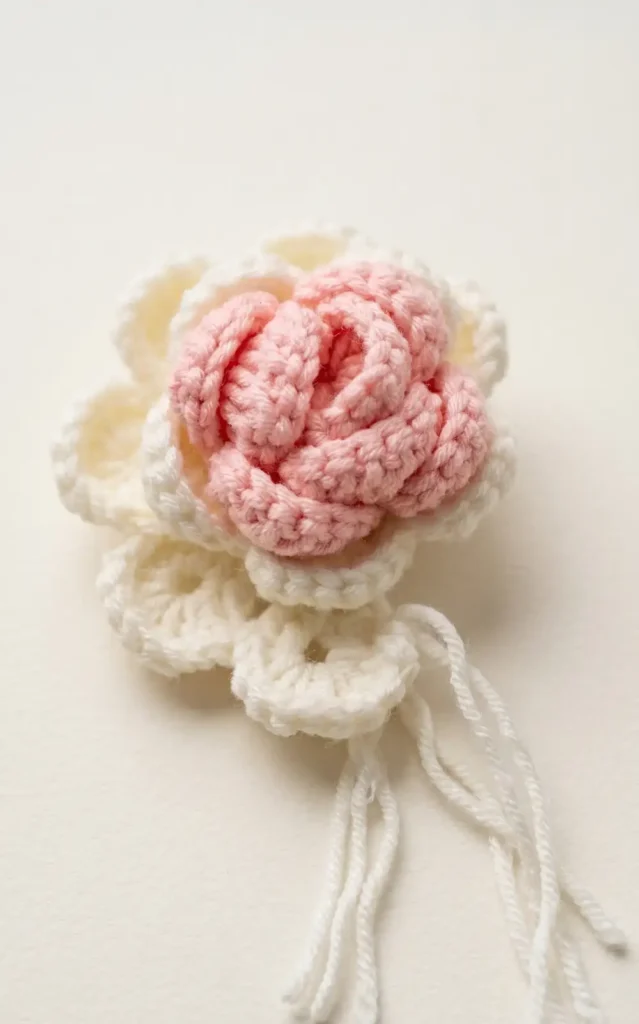
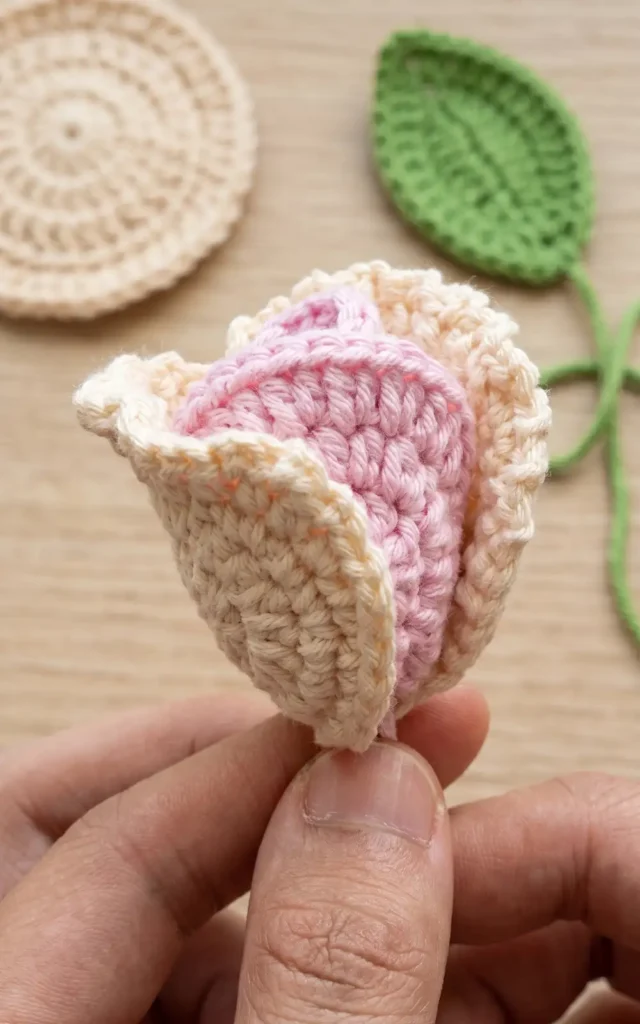
The petals are worked in two colours, starting with pink for the inner section and white for the outer section. Begin by attaching the pink yarn with a slip knot and chaining one. For the very first petal, work 12 double crochets into the large space created by the two chains in the previous row. It is helpful to pull the yarn slightly longer for these stitches to ensure the petals are prominent. Finish the first petal by making a slip stitch into the space between the two double crochets of the previous row.
From the second petal onwards, chain one and work eight double crochets into the next large space. Follow this with a slip stitch and another chain one in the smaller space between the double crochets of the previous row. Repeat this process until you have completed seven pink petals. After the seventh petal, cut the pink yarn and switch back to the white yarn. Attach the white yarn with a slip stitch and chain one, then continue working eight double crochets for each of the remaining petals until the end.
The Flower Torus
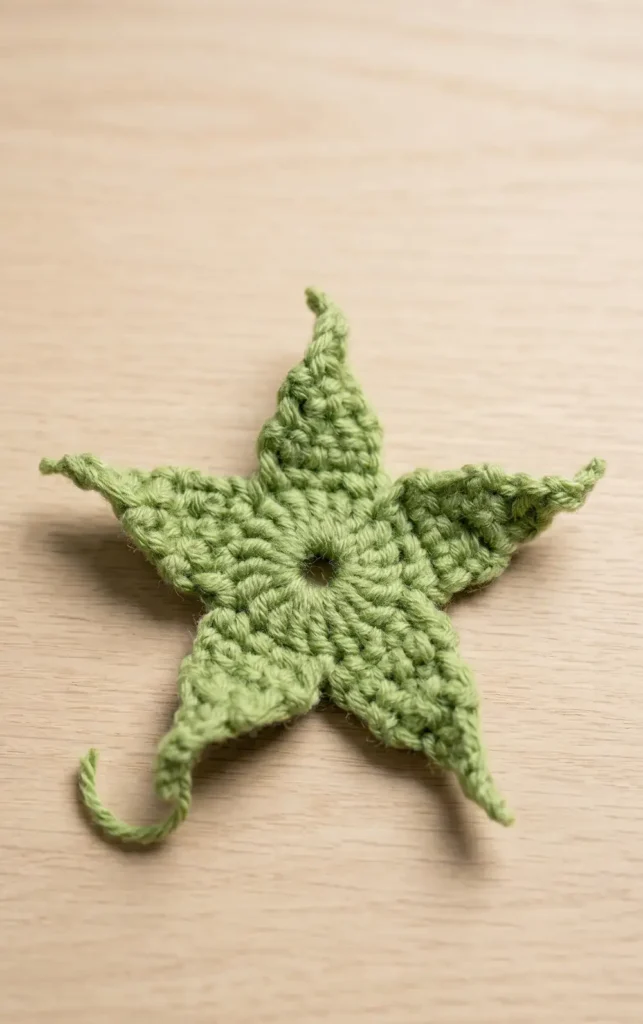
The torus, or the green base of the flower, begins with a double circle or a magic ring using green yarn. Work 20 double crochets into this circle. To close the circle tightly, pull the tail of the yarn to identify which strand moves, then pull that strand to tighten the ring before pulling the tail again. Once the circle is secure, chain one to act as a turning chain.
The torus features five small green petals. To make the first one, work four single crochets across the first row, then chain one and turn. In the second row, work four single crochets again. In the third row, perform one decrease followed by two single crochets. For the fourth row, work a decrease over the first two spaces and then one single crochet. In the fifth row, perform a decrease over the remaining two spaces. Finally, in the sixth row, work one half double crochet, chain two, and cut the yarn. Repeat this entire sequence four more times around the circle to complete the torus.
Crocheting the Leaf
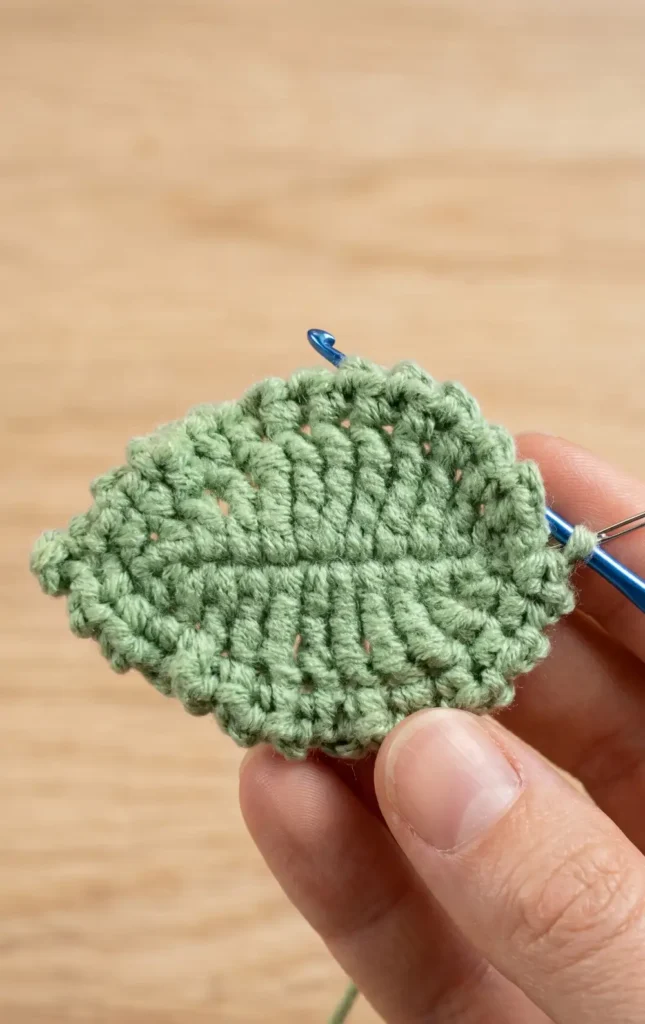
To create the leaf, start with a slip knot and chain 12. Insert a wire into the work and begin the first side by working into the second back bump from the hook. The stitch sequence for the first side is one single crochet, one double crochet, two double triple crochets, and then a double triple crochet increase which consists of two stitches in one space. Follow this with another double triple crochet, a triple crochet, a double crochet, and a half double crochet. In the final space at the tip, work three single crochets.
Move to the other side of the chain and mirror the pattern, starting with a half double crochet and a double crochet. Once the first round is complete, close it with a slip stitch and chain one. For the second round, work a pattern of one single crochet followed by two chains in each space. When you reach the middle space at the tip of the leaf, work a three chain picot stitch by making one single crochet, three chains, a slip stitch into the front of the stitch, and another single crochet in the same space. Continue the pattern of one single crochet and two chains until the end.
Assembly and Finishing
Once all the individual components are crocheted, the flower is formed by wrapping the long petal strip together. The pink petals should be on the inside with the white petals on the outside. Finally, wrap the ends of the yarn for approximately two to three centimetres to fix them securely and finish the rose.
Video Credits: Lingzhi Handmade
4. Crochet Tulip Flower Bouquet Pattern
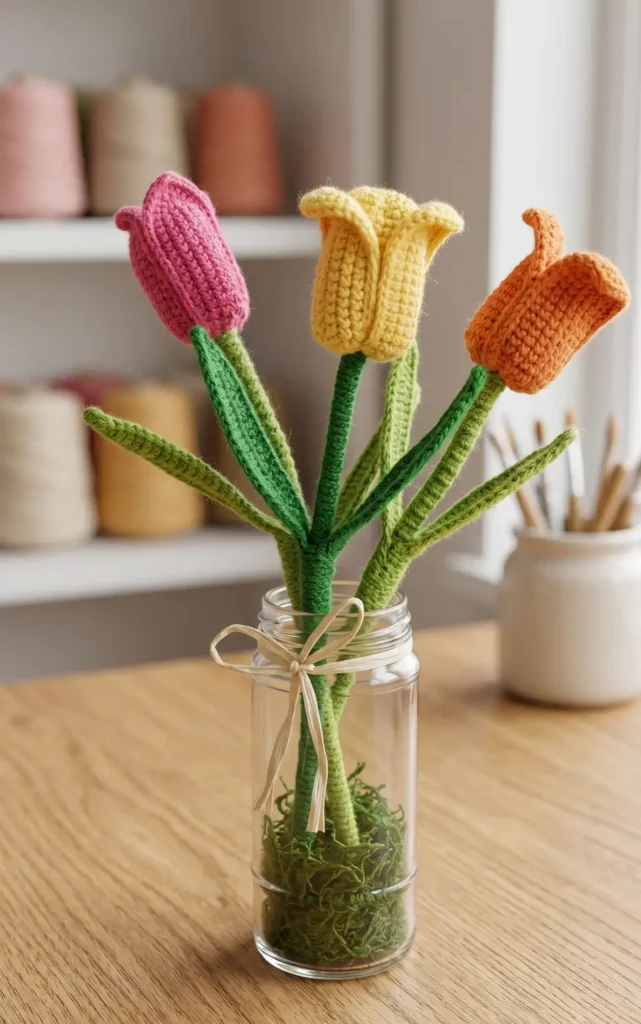
This guide provides a comprehensive walkthrough for creating a handcrafted crochet tulip, featuring detailed instructions for the branch, leaves, and petals. This pattern consists of one inner petal, three outer petals, two leaves, and one branch.
Materials and Tools
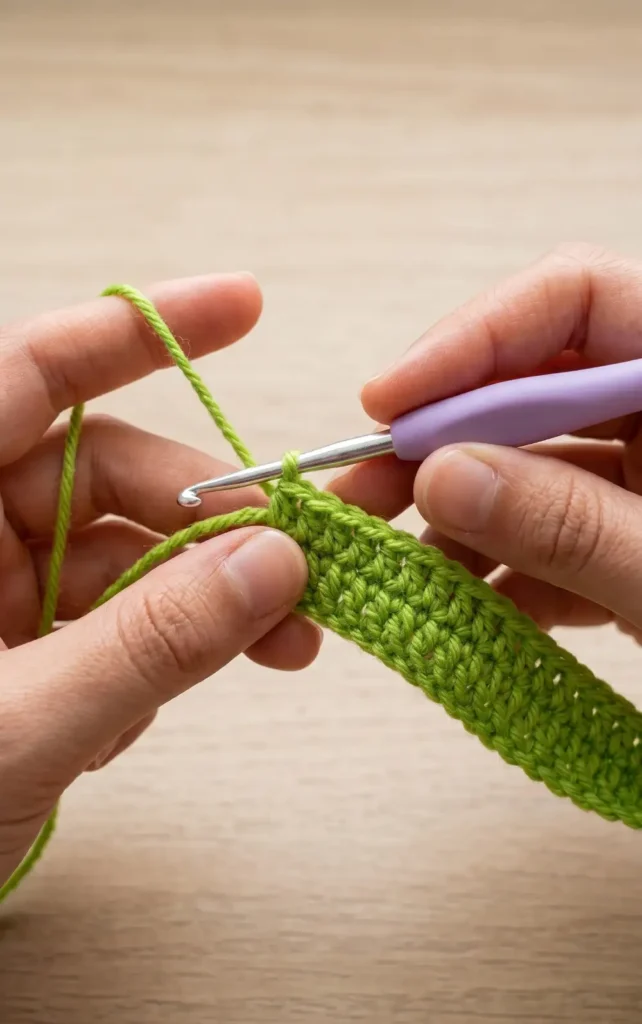
To begin your tulip project, gather the following supplies:
- Yarn: Orange yarn for the petals (or your preferred flower color) and yarn for the branch and leaves.
- Crochet Hook: Size 4 (2.5 mm).
- Copper Wire: Approximately 25 centimetres (10 inches) for the branch, plus additional wire for the leaves.
- Stuffing: Polyester fiber filling for the inner petal.
- Basic Tools: Scissors and a needle for sewing and assembly.
Creating the Branch and Leaves
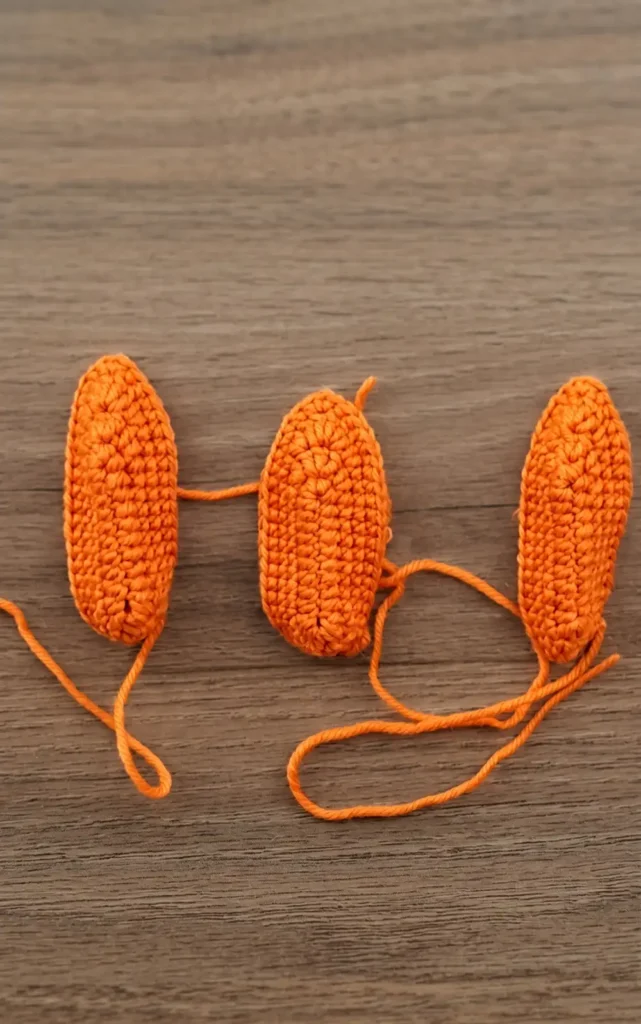
The structure of the tulip relies on a firm branch and shaped leaves, both reinforced with copper wire.
The Branch Measure 25 centimetres of copper wire and fold it to create four layers of wire. Twirl the outer layer around the inner layers to make it thick and firm. For the crochet portion, start with a magic ring of 5 SC. Continue crocheting 5 SC for every round until the branch reaches your desired length, ensuring you reverse the piece after the first round so it is easier to work with. Insert the prepared wire into the crocheted tube. In the final row, perform 5 increases and fasten off, leaving a long tail for sewing.
The Leaves Start by crocheting 30 chains. Prepare a piece of copper wire slightly longer than your chains and form a loop at one end. To attach the wire, insert your hook into the stitch and the wire loop, then crochet SCs around the wire to secure it. For the first three stitches, put the needle into the loop; after that, keep the needle below the wire for every crochet stitch. At the tip, fold the wire to form another loop and crochet 4 SC into the last stitch. Work down the other side of the chain symmetrically to finish the leaf, then fasten off and bend the wire to your preferred shape.
Crocheting the Petals
The tulip bloom is composed of a firm inner core surrounded by three delicate outer petals.
Outer Petals (Make 3)
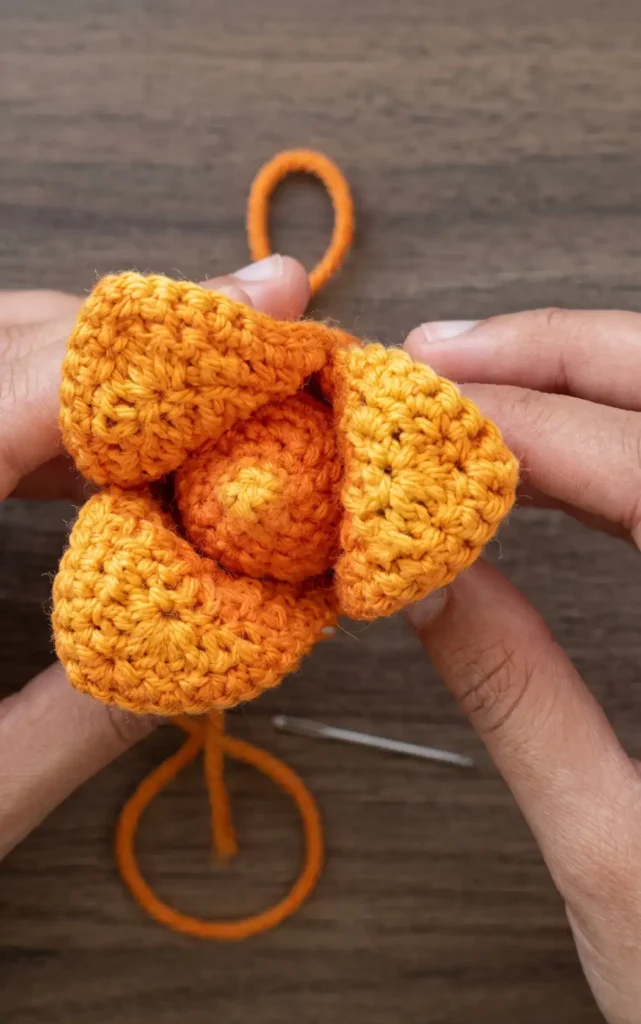
- Row 1: 10 chains.
- Row 2: 2 chains, 9 HDC, 5 HDC in the last chain, 8 HDC along the line, and 4 HDC in the last stitch. Finish with a slip stitch.
- Row 3: Chain 1, 9 SC, 1 HDC, 2 HDC in the same stitch. At the tip, work 3 DC. Follow with 2 HDC in the same stitch, 1 HDC, 9 SC, and 3 increases. Finish with a slip stitch.
- Row 4: Chain 1, 12 SC, 2 HDC in the same stitch. At the tip, work 5 DC. Continue with 2 HDC in the same stitch, 18 SC, and a slip stitch.
- Row 5: Chain 1, 16 SC. At the tip, work 3 SC in the same stitch. Finish with 22 SC and fasten off, leaving yarn for assembly.
Inner Petal
- Row 1: Magic ring for 4 SC, then slip stitch.
- Row 2: 2 SC increases (6 stitches total).
- Row 3: 3 SC increases (9 stitches total).
- Row 4: Repeat (SC, INC, SC) 3 times (12 stitches total).
- Row 5: Repeat (SC, INC) 6 times (18 stitches total).
- Row 6: 18 SC.
- Row 7: Repeat (5 SC, INC) 3 times (21 stitches total).
- Rows 8 to 14: 21 SC for each of the 7 rows.
- Row 15: Repeat (5 SC, DEC) until the end of the row (18 stitches total).
- Row 16: Repeat (SC, DEC) 6 times (12 stitches total).
- Stuffing: Fill the petal with polyester fiber to make the shape firm.
- Row 17: 6 decreases (6 stitches total), then fasten off and leave a tail for sewing.
Final Assembly
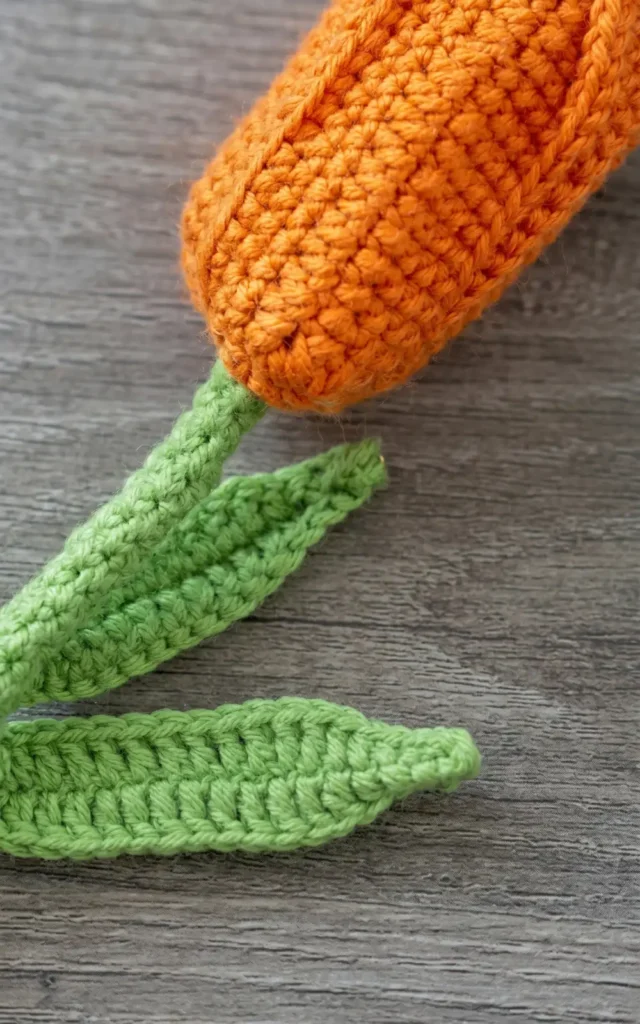
To assemble your tulip, start by attaching the three outer petals to the inner petal. Position the outer petals around the inner core and sew them at the edges, only attaching the bottom half of each petal. This allows the top of the petals to remain free, which you can then fold slightly to create a natural look.
Next, insert the branch wire through the hole at the bottom of the inner petal and sew them together securely. Finally, attach the leaves to the middle of the branch. Sew only a portion of the leaf to the branch so that you can bend the wire to shape the leaves realistically. Your handcrafted crochet tulip is now complete.
Video Credits: Crocket Crochet
5. Crochet Closed Rose Pattern
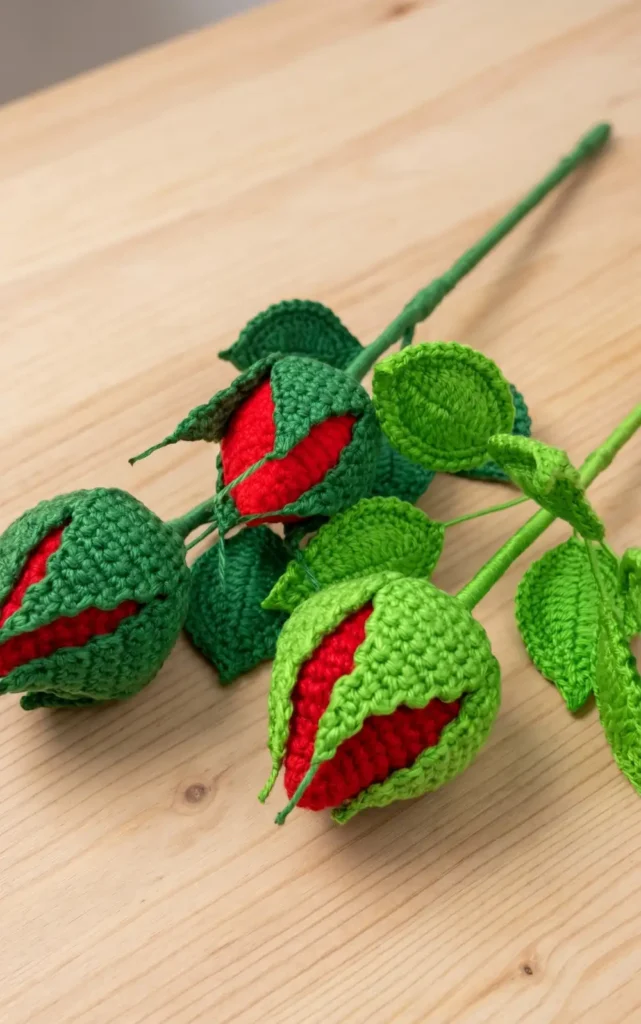
This section outlines the specific Thai crochet technique used to create a rosebud, as presented by Natagor Finlayson. The pattern focuses on a structured, closed design that is popular for floral arrangements.
Materials and Tools
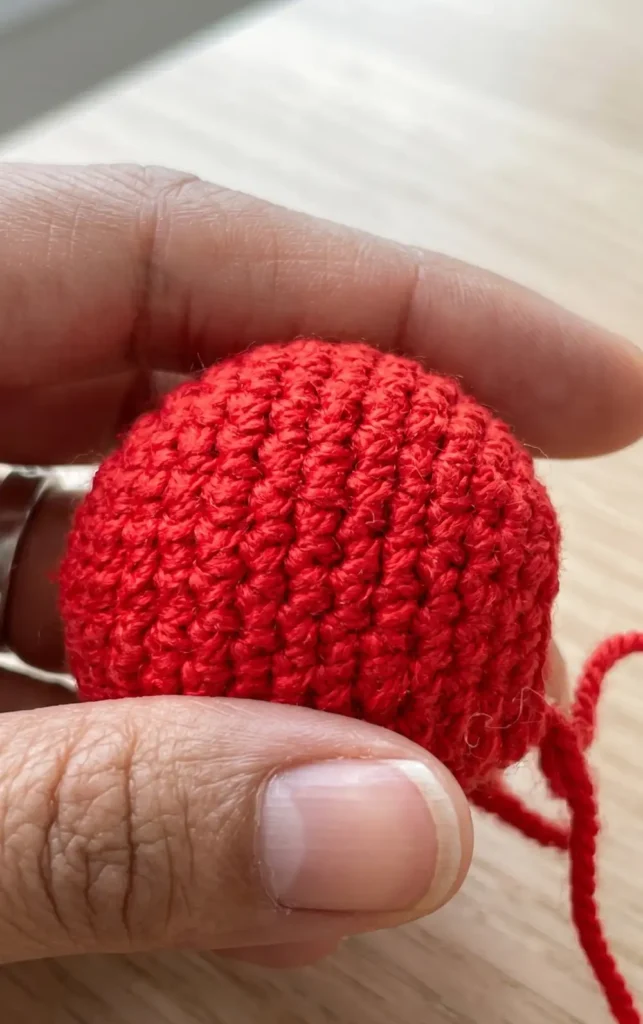
The tutorial emphasizes the importance of the initial design and the selection of materials suitable for a compact flower. While specific yarn types are not listed by name, the process involves working with a series of lengths and sequences to build the rose. A recurring element in the technique involves the use of a “lapis” or similar tool to manage the stitches during the creation of the petal layers.
Foundation and Initial Stitches
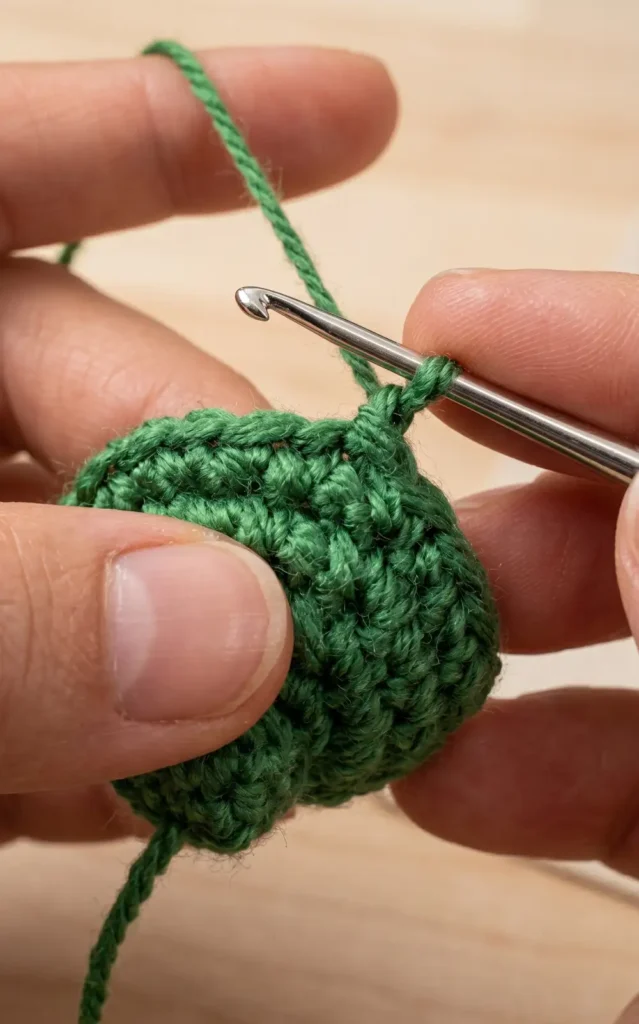
The pattern begins by establishing a foundation through a series of foundational movements. Key steps in the early stages include:
- Establishing the first set of loops to serve as the base of the bud.
- Utilizing a specific “jacoby” or “kobe” stitch pattern that is repeated to ensure the base is firm.
- Counting a sequence of five initial movements to maintain the symmetry required for a realistic rosebud shape.
Developing the Rose Structure
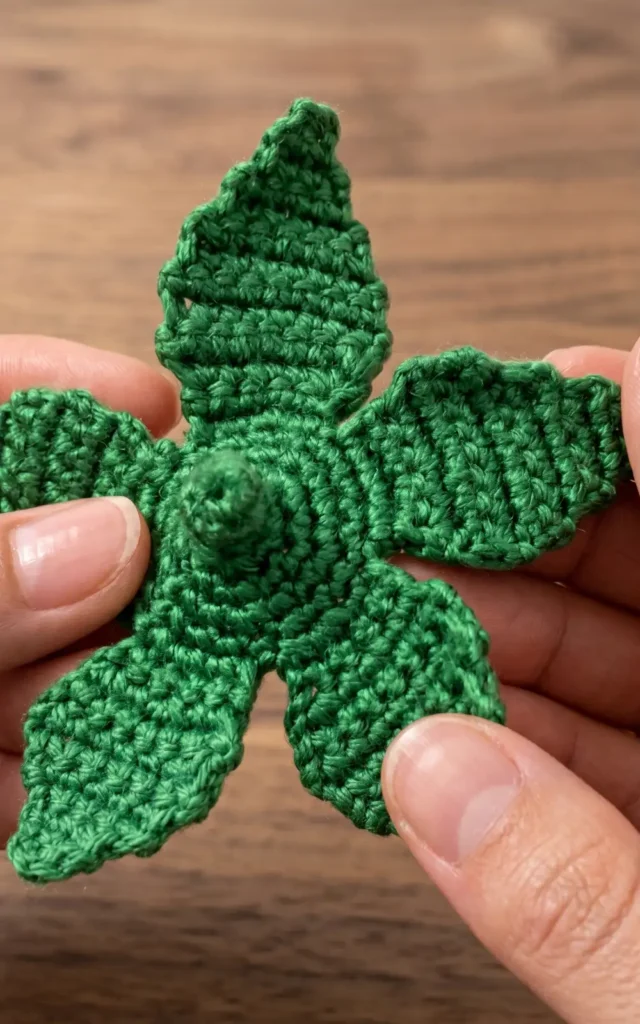
Once the base is set, the process shifts to building the body of the rose. This is achieved through repetitive sequences that create the overlapping effect of petals:
- Iterative Stitching: The pattern follows a cycle of “son” and “chinga” movements, which are repeated to add volume to the rose.
- Layering: The work continues by transitioning through different sections, referred to as “taxi” movements, which help the rosebud gradually expand and take shape.
- Consistency: It is essential to maintain the same stitch count throughout these middle rows to keep the rose in its “closed” or “bud” state.
Finishing the Rosebud
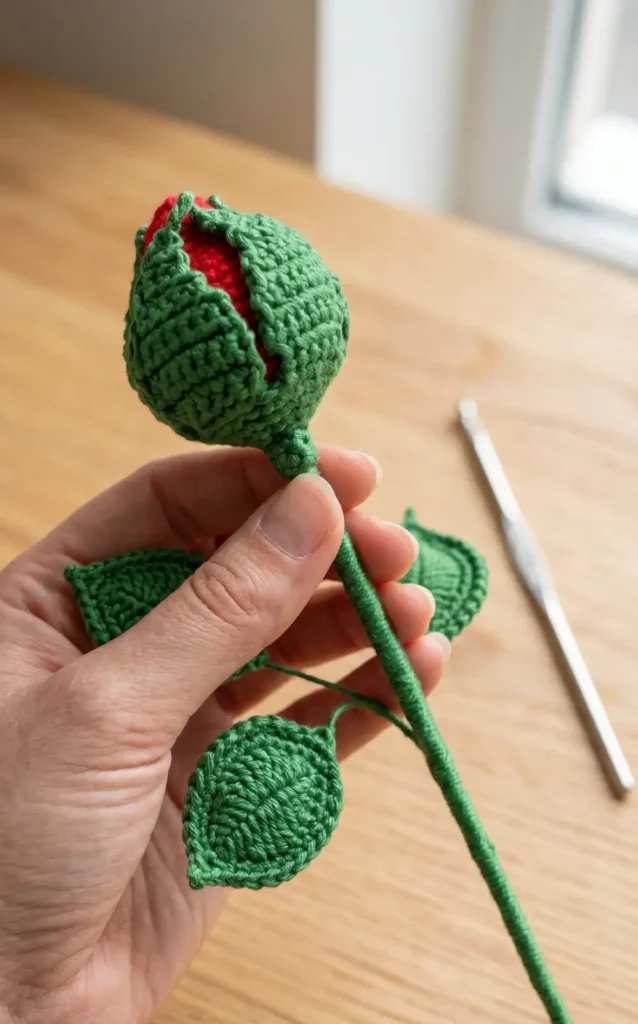
The final stages of the pattern involve securing the structure so it does not unravel. The transcript highlights a “final” sequence of stitches that serves to lock the design in place. To complete the rose, the yarn is worked through the last set of loops, and the project is finalized by securing the end of the thread to the bottom of the flower. The result is a tightly formed rosebud that maintains its shape through the density of the stitches.
Video Credits: Natagor Finlayson
6. Crochet Leaves Easy Bouquet Pattern
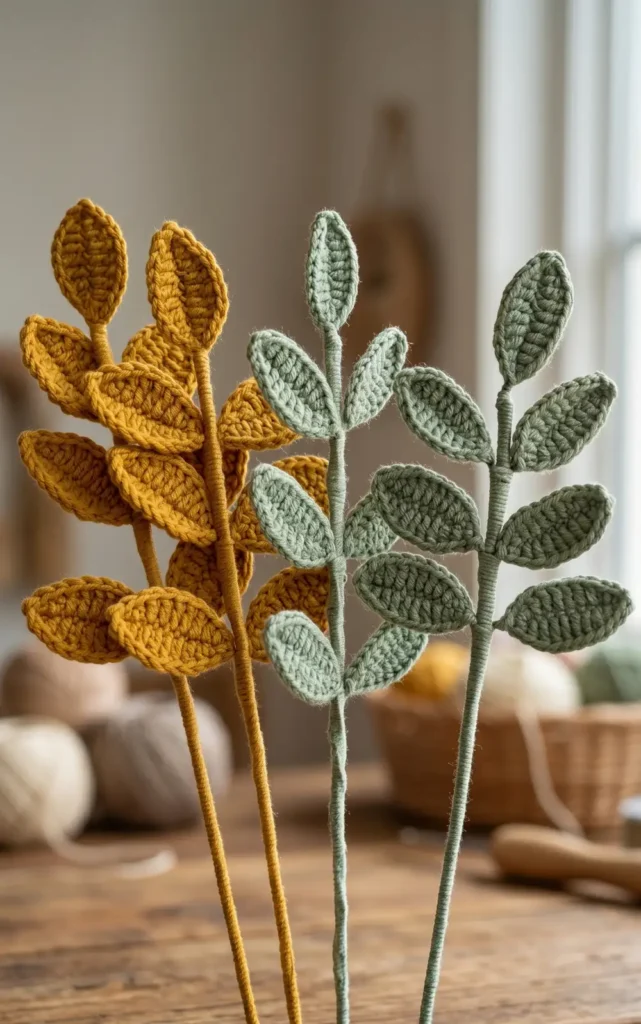
To create these versatile leaves for your flower matching, you will need green yarn and a crochet hook. A piece of wire is required to support the leaves and provide structure. You should also have scissors available to cut the yarn, specifically leaving a long tail of about 10 centimeters for finishing.
Step-by-Step Instructions
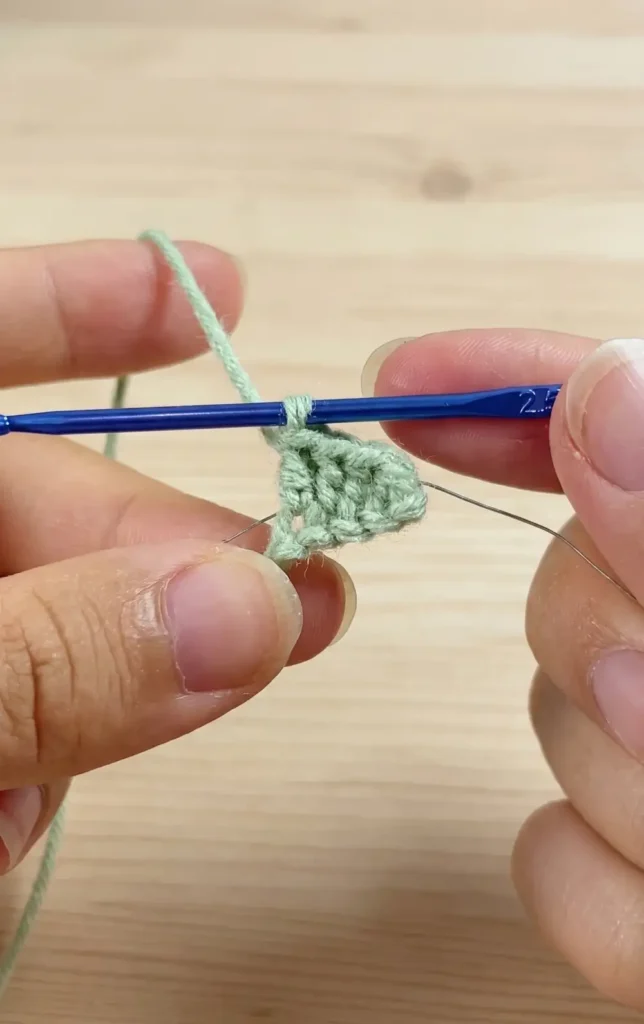
The construction of the leaf begins with a slip knot followed by a foundation chain of 11. Once the chains are ready, you must insert the wire to provide support before working the stitches.
Working the First Side
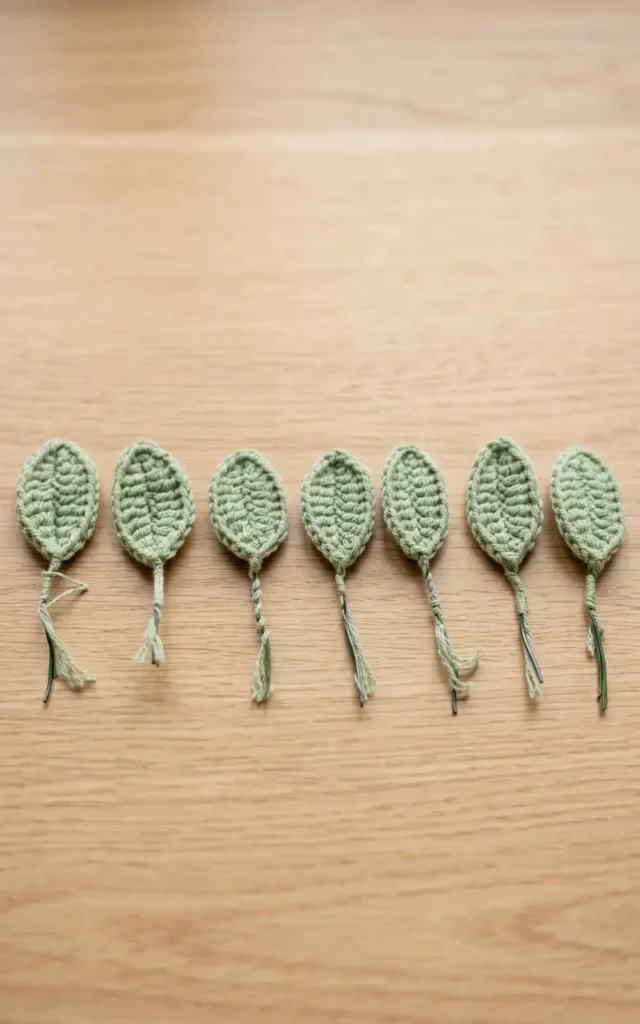
- Find the second space from the hook and work one single crochet.
- In the next space, work one half double crochet.
- Work one double crochet in each of the next five spaces.
- In the following space, work one half double crochet.
- In the very last space, work a sequence of one slip stitch, one chain, and one slip stitch.
Working the Second Side After completing the tip, you will move to the other side of the foundation chain to repeat the stitch pattern.
- Work one single crochet in the first space.
- Work one half double crochet in the next space.
- Work five double crochet across the next five spaces.
- Finish the side by working one half double crochet and one single crochet in the last two spaces.
Assembly and Finishing
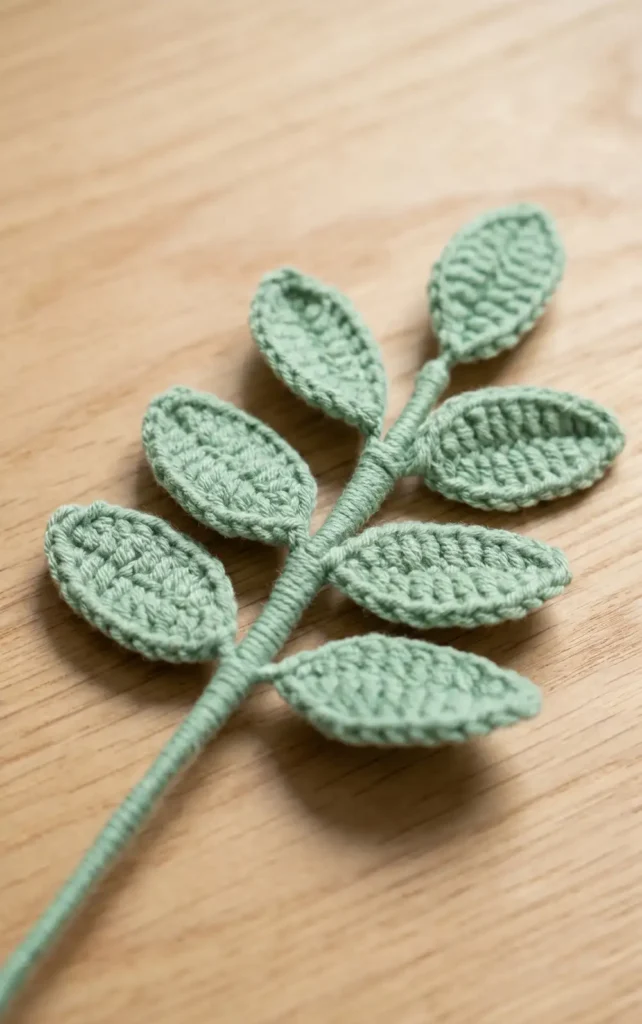
To complete the leaf, perform a slip stitch through the first space. Cut the yarn while leaving a 10 centimeter tail, which is used to wrap the end of the wire and yarn securely. For a complete look, you can make seven of these leaves to assemble into a single branch for your bouquet.
Video Credits: Lingzhi Handmade
What’s Your Next Bloom?
Every pattern here gives you something different to practice. The mini rose keeps things quick and beginner-friendly. The tulip pushes you into new territory with wire, stuffing, and shaped petals. Start with one and let the next flower pull you in naturally.
The best part about a crochet bouquet is that it grows with you. Add a rose today, a leaf cluster tomorrow, and a tulip by the weekend. Before you know it, you have a full arrangement sitting on your shelf that your hook built from scratch.