6 Crochet Fall Clothing Free Patterns for Cozy Layers
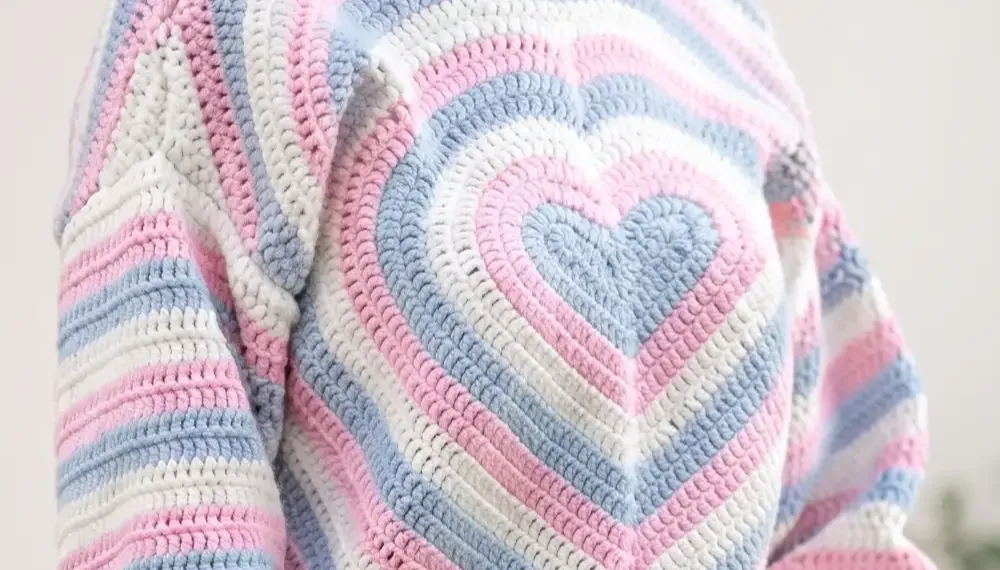
Fall layering season is here, and your hook is ready. These six patterns give you real, wearable pieces for the cooler months ahead. From a floor length duster to a cozy mock neck sweater, each project builds skills you will use again and again.
I picked these patterns because they solve actual layering problems. You get texture, warmth, and style options for every skill level. Grab your yarn and let’s get you ready for fall.
1. Crochet Fall Duster Cardigan Pattern
Step 1: Gathering Materials and Foundation
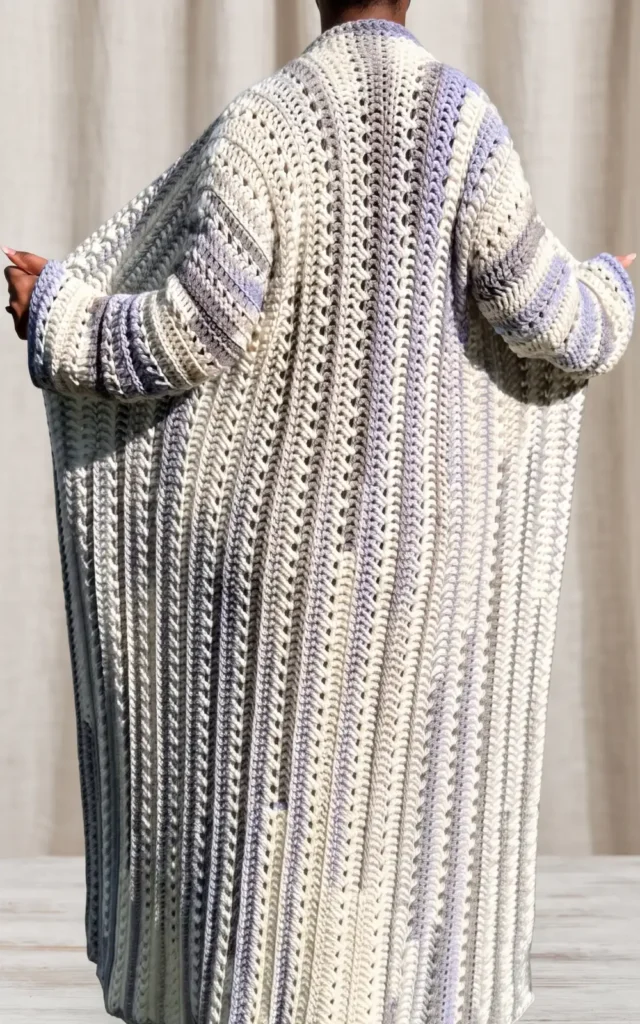
To begin this floor length duster, you will need three and a half skeins of Caron Cinnamon Swirl Cakes, which is a 100% acrylic, medium four-weight yarn. While the yarn label suggests a 5mm hook, this specific design uses a 6mm J hook to create the right texture.
Essential tools include a tape measure, stitch markers, scissors, and a darning needle for weaving in ends and joining panels. The project starts with a foundation double crochet row of 120 stitches, which allows you to create the base chain and the first row of double crochet simultaneously.
Step 2: Mastering the Four-Row Repeat
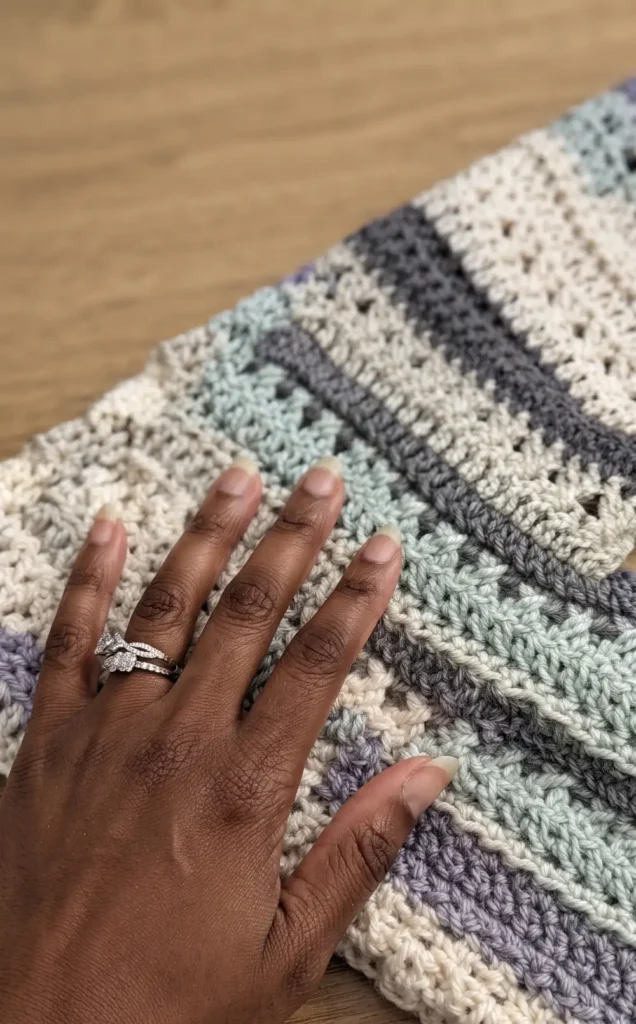
The cardigan features a distinct four-row repeat that provides both texture and visual interest. Throughout the construction, you will use stacked single crochets as an alternative to traditional turning chains to keep your edges straight.
- Row 1: This is a simple row of double crochet stitches.
- Row 2: This row uses cross-stitch double crochets. To achieve this, skip one stitch, double crochet in the next, and then go back to the skipped stitch to place your second double crochet.
- Row 3: Work regular double crochet stitches across the entire row.
- Row 4: This row consists of half double crochet in the back loop only. It is important to work under both loops for the very first and very last stitches of the row to maintain stability.
Step 3: Constructing the Panels and Armholes
The body of this cardigan is worked in one large piece to simplify the process. Start by completing 15 rows of the four-row repeat for the first front panel. To create the armhole, measure a depth of 8 inches from the shoulder and create a chain of 22 stitches. You will then work the back panel for 26 rows using the same repeat pattern. Once the back is finished, create another chain of 22 to form the second armhole and complete the final 15 rows for the second front panel.
Step 4: Assembly, Sleeves, and Final Border
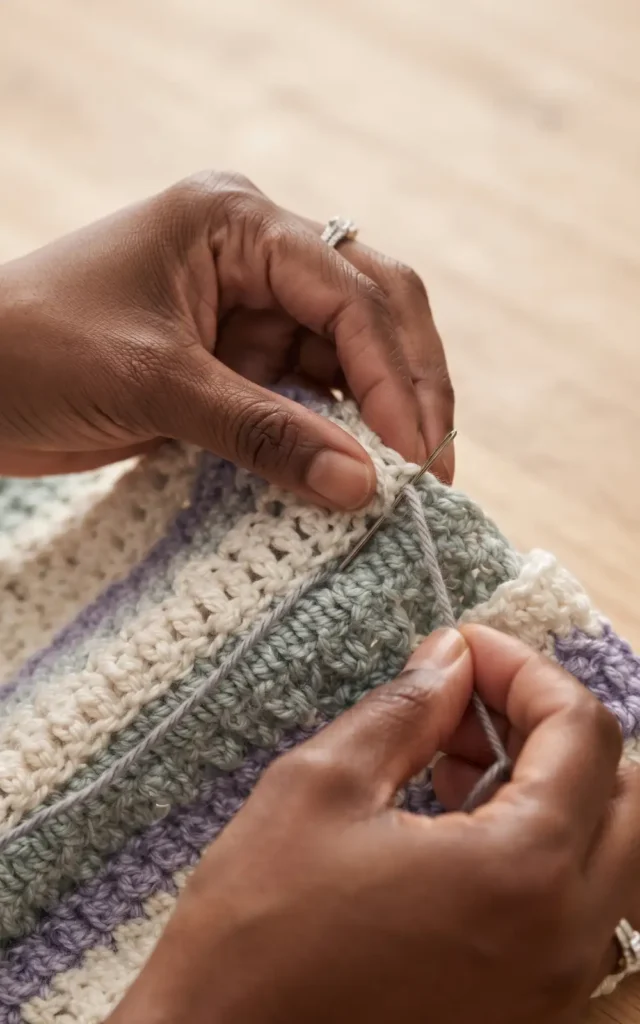
After completing the main body, use a darning needle to whip stitch the front panels to the back panel at the shoulders. For the sleeves, join your yarn at the armhole and work the four-row repeat in the round for 24 rounds. To give the garment a professional finish, add a border of extended single crochet. This border should run from the bottom hemline, up around the neck, and back down the other side to create a clean, finished edge. Your floor-length duster is now ready for the autumn season.
Hey there! Some links on this page may be affiliate links which means that, if you choose to make a purchase, I may earn a small commission at no extra cost to you.
Video Credits: Crochet State of Mind
2. Crochet Granny Hexagon Cardigan Pattern
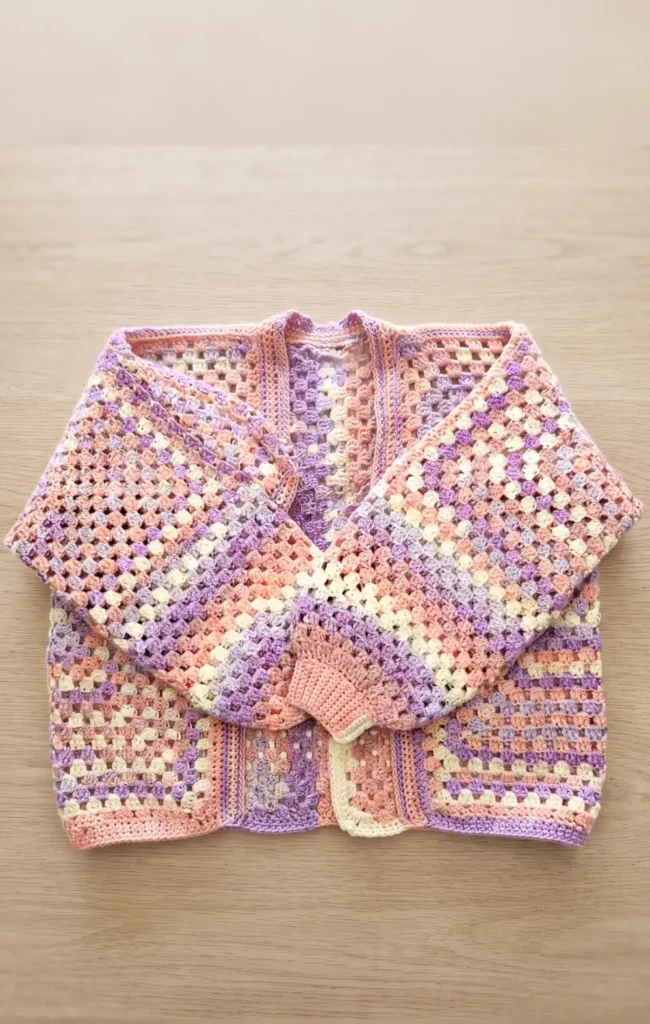
Creating this stylish and comfortable cardigan is a versatile project because you can use any size yarn and matching hook. For this specific tutorial, a three-weight premium acrylic yarn was used with a 6.5 millimetre hook for the main body to achieve loose, comfortable stitches. You will also need a 4 millimetre hook for the cuffs, a 5.5 millimetre hook for the border, a measuring tape, scissors, and a yarn needle.
Step 1: Crafting the Hexagon Foundations
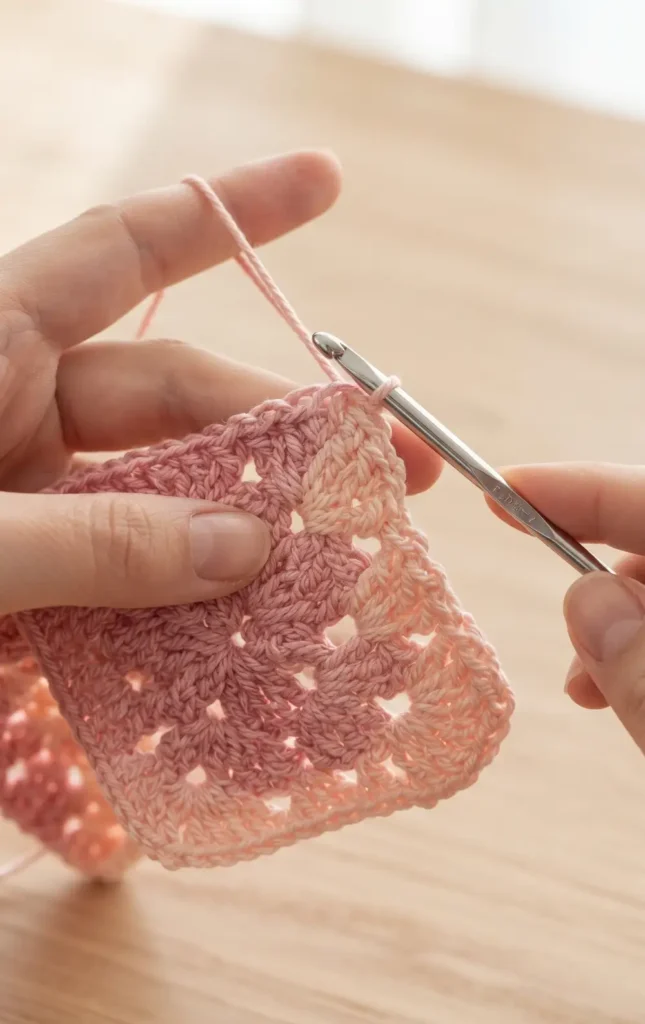
The foundation of this cardigan consists of two identical hexagons. Start by creating a magic circle and work your first round of six clusters, where each cluster contains three double crochets separated by a chain space. This six sided shape differs from a standard four sided granny square to allow for the unique cardigan geometry.
To ensure a perfect fit, use a favorite hoodie or sweater as a guide. Measure the width of its sleeve from the armpit straight across and multiply that number by two. Continue crocheting rounds of granny clusters (three double crochets in each space, with corners consisting of two clusters separated by a chain) until one side of your hexagon matches this sleeve circumference measurement. Once complete, repeat the process to create a second, symmetrical hexagon.
Step 2: Seaming and Sleeve Extension
To transform your flat hexagons into wearable pieces, fold each one into an “L” shape. This fold naturally creates an armhole and the front and back panels of one half of the cardigan. Instead of sewing, use a no-sew slip stitch method to join the top edges, which will become the shoulder and upper sleeve seam. Join the clusters of the front and back panels by slip stitching through the chain spaces as you work across the top.
After joining the shoulder, do not cut the yarn. Instead, continue working granny clusters in rounds directly around the arm opening to extend the sleeves. You can try the piece on periodically to check the length, continuing until the sleeve reaches your wrist or your desired length.
Step 3: Expanding the Back and Adding Cuffs
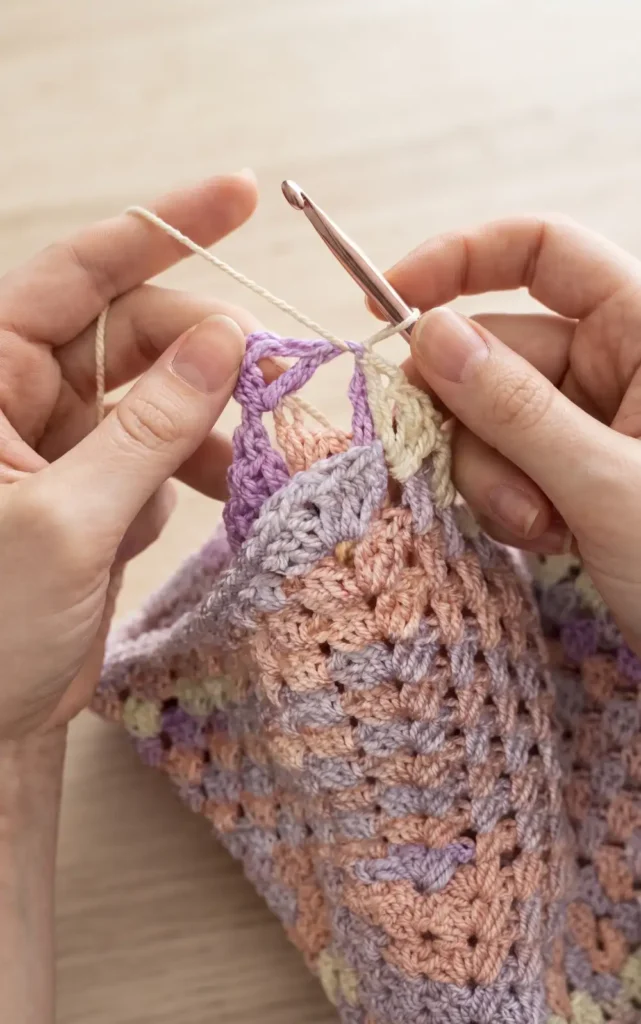
Because a direct connection of the two hexagons would leave no room for the neck, you must add space to the back panels. Attach your yarn to the back side of one hexagon and work two to three inches of granny stitch rows (approximately three rows depending on your yarn weight) to extend the panel. Repeat this on the second hexagon, and on the final row of the second extension, use the slip stitch method to join the two halves together down the center of the back.
For the cuffs, switch to a 4 millimetre hook to create a tighter, ribbed look. Begin with a row of single crochet decreases around the sleeve opening to pull the fabric in. Then, chain your desired cuff width and work rows of back-loop only single crochets. This technique creates a stretchy, professional ribbing that you will eventually slip stitch closed.
Step 4: Adding Length and the Final Border
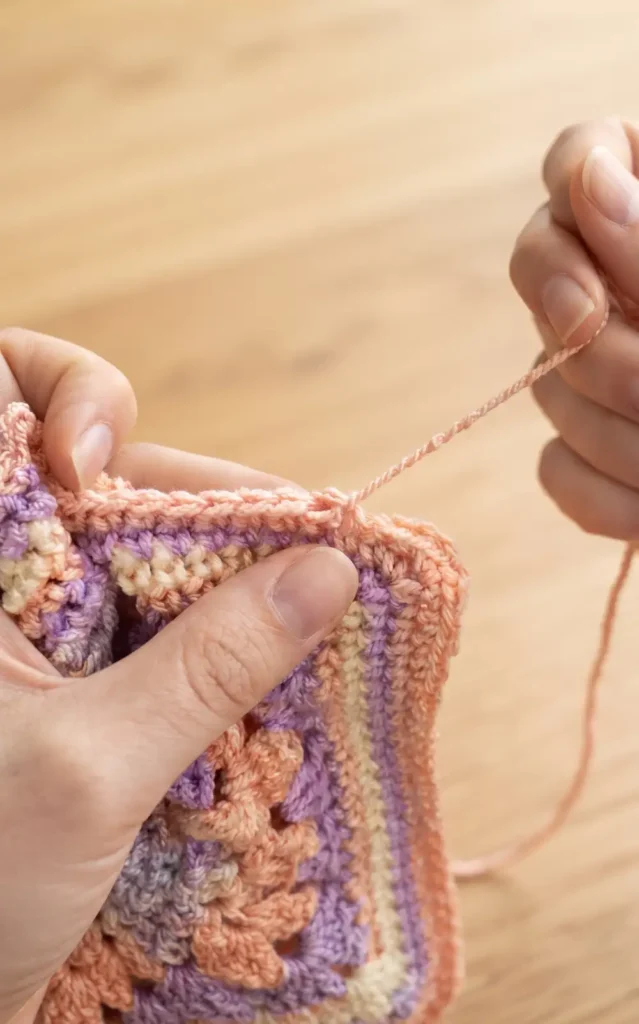
If you prefer a longer cardigan rather than a cropped style, attach your yarn to the bottom front corner and work rows of granny clusters back and forth across the entire bottom edge. Alternate your rows between starting with a full cluster and starting with a double crochet to keep the edges straight. Continue until the cardigan reaches your preferred length.
To finish the project, use a 5.5 millimetre hook to add a cohesive border. Work approximately five rows of single crochet all the way around the bottom, up the front panels, and around the neckline. In the bottom corners, place a single crochet, a chain, and another single crochet in the same spot to help the border turn the corner neatly. Finish by using a yarn needle to weave in all ends for a clean, professional look.
Video Credits: PassioKnit Kelsie
3. Crochet Unisex Oversized Sweater Pattern
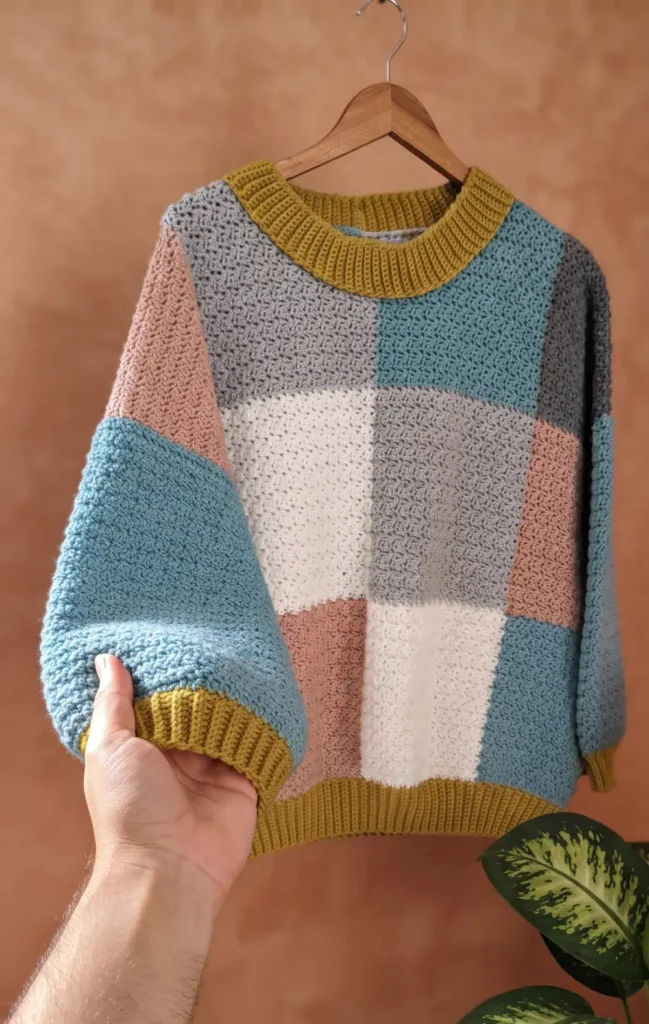
Creating this oversized, beginner friendly sweater requires approximately 700g of category 4 medium weight yarn. The project uses 4.5 mm and 5 mm crochet hooks to achieve a soft, comfortable texture that fits like a medium to large size, though its generous proportions can also serve as an extra large fit.
Step 1: Foundation Ribbing and Base Row
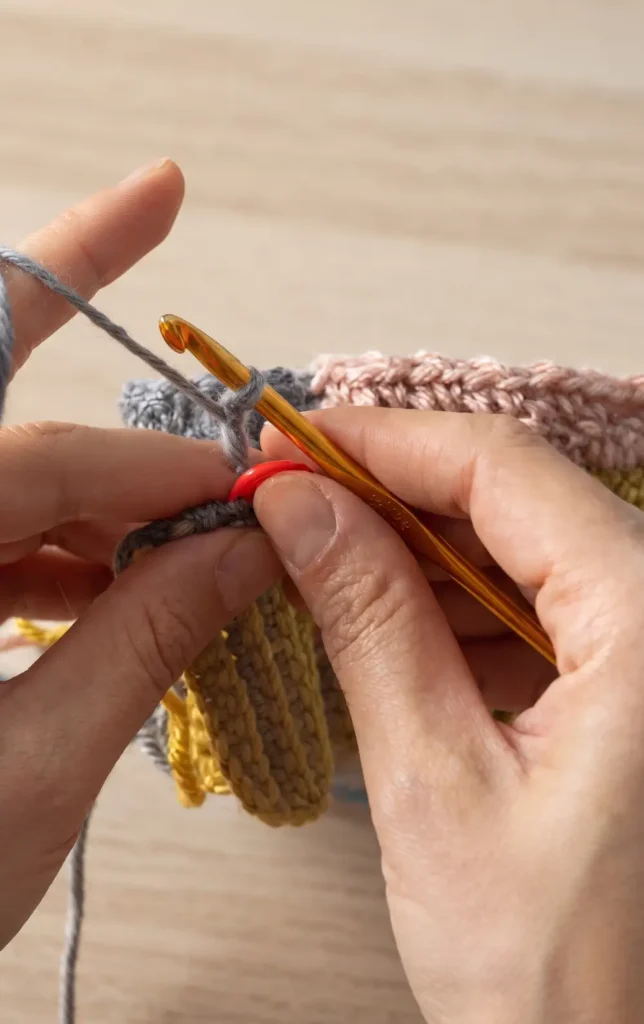
To begin the sweater, create a slip knot and 13 chains using the smaller hook. Work 12 single crochets into the chains, then continue for 100 rows using back loop only (BLO) single crochets to create a stretchy ribbed texture. Once the ribbing is complete, switch to the 5 mm hook and work a row of single crochets along the long edge of the ribbing. You must ensure you have an even number of stitches for the body blocks; in this design, you should increase slightly to reach a total of 104 stitches, which allows for four blocks of 26 stitches each.
Step 2: Working the Lemon Peel Body Blocks
The body of the sweater is constructed using the lemon peel stitch, which consists of alternating single crochet and double crochet stitches. Divide your 104 stitches into four colour blocks (such as dark grey, pink, cream, and blue) with 26 stitches per colour. When moving between colours, do not complete the final double crochet of a block with the old colour; instead, pull through the new colour to create a seamless transition. Work 24 rows for the first set of blocks to create a square shape, then repeat the process with a new colour order for the next set of squares.
Step 3: Shaping the Neck and Panel Assembly
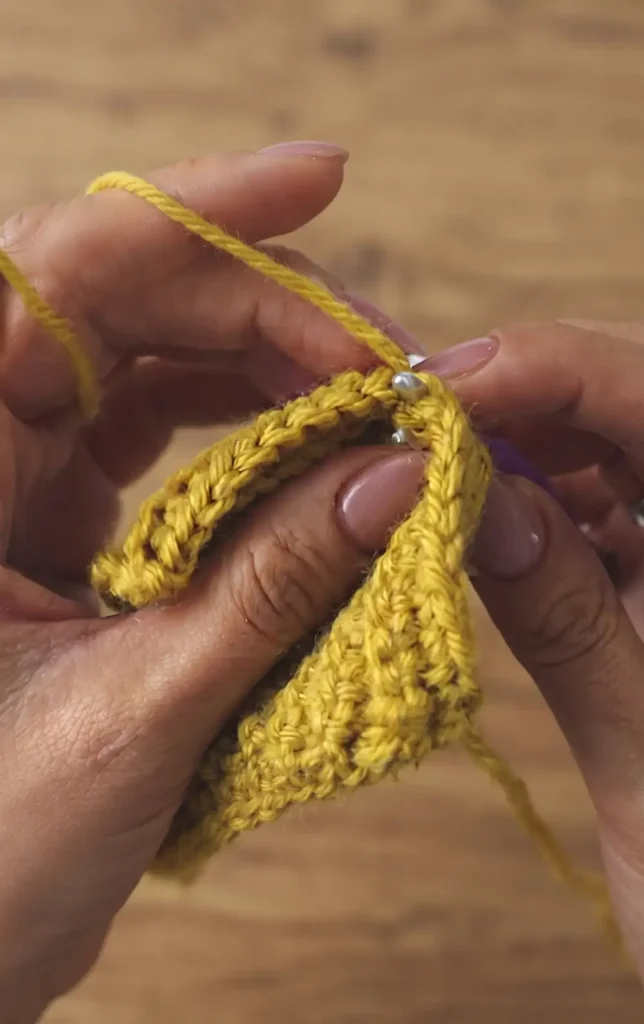
Once you have completed two and a half sets of blocks (approximately 60 rows total), you will begin the neck opening on the front panel. Mark the center of your work and leave a gap by decreasing or skipping stitches over several rows to create a comfortable dip for the head. After finishing the front and back panels, place the right sides together and join the shoulders using slip stitches. Continue joining the sides of the sweater with slip stitches or by sewing with a needle, leaving a large enough opening at the top for the sleeves.
Step 4: Sleeves and Final Ribbing
For the sleeves, start by making a smaller ribbed cuff of 10 single crochets for 40 rows. Join the cuff into a circle and work a base row of single crochets, increasing to 60 stitches around. Continue in the lemon peel stitch for approximately 44 rows before sewing the sleeves onto the body panels. To finish the garment, create a long strip of neck ribbing and sew it around the collar opening. For a professional look, work a final round of loose slip stitches around the very top of the neck ribbing to slightly pull the opening together and help it hold its shape.
Video Credits: Sirin’s Crochet
4. Crochet Heart Sweater Pattern
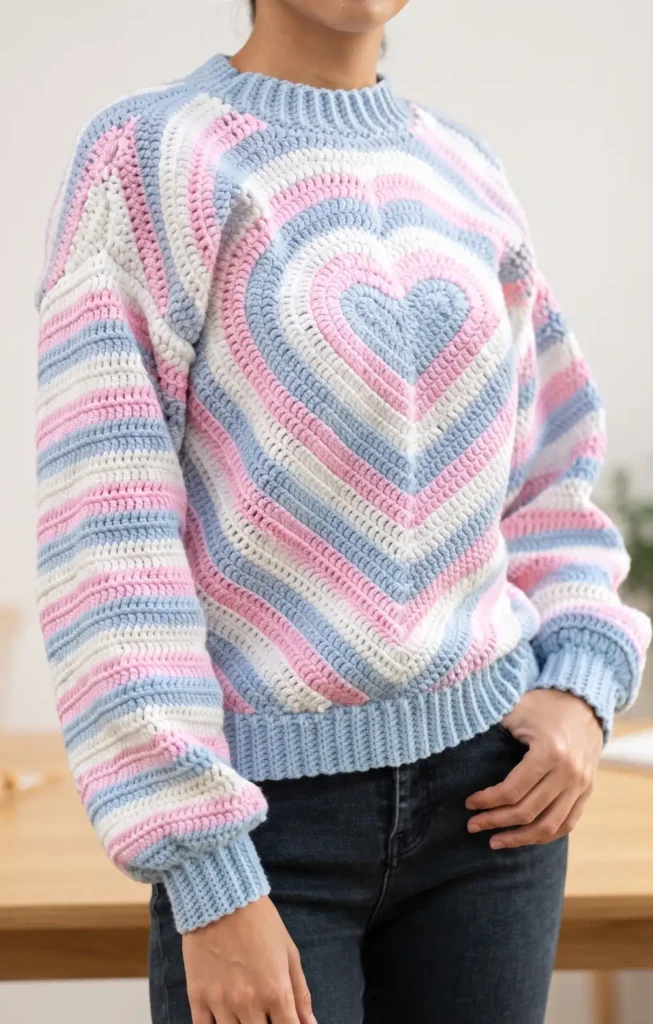
This tutorial guides you through creating a trending heart sweater inspired by Olivia_Made on Instagram, designed to fit sizes small and medium. The final panel dimensions are approximately 19.5 inches wide and 20 inches tall from the shoulder to the bottom.
Materials and Essentials
To begin this project, you will need 270g of blue yarn and a secondary supply of pink yarn. The pattern uses standard stitches including double crochet (dc), half double crochet (hdc), single crochet (sc), and slip stitches. You should also have stitch markers ready to track increase and decrease points, as maintaining a loose tension is vital for a flat, professional finish.
Step-by-Step Construction Guide
Step 1: Crafting the Central Heart Motif
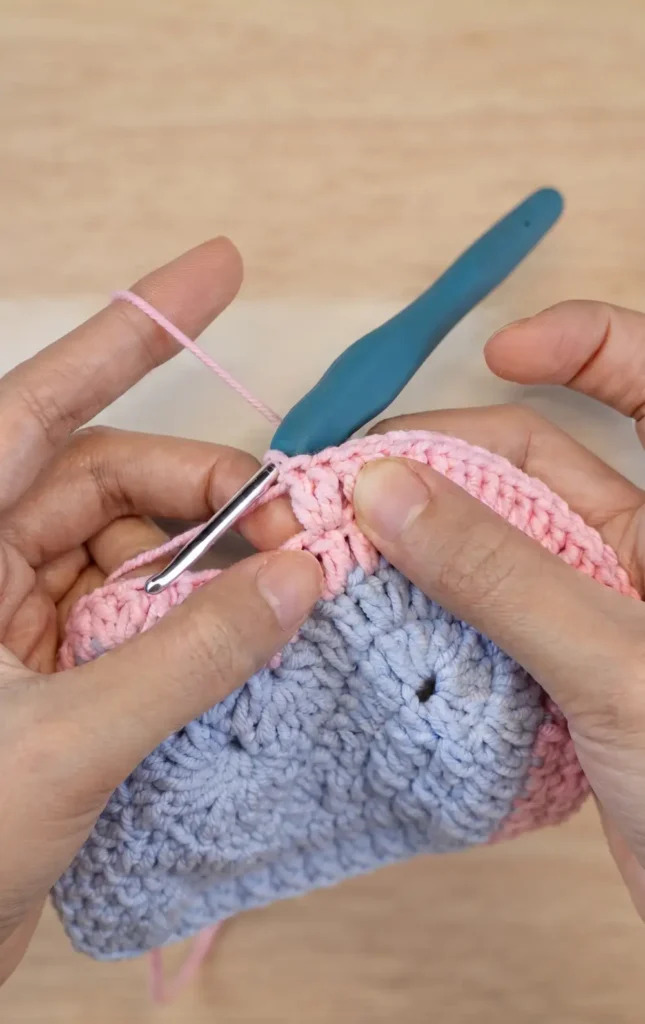
The construction begins by making a slip knot and chaining 18. For the first row, you skip three chains and work six double crochets into the fourth chain, followed by a series of double crochets and a double crochet 5 together (dc5tog) decrease to start forming the heart’s dip.
As you progress through the first few rows, you will incorporate 5 dc increases at the bottom point and change yarn colours every two rows to create the striped effect. By row four, the decrease method shifts to a double crochet 3 together (dc3tog) for the upper part of the heart.
Step 2: Expanding the Body and Shaping the Neckline
Starting at row 14, you will define the neckline by using stitch markers to identify the middle of the heart. You must skip the central marked stitch and count eight stitches out on both sides to begin shaping the neck opening.
During these rows, you will continue to use dc3tog decreases and 5 dc increases to widen the piece until it reaches its desired width of 19.5 inches. If you require a larger size, you can repeat rows 17 through 19 to further expand the panel.
Step 3: Shaping the Shoulders
Once the main body width is achieved, you transition to the shoulder parts. This involves skipping specific stitches at the beginning of rows to create a tapered look.
You will use a combination of single crochet decreases, half double crochets, and double crochets to build height while maintaining a curved edge. For example, row one of the shoulder involves skipping four stitches and working a single crochet decrease into the fifth, followed by hdc and 27 dc. This process is repeated on both sides to ensure symmetry.
Step 4: Squaring the Bottom V-Shape
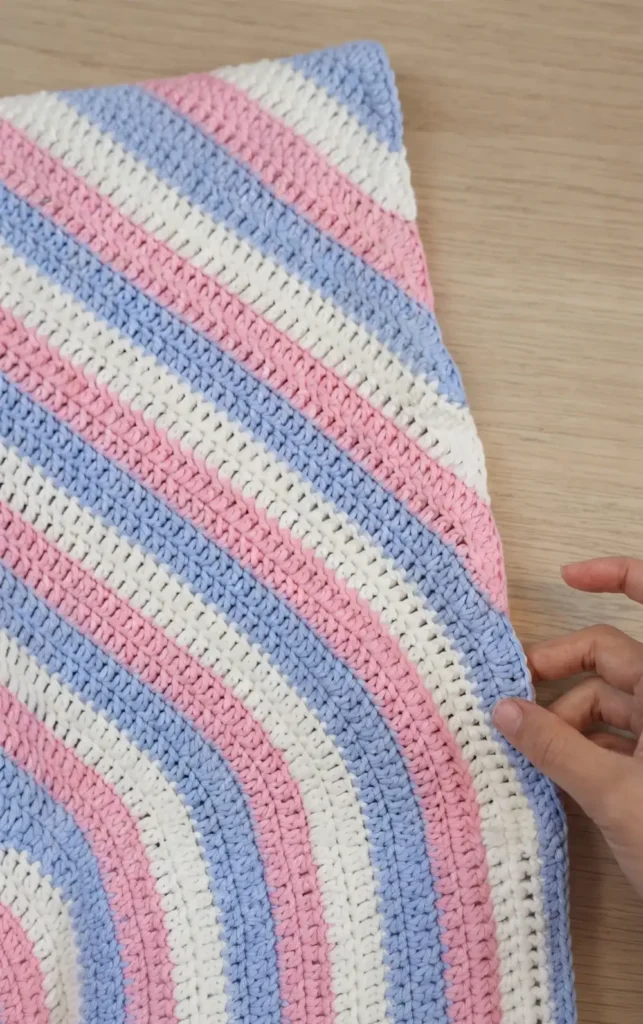
The final phase of Part I involves filling in the V-shape at the bottom of the heart to create a straight edge for the sweater hem. You will attach yarn 12 stitches away from the centre and use single crochet decreases, half double crochets, and double crochet 4 together (dc4tog) decreases to level the bottom. By row 11 of this section, you will perform a double crochet 6 together to finish the decrease and secure the yarn. This completes the front panel, measuring 17 inches from the neck to the bottom.
Pattern Credits: Chenda DIY
5. Crochet Textured Mock Neck Sweater Pattern
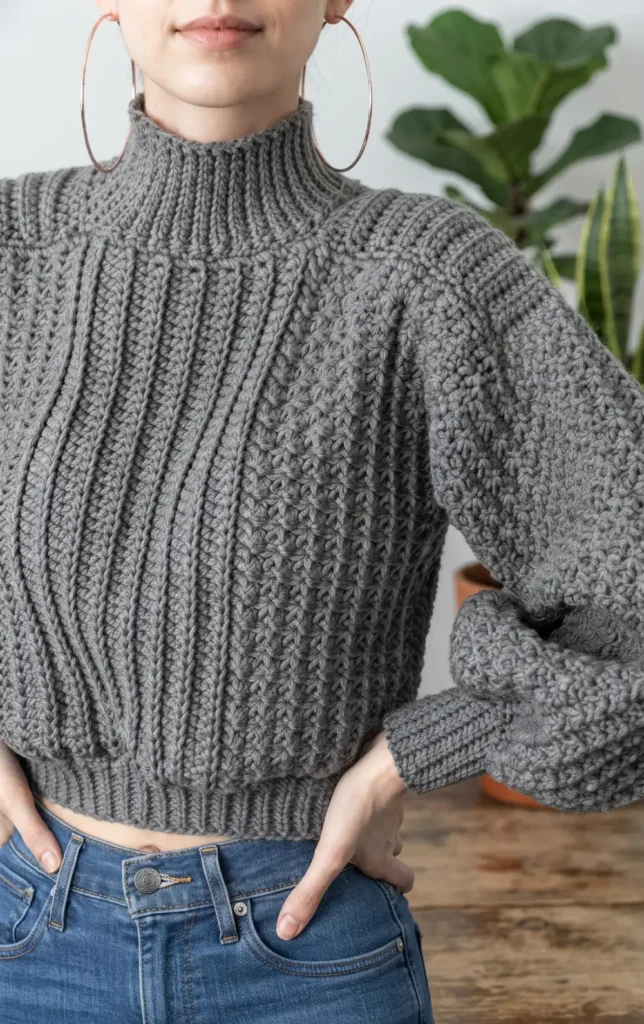
This trendy and comfortable sweater features textured trinity stitch panels, stylish shoulder pads, and balloon sleeves. By following these four detailed steps, you can create a custom fit garment using category 4 yarn.
Essential Materials and Tools
Before starting, gather approximately 680 grams (990 yards) of category 4 yarn. You will need both 5 millimeter and 6 millimeter crochet hooks, scissors, stitch markers, and a tape measure. The project utilizes five basic stitches: the chain, slip stitch, single crochet, half double crochet, and trinity stitch.
Step 1: Constructing the Front and Back Panels
Using your 6 millimeter hook, begin the front panel with an odd number chain that reaches from the base of your neck to your waist. Work rows of back loop half double crochet until you reach the width of your neck base.
For the side panels, switch to the trinity stitch and continue until the piece reaches the outside of your arm. Complete the front panel by adding a shoulder band made of back loop half double crochet rows. The back panel is simpler, consisting entirely of back loop half double crochet rows for the same total number of rows as the front panel.
Step 2: Seaming the Body
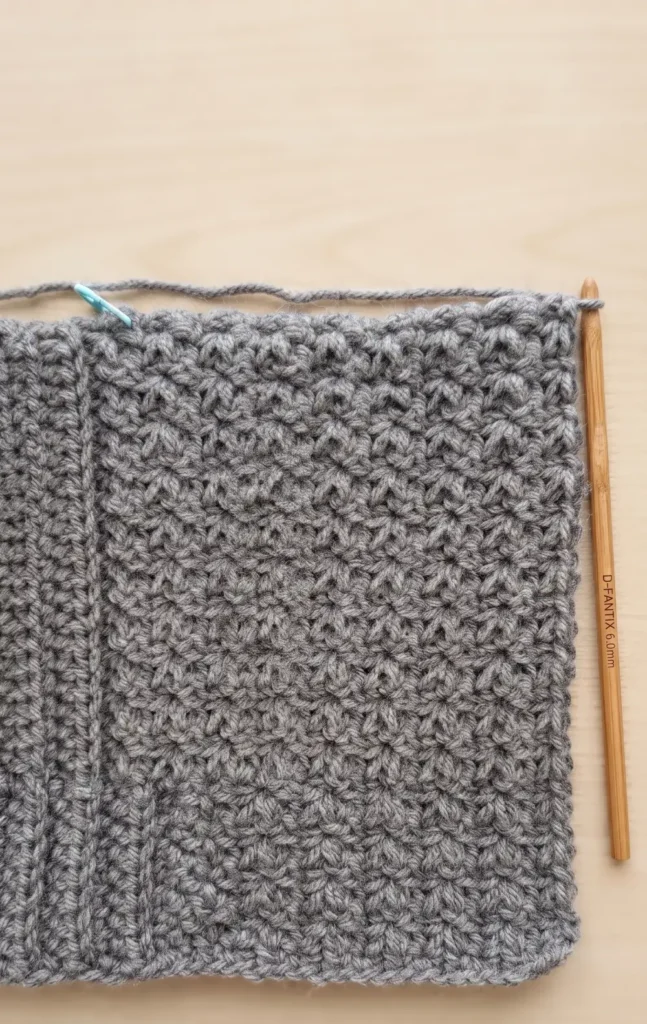
To assemble the body, place the front panel directly on top of the back panel. With your 6 millimeter hook, join the shoulders by working one single crochet into every side row through both panels. Next, flip the work wrong side out to seam the sides. Insert a stitch marker where you want your armhole to begin, then single crochet the panels together from the bottom corner up to that marker.
Step 3: Crafting the Textured Sleeves and Cuffs
With the work right side out, attach your 6 millimeter hook near the side seam of the armhole. Create an odd number chain for your desired sleeve length and work trinity stitch rows, connecting each row into the base of the armhole with slip stitches.
Once the sleeve is seamed, switch to a 5 millimeter hook for the cuff. Start with a row of single crochet decreases to cinch the sleeve, followed by back loop slip stitch rows to create a stretchy ribbing.
Step 4: Finishing with the Bottom Band and Mock Neck
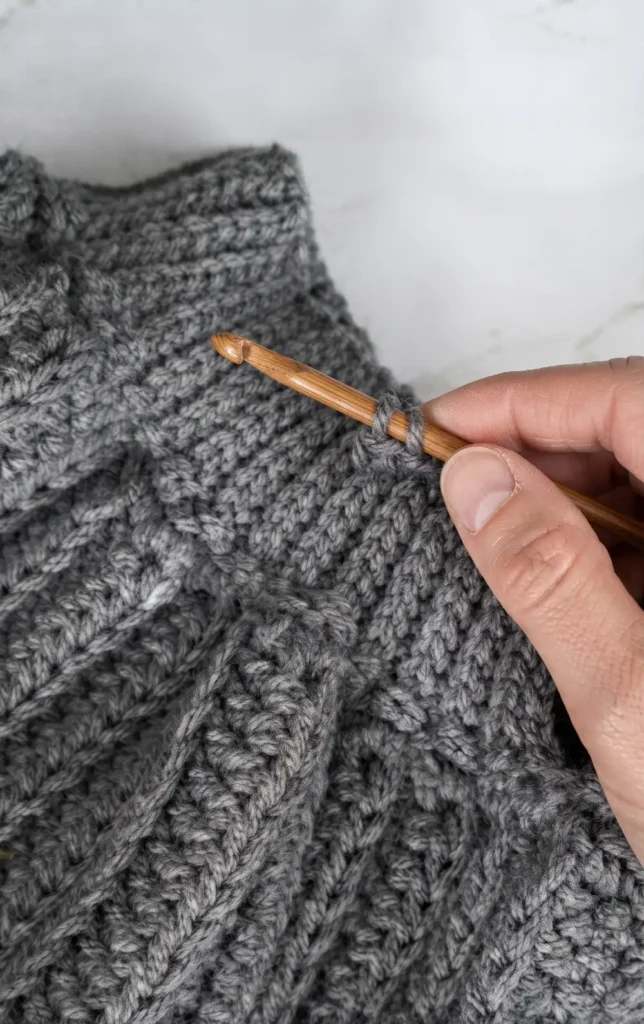
For the bottom band, use your 5 millimeter hook to work a single crochet row around the bottom edge, followed by a back loop slip stitch ribbing of about two inches. To create the mock neck, switch back to the 6 millimeter hook and work a single crochet row around the neckline, alternating between one and two stitches per side row. Finally, crochet a three inch slip stitch ribbing for the collar and seam it using an outside loop slip stitch seam. Once finished, weave in all your ends to complete the sweater.
Video Credits: TCDDIY
6. Crochet Brown Patchwork Cardigan Pattern
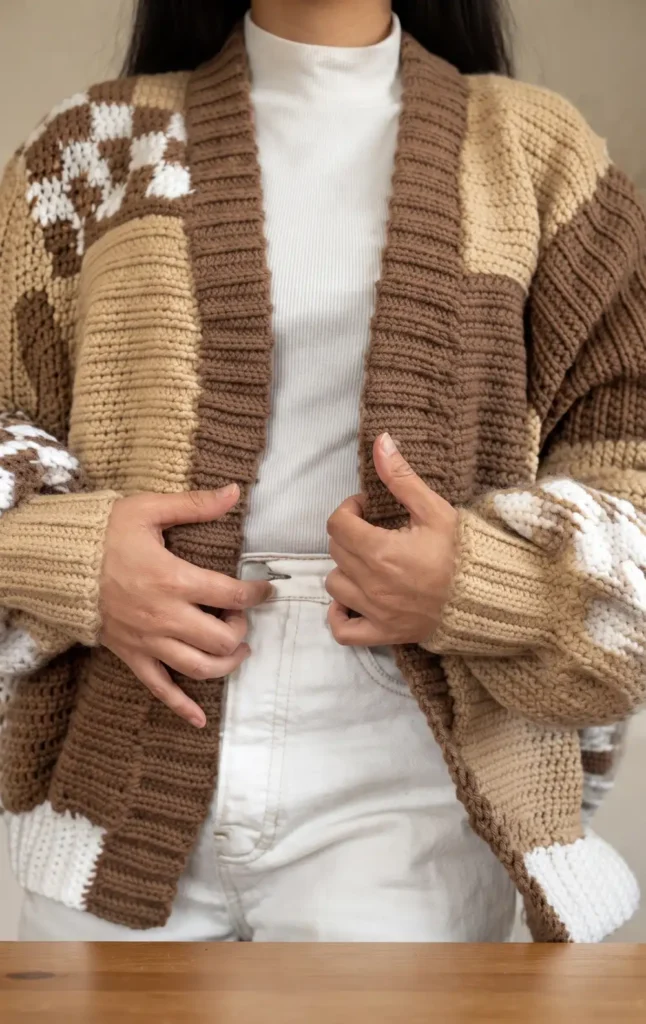
This guide provides a comprehensive walkthrough for creating a stylish beige and brown patchwork cardigan. By following these steps, you can assemble a custom garment using basic crochet techniques and simple assembly.
Materials Needed
To complete this project, you will need Red Heart Super Saver yarn in Soft White, Buff, and Cafe Latte. The tutorial requires both a 5mm and a 4mm crochet hook, along with a yarn needle, scissors, and a measuring tape. Additionally, you may want four or five 15mm buttons for the front of the cardigan.
Step 1: Crafting the Solid and Checkered Squares
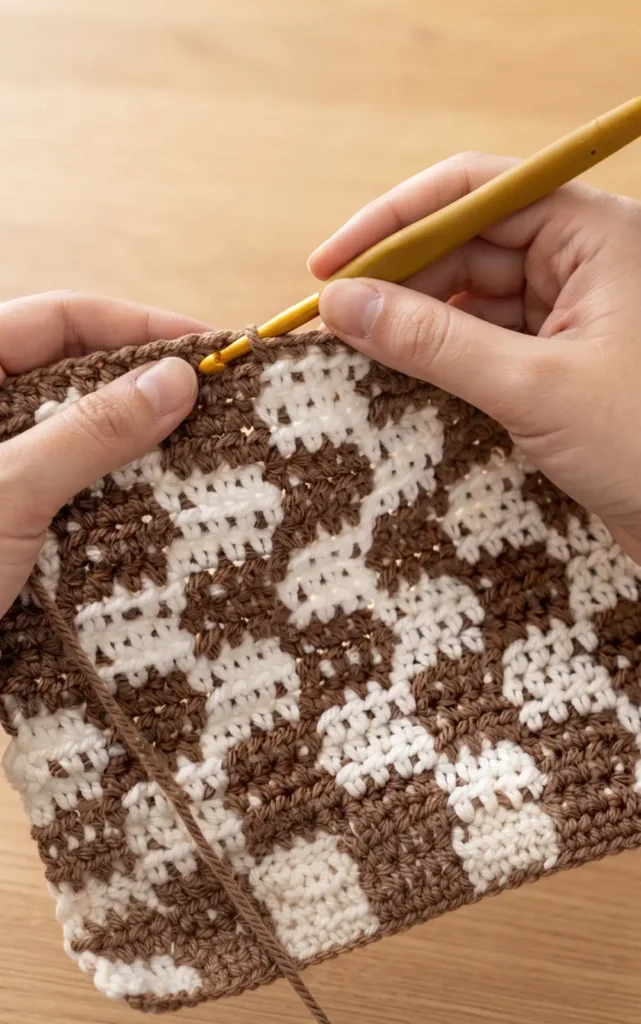
The foundation of the cardigan consists of individual patchwork squares. For solid squares, start with a foundation chain of 28 and work 20 rows of half double crochets. To create the checkered squares, begin with 29 chains and alternate colors every four stitches. Work three rows for each color block to create the checkered effect, ensuring the final 20th row matches the color of your starting foundation chain.
Step 2: Creating Specialty Cuffs and Neckline Panels
The cuffs and neckline require specific shaping. For the sleeve cuffs, use a 4mm hook to chain 15, then work 20 rows of back loop half double crochets to create a ribbed effect. The neckline is formed by creating two separate pieces with sloped edges. This is achieved by skipping the first stitch on one side of the work over several rows to create a diagonal slant.
Step 3: Assembling the Body and Sleeves
Once you have approximately 32 patches, or the amount needed for your size, you can begin the first part of assembly. Use a yarn needle to sew the patches together vertically and horizontally, matching the stitches between panels for a clean finish. After forming the front and back body panels, sew the shoulder and side seams together while leaving space for the armholes to attach the sleeves.
Step 4: Finishing with Ribbing and Buttons
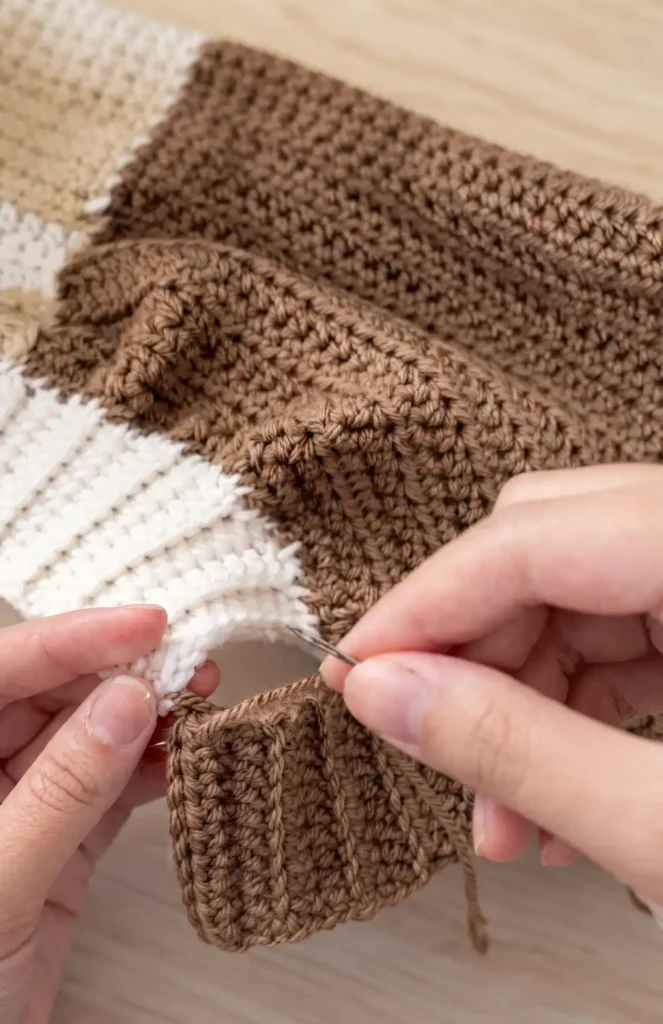
The final step involves adding the ribbing to the bottom and the neckline. For the bottom ribbing, use a 4mm hook to create 108 rows of back loop half double crochets. The neck ribbing is worked with a 5mm hook for 140 rows. Sew these ribbing pieces onto the cardigan edges using a long yarn tail, and then attach your buttons to complete the garment.
Video Credits: Yarnalina
What’s Your Favorite Design?
Six patterns, six different ways to layer up this fall. Whether you go for the dramatic sweep of the duster cardigan or the cozy ribbing on the mock neck sweater, you have real options now. Each one teaches new techniques you can carry into future projects.
Pick the pattern that matches your skill level and your closet needs, then get that hook moving. Fall layers made by hand always feel a little warmer.