5 Handmade Fall Garland Crochet Patterns Available for Free
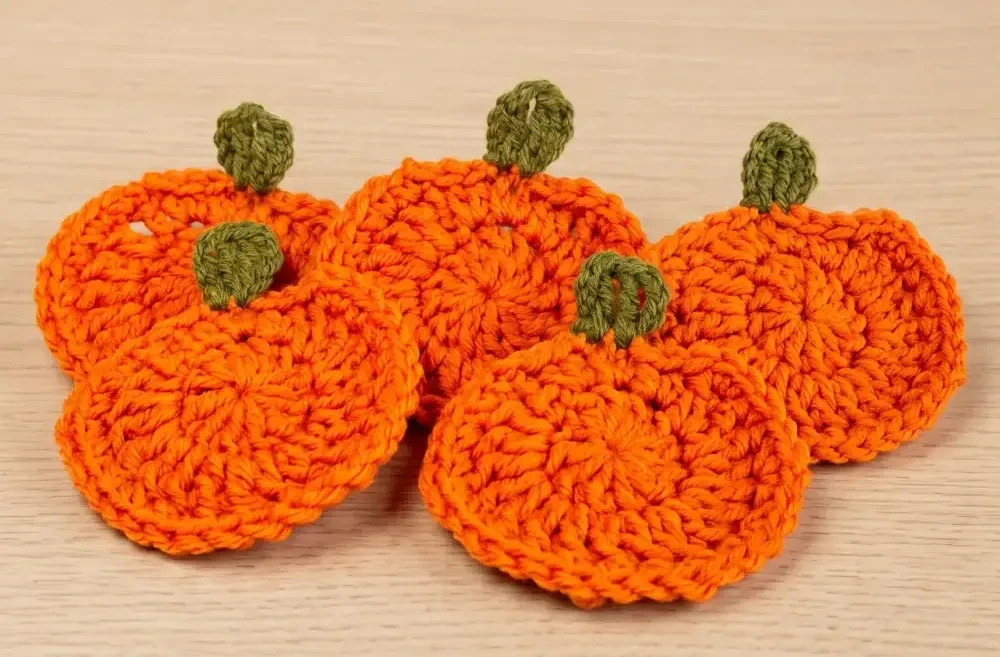
Fall decorating doesn’t have to mean a trip to the craft store. A hook, some yarn in warm autumn shades, and a few quiet evenings are all it takes. These five garland patterns turn simple stitches into little pumpkins, leaves, mushrooms, and acorns you’ll find yourself pulling out every October.
New to crochet and still counting every stitch? There’s something here for you. Been at it for years and just want a satisfying weekend project? Also you. Each pattern walks through the motifs one step at a time, so you can mix shapes together or keep it simple with just one. Pick up your hook and let’s get into it.
1. Crochet Autumn Leaf Garland Pattern
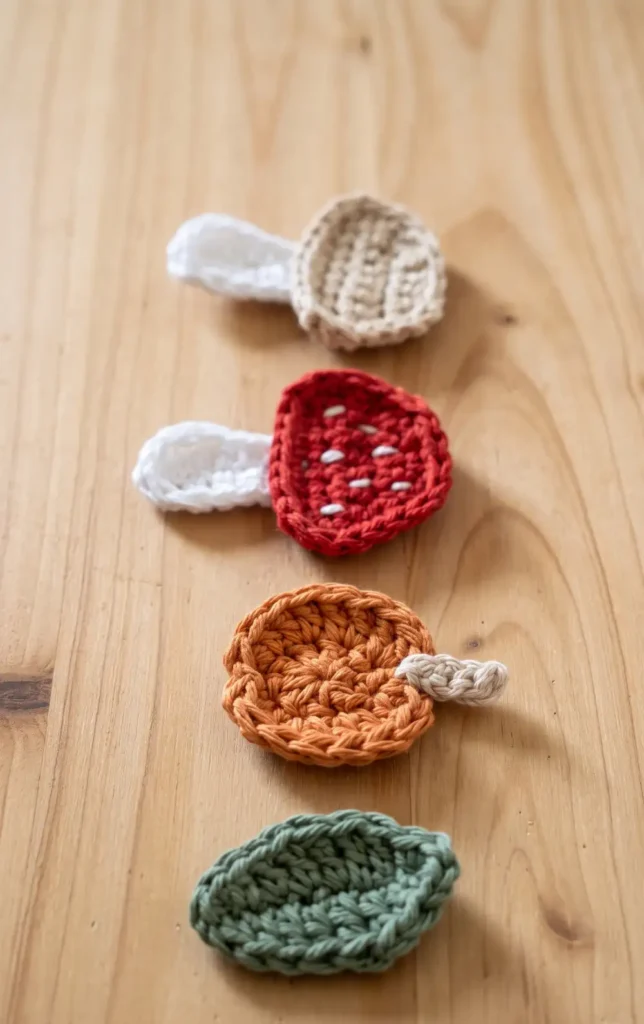
This beginner friendly project allows you to create a charming seasonal decoration by crocheting several small motifs and joining them together. You can customize the length of your garland by simply making more or fewer of each shape.
Materials Needed
To complete this project, you will need a size 3 crochet hook and fine cotton yarn (size 8/4) in autumnal colors like green, orange, red, and beige. You also need a pair of scissors and a needle to weave in your ends and assemble the final piece.
Step 1: Prepare Your Motifs
The garland consists of three different types of motifs: mushrooms, leaves, and pumpkins. While the mushroom tutorial is available as a separate video, you can easily create the other two shapes following the steps below. Once you have mastered the leaf and pumpkin, you can multiply these motifs until you have enough to reach your desired garland length.
Step 2: Crochet the Autumn Leaves
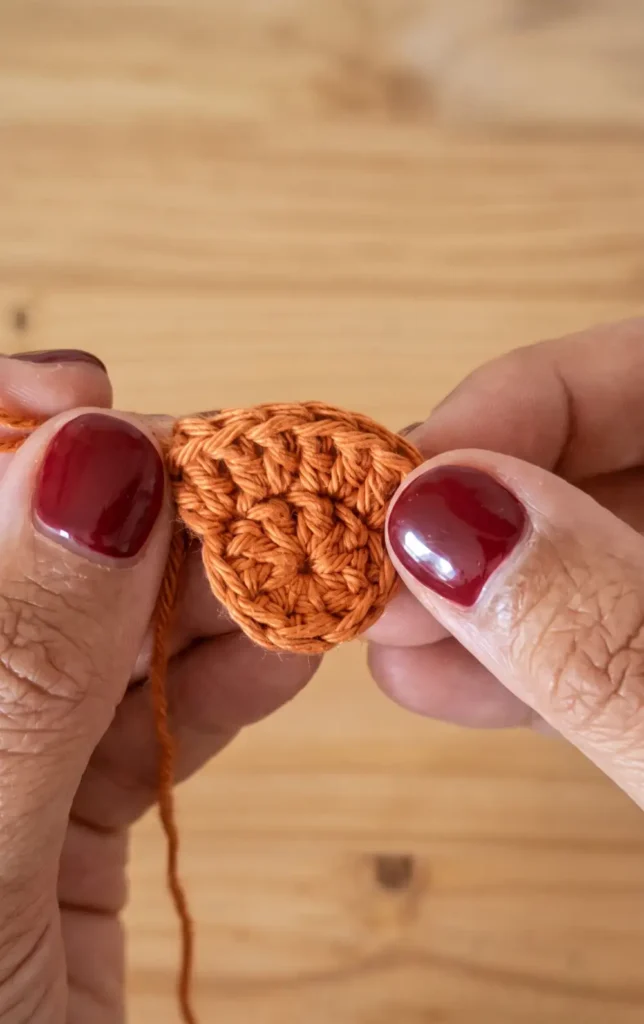
To begin a leaf, use green yarn to create a slip knot and chain 9. Skip the first chain from the hook and work a single crochet into the second chain. In the subsequent stitches along the chain, work one half double crochet, followed by two double crochets in the next two stitches, and one treble crochet in the stitch after that.
Continue by working two double crochets in the following two stitches. In the very last chain, work four single crochets to round the end and move to the other side of the foundation chain. To finish the leaf, mirror the previous stitches back down the other side: two double crochets, one treble crochet, two double crochets, one half double crochet, and one final single crochet. Fasten off and weave in your ends using a needle.
Step 3: Create the Mini Flat Pumpkins
Start your pumpkin with orange yarn by making a magic circle. Chain 3, which counts as your first double crochet, and then work 8 more double crochets into the circle for a total of 9 stitches. Pull the circle tight and join with a slip stitch.
For the second round, chain 2 and work 2 double crochets in each of the next four stitches. To create the pumpkin’s characteristic dip at the bottom, work a slip stitch in the next stitch. Complete the shape by working 2 double crochets in each of the remaining four stitches and finishing with a slip stitch. For the stem, use beige or brown yarn to chain 4, skip the first chain, and slip stitch back down the remaining three chains. You can then sew or glue this stem to the top of your pumpkin.
Step 4: Assemble the Garland
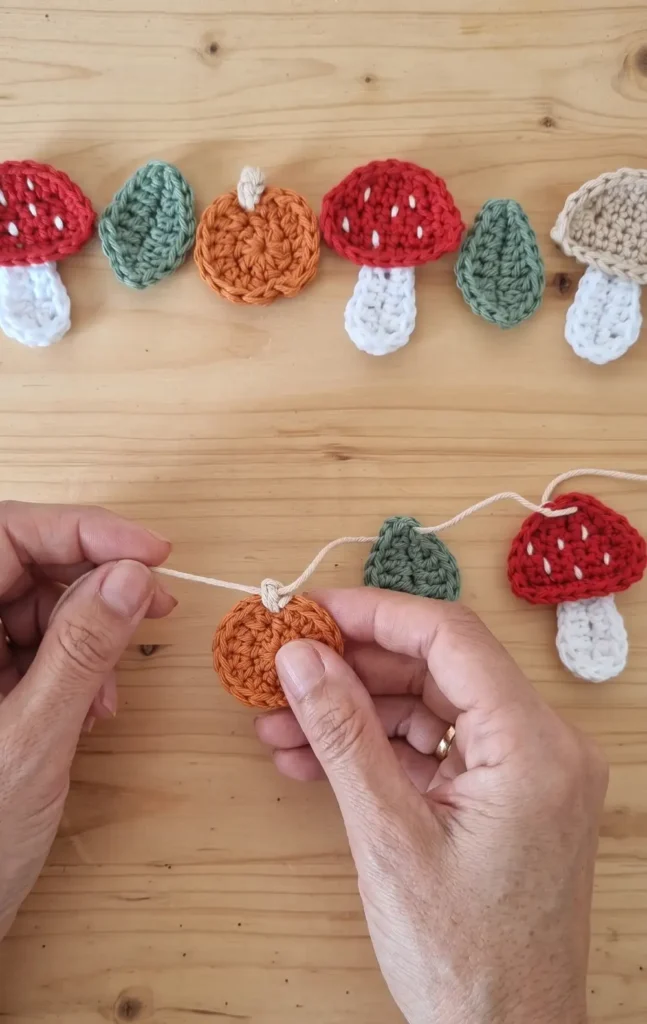
The simplest way to assemble your garland is to thread a needle with a long piece of neutral colored yarn, approximately 1.20 to 1.40 meters in length. Instead of crocheting a complex chain to join them, simply pass the needle through the top of each motif.
This threading technique is much faster than traditional methods and allows you to slide the motifs along the thread. You can easily adjust the spacing or change the order of your pumpkins, leaves, and mushrooms to get the exact look you want for your autumn decor.
Video Credits: hibouchoucaillou
2. Crochet Pumpkin Garland Pattern
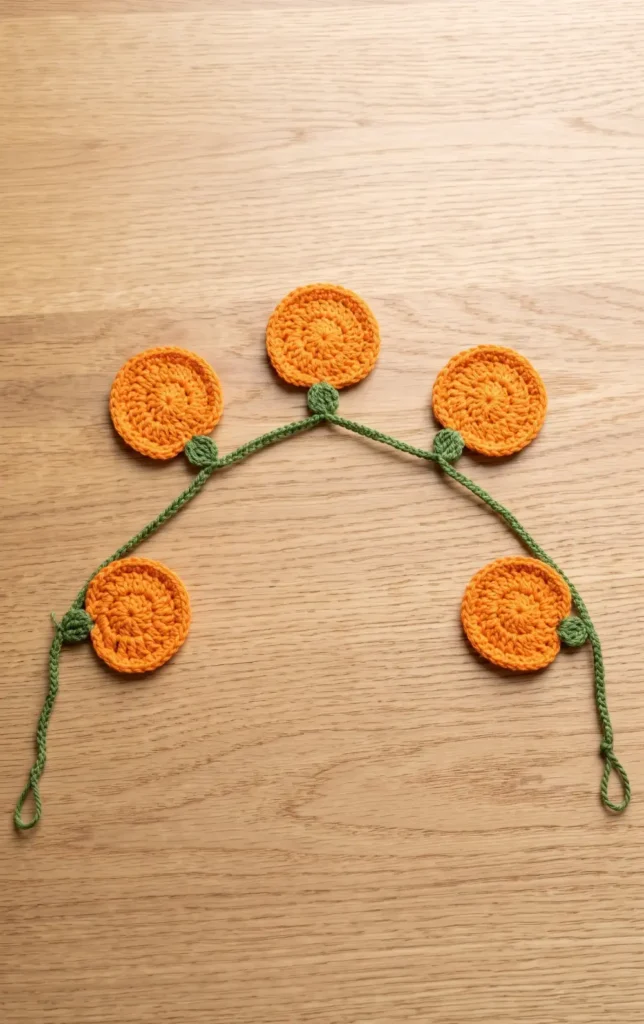
This beginner friendly project is a fantastic way to use up yarn scraps while creating festive decorations for autumn or Halloween. By simply changing your yarn colours, you can also adapt this pattern to create Christmas baubles or red and green apples.
Essential Materials
To begin your project, gather the following supplies:
- Orange yarn (the source uses Red Heart Super Saver in the colour “Pumpkin”).
- Green yarn for the stalks (the source uses the colour “Field Stalk”).
- Crochet hook that matches your chosen yarn weight.
- Scissors and a yarn needle for finishing and sewing in ends.
Step 1: Create the Foundation Circle
Start by making a magic ring, or if you prefer, chain 5 and join to form a loop, as this ensures a tight centre for the pumpkin. Chain 3, but do not count this as your first stitch. Work 12 double crochets into the centre of the ring. To finish the round, pull the yarn tail to close the centre tightly.
Step 2: Shape the Pumpkin Body
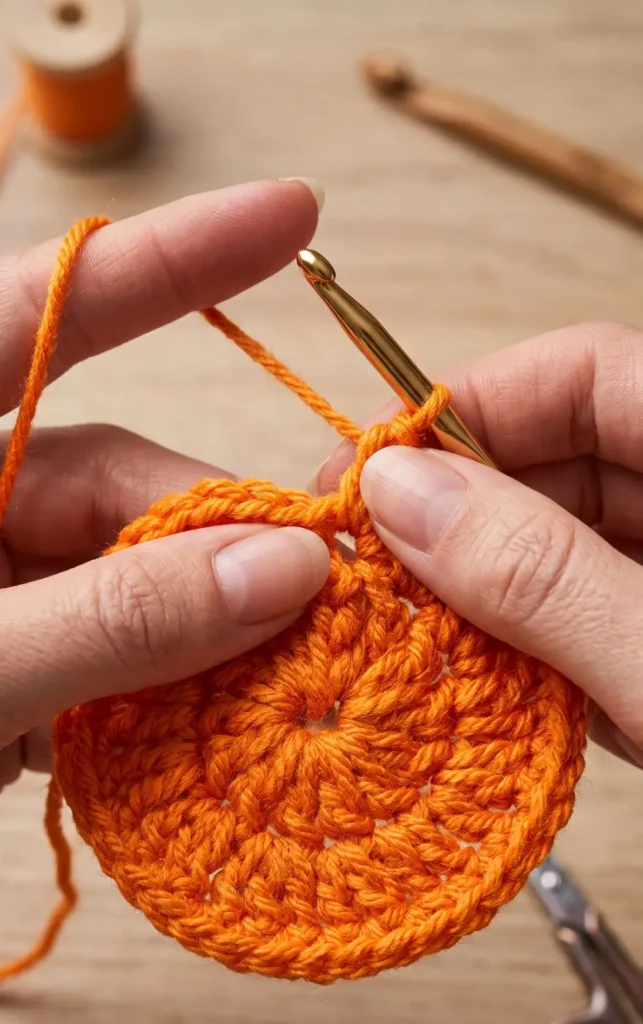
To achieve a professional look, this pattern uses an invisible seam technique by ignoring the chain 3 and joining directly into the top of the first double crochet.
- Round 2: Chain 3 and work a double crochet into the same stitch. Continue with two double crochets (increases) in each stitch until three stitches remain. In these last three stitches, work 2 half double crochets, 2 single crochets, and 2 half double crochets respectively to give the pumpkin its characteristic non-round shape.
- Round 3: Chain 1 and work a single crochet in the first stitch, followed by an increase in the next. Repeat this around until you are roughly seven stitches from the end. Slip stitch across these remaining stitches to create a flat top for the stalk.
Step 3: Add the Green Stalk
Switch to your green yarn and identify the middle two stitches on the flat top of your pumpkin. Join the yarn and chain 4 for a treble crochet (or chain 3 if you prefer a shorter double crochet stalk). Work a treble crochet into the same stitch, then work another treble crochet into the next stitch. To finish, chain 4 and slip stitch back into that second stitch before fastening off and weaving in your ends.
Step 4: Assemble the Garland
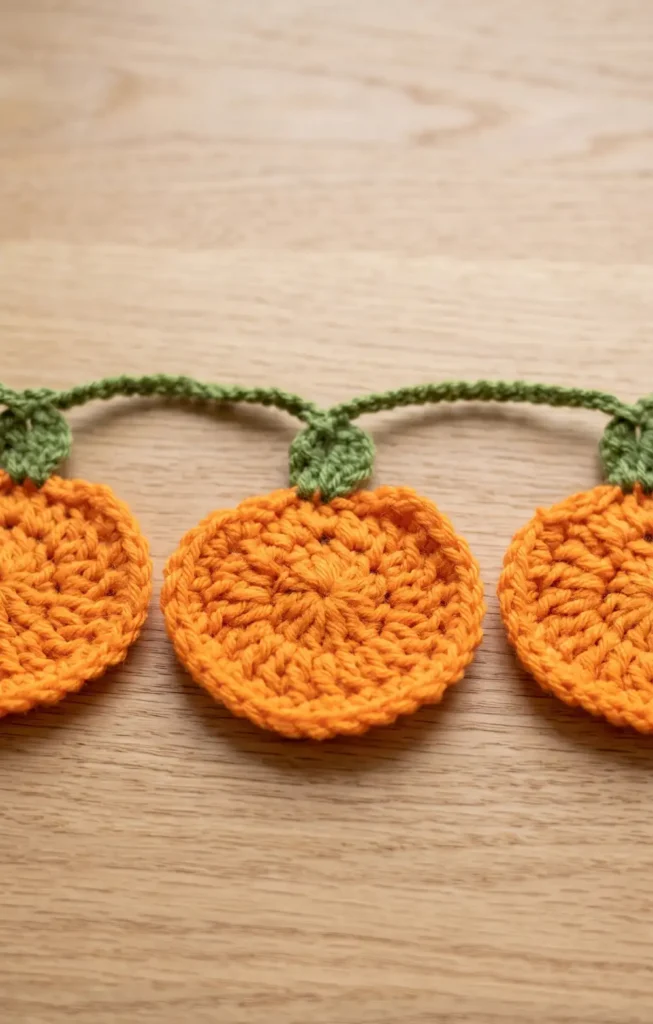
Select a yarn colour for your string and leave a long tail at the start to create a hanging loop. Chain 20 (or any number you choose for the spacing between pumpkins). Attach your first pumpkin by working a slip stitch into the gap between the two stitches of the green stalk. Continue this pattern by chaining 20 and slip stitching into each pumpkin until the garland is your desired length. Finish by tying a knot and a loop at the end of the chain for easy hanging.
Video Credits: Crochet with Clare
3. Crochet Fall Decor Acorn Pattern
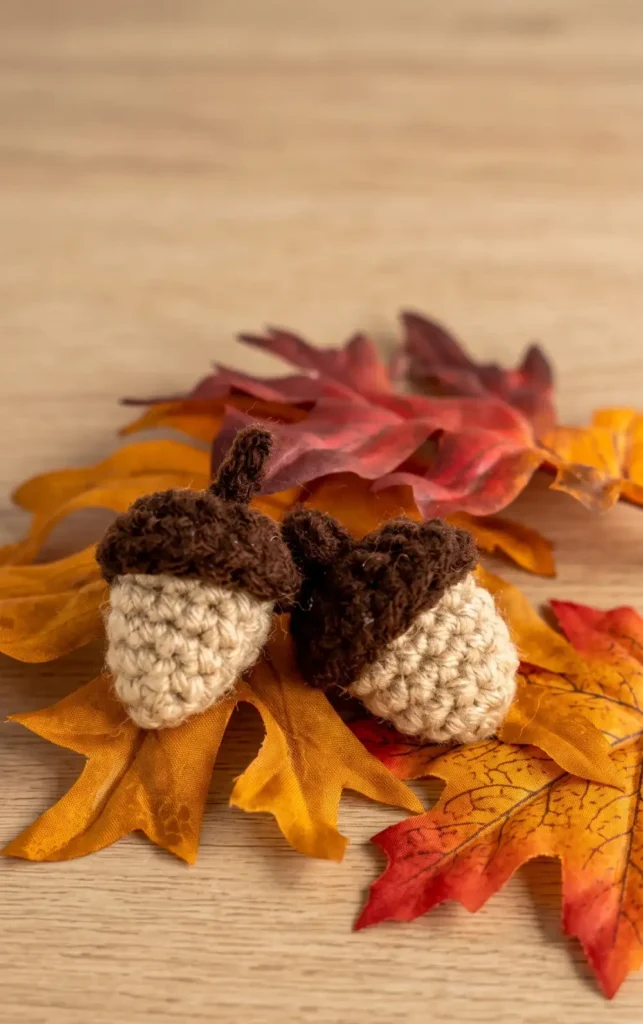
These small acorns are perfect for a variety of autumn projects, ranging from decorative belts and ear warmers to wreaths and gnome accessories. This pattern is designed to be a fast project that uses a very small amount of yarn.
Materials Needed
Before you begin, gather the following supplies:
- Yarn: Red Heart Super Saver (size 4 medium worsted weight) in tan (buff) and brown (cafe latte).
- Hook: Size E 3.5 millimeter crochet hook.
- Tools: Yarn needle, scissors, and a stitch marker or bobby pin.
Step 1: Crocheting the Acorn Body
The body is worked in continuous rounds using the tan yarn. Start by making a magic circle with a six inch tail and work four single crochets into the loop. For round two, work two single crochets into each of the four stitches to reach a total of eight. In round three, follow a pattern of one single crochet followed by two single crochets in the next stitch; repeat this four times to reach twelve stitches. For rounds four through six, simply work one single crochet in every stitch around to give the acorn its height. Once round six is finished, fasten off and tuck the yarn ends inside the piece to act as stuffing.
Step 2: Creating the Stem
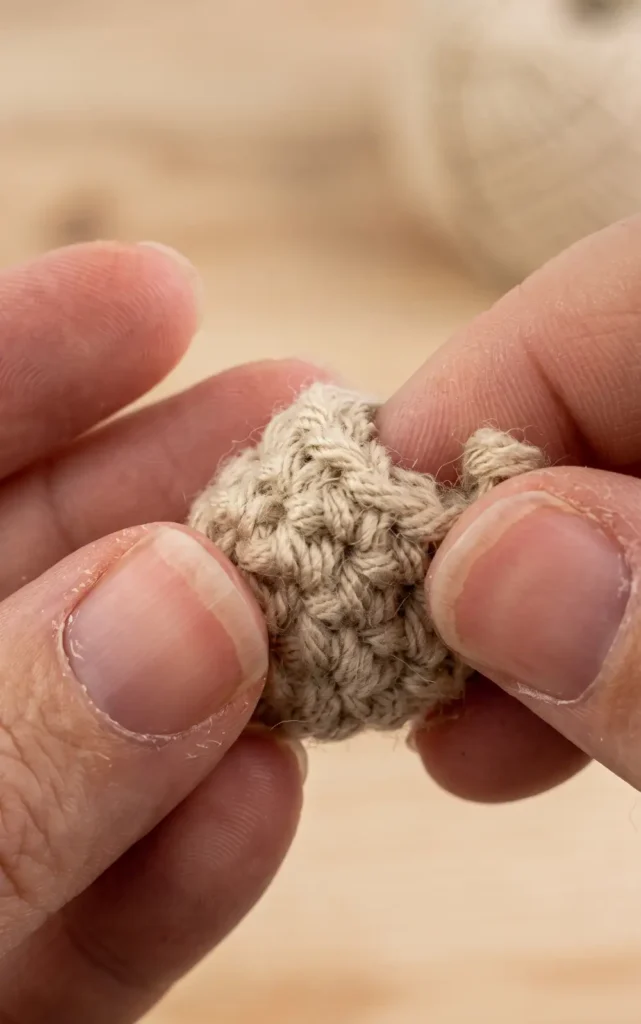
Switch to the darker brown yarn to create the stem. Start by making a slip knot and chaining four. Work a slip stitch into the second chain from the hook, followed by a slip stitch in the third chain, and a final slip stitch in the fourth chain. Fasten off the yarn to complete the small stem piece.
Step 3: Crafting the Acorn Cap
The cap is worked in joined rounds using the brown yarn. Create a magic circle and chain two, which does not count as a stitch. Work 12 or 13 double crochets into the circle, depending on your yarn thickness, and join with a slip stitch to the first double crochet. For the second round, chain one and work a single crochet into every stitch around. Fasten off while leaving a long tail of about 12 inches for sewing.
Step 4: Final Assembly
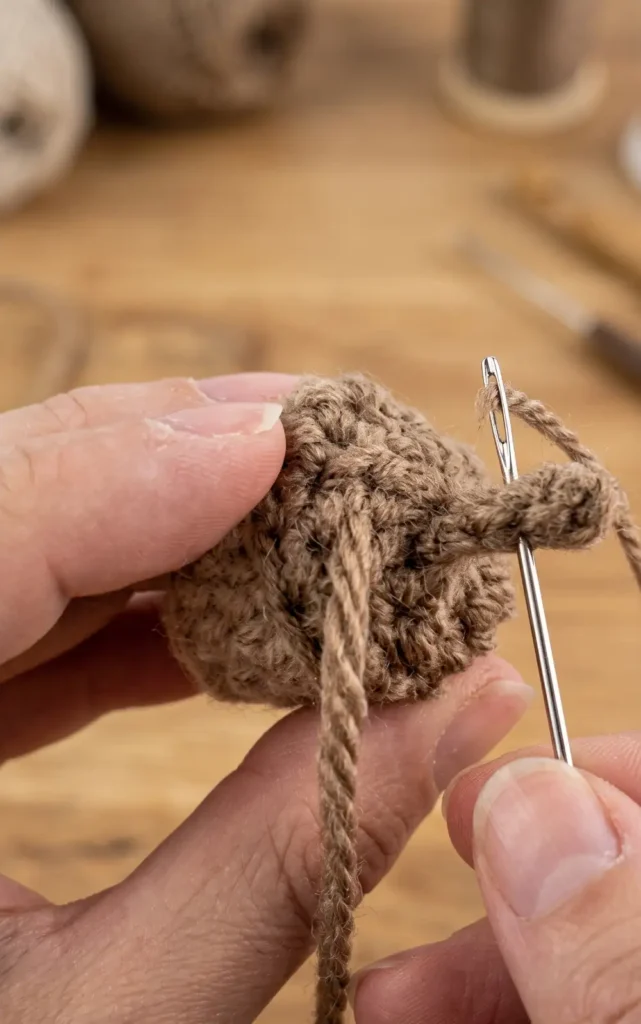
To finish the acorn, pull the stem ends through the center of the cap and knot them securely on the underside. Thread the long tail from the cap onto your yarn needle and stuff all remaining yarn scraps into the acorn body. Place the cap over the body and sew them together by stitching through the top of the double crochet row on the cap and the final row of the body. This specific placement ensures the cap has a slight lip rather than being flush with the edge. Weave in your ends and pull the final tail through the bottom of the acorn to hide it.
Video Credits: Winding Road Crochet
4. Crochet Autumn Banner Pattern
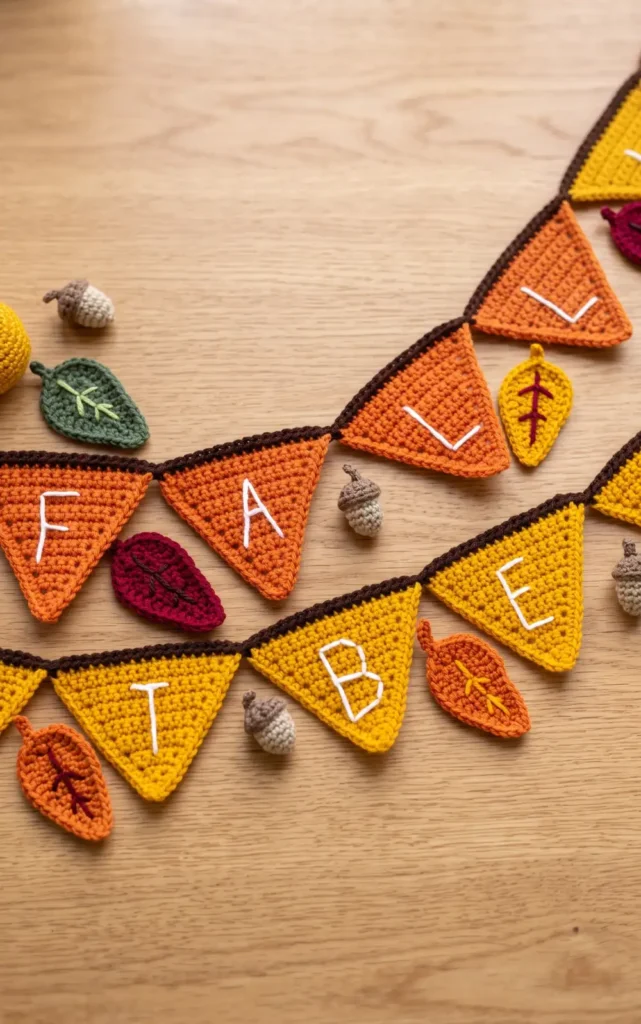
Creating a festive fall garland is a simple project perfect for beginners looking to add a handmade touch to their autumn decor. You can customize this project with different colors or even add embroidered words like “Fall Vibes” to personalize your space.
Materials Needed
To complete this project, you will need the following supplies:
- Medium weight yarn in your choice of colors.
- Size H or 5 mm crochet hook.
- Yarn needle.
- Scissors.
Step 1: Crochet the Triangle Base
Begin by making a slip knot and chaining two. Work a single crochet into the second chain from the hook for your first row. For the second row, chain one and turn, then work two single crochets into the single stitch from the previous row. From row three through row 17, you will continue to increase the size of the triangle by chaining one, turning, and working two single crochets in the first stitch followed by a single crochet in every remaining stitch across. By the end of row 17, you should have a total of 17 stitches.
Step 2: Add a Decorative Border
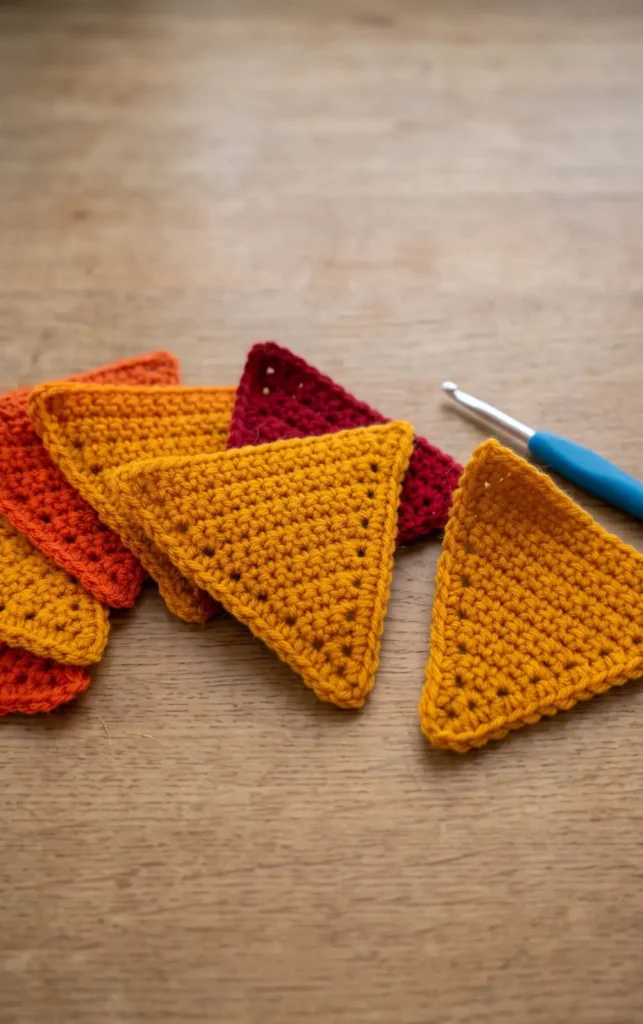
Once your triangle is the desired size, you will create a finished look by single crocheting around the edges. Start with a chain one and work one single crochet into the side of every row down the first side. When you reach the bottom point, chain two to turn the corner and then single crochet back up the opposite side. It is helpful to crochet over your starting yarn tail during this step to save time later. Finally, fasten off and use your yarn needle to weave in any remaining ends.
Step 3: Embroider Custom Letters
If you want to add words to your garland, you can embroider them directly onto the triangles. To ensure your letters are centered and shaped correctly, you can draw the letter on a piece of paper, place it over the triangle, and stitch right through the paper. Use the stitches of the triangle as a guide, keeping the top of the letters about four stitches down from the top edge. You can use large stitches for a simple look or smaller stitches for more detail.
Step 4: Assemble the Garland
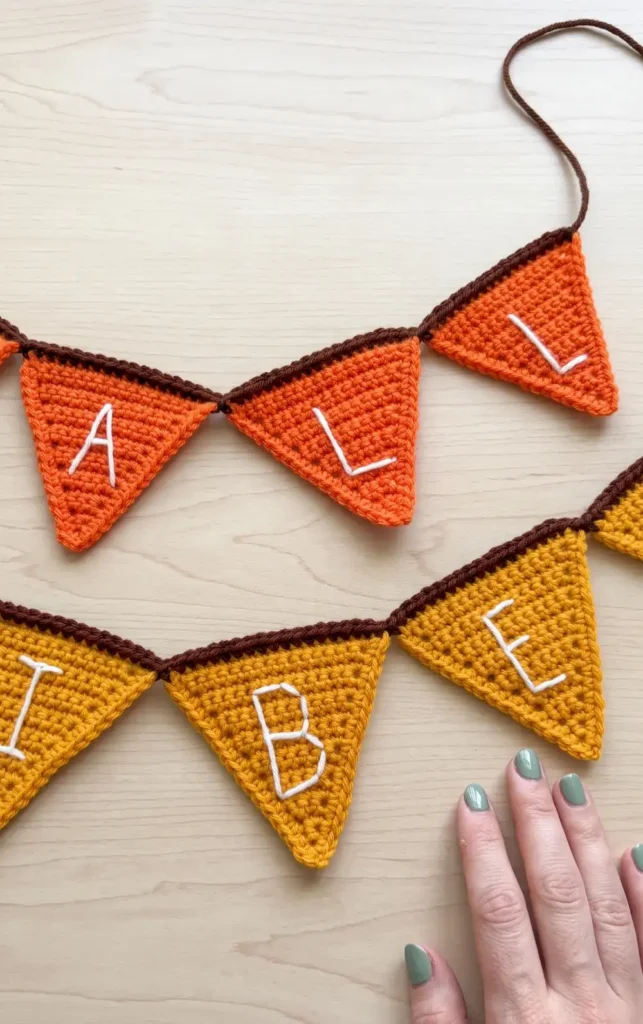
To join your finished triangles together, start by making a slip knot and creating a chain long enough to hang the garland, such as a starting chain of 15. To attach a triangle, single crochet into the side of the border row, then work a single crochet into each of the 17 stitches across the top, and finish with one more single crochet into the opposite border row. You can add extra chains between triangles if you prefer gaps or join them directly for a continuous look. Repeat this process for every triangle until your garland is complete.
Video Credits: Winding Road Crochet
5. Crochet Maple Leaf Garland Pattern
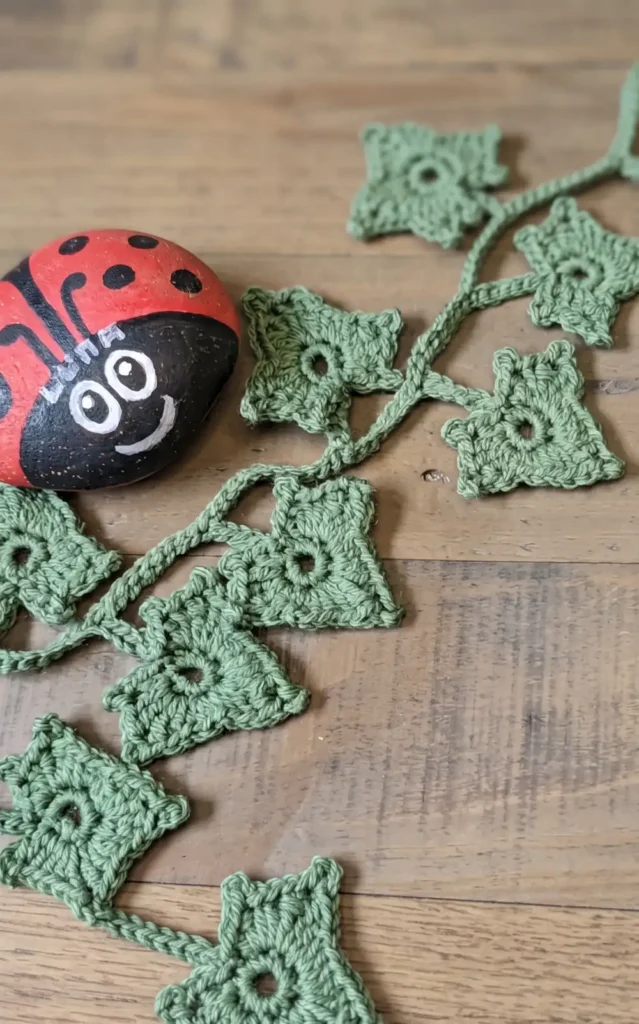
To create this realistic garland in one piece without any sewing, you will need DK yarn and a four millimetre crochet hook. Using a stitch marker is also recommended so you can easily identify where each round begins.
Step 1: Form the Foundation Circle
Start the project by making a slip knot and then crocheting four chain stitches. Slip stitch into the very first chain to create a small circle. To finish the foundation, work eight single crochet stitches directly into the centre of that circle.
Step 2: Crochet the Leaf Points
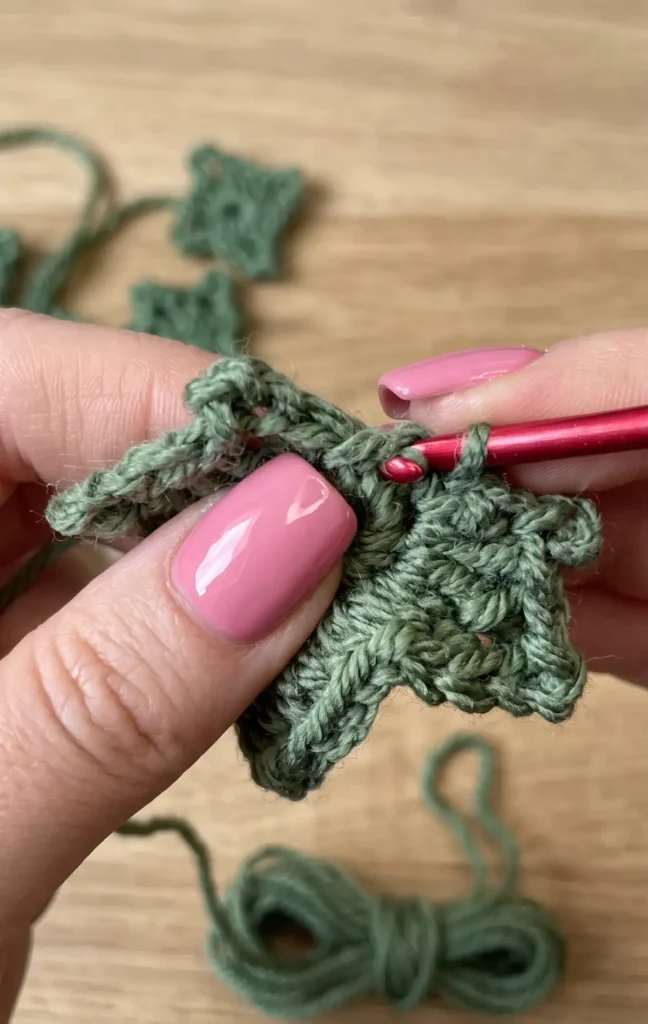
Work into the eight single crochet stitches to shape the leaf. In the first stitch, work a single crochet, a double crochet, a picot (chain three and slip stitch back), and another double crochet. Continue around the circle using a sequence of treble crochets, picots, and half double crochets to create the points, ensuring the fourth stitch contains two double crochets, a treble, a picot, and another treble to form the top tip of the leaf.
Step 3: Create the Stem and Subsequent Leaves
After completing the first leaf, chain 18 to begin the next section of the trail. Skip the first three chains and slip stitch into the fourth chain to create a new circle for your next leaf. Repeat the leaf stitch pattern in this new circle, and once finished, slip stitch six times back into the original chain of 18 to create a defined stem for the leaf.
Step 4: Complete the Trail and Finish
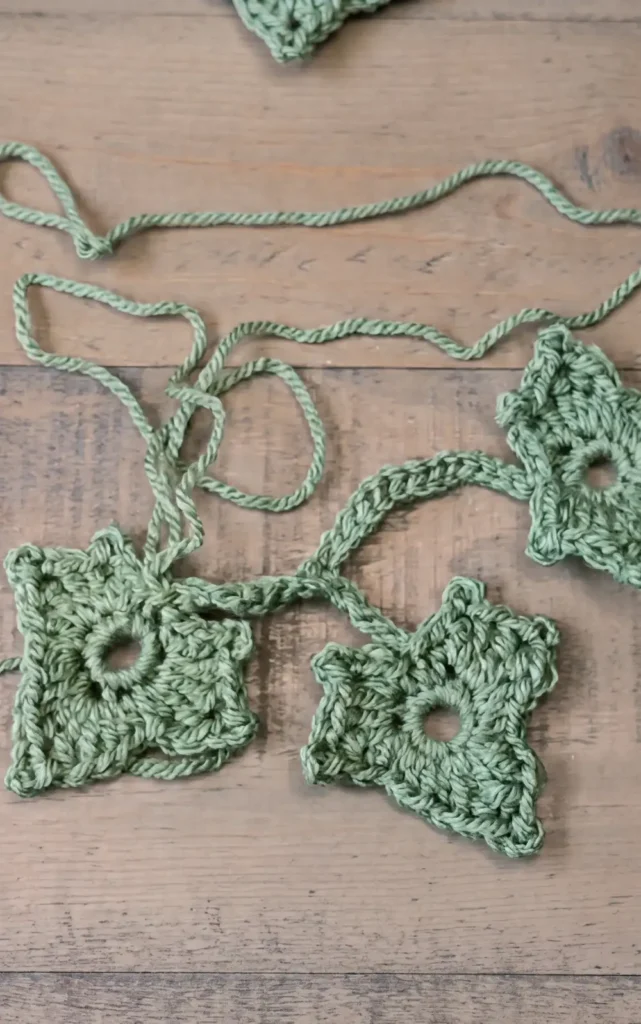
Continue the process of chaining 18 and adding leaves until the garland reaches your preferred length. To finish, slip stitch all the way back through the chain towards the beginning of your work, bypassing the stems until you reach the very first leaf. Fasten off the yarn and cut it, leaving only two tails to sew in for the entire garland. You may also use spray starch on the finished leaves to help them maintain their shape.
Video Credits: Luna Crochet Designs (a.k.a. Luna the Ladybird)
Ready For Handmade Decor?
Five patterns, endless ways to make your home feel like fall. Pick your favorite motif or crochet a bit of each one for a garland that’s truly yours. Either way, you’ll end up with a decoration that outlasts anything from the store.
Grab your hook, pick a color palette, and start stitching. Once you see that first leaf or pumpkin take shape, you’ll want to make a dozen more. Happy crocheting.