4 Beginner-Friendly Granny Square Fall Sweater Patterns
Fall is granny square season, and these four sweaters prove it. Chunky yarn, classic stitches, and a little patience turn simple squares into cozy, wearable art. Whether you want an oversized pullover or a polished coat, there’s a pattern here for you.
You don’t need years of experience to make any of these. Each project breaks the process into clear steps, from the first magic ring to the final stitch. Grab your hook and favorite yarn colors. Let’s get you ready for sweater weather.
1. Crochet Oversized Fall Sweater Pattern
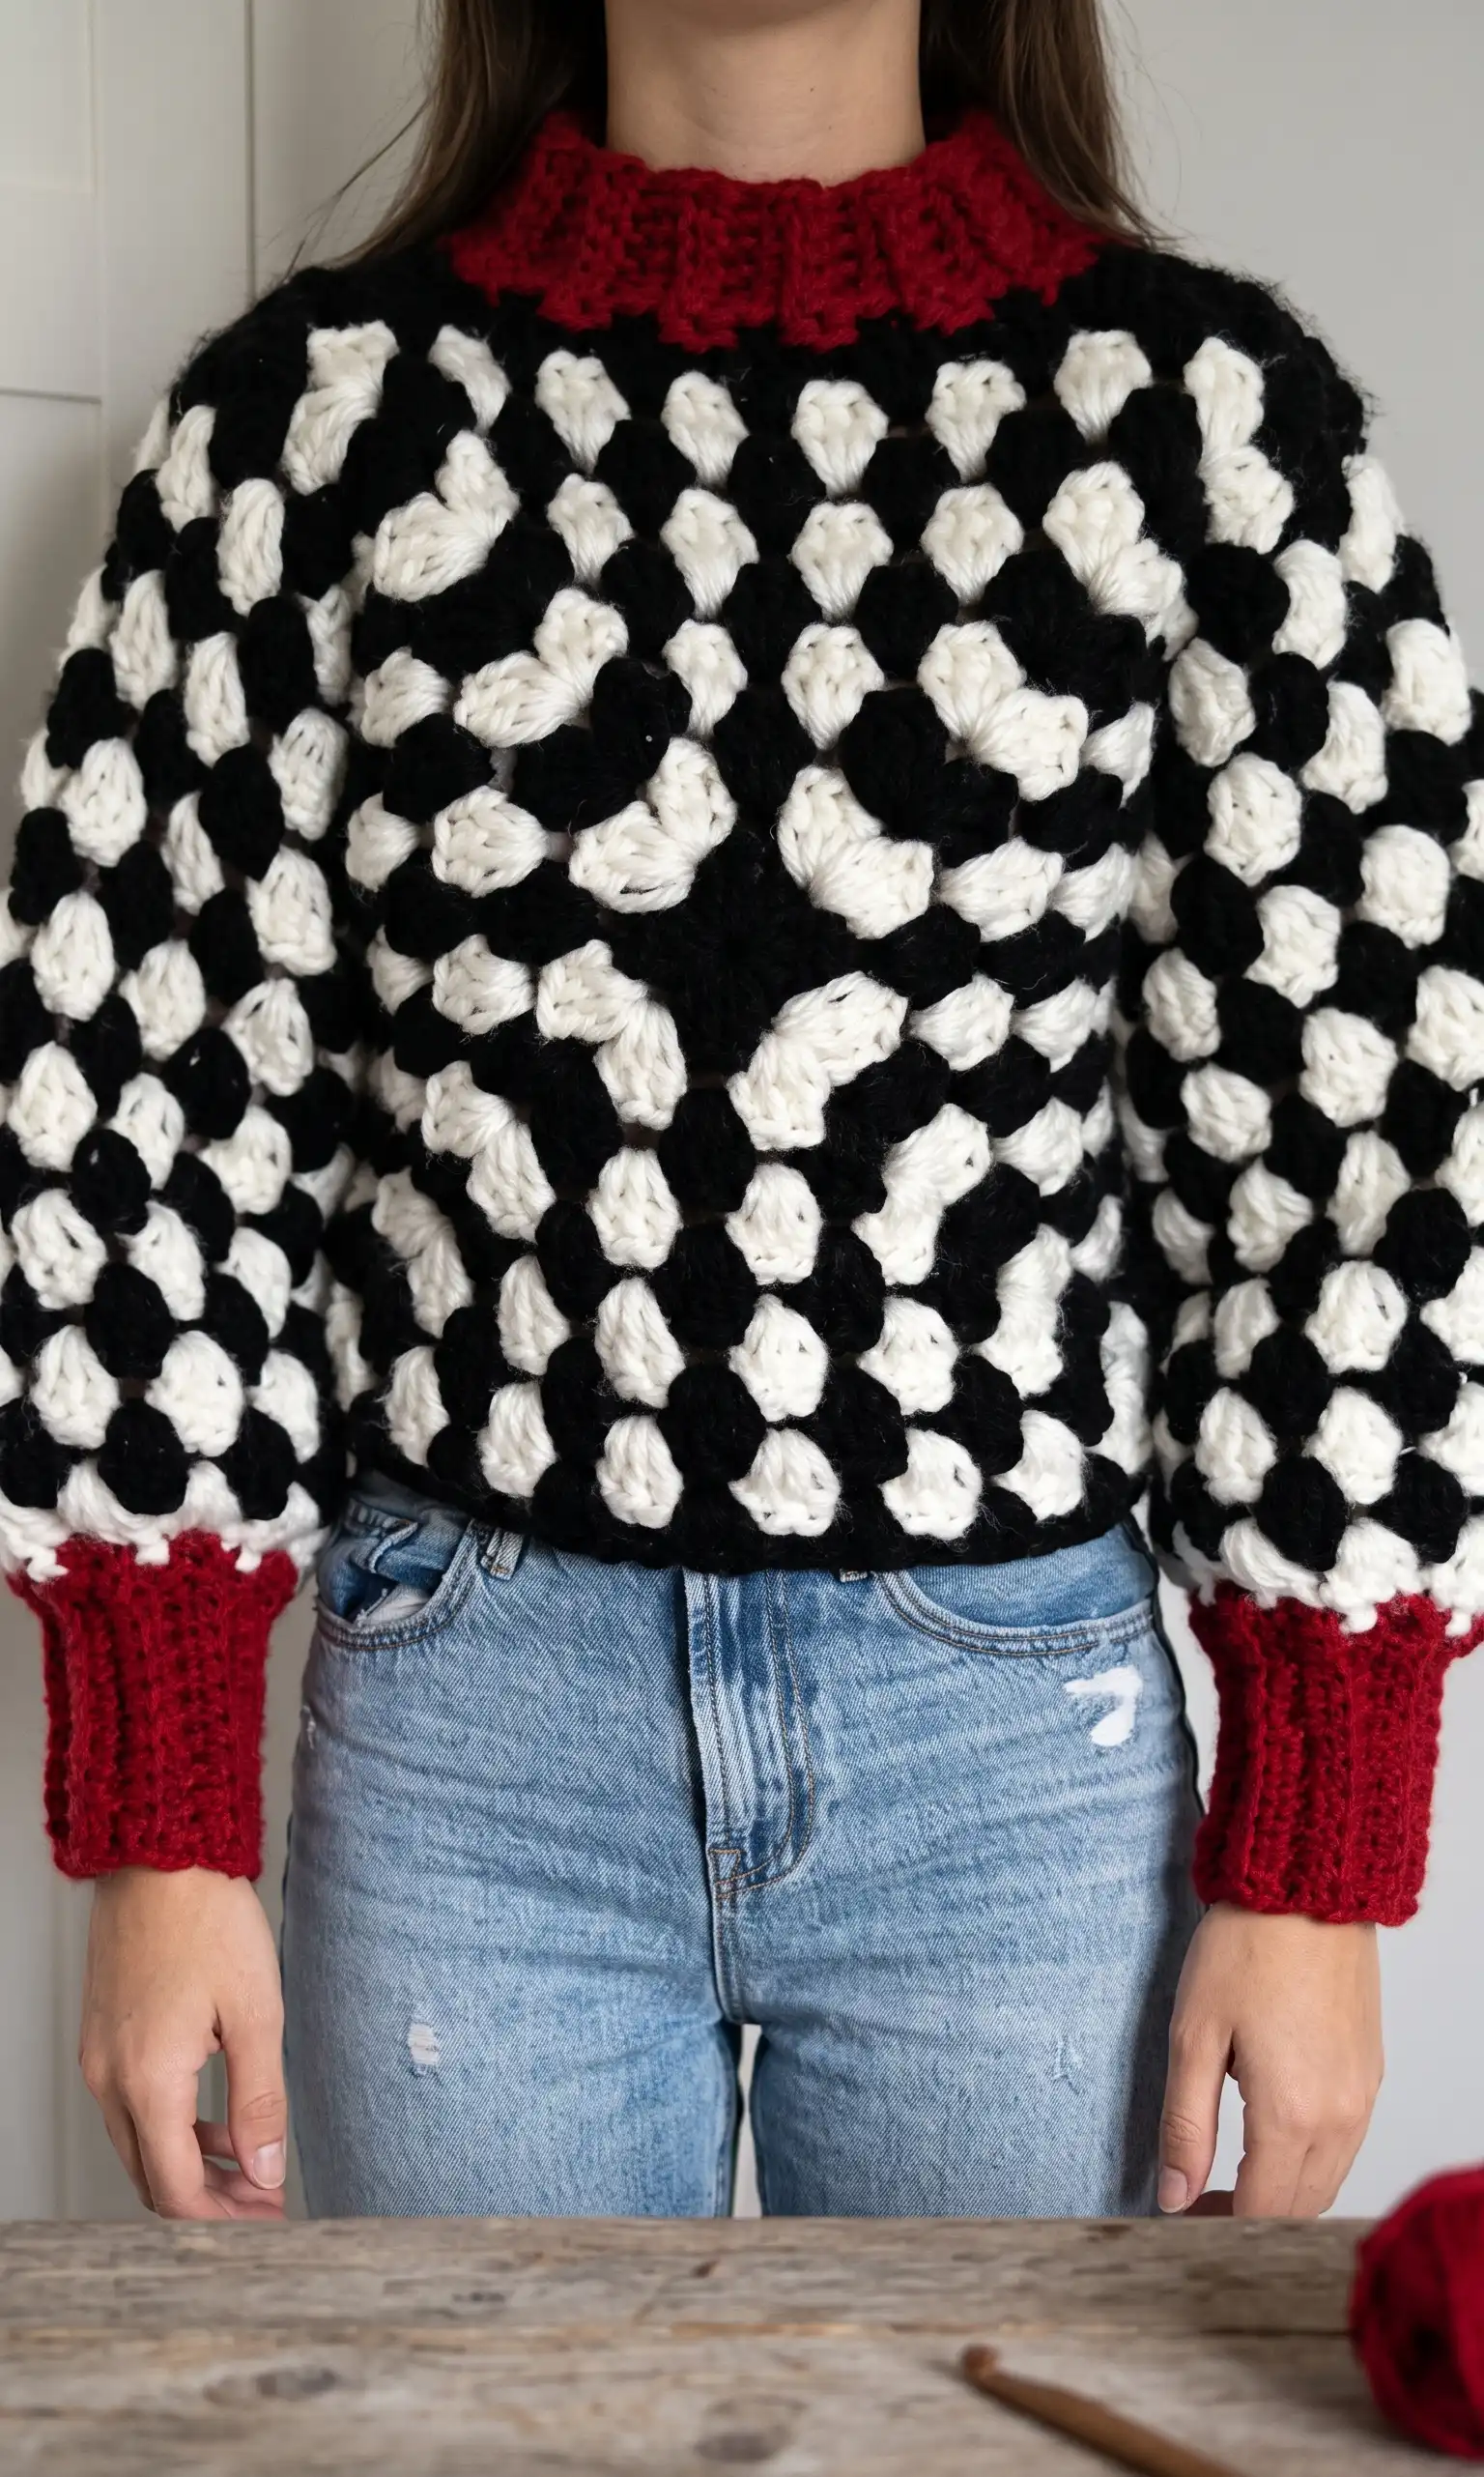
This project creates a chunky, oversized granny square sweater perfect for autumn. To begin, you will need super chunky yarn in three colours: 400g of black, 400g of white, and 200g of red. You will also need a 10 mm crochet hook, scissors, and a needle for weaving in ends.
Step 1: Crafting the Identical Body Panels
The sweater consists of two identical granny square panels for the front and back. Start by making a magic circle and work your first round by chaining three (counts as a double crochet) and adding two more double crochets into the ring. Chain two and repeat the cluster of three double crochets three more times until you have four clusters separated by chain two spaces.
For subsequent rounds, change colours by slip stitching into the third chain of the previous round and joining the new yarn in any corner space. In every corner, work three double crochets, chain two, and three double crochets. In the spaces along the sides, work only three double crochets. Continue this pattern until the panel is large enough to cover half of your bust and waist. For the example sweater, nine rounds were completed.
Step 2: Shaping Shoulders and Joining
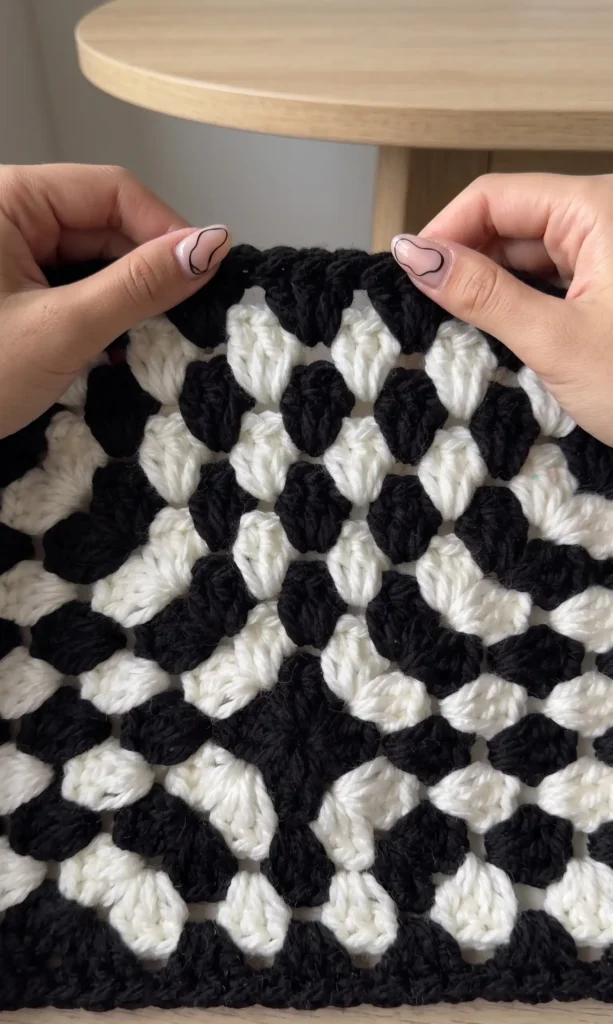
Once the squares are finished, you must shape the shoulders on both panels. Attach your yarn to a corner and work three clusters of three double crochets across the top edge. Leave the middle section open for the neckline. Repeat this for both shoulders on both panels, ensuring you leave long tails for sewing.
To assemble, lay the panels with right sides facing inward. Join the shoulders by slip stitching through the back loops only of both pieces. Next, determine your sleeve size by slip stitching the side seams from the bottom up to the underarm, leaving a large enough opening for your arm.
Step 3: Crocheting the Chunky Sleeves
Turn the sweater right side out to work on the sleeves. Join your yarn at the side seam and work three double crochets into every space around the armhole. When you reach the shoulder join, place a cluster of three double crochets directly into the middle of the seam to avoid gaps.
Continue working rounds of three double crochets, alternating colours to match your design. Repeat these rounds until the sleeve reaches your desired length, but stop approximately 10 cm before the end to allow room for the ribbed cuff.
Step 4: Finishing with Ribbed Cuffs and Collar
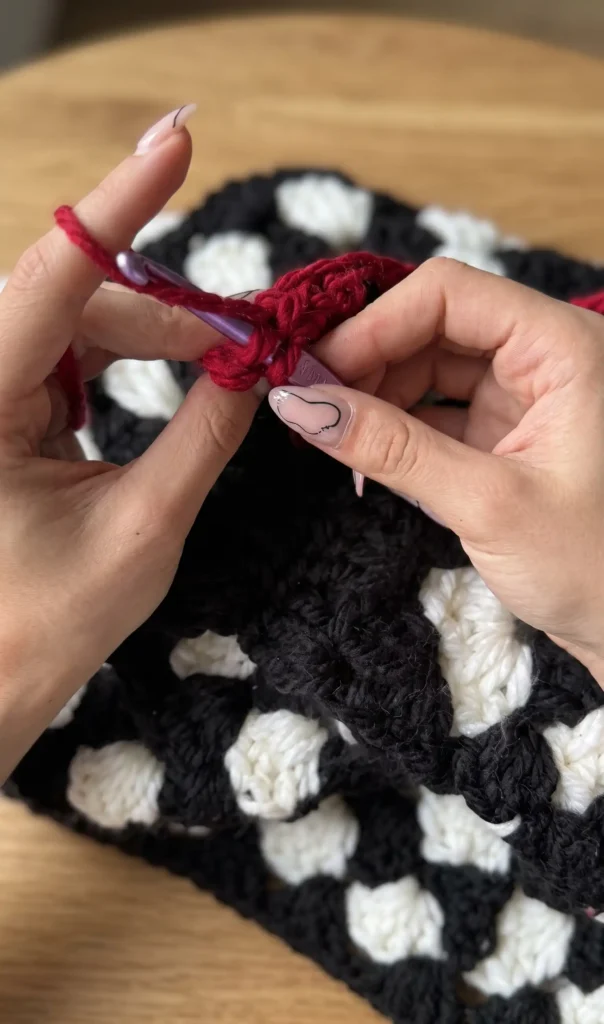
To create the ribbed texture for the cuffs, join your yarn at the armpit area and chain 11. Work 10 single crochets back down the chain. To attach the ribbing to the sleeve, perform three slip stitches into the next three stitches of the sleeve edge. Turn your work, skip those slip stitches, and crochet single crochets into the back loops only of the ribbing. Repeat this process all the way around and join the ends with slip stitches.
Follow a similar process for the collar by joining yarn at the shoulder seam. Chain six and work five single crochets into the back loops, using the three-slip-stitch technique to anchor the ribbing to the neckline. Once finished, join the collar edges and weave in all remaining tails to secure your sweater.
Video Credits: Kenikse Crochet
2. Crochet Granny Sweater Pattern
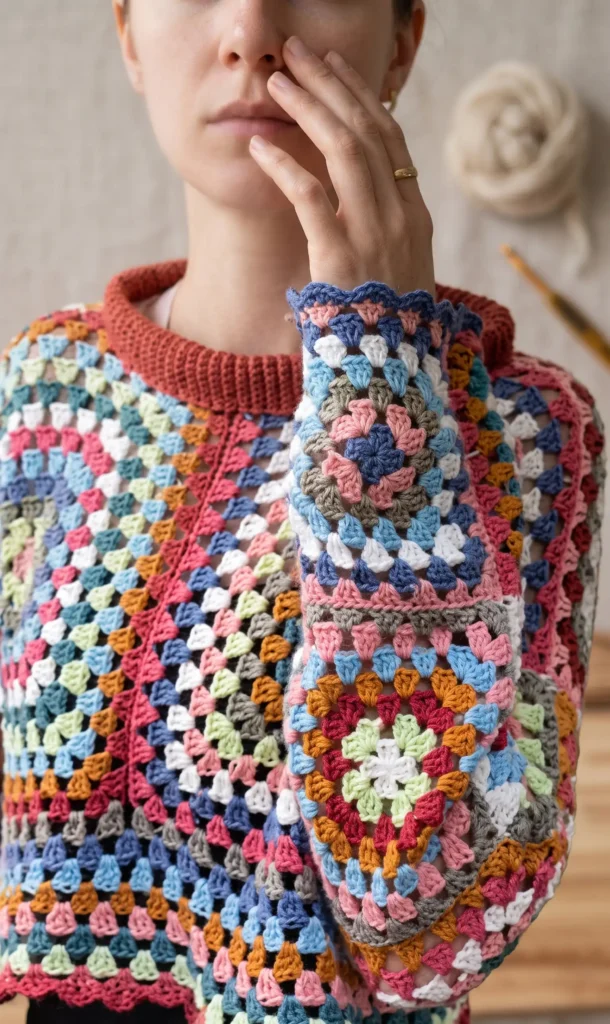
This beginner friendly pullover is constructed primarily from classic granny squares, making it an ideal project for those new to crochet. The design features two large squares for the front and back of the body and smaller squares for the sleeves, finished with decorative borders and a ribbed collar.
Step 1: Materials and Basic Square Construction
To start, you will need a crochet hook and yarn in your choice of colours. The foundation of the sweater relies on the granny square technique. Begin by creating a magic ring. Inside the ring, crochet three chain stitches (which count as your first double crochet) followed by two double crochets. Continue this pattern until you have four groups of three double crochets, each separated by two chain stitches. Close the first round with a slip stitch in the third initial chain.
For the following rounds, change colours by knotting the new yarn into a corner hole. In each corner, work three double crochets, two chain stitches, and three additional double crochets. Between these corners, crochet one chain stitch to move to the next space. To complete the pieces for this sweater, you need:
- Body: Four large squares consisting of 12 rows each (two for the front and two for the back).
- Sleeves: Six smaller squares consisting of 7 rows each.
Step 2: Assembling the Body and Sleeves
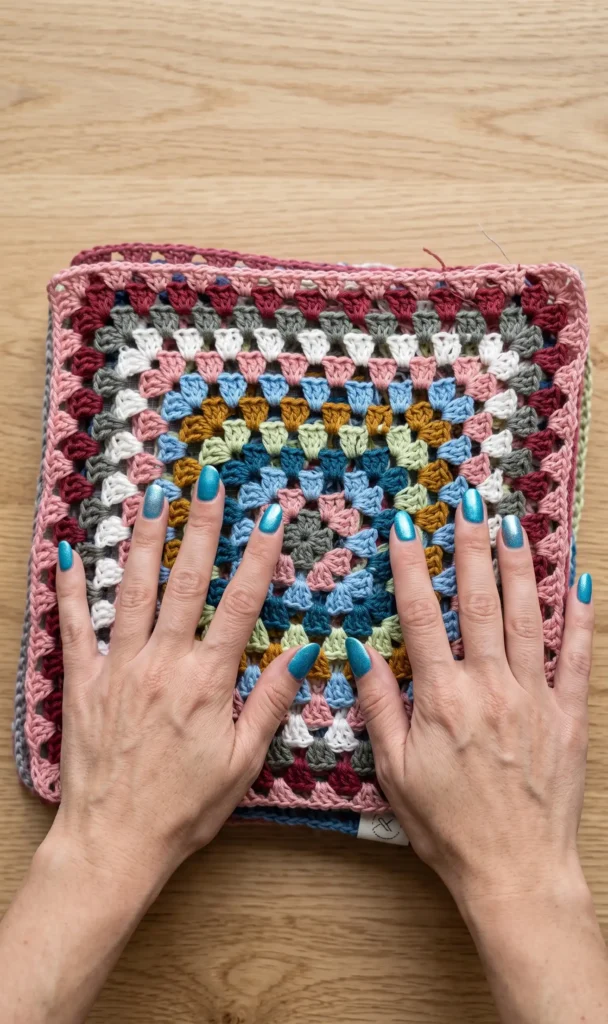
Once all your squares are ready, it is time to join them together. Lay the pieces with their right sides facing each other. Using a coordinating yarn, join the squares using slip stitches. It is essential to crochet these joins loosely to ensure the seams remain elastic, especially in the sleeves.
Begin by joining the large body squares and the smaller sleeve squares. Next, attach the sleeves to the body pieces at the shoulder line. Once the top is connected, fold the sweater and crochet the side seams and the underside of the sleeves in one continuous line. When joining the shoulders at the top, leave a gap for the head by measuring approximately five stitch groups from the outer edge, though you can adjust this for a wider or tighter neck opening.
Step 3: Extending Length and Adding Decorative Edging
If the pullover is too short after assembly, you can add length to the bottom. To do this, crochet additional rows of the granny stitch (three double crochets per hole separated by one chain stitch) directly onto the bottom edge until you reach your desired length.
To finish the sleeves and the bottom of the sweater, add a decorative semicircle border. In each hole of the edge, work one single crochet. For the groups of three double crochets, follow this sequence:
- First stitch: One single crochet and one half double crochet.
- Middle stitch: Two double crochets.
- Last stitch: One half double crochet and one single crochet. This creates a sweet, scalloped look along the edges.
Step 4: Creating the Ribbed Collar and Finalizing
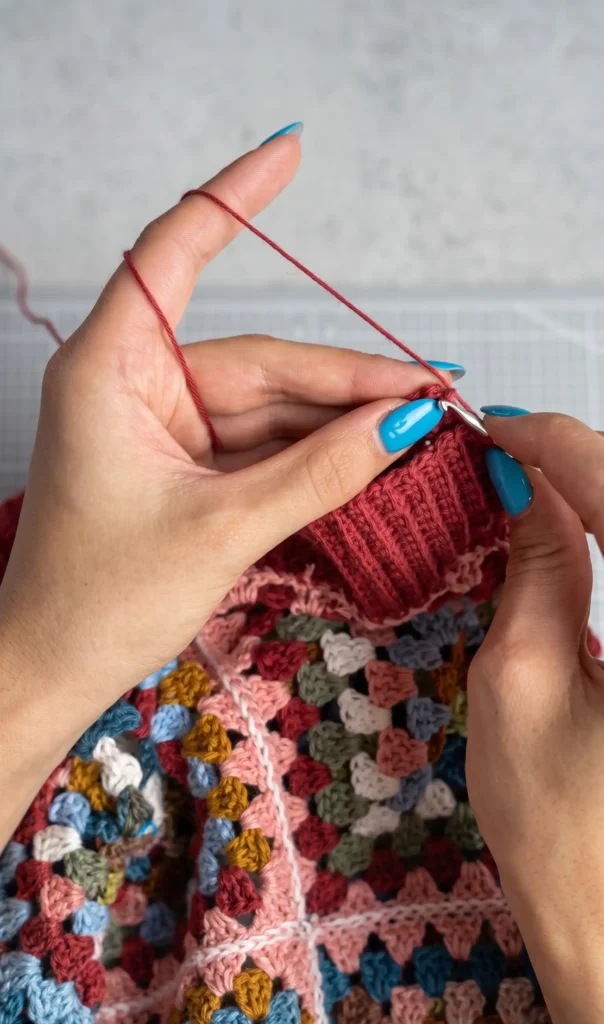
The final step is adding the collar for a polished look. Knot your yarn at the neck opening and chain as many stitches as you want for the height of the collar. Work rows of single crochets back and forth along this chain. To achieve a ribbed “knit” look, only crochet into the back loops of the stitches. As you finish each row at the base, attach it to the neck of the sweater using a slip stitch before starting the next row.
Once the collar is finished, turn the sweater inside out and join the two ends of the collar with slip stitches. Finally, weave in all loose threads. A helpful tip for finishing is to knot the starting and ending threads of colour changes together and pull them through the crochet “tunnels” with your hook before trimming the excess.
Video Credits: Madeleine
3. Classic Granny Square Crochet Coat Pattern
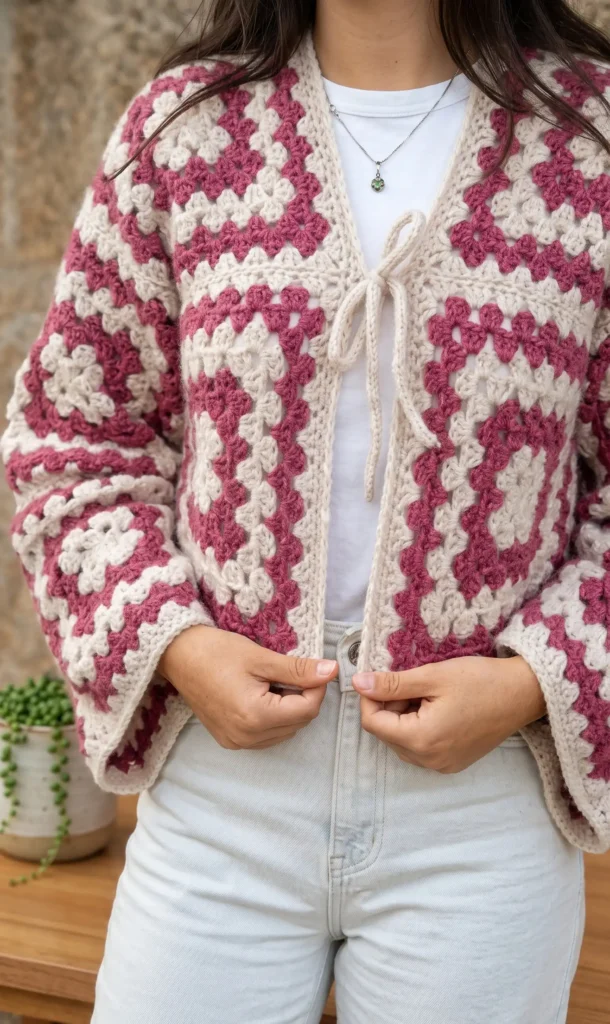
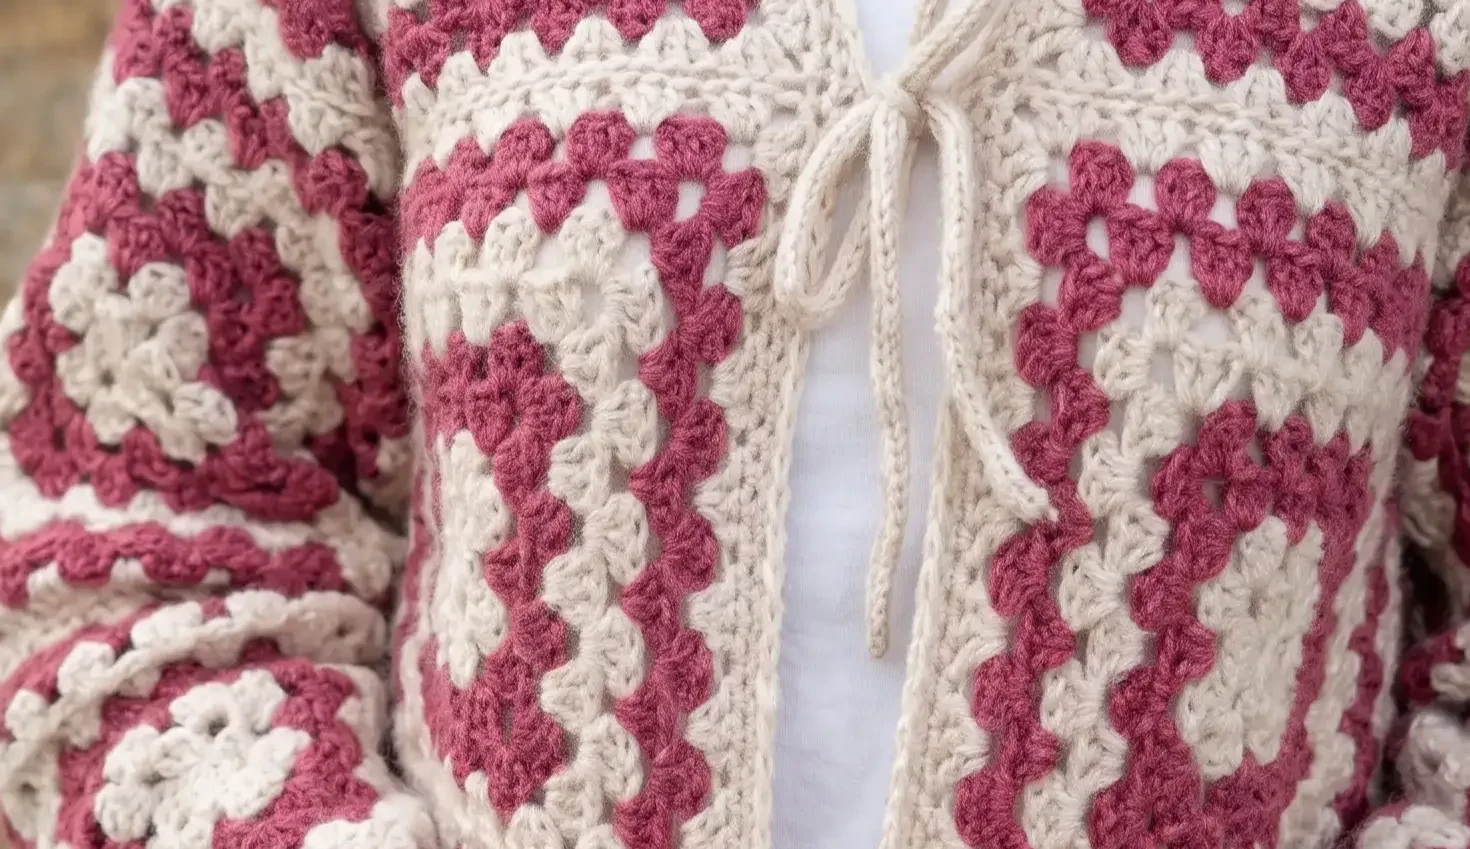
This stylish and relatively simple crochet project is perfect for beginners and yields a beautiful, high-quality result. The design is based on 16 large granny squares that are joined to form a comfortable, oversized garment.
Materials and Sizing
To create this coat in a standard size M, you will need five skeins of Drops Air yarn in color 02 (Wheat) and four skeins in color 14 (Bear). Essential tools include a 5.5mm crochet hook, scissors, and a tapestry needle.
Each granny square should measure approximately 23 to 24 cm. A good rule of thumb for custom sizing is that one square should cover roughly half of your body width when held up to your front.
Step 1: Crocheting the Squares
The foundation of the coat consists of 16 squares: eight for the body and eight for the arms.
- Foundation: Start with a magic ring.
- The Pattern: Work clusters of three double crochets. In the corners, separate these clusters with two chain stitches. For the sides, work the clusters directly into the spaces without extra chains.
- Color Work: The elegant look is achieved by alternating colors every two rounds.
- Preparation: It is highly recommended to hide all yarn tails as you finish each square, as it is much easier to manage while the pieces are small.
Step 2: Joining the Panels
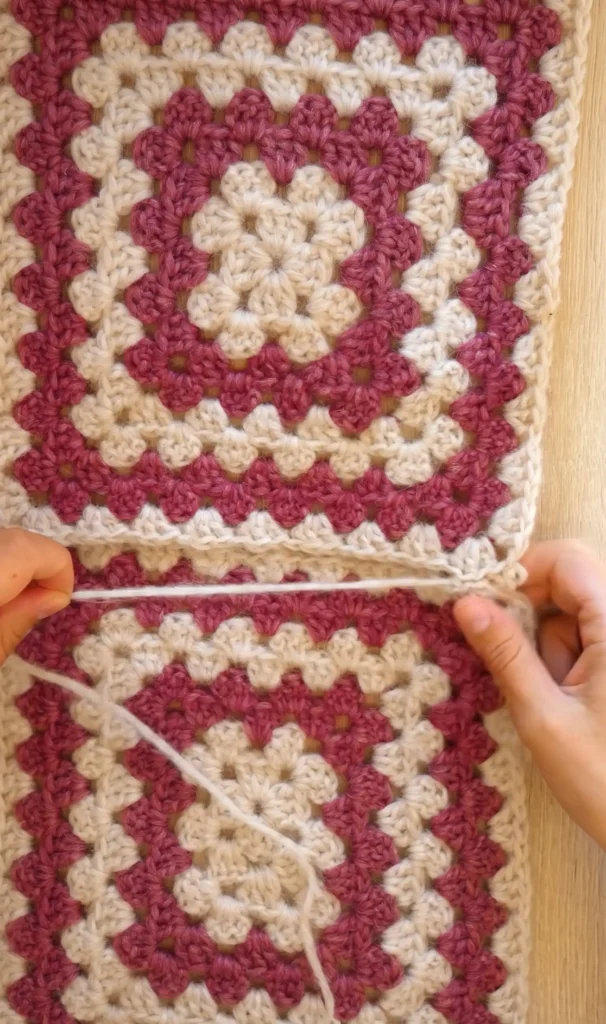
Once the 16 squares are ready, they must be joined using a specific sewing technique to ensure a clean finish.
- Joining Technique: Align two squares and pass the tapestry needle over the first stitch and under the second. Continue this “over and under” sequence, pulling the yarn tight to join the edges seamlessly.
- Body Assembly: Join the squares for the front and back panels at the shoulders and sides. Be sure to leave the armholes open for the sleeves.
Step 3: Back Extension and Sleeve Attachment
To ensure the coat fits comfortably across the back, extra width is added before the final assembly.
- The Back Extension: Attach yarn to the inner edges of the back panels and work straight rows of three-double-crochet clusters. This adds necessary width to the garment’s center.
- Joining the Back: After adding these extra rows, use the same sewing technique from Step 2 to join the two back halves together.
- Sleeve Assembly: Join the remaining eight squares into pairs to create the sleeves, then attach them to the armholes of the main body.
Step 4: Borders and Finishing Touches
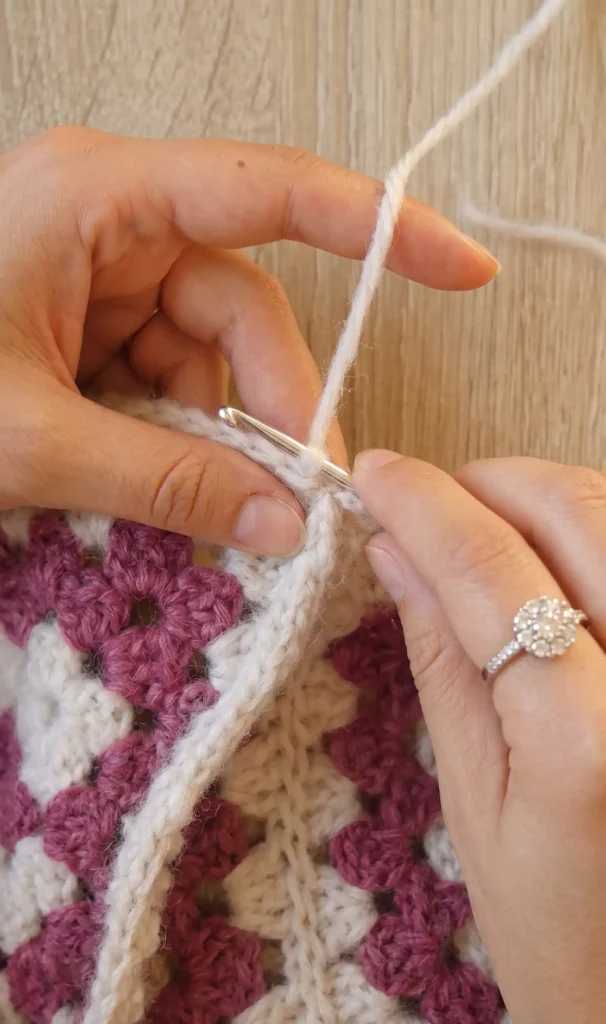
The final step involves adding borders and front closures to give the coat a polished look.
- Borders: Work single crochet stitches around the entire perimeter of the coat and the sleeve cuffs. Apply two rounds for the sleeves and three rounds for the body to add thickness and length.
- Front Ties: Create two cords to tie the coat at the front.
- Crochet Cord Option: Chain to your desired length (approximately 30 cm) and then work slip stitches back through each chain for a sturdy, attractive finish.
- Attachment: Sew the ties firmly to the front edges of the coat using a tapestry needle.
Video Credits: Laral Crafts
4. Simple Granny Square Crochet Jacket Pattern
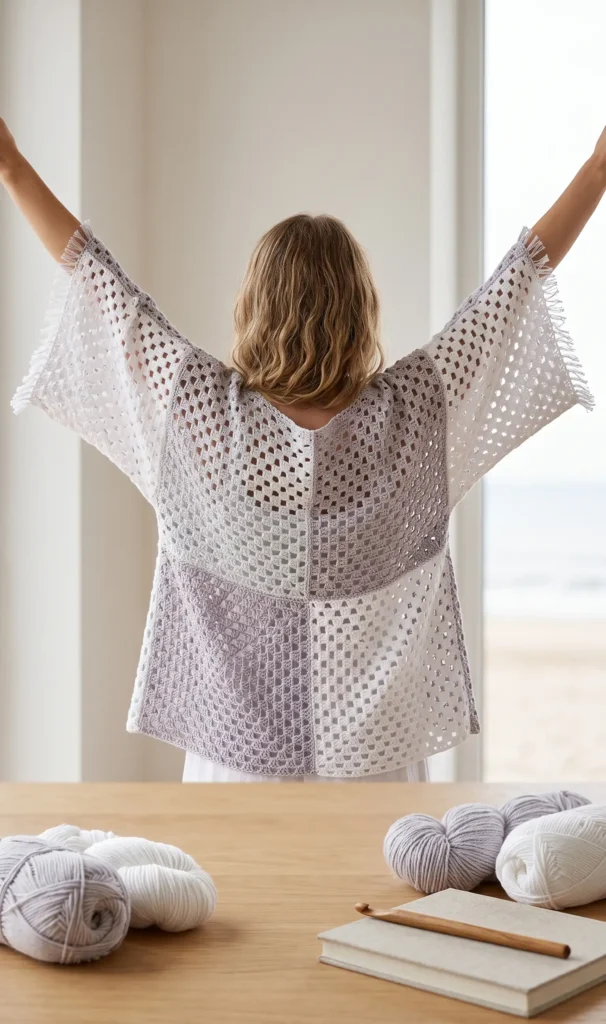
Creating a crochet jacket using granny squares is an accessible project that results in a stylish, handmade garment. By following this guide, you will learn how to construct the basic blocks and assemble them into a finished piece.
Essential Materials for Your Project
Before you begin, gather the necessary supplies to ensure a smooth crafting process. For this specific jacket, you will need approximately 500 grams of 100% acrylic wool. The source recommends a children’s wool for its pleasant touch and affordability. Although the yarn may be indicated for 3 to 4 mm needles, you should use a 5.5 mm crochet hook to achieve a looser, more comfortable stitch for the garment. Additionally, keep a pair of scissors and a wool needle on hand for joining and finishing.
Step 1: Crafting the Foundation Granny Squares
The base of your jacket consists of large granny squares. Each square for this project is worked in 10 rounds to achieve the necessary dimensions.
- Starting the Ring: Begin by making a slip knot and chaining five stitches. Close these chains into a circle using a slip stitch in the first chain.
- The First Round: Make three ascending chains, which count as your first double crochet. Work blocks of three double crochets into the ring, separating each block with three chains. You should have four blocks in total.
- Growing the Square: To move between rounds, use slip stitches (also called dwarf stitches) to reach the next corner arch. In every corner arch, you will create two blocks of three double crochets separated by three chains.
- Working the Sides: As the square grows, you will find intermediate arches on the sides. In these spaces, work a single block of three double crochets, separating them from the corners with a single chain.
Step 2: Joining the Squares into Modules
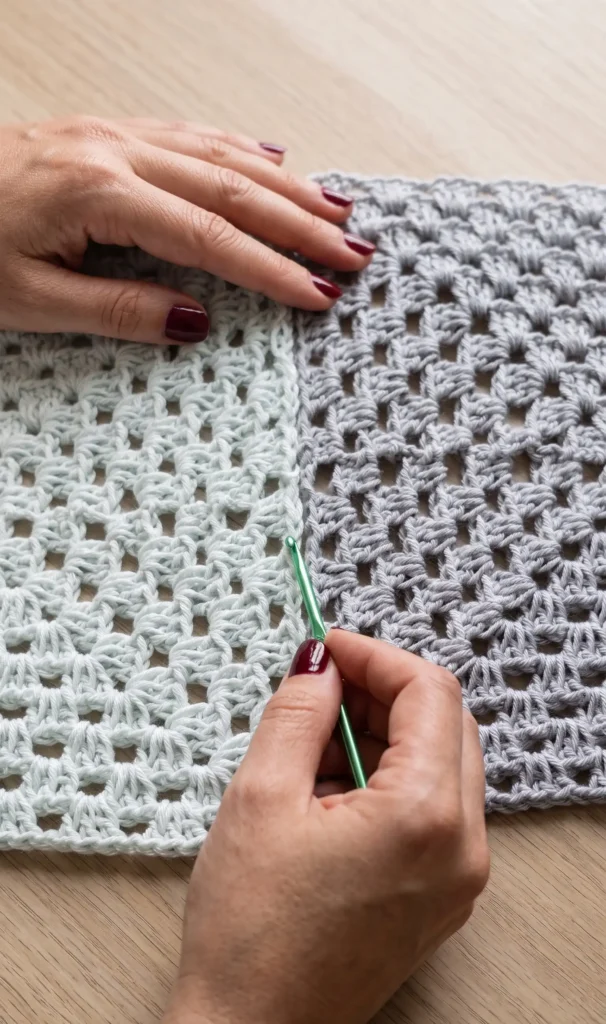
Once you have completed your squares, the next phase is joining them. The tutorial suggests a method that creates a decorative, clean seam.
- Positioning: Place two squares with their right sides facing each other. You will be sewing from the wrong side (the purl side).
- The Invisible Seam Technique: Use your wool needle and yarn to join the squares by taking only the outside strand of each stitch. This allows the inner strands to remain visible on the right side, creating a beautiful textured line in the union.
- Efficiency Tip: As you sew, hide any excess yarn tails within the seam to save time on finishing later.
Step 3: Assembling the Front and Back Panels
The jacket is constructed by organizing your squares into specific modules.
- Front Panels: Create two modules, each consisting of three granny squares joined in a row.
- The Back Panel: The back is formed by joining two of these three-square modules together vertically.
- Consistency: It is vital to ensure that your blocks match up perfectly stitch-for-stitch while sewing to prevent the jacket from becoming crooked.
Step 4: Final Assembly of Shoulders, Sleeves, and Sides
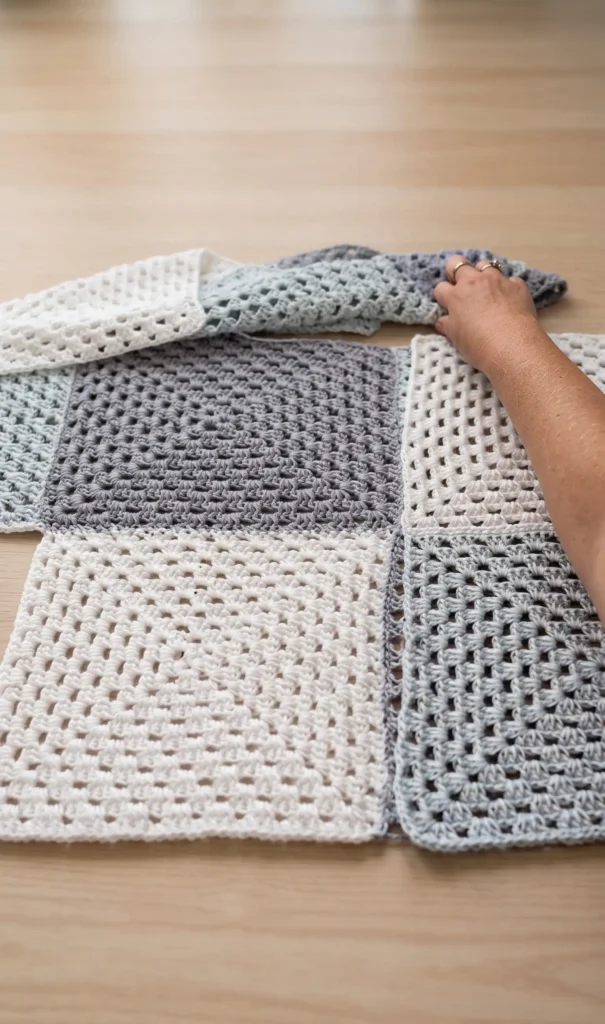
The final step involves connecting the modules to form the actual jacket shape.
- Shoulder Seams: Join the shoulders starting from the outer edge of what will be the sleeve, working toward the neck. A helpful tip from the source is to leave the shoulder seams provisional until you have tried the jacket on. This allows you to adjust the neck opening to be more open or closed based on your preference before permanently hiding the thread.
- Sleeves and Side Seams: Turn the entire piece inside out. Sew the underside of the sleeves and the sides of the jacket in one continuous motion or separate seams as needed.
- Finishing: Once you are satisfied with the fit, secure all remaining threads and cut the excess. Your granny square jacket is now ready to wear.
Video Credits: Mona Monisima
Which Design Will You Choose?
Four sweaters, four different vibes, one skill set. Once you know your way around a granny square, you can crochet any of these with confidence. Pick the one that matches your style and your yarn stash.
Cast on soon, because fall moves fast. Your new favorite sweater is just a few squares away.