Free Crochet Tote Bag Patterns for Beginners

Your tote bag just blew out at the bottom seam, right in the middle of the farmer’s market. We have all been there. I started crocheting my own bags years ago after exactly that moment, and I have never gone back to store-bought.
A handmade crochet tote is stronger than anything you will find on a shelf when you build it right. Cotton yarn holds up to daily abuse in a way that surprises most beginners. These four patterns each teach you something different without burying you in complicated stitches.
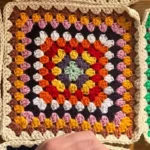
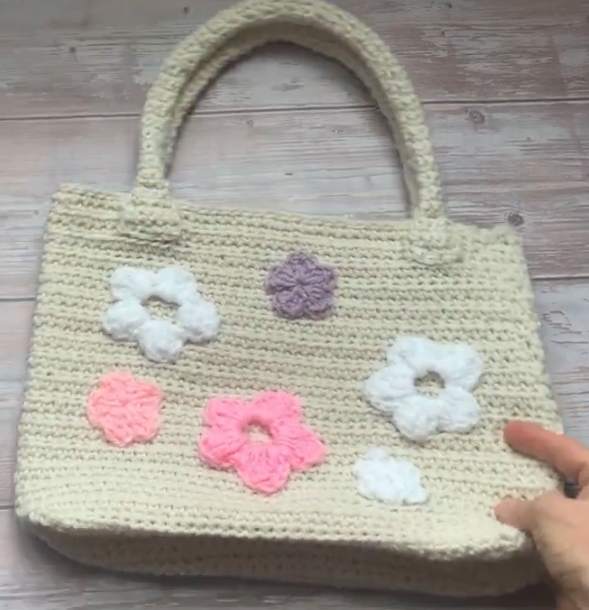
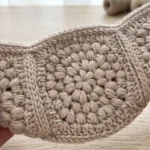
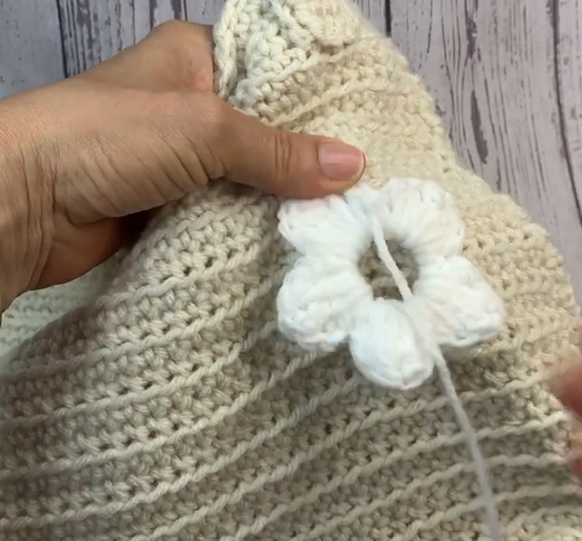
1: Heart Granny Square Crochet Tote Bag Pattern
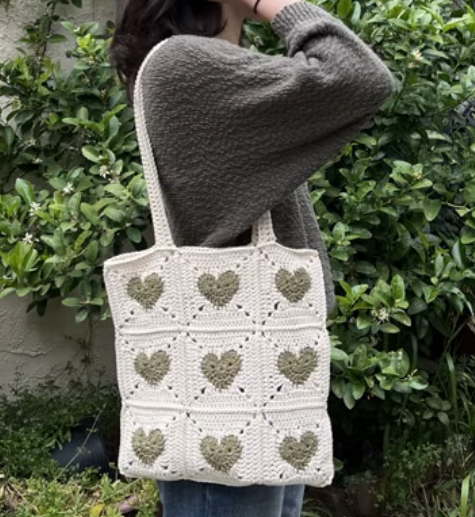
This charming tote bag features a 3×3 square layout on both sides, creating a total of 18 heart-themed granny squares. Using cotton yarn is highly recommended for this project because it provides better structure and stretches less than other fibers.
Materials and Tools
To get started, you will need the following supplies:
- Yarn: Approximately 186g of medium-weight mercerized cotton yarn (such as 24/7 Cotton) in a base color (e.g., Ecru) and 54g in a heart/accent color (e.g., Bay Leaf).
- Hook: 4mm crochet hook.
- Notions: Scissors and a yarn needle for weaving in ends.
Creating the Heart Granny Square
Each square is worked in rounds, starting with the heart center before forming the square border.
Round 1 (Heart Color)
Start with a magic ring or chain 4 and join with a slip stitch. Chain 3 (counts as your first double crochet) and work 11 more double crochets (DC) into the ring for a total of 12.
Round 2
Skip the first two stitches. In the third stitch, work 8 treble crochets (TR). Work 1 DC in each of the next two stitches. In the next stitch, work (1 DC, 1 TR), then chain 1 for the bottom point. Mirror the stitches back up: (1 TR, 1 DC) in the next stitch, 1 DC in each of the next two stitches, and 8 TR in the next stitch. Skip the last two stitches and slip stitch between the first and last stitch of Round 1.
Round 3 (Square Border)
Attach your base color yarn to the fourth TR of the previous round. Chain 3 (counts as DC) and work 1 DC in the same base. Follow the pattern around the heart using a mix of single, half-double, double, and treble crochets to create corners and straight edges.
Rounds 4 & 5 (Increasing)
Continue increasing the square by working double crochets along the sides and (2 DC, ch 2, 2 DC) in each corner chain space. A finished square with five rounds should have 17 stitches per side.
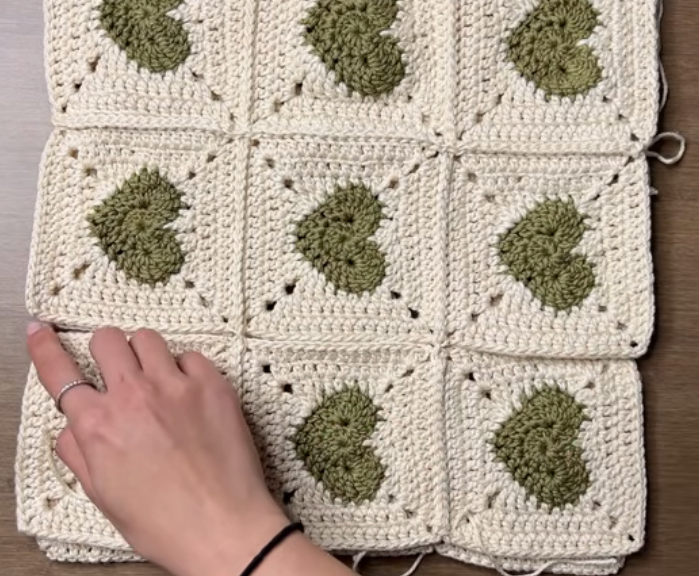
Assembling the Bag
Once you have 18 squares, weave in your ends and prepare for assembly.
- Layout: Arrange your squares into three rows of six squares.
- Seaming: Place squares right sides up and back-to-back. Use a slip stitch through the outer loops only; this creates a professional ridge on the outside while keeping the inside flat.
- Folding: After connecting the 3×6 grid, fold it in half so you have a 3×3 layout for the front and back.
- Final Seams: Stitch down the sides and across the bottom to close the bag, ensuring the top remains open.
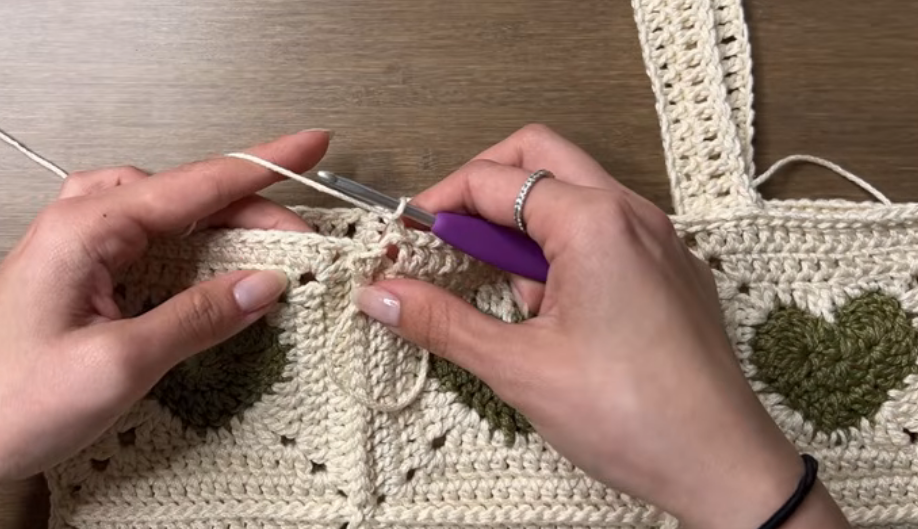
Straps and Finishing Touches
The straps are designed to be sturdy and comfortable.
- Strap Construction: Chain the desired length (about 100 chains for a 60cm strap). Work two rows of double crochet.
- Anti-Stretch Row: To prevent the straps from sagging, add a final row of slip stitches across the top. This reinforces the strap and reduces elasticity.
- Attachment: Attach the straps to the top of the bag using slip stitches. This method also allows you to reinforce the bag’s opening at the same time.
For added durability, especially if you plan to carry heavier items, it is recommended to line the bag with fabric once completed.
Video Credits: VivCrochets
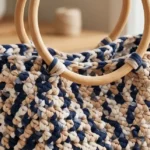
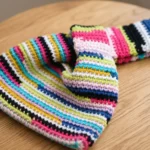
2: Japanese Knot Crochet Tote Bag Pattern
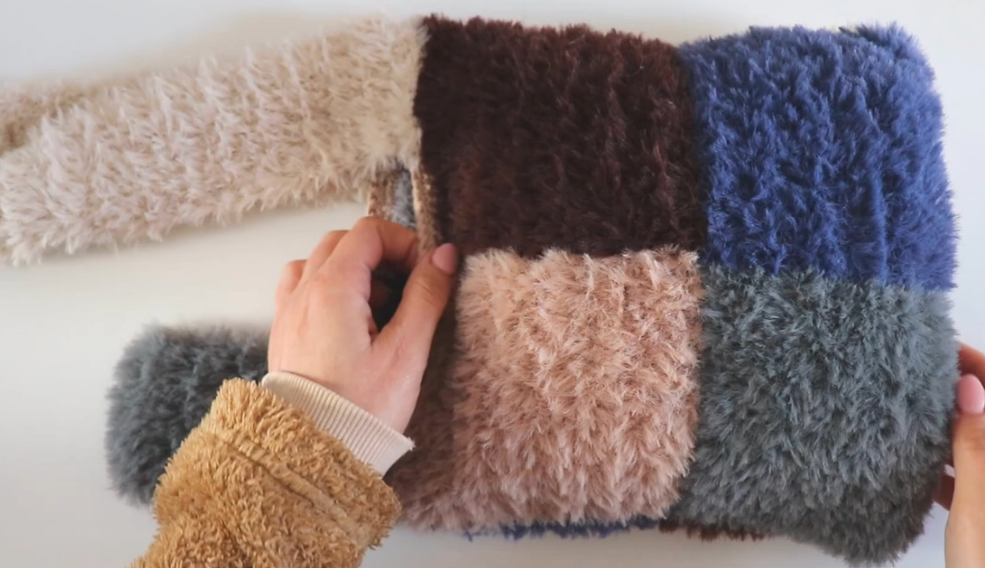
The Japanese Knot Tote Bag is a stylish, soft, and functional accessory that is perfect for carrying daily essentials like books and a phone. This specific design features a fluffy texture and uses a unique closure method where one strap is pulled through another. The finished bag measures approximately 25 to 27 cm.
Materials and Tools
To complete this project, you will need the following materials:
- Yarn: Approximately 150g of fluffy yarn (the source uses Nit Me Penelope, 50g/90m per ball).
- Hook: A 4.5 mm crochet hook.
- Optional: A secondary strand of smooth yarn in a similar color to make the foundation chains easier to see.
- Darning needle for sewing and hiding tails.
Step 1: Crocheting the Eight Squares
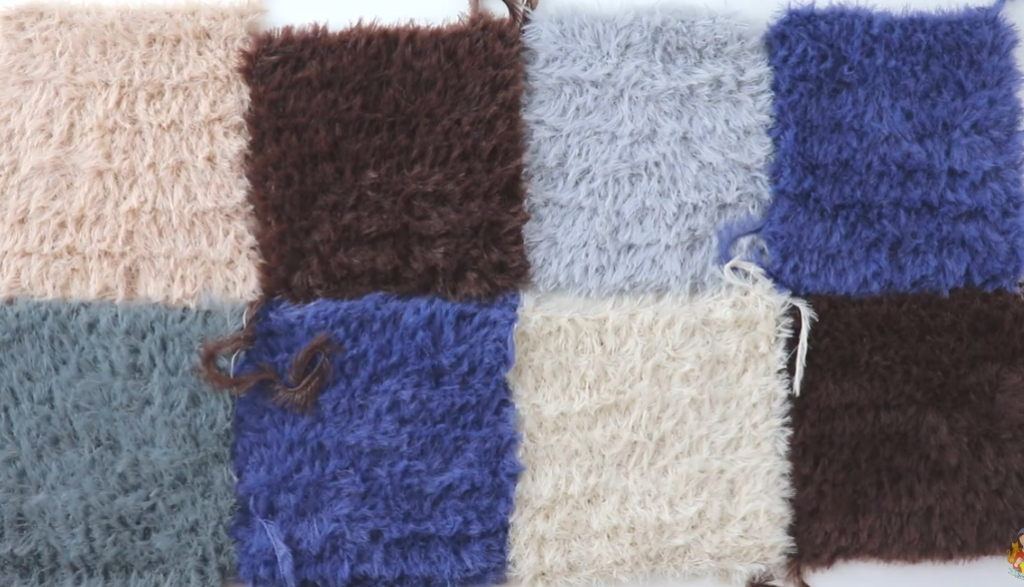

The body of the bag is constructed from eight individual squares.
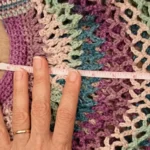
- Foundation: Start with a slip knot and 22 chains. If using fluffy yarn, consider holding a second strand of regular yarn just for the chain to help identify stitches.
- Row 1: Skip the first two chains and work double crochets (dc) into each remaining chain across.
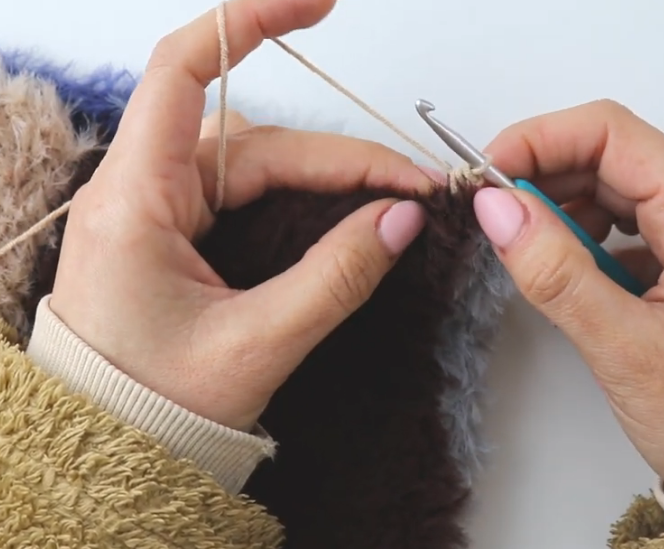
- Subsequent Rows: Chain 2 (this does not count as a stitch) and turn. Because fluffy yarn hides stitch definition, work your double crochets in between the posts of the previous row rather than into the top loops. You can feel these spaces with your fingers to ensure placement.
- Finish the Square: Repeat this pattern for 14 rows (or until it forms a perfect square of about 14 cm).
Repeat: Complete a total of eight squares.
Step 2: Joining the Body
Once your squares are ready, you must join them together to form the bag’s shape.
- Sewing: Place the right sides together and sew from the back (inside) using a needle and yarn.
- Assembly: Join the squares to form a rectangle, then fold and sew the sides together, leaving the top open for the bag’s mouth.
Step 3: Adding the Edging
To give the opening a clean finish, work three rounds of edging around the top of the bag:
- Round 1: Work one half double crochet (hdc) into each space around the opening.
- Round 2: Work one single crochet (sc) into every stitch.
- Round 3: Work a final round of slip stitches (sl st). Keep these stitches loose to prevent the opening from becoming too tight.
Step 4: Making and Attaching the Straps
The “knot” style requires two straps of different lengths. Both are approximately 8 cm wide, starting with 14 chains and working 12 single crochets per row.
- Short Strap: Crochet until the strap reaches 25 cm in length.
- Long Strap: Crochet until the strap reaches 50 cm in length.
Assembly: Sew one strap to each side of the bag’s opening. To close the bag, simply insert the long strap through the short strap
Video Credits: Sirin’s Crochet
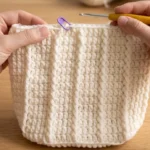
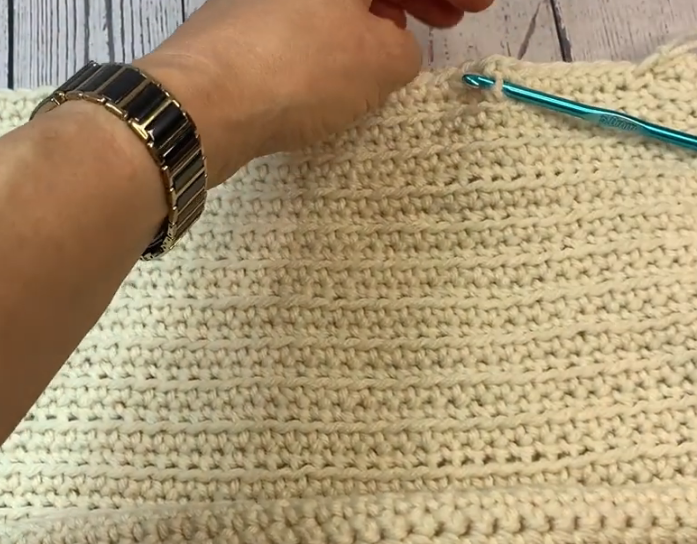
3: Mesh Market Crochet Tote Bag Pattern
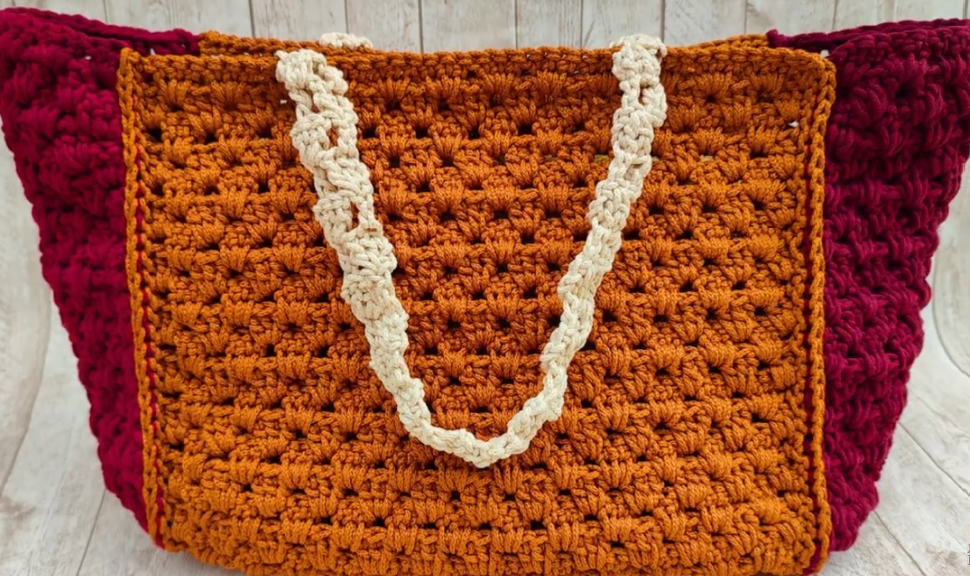
This beginner-friendly pattern creates a stylish and functional mesh tote bag using a variation of the granny stripe stitch. The design consists of three crocheted rectangles, one large main body and two smaller side panels, joined together with a sturdy handle.
Project Overview and Materials
To complete this project, you will need basic crochet supplies. While the specific yarn weight and hook size are flexible based on your preference for the bag’s final size, the pattern utilizes the following tools and techniques:
- Crochet Hook and Yarn (The pattern is worked using chains, double crochets, and single crochets).
- Stitch Markers (Used to center the handles).
- Scissors and a Tapestry Needle (For weaving in ends).
Step-by-Step Instructions
Step 1: Creating the Main Body
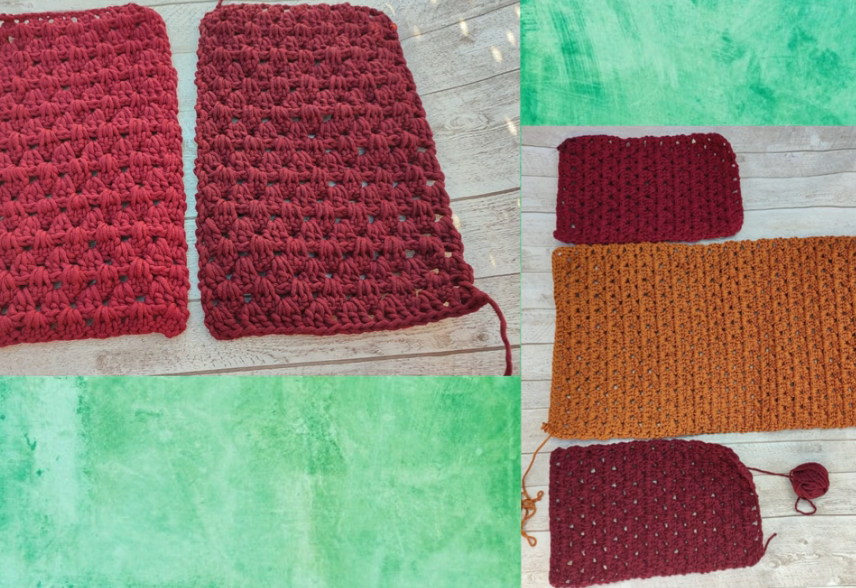
The main body of the bag is a large rectangle worked in alternating rows. You can customize the width by using any multiple of 3 + 5 chains for the turning chain.
- Foundation Row: Chain 41. Work a double crochet (dc) into the 6th chain from the hook, then add 2 more dc into that same space. Skip 2 chains, work 3 dc into the next chain. Repeat this pattern 10 more times. Finish the row by adding one dc into the very last chain, then chain 3 and turn.
- Row 2 (Even Rows): The turning chain counts as your first dc; add 2 more dc into the first space. Skip 3 dc from the previous row and work 3 dc into the next space between clusters. Repeat this until the end of the row, ending with a final 3 dc cluster. Chain 3 and turn.
- Row 3 (Odd Rows): These rows start and finish with a single dc. Work 3 dc into every space between the clusters of the previous row. To finish, work one dc under the last stitch, then chain 3 and turn.
- Finishing the Body: Repeat the patterns for Rows 3 and 4 for a total of 25 times.
Step 2: Creating the Side Rectangles
Once the main body is complete, you will need to create two smaller side panels to give the bag its depth.
- Foundation: Start with a chain of 26.
- Pattern: Follow the same stitch steps used for the main body.
- Length: Continue until you have completed 20 rows in total for each side piece.
Step 3: Assembling the Bag
After completing all three rectangular sections, it is time to join them together.
- Seaming: Use slip stitches to seam the crochet pieces together.
- Top Edge: Once the first side is attached, continue working slip stitches along the top edge of the bag before joining the second side panel.
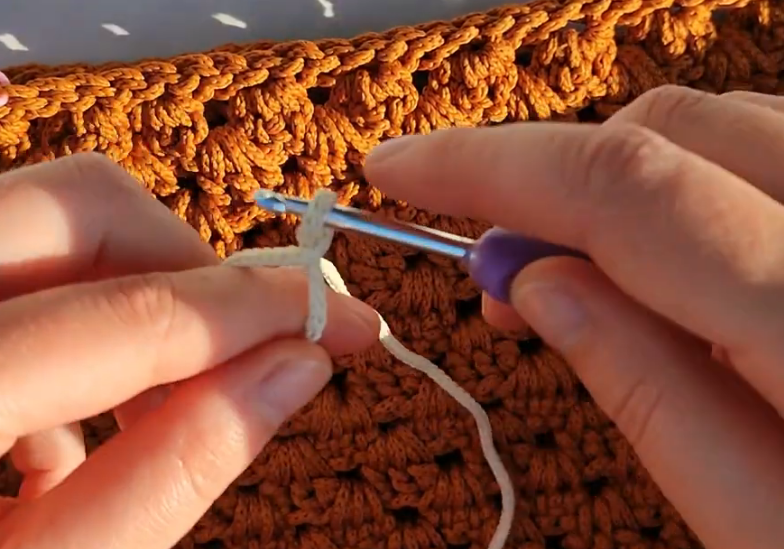
Step 4: Adding the Handles
The handles are worked directly onto the bag for a seamless finish.
- Placement: Use stitch markers to identify the center of the bag and ensure the handles are placed at an equal distance from the center.
- Foundation: Join your yarn with a slip knot and work 3 single crochets (sc). Chain 2 and turn.
- Handle Pattern: Work 2 dc into the first sc stitch, chain 1, skip 1 stitch, and add a dc into the last stitch. Chain 2 and turn.
- Growth: For the following rows, work 2 dc into the top two loops of the dc from the previous row, chain 1, and add a dc in the last stitch.
- Finishing: Repeat this pattern until the handle reaches your desired length. Attach it to the opposite side of the bag with 3 stitches and weave in your ends
Video Credits: Natessa | Sacred Crochet Art
4: Rectangle Crochet Tote Bag Pattern
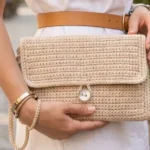
This crochet project is ideal for beginners because it primarily uses the single crochet stitch and chain stitches. By following this method, you can create a personalized bag with various color patterns and stripes.
Materials Needed
To create this tote bag, you will need the following supplies:
- Yarn: Approximately 200 to 300 grams of yarn, depending on the final size of your bag. You can use a merino aran blend for a winter style or cotton yarn for a summer look.
- Crochet Hook: A 5mm ganchillo is recommended, though you should choose the size that best fits your yarn.
- Straps: 2 meters of cotton webbing or any other type of strap you prefer.
- Tools: A yarn needle for assembly, a standard sewing needle and thread for the straps, and scissors.
Preparing the Yarn
The pattern uses a double strand technique to give the bag a firmer and more cushioned feel. You can prepare your yarn by taking the inner and outer ends of a single ball, or strands from two different balls, and winding them together into a new double-strand ball.
Step by Step Instructions
Step 1: Starting the Panel
The bag consists of two panels worked from one corner outward.
- Make a slip knot using the double strand of yarn and insert your hook.
- Work 2 chains.
- In the first chain you made, work 1 single crochet, 2 chains, and 1 single crochet. This creates the first corner and the base for your project.
Step 2: Growing the Panel
Every subsequent row follows a consistent pattern to increase the size of the square or rectangle.
- Chain 1 and turn your work.
- Work 1 single crochet into each stitch until you reach the corner space (the hole created by the 2 chains in the previous row).
- Inside that corner space, always work: 1 single crochet, 2 chains, and 1 single crochet.
- Work 1 single crochet in every remaining stitch of the row.
- Repeat these steps for every row until the panel reaches your desired dimensions, such as 40 by 40 centimeters.
Step 3: Adding Color and Stripes
You can change colors at any time to create regular or irregular stripes. To change colors, introduce the new yarn at the end of a row. You can hide the loose ends by crocheting over them as you work the next row of single crochets.
Step 4: Assembly and Finishing
Once you have completed two identical panels, it is time to put the bag together.
- Place the two panels together with their wrong sides facing out.
- Using a yarn needle and a long strand of yarn, sew along three of the sides (the two lateral sides and the bottom). Leave the fourth side open to serve as the top of the bag.
- Turn the bag right side out so the seams are hidden on the inside.
- Attach the 2 meters of cotton webbing as handles by sewing them onto each face of the bag using a regular needle and sewing thread
Video Credits: JTEasyCrochet
Which Tote Are You Making First?
All four of these patterns are genuinely beginner-friendly, but they each teach you something different. The heart granny squares build your joining skills. The Japanese knot bag is a lesson in working with tricky yarn. The mesh tote is great for understanding structure. The rectangle panel bag? That one will become your go-to once you know it.
Pick the one that excites you most and just start. You will figure out the details as you go. That is honestly how most crochet knowledge gets built.
Share your finished bag if you make one. Seeing what colors and yarn choices people go with is always the best part.