25+ Easy 4th of July Crochet Patterns for Beginners
The 4th of July is one of my favorite times to pick up a crochet hook. There’s something so satisfying about making your own patriotic decorations and accessories in red, white, and blue. Whether you’re brand new to crochet or have been stitching for a while, these patterns are simple enough to finish before the fireworks start.
Most of these projects use basic stitches like chain, single crochet, and double crochet. You don’t need to be an expert. You just need a little yarn, a hook, and some free time.
Before we get into the patterns, here are a few things you’ll need for most of these projects.
Basic Materials
You’ll want worsted weight yarn in red, white, and blue. Cotton yarn works especially well for dishcloths, coasters, and anything that needs to hold its shape. For accessories like headbands or scrunchies, a softer acrylic blend feels much better against the skin.
Pick up a size 5.0mm hook for worsted weight yarn. A yarn needle for weaving in ends is a must. Keep scissors nearby too. That’s really all you need to get started.
Beginner Tips Before You Start
Always make a gauge swatch before starting. It sounds annoying, but it saves frustration later.
Count your stitches at the end of every row. It’s so easy to accidentally add or lose one.
Weave in your ends as you go instead of saving them all for the end. Future you will be very grateful.
Now let’s get into the patterns.
1. 4th of July Crochet Coaster Pattern
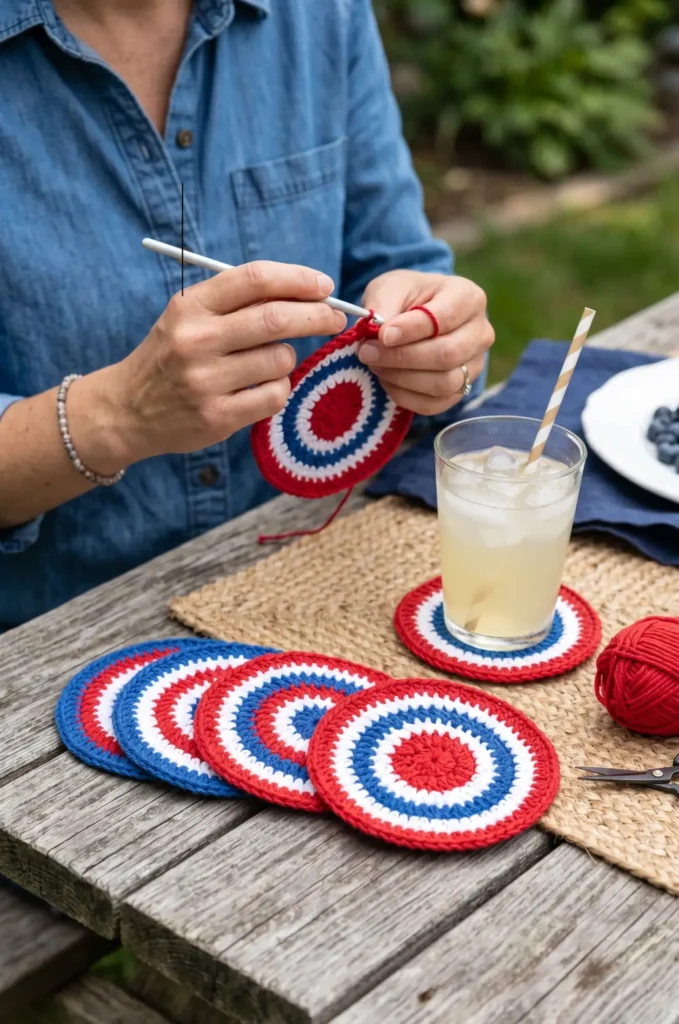
Coasters are one of the best beginner projects because they’re small and quick.
Setup
- Use red cotton yarn and a 4.5mm hook
Foundation
- Chain 4 and join to form a ring
- Work 10 single crochets into the ring and join
Rounds
- Round 2: chain 1, work 2 single crochets in each stitch around (20 stitches)
- Round 3: alternate between 1 single crochet and 2 single crochets in each stitch
- Continue in rounds until the coaster is about 4 inches wide
Color Detail
- Switch colors each round to create a striped effect using red, white, and blue
Fasten off and weave in ends. Make a set of 4 for the perfect July 4th table setup.
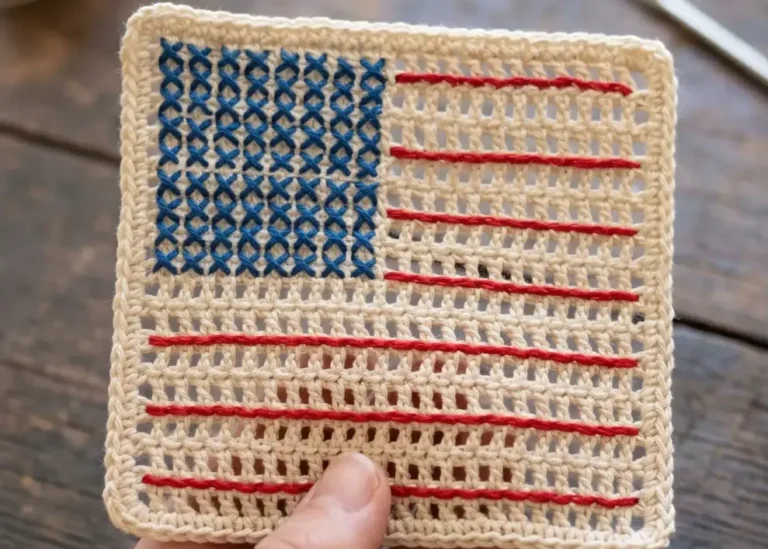
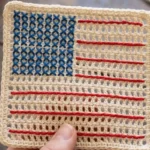
2. Easy American Flag Crochet Dishcloth
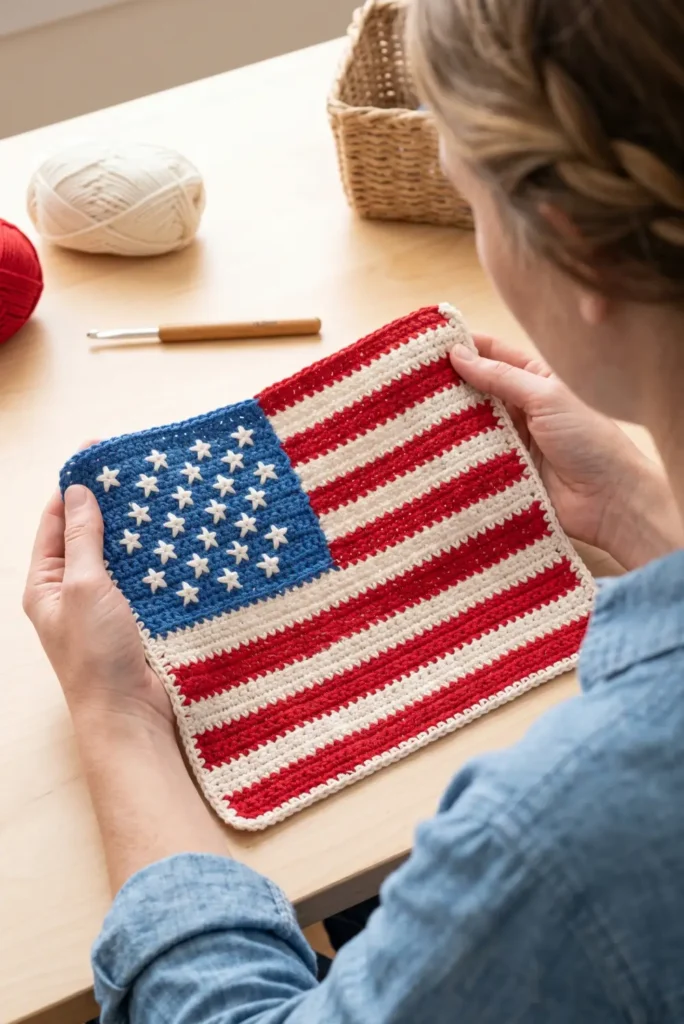
This one looks impressive but is actually very easy.
Setup
- Use worsted weight cotton yarn and a 5.0mm hook
Stripe Section
- Chain 31
- Work rows of single crochet in red and white stripes, switching colors every 2 rows
- Work about 13 rows total for the stripe section
Blue Canton (top left corner)
- Join blue yarn at the beginning of row 1
- Work a 12 stitch by 6 row block in blue over the stripes
- Either use surface slip stitch or crochet the block separately and sew it on
Add small white star shapes using a simple 5-point slip stitch star motif.
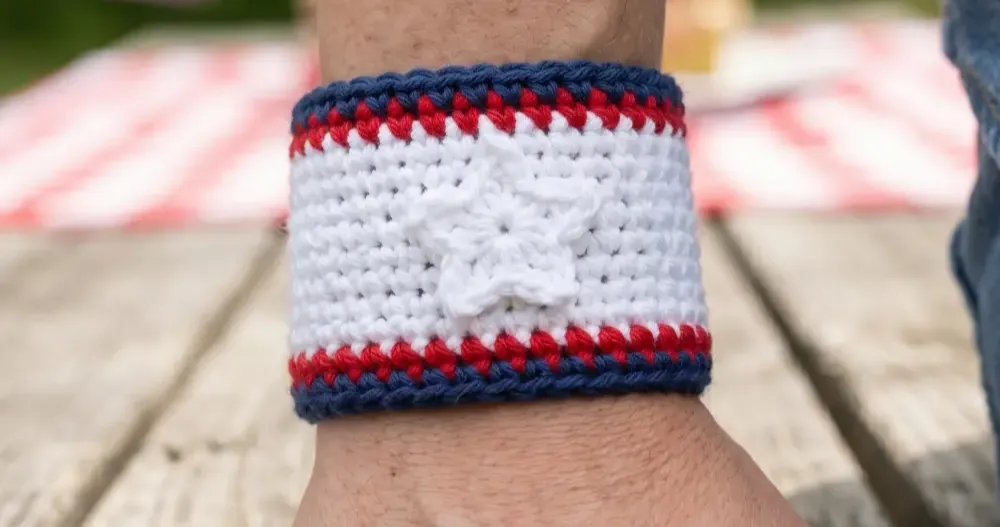
3. Simple Patriotic Crochet Wristband
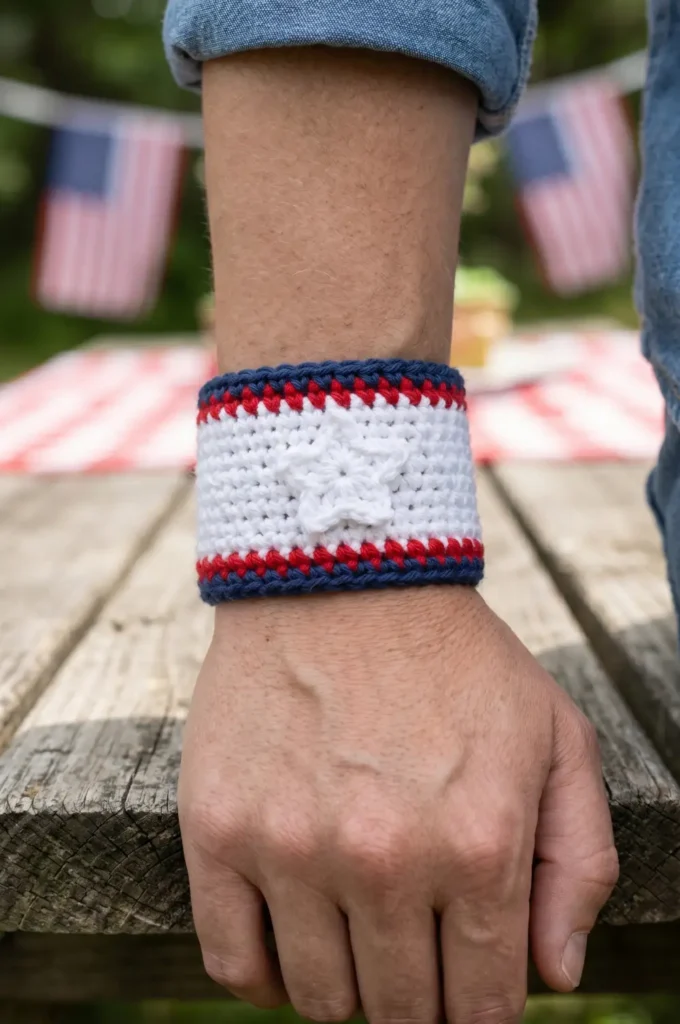
This takes about 20 minutes and makes a great accessories for parade day.
Setup
- Chain 6 with white yarn
Band
- Single crochet in each stitch across for about 7 inches, or until it fits comfortably around your wrist
Color Detail
- Work one row in red and one row in blue on each side
Finishing
- Fasten off leaving a long tail
- Sew the ends together
You can add a small crocheted star to the front for extra flair.
4. Red, White & Blue Crochet Bunting
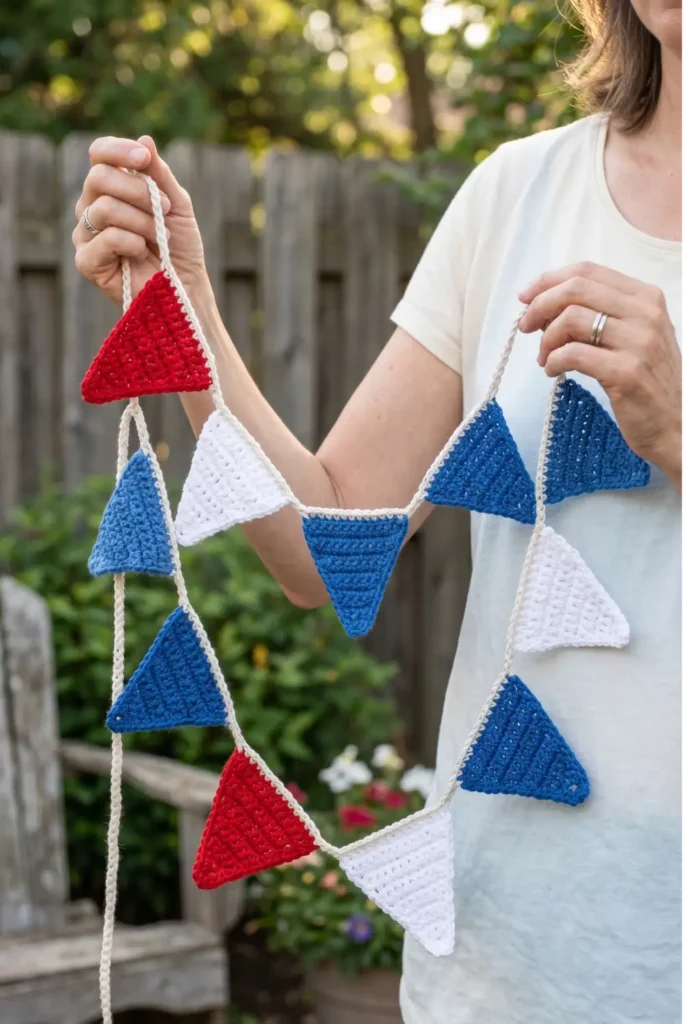
Bunting is one of those decorations that instantly transforms a space.
Individual Pennants (make 9 total)
- Chain 3
- Decrease one stitch on each side every row until 1 stitch remains
- Each triangle takes about 5 minutes
Color Breakdown
- 3 red pennants
- 3 white pennants
- 3 blue pennants
Thread all pennants onto a long chain string, spacing them evenly. Hang across your porch, mantle, or backyard fence.
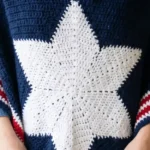
5. Simple Stars Crochet Garland
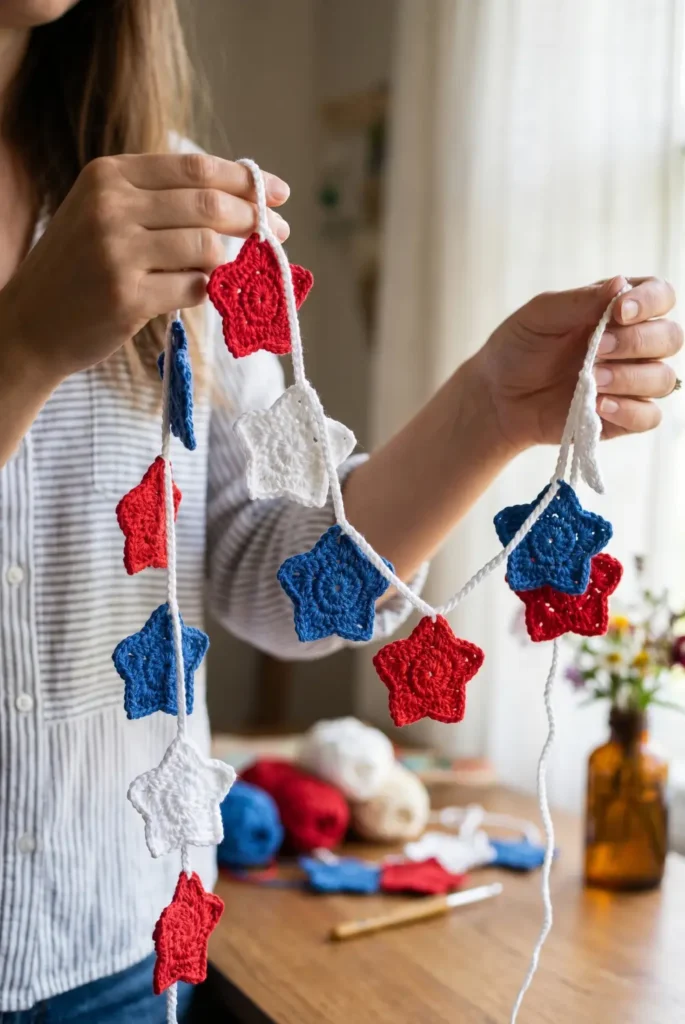

This garland is adorable strung across a window or table.
Foundation
- Chain 4 and join into a ring
- Round 1: work 10 single crochets into the ring
Star Points (repeat 5 times)
- Slip stitch into 2 stitches
- Chain 3 and turn
- Single crochet twice
- Slip stitch back down
Make 10 to 15 stars in red, white, and blue. Connect them with a long chain between each one.
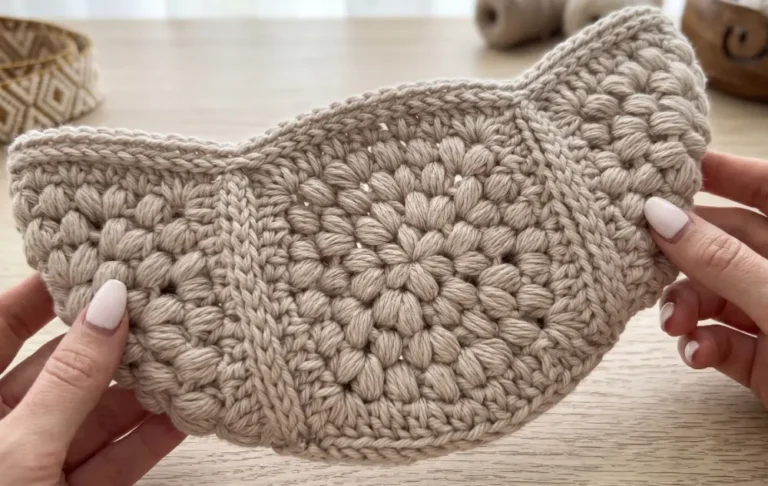
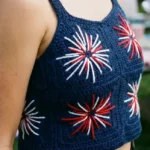
6. Easy Firework-Inspired Crochet Pillow
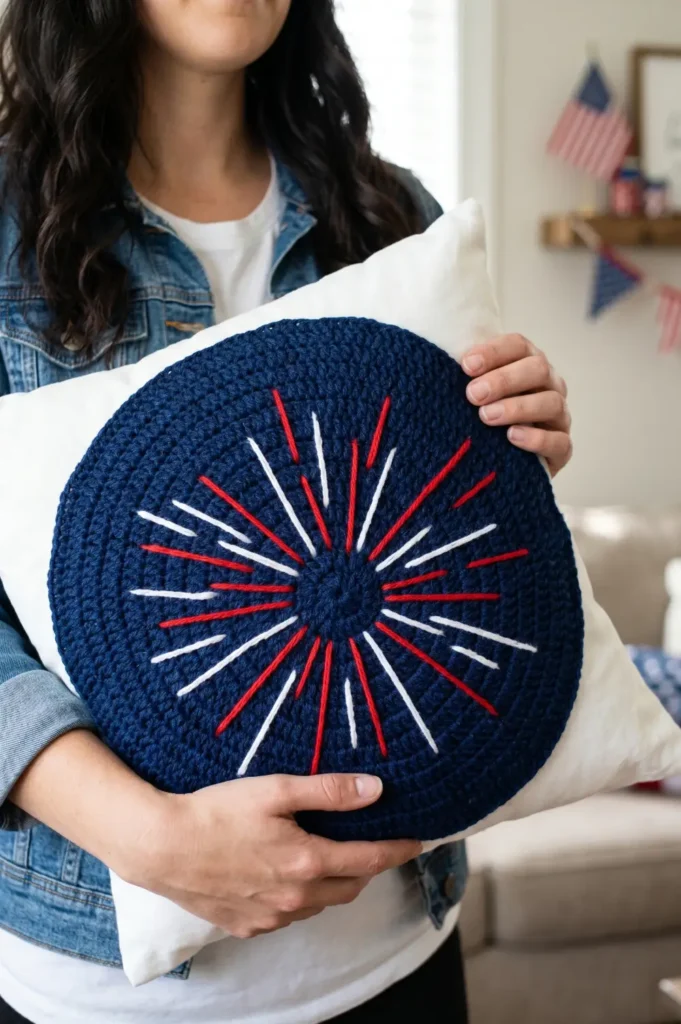
This pillow cover uses a starburst pattern that looks just like fireworks bursting in the sky.
Setup
- Use a 5.0mm hook and worsted weight yarn in navy blue
Foundation
- Chain 4 and join
- Work 6 double crochets into the ring
Building the Circle
- Continue increasing 6 stitches per round until the circle is 12 inches wide
Finishing
- Attach to a plain white pillow cover by slip stitching around the edge
Add bursts of red and white yarn using embroidery-style stitches radiating from the center.
7. Crochet USA Flag Bookmark Pattern
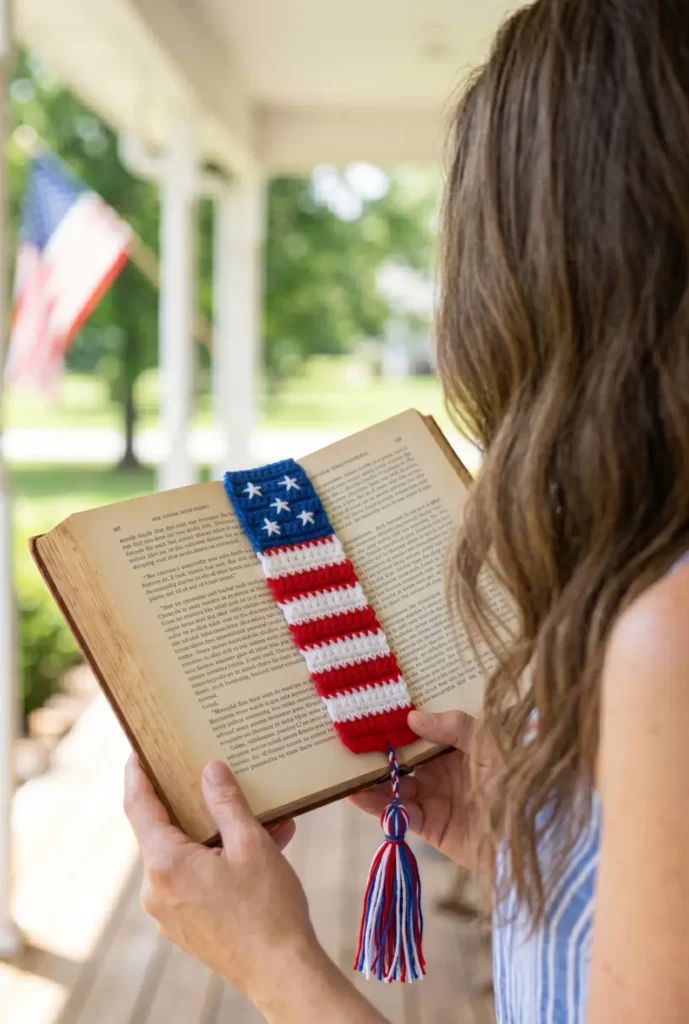
Perfect for the book lovers in your life.
Foundation
- Chain 8 with red yarn
Stripes
- Single crochet in rows for 2 rows in red, then switch to white for 2 rows
- Repeat until you have 6 total stripes
Blue Square
- Add a blue square at the top using the same technique from the dishcloth pattern
Finish with a small tassel at the bottom using all 3 colors. Simple, cute, and useful.
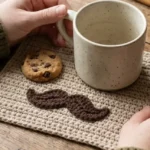
8. Quick Patriotic Mug Cozy Crochet Idea
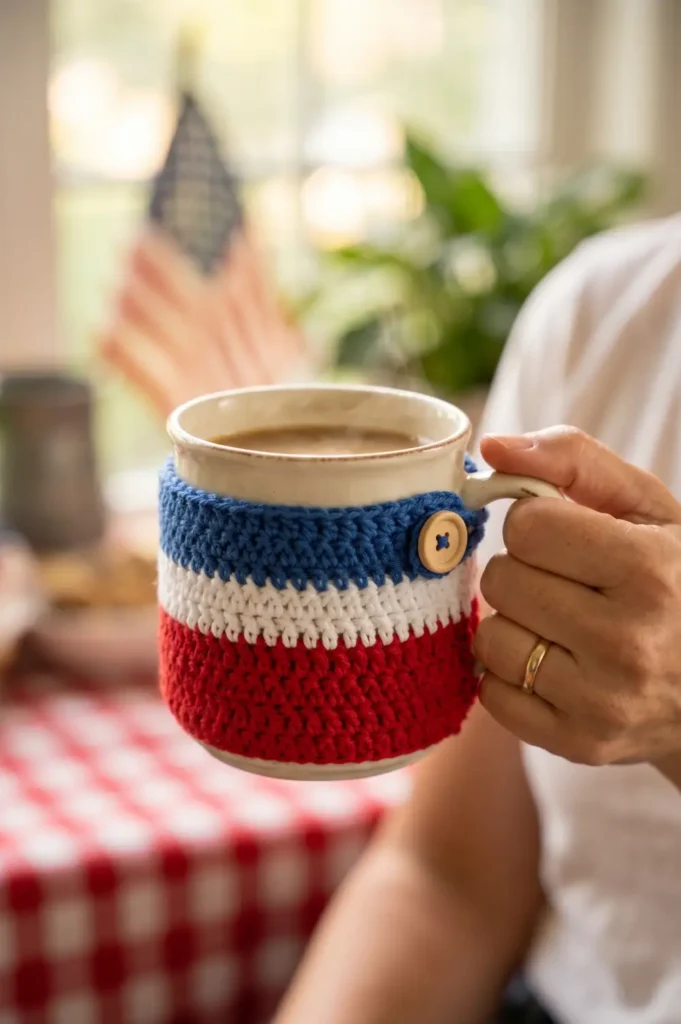
Mug cozies are fantastic stash busters and make sweet little gifts.
Setup
- Use red yarn and chain 28, or enough stitches to wrap snugly around your mug
Main Body
- Work rows of half double crochet for 4 inches in red
- Half double crochet gives a thicker, stretchier fabric ideal for insulation
Color Stripes
- Switch to white and work 1 row
- Switch to blue and work 1 row
Finishing
- Join the short ends together with a slip stitch seam to form a ring around the mug
- Weave in all loose ends from color switches before seaming
Add a small button for closure or just crochet a loop on one end to button it shut.
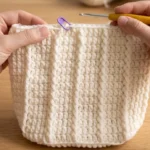
9. Easy 4th of July Crochet Headband
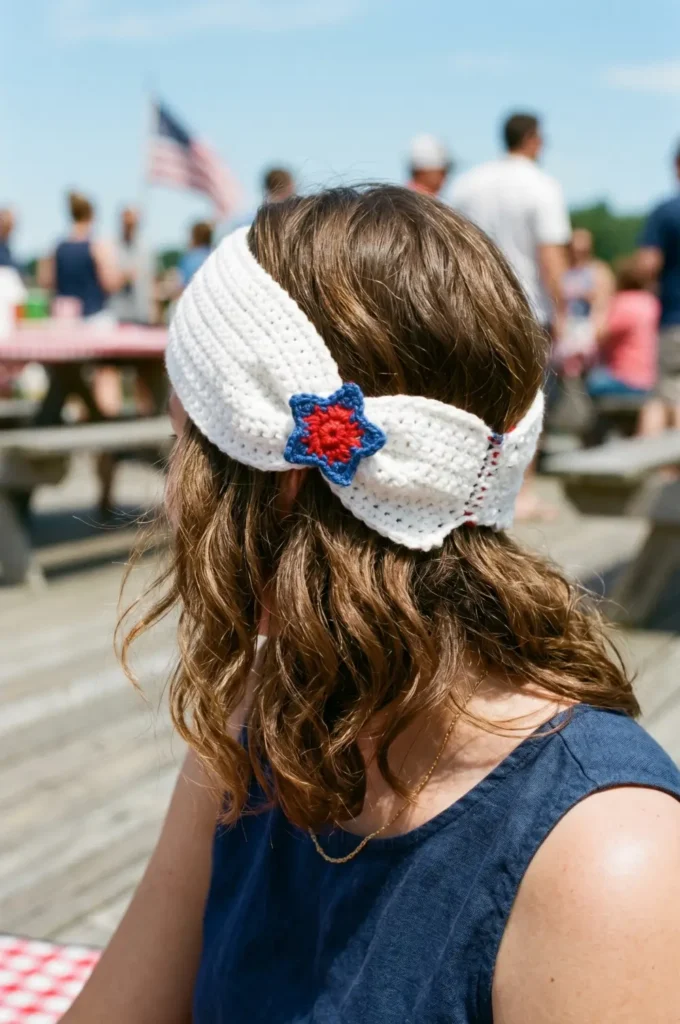
A crocheted headband is one of those things that looks much harder than it is.
Setup
- Use white yarn and chain 10
Strip
- Work rows of single crochet until the strip measures about 18 inches long
Shaping
- Fold the strip in half and join the ends together
- Twist the center once to create a bow shape
- Tack the twist in place with a few firm stitches to hold the bow shape
Crochet a small flower or star in red and blue and attach it to the twist point. So cute for a July 4th gathering.
10. Red, White & Blue Crochet Scrunchie
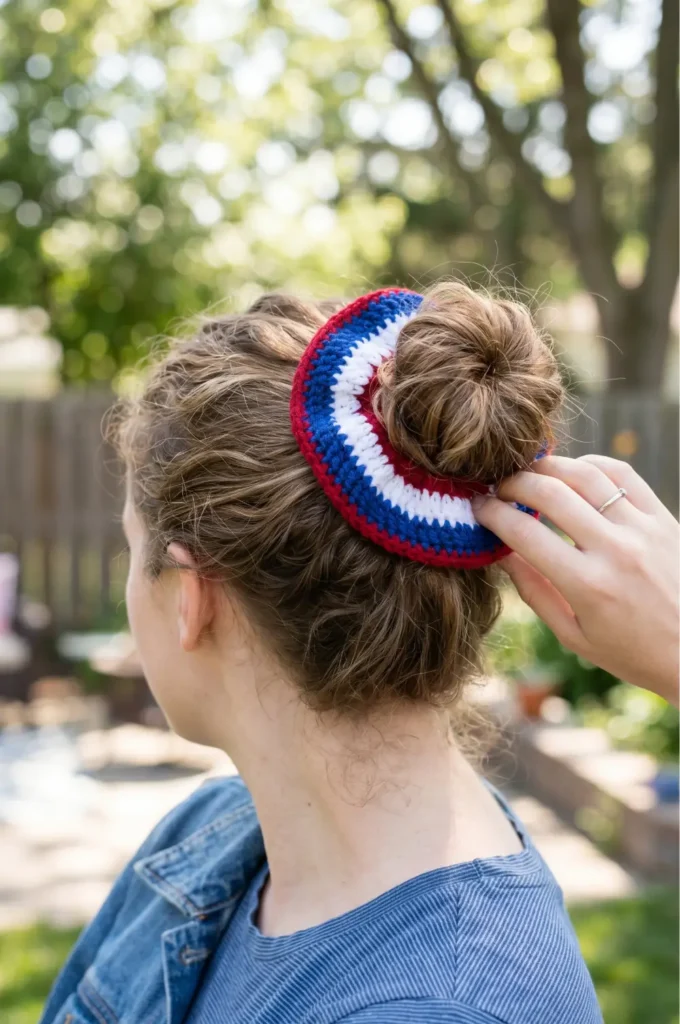
Hair scrunchies are super trendy and take less than 30 minutes.
Materials
- Hair tie
- 4.0mm hook
- Lightweight yarn in red, white, and blue
Setup
- Attach yarn to the hair tie with a slip stitch to secure it in place
Covering the Hair Tie
- Single crochet over the entire hair tie, working stitches snugly around it until it is fully covered
- Keep tension consistent to avoid gaps or bunching around the tie
Color Detail
- Switch between red, white, and blue every few stitches to create a striped look
- Vary the stitch count between color switches for a more organic, uneven stripe effect if desired
Finishing
- Slip stitch to close and fasten off once the hair tie is fully covered
- Weave in all loose ends securely so they don’t catch in hair
Join and fasten off. Wear it or gift it.
11. Easy Crochet Independence Day Table Runner
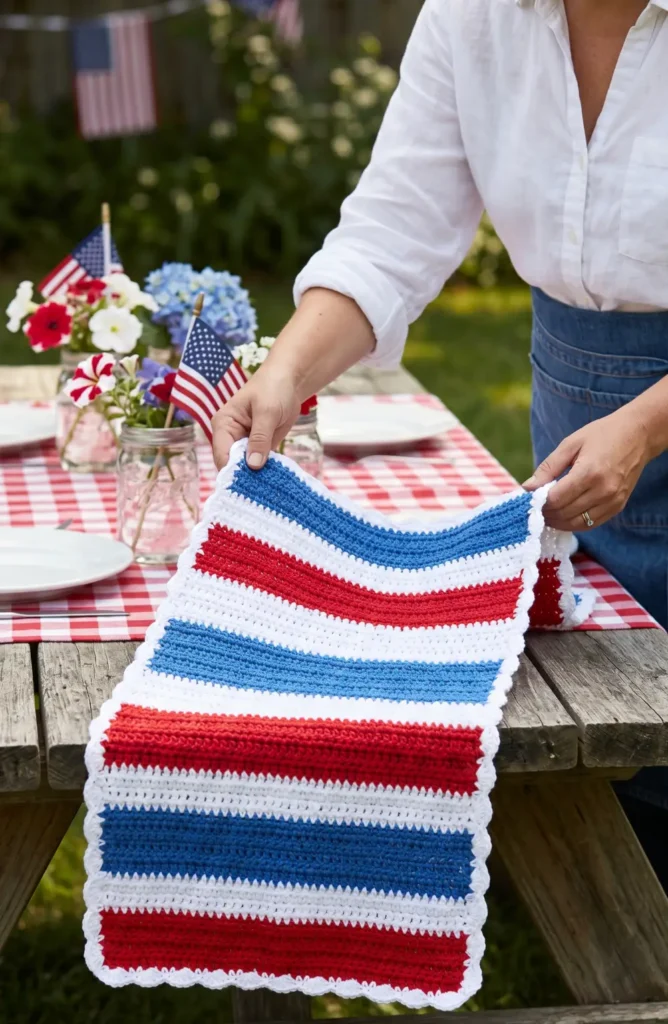
This project makes your July 4th table look like it was styled for a magazine.
Setup
- Use red yarn and chain 21
- Double crochet gives a looser, drapey fabric well suited for a table runner
Main Body
- Work double crochets in rows for 6 rows in red
- Switch to white and work 2 rows
- Switch to blue and work 2 rows
- Continue alternating colors in the same pattern until the runner measures about 36 inches long
Tips
- Carry unused yarn loosely up the side edge to avoid too many loose ends
- Block the finished runner flat to even out the stitches and straighten the edges
Finishing
- Fasten off and weave in all loose ends from each color switch
- Optionally add a border round of single crochet in red or blue to frame the edges neatly
Add a simple shell stitch border in white along both long edges to finish it off cleanly.
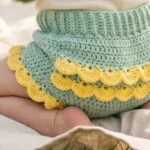
12. Patriotic Mason Jar Cozy Crochet Pattern
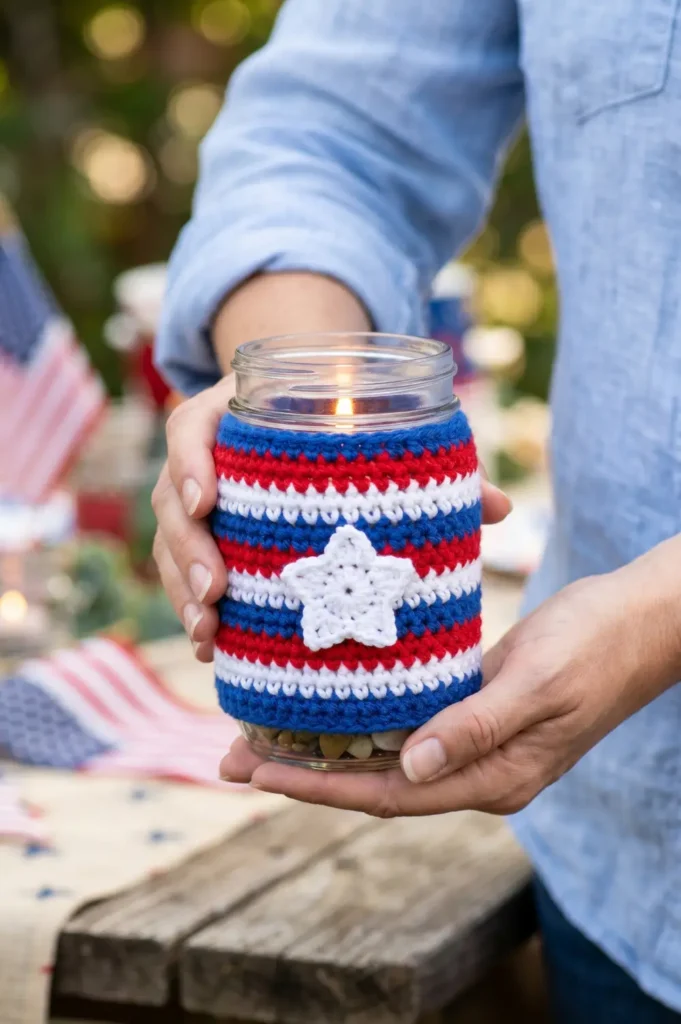
These are adorable for holding candles or flowers at your 4th of July party.
Measurements
- Measure the circumference of your mason jar before starting
- Also measure the height of the jar to know how many rows to work
Setup
- Chain the number of stitches matching your jar’s circumference
- Adjust stitch count to an even number for easier color switching
Main Body
- Work rows of single crochet until the piece is tall enough to slide over the jar
- Keep tension even and slightly firm so the cozy holds its shape on the jar
Color Stripes
- Switch colors every 2 rows, rotating through red, white, and blue
- Carry unused yarn loosely up the side edge to minimize loose ends between color switches
Finishing
- Join the short ends together with a slip stitch seam to form a cylinder
- Weave in all loose ends from each color switch
- Slide the cozy over the jar and adjust for a snug fit
Slip it over the jar, add a flower or star motif on the front, and fill with a tea light for a beautiful centerpiece.
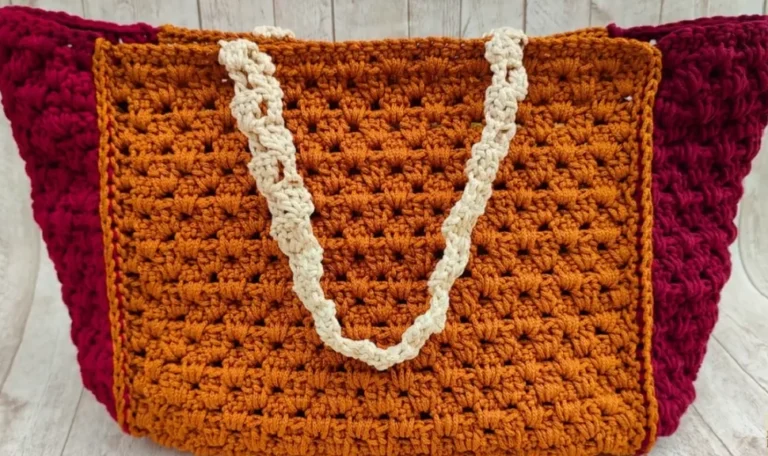
13. Easy 4th of July Crochet Tote Bag
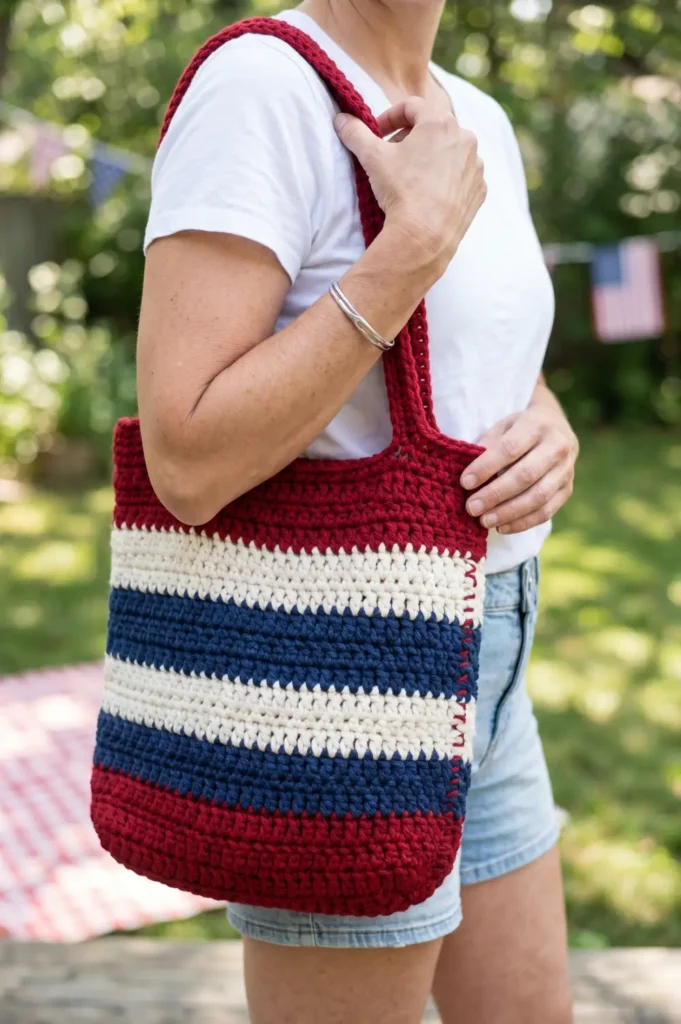
A patriotic tote bag is practical and festive.
Setup
- Use bulky yarn and a 6.0mm hook
- Bulky yarn gives the bag structure and durability for everyday use
Main Body
- Chain 40
- Work rows of double crochet for about 14 inches
- Double crochet creates a sturdy, open weave well suited for a tote bag
Seaming
- Fold the piece in half with wrong sides facing
- Single crochet up both sides to seam them together
- Single crochet seam adds a clean, visible edge that doubles as a decorative detail
Handles (make 2)
- Chain 24 inches in length
- Single crochet back over the entire chain for thickness and strength
- Repeat for the second handle
Attaching Handles
- Attach both ends of each handle to the top corners of the bag
- Sew each end down firmly with several stitches to secure under the weight of the bag’s contents
Finishing
- Weave in all loose ends thoroughly
- Optionally work a border round of single crochet around the top opening for a neat, finished edge
Stripe the body in red, white, and blue for the full patriotic effect.
14. Crochet American Flag Wall Hanging
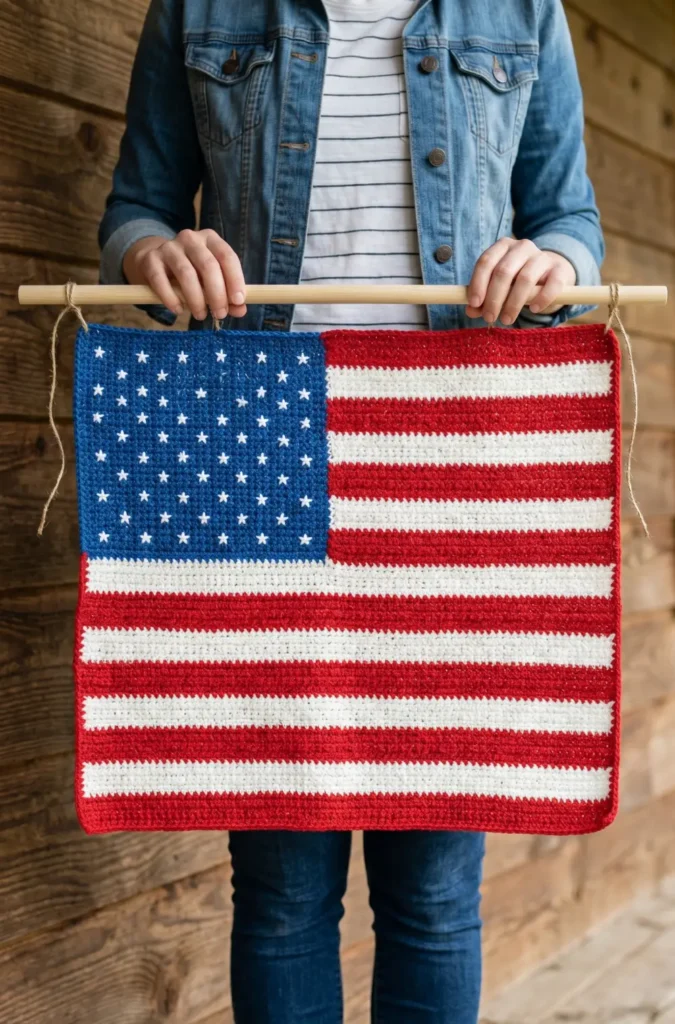
This one is a little more involved but absolutely stunning when finished.
Setup
- Use red and white yarn with an appropriate hook size for your chosen yarn weight
- Plan your starting chain to measure 20 inches wide before beginning
Stripes (make 13 total)
- Work rows of single crochet in alternating red and white stripes
- Make each stripe about 3 inches tall and 20 inches wide
- Switch colors cleanly at the end of each stripe to keep edges neat
- Carry unused yarn loosely up the side to minimize loose ends between color switches
Blue Canton (upper left rectangle)
- Join blue yarn at the upper left corner once all stripes are complete
- Work over the red and white section to create a solid blue rectangle
- Match the rectangle height to cover the top 7 stripes and width to cover roughly one third of the total width
- Use surface slip stitch or crochet the rectangle separately and sew it on for a cleaner finish
Finishing
- Weave in all loose ends from every color switch
- Block the finished piece flat to even out the stripes and square up the edges
- Optionally add a border round of single crochet around the entire piece to frame it neatly
Use a yarn needle to embroider small stars onto the blue section in white. Attach a wooden dowel along the top and hang with twine.
15. Beginner-Friendly Crochet Bandana Pattern
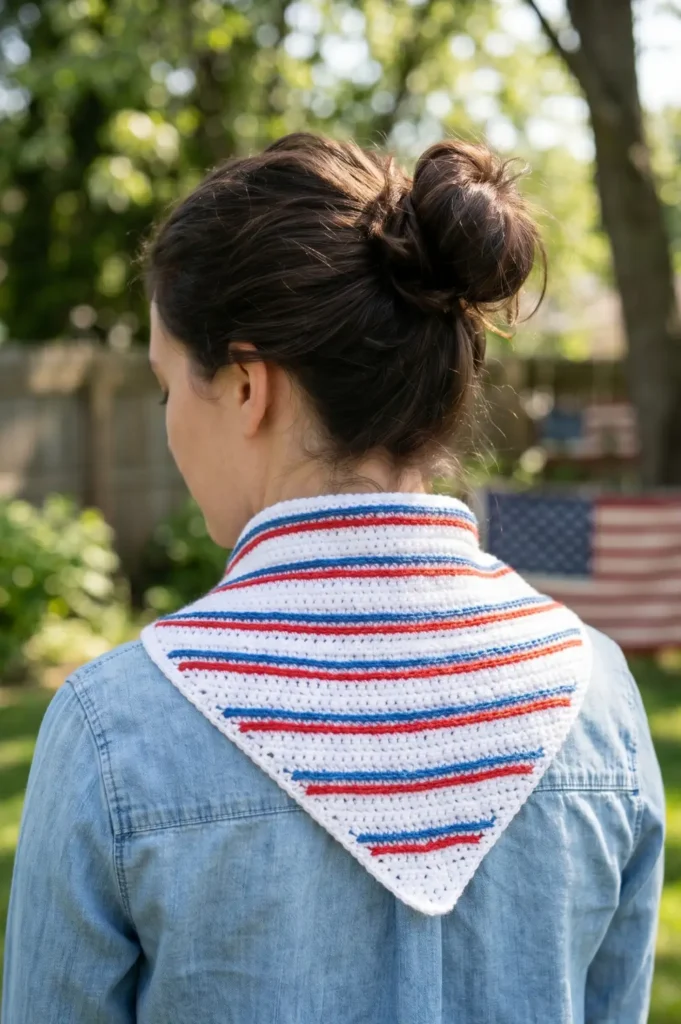
A crocheted bandana sounds fancy but is actually just a triangle.
Setup
- Use white yarn and chain 90
- This long starting chain forms the wide base of the triangle shape
Foundation Row
- Row 1: single crochet across all 90 stitches
- Keep tension even across the full length of the row
Shaping the Triangle
- Row 2: decrease one stitch at each end to begin tapering
- Continue decreasing one stitch at each end every row
- Maintain single crochet across all remaining stitches between the decreases
- Keep edges neat by working decreases consistently at the very start and end of each row
Finishing
- Continue until only 3 stitches remain
- Fasten off and weave in all loose ends
- Block the finished triangle flat to straighten the edges and even out the point at the tip
Weave in red and blue stripes using a yarn needle after the piece is complete. Tie around your neck or head for a festive look.
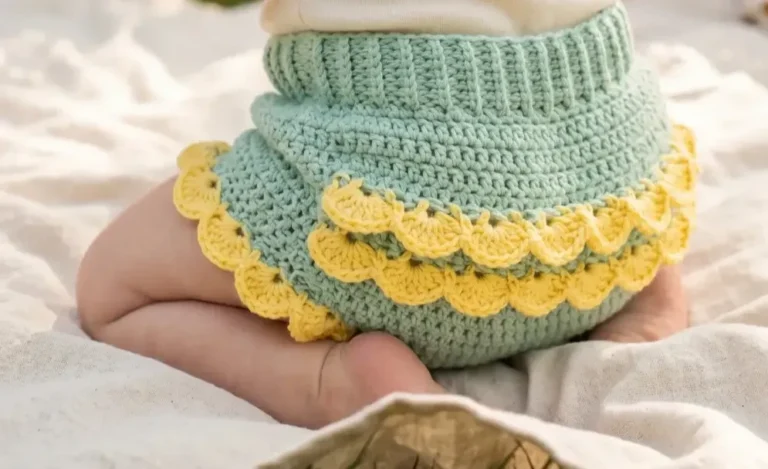
16. Easy Patriotic Crochet Baby Booties
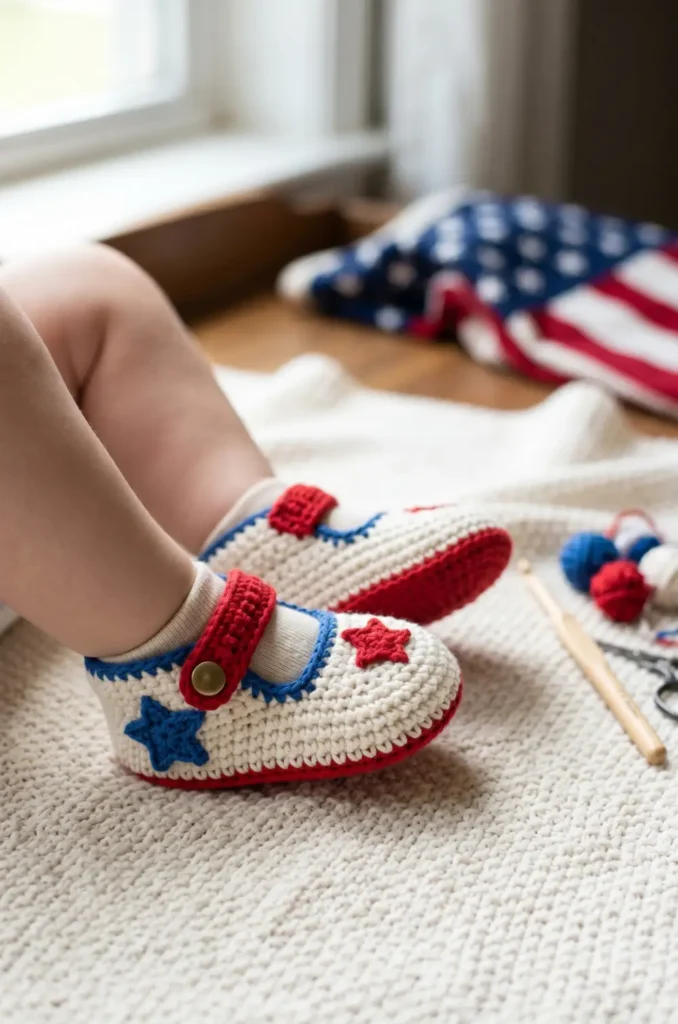
These tiny shoes are the most adorable thing you’ll make all summer.
Setup
- Use a 3.5mm hook and soft cotton yarn
- Cotton yarn is ideal for baby booties as it is breathable and gentle on delicate skin
Sole
- Chain 12 to form the sole base
- Round 1: work 3 single crochets in the first stitch, 10 single crochets across, 3 single crochets in the last stitch, then continue back along the other side
- The 3 stitches at each end create a rounded oval sole shape
Building the Sides
- Round 2: increase at each end again to widen the sole slightly
- Work 2 more rounds without increasing to build up the sides of the bootie
Shaping the Toe
- Work decreases at the front of the bootie to close and shape the toe
- Decrease gradually and evenly to avoid puckering at the tip
- Stuff loosely with a small amount of fiberfill if a more structured shape is desired
Strap
- Chain a short length in blue or red to form the strap
- Single crochet back over the chain for thickness and durability
- Attach both ends of the strap to either side of the bootie opening
- Optionally add a small button or snap for a decorative and functional closure
Finishing
- Fasten off and weave in all loose ends securely
- Make a second bootie to match
Make 2 (don’t forget the second one, it happens to all of us).
17. Red, White & Blue Crochet Pillow Cover
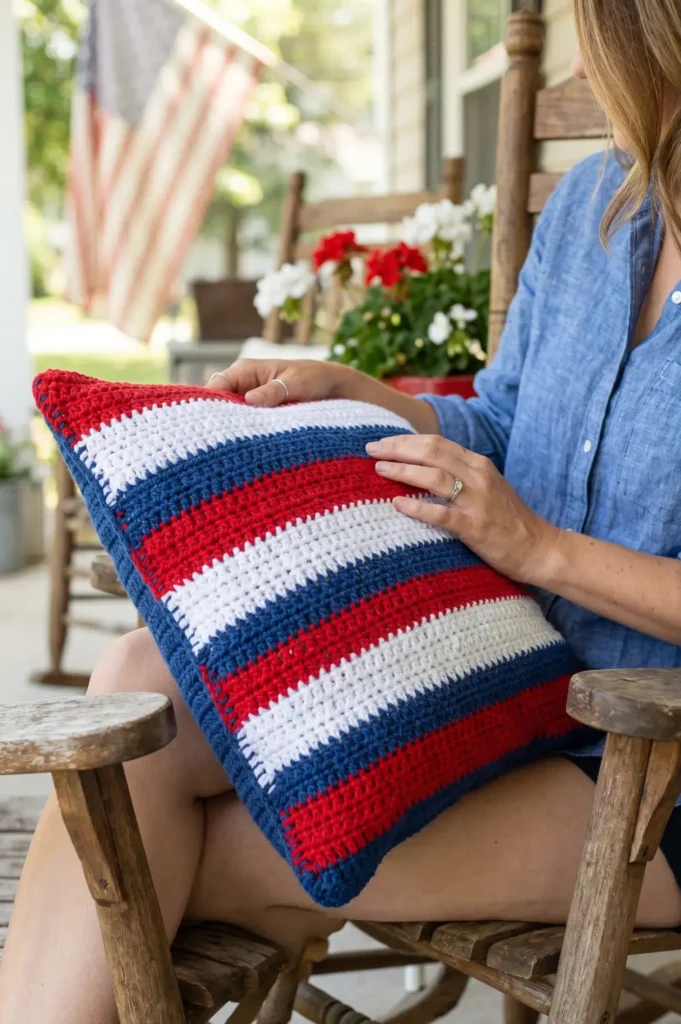
This project is a great way to use up yarn scraps.
Setup
- Measure your pillow insert width before starting and chain the matching number of stitches
- Use a hook size appropriate for your chosen yarn weight for an even, consistent fabric
Stripe Pattern
- Work rows of double crochet in the following stripe sequence:
- 4 rows red
- 4 rows white
- 4 rows blue
- Double crochet creates a thicker, structured fabric well suited for a pillow cover
Building the Panels
- Continue the stripe sequence until you have two panels long enough to fold around your pillow insert
- Add extra length to one panel to create a flap closure that overlaps at the back
- Keep tension consistent throughout to ensure both panels are the same width
Assembly
- Place both panels together with wrong sides facing
- Single crochet around three sides to seam them together
- Leave one short end open for inserting the pillow
Flap Closure
- Fold the extra length of one panel over the opening to form the flap
- Optionally add buttons or ties along the flap edge to keep the closure secure
Finishing
- Weave in all loose ends from every color switch
- Block both panels flat before assembly to even out the stripes and square up the edges
- Insert the pillow through the open end and fold the flap closed
Slip stitch the side seams and fold the flap over. No zipper needed.
18. Easy Crochet Placemats for July 4th
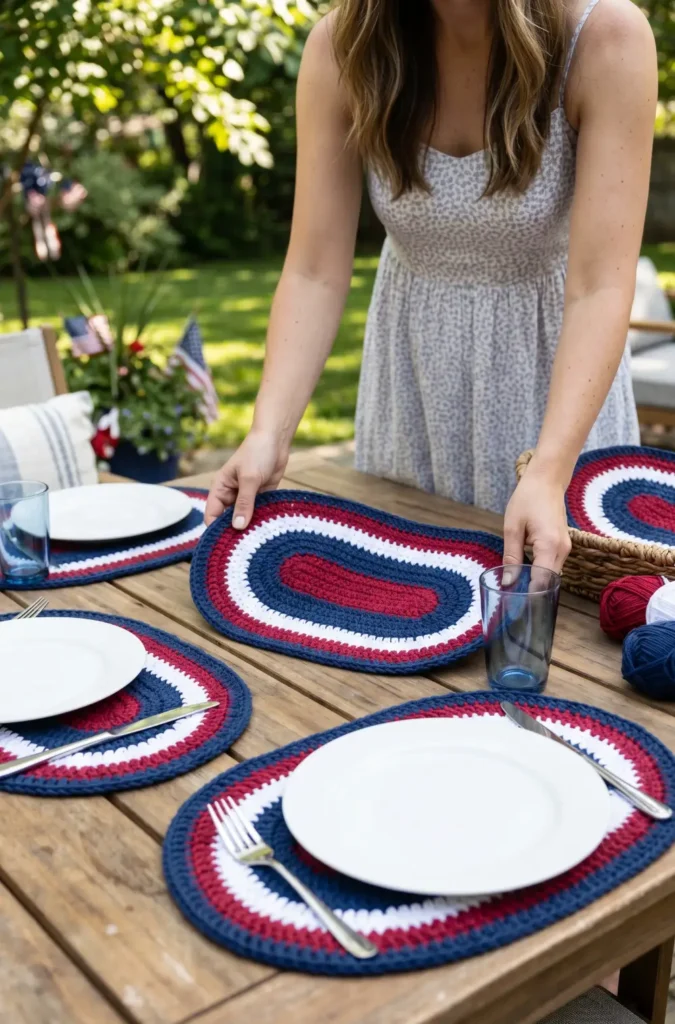
Oval placemats look gorgeous in patriotic colors.
Setup
- Begin with a foundation chain of 15 stitches to form the oval base
Foundation Round
- Round 1: single crochet around both sides of the foundation chain
- Increase at each end to create the rounded oval shape
Building the Rug
- Continue working in rounds, increasing 6 stitches per round to keep the rug flat
- Maintain consistent increases to prevent the edges from curling or ruffling
- Work on a flat surface periodically to check the rug is lying flat as you go
Color Stripes
- Switch colors every 2 rounds, rotating through red, white, and blue
- Carry unused yarn loosely on the wrong side to minimize loose ends between color switches
- Join new colors cleanly at the same point each round to keep the color transitions neat
Finishing
- Slip stitch to close the final round once the rug reaches your desired size
- Fasten off and weave in all loose ends securely on the wrong side
- Block the finished rug flat if needed to even out the shape and flatten any curling edges
Work until the placemat is about 12 by 18 inches. Make a set of 4 or 6 for the whole table.
19. Beginner Crochet Water Bottle Holder
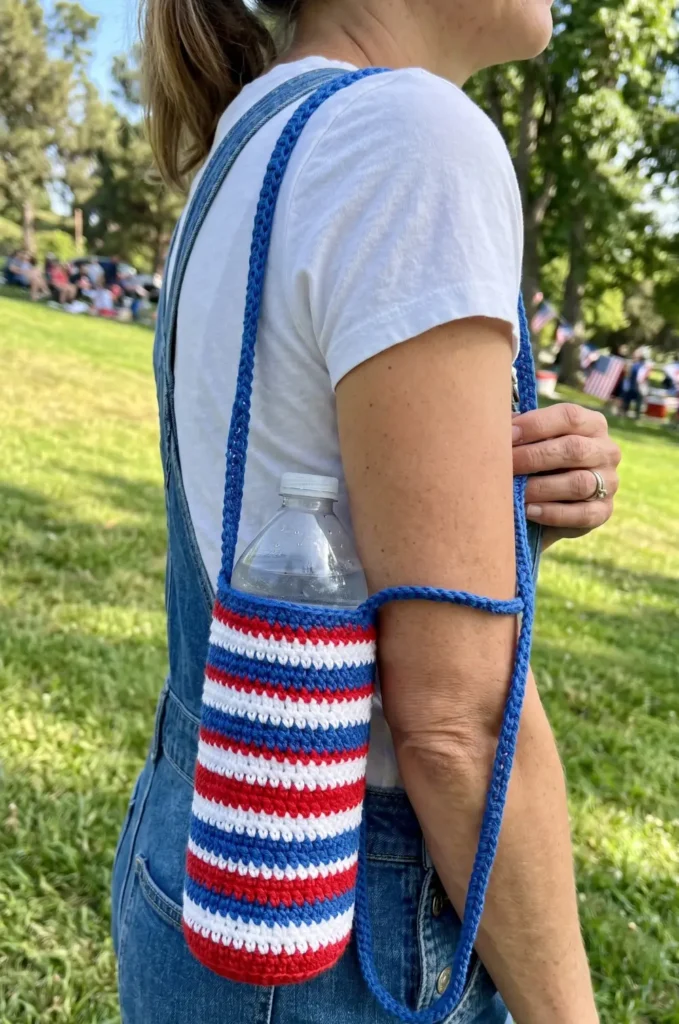
Great for picnics, hikes, and parade days.
Setup
- Chain 30 and join into a ring to form the base of the bag
- Ensure the chain lies flat and is not twisted before joining
Main Body
- Work rounds of single crochet in red, white, and blue stripes
- Continue until the tube measures about 6 inches tall
- Keep color switches at the same point each round for clean, even stripes
Closing the Bottom
- Work decreases evenly around the bottom of the tube to close it
- Decrease gradually over several rounds to avoid puckering at the base
- Fasten off and weave in the end securely once the bottom is fully closed
Strap
- Chain a length long enough to go over your shoulder comfortably
- Single crochet back over the entire chain for thickness and durability
- Attach both ends of the strap securely to opposite sides of the bag opening
- Sew each end down firmly with several stitches to hold up under the weight of the bag contents
Finishing
- Weave in all loose ends from every color switch
- Optionally work a round of single crochet around the top opening for a neat, finished edge
This little holder keeps your water bottle secure and looks great.
20. Simple Patriotic Crochet Earrings
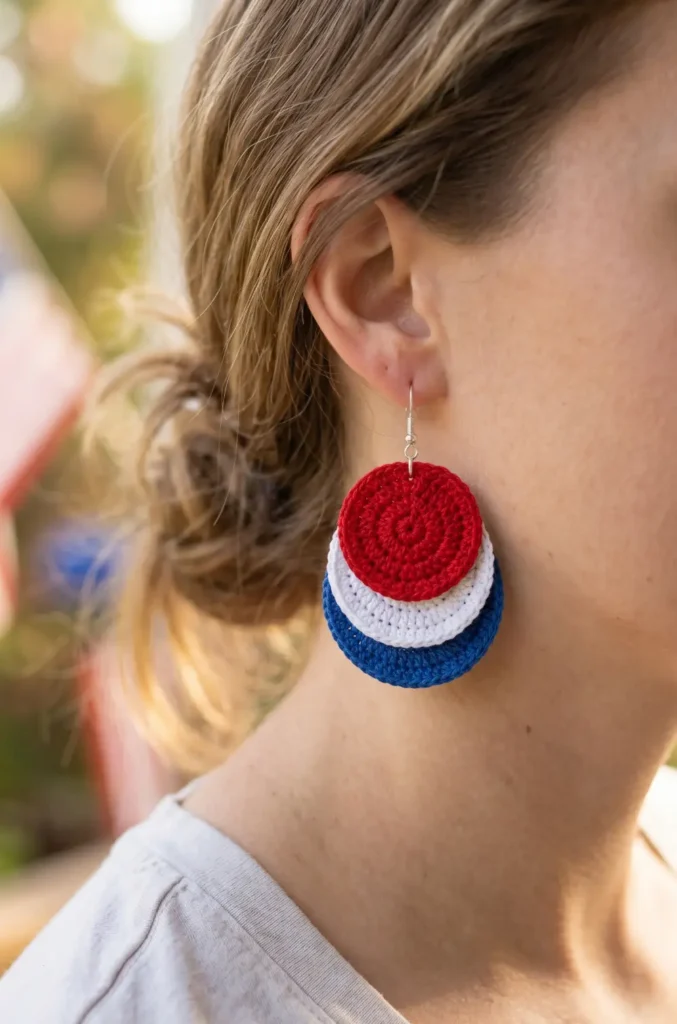
Yes, you can crochet earrings. They’re stunning.
Setup
- Use size 10 crochet thread and a 1.5mm hook
- Size 10 thread produces a fine, delicate fabric ideal for small decorative pieces
Foundation
- Chain 4 and join into a ring
- Work 10 single crochets into the ring to form a small disc
Building the Disc
- Add one more round with slight increases to expand the disc evenly
- Keep tension firm and consistent throughout for a neat, even finish
- The small scale of this project requires careful stitch placement due to the fine thread
Stiffening
- Apply fabric starch evenly over the finished disc
- Shape the piece carefully while still damp
- Allow to dry completely on a flat surface to set the shape
- Apply a second coat of starch for extra rigidity if needed
Finishing
- Fasten off and weave in all loose ends as neatly as possible given the fine thread
- Handle gently after stiffening to preserve the shape
Attach earring hooks through the top. Make them in red, white, or blue or layer all three colors.
21. Easy Crochet BBQ Pot Holder Pattern
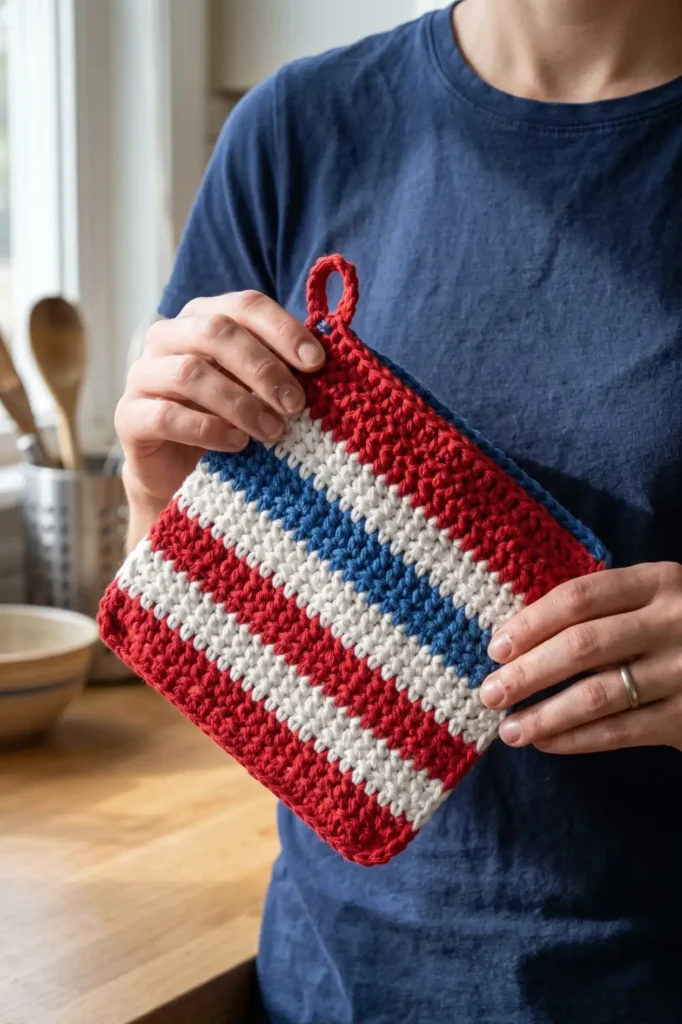
A functional, cute, and completely practical July 4th make.
Safety Note
- Use 100% cotton yarn only, synthetic fibers can melt under heat and are not safe for pot holders
Setup
- Use red cotton yarn and chain 20
Main Body
- Work rows of half double crochet for 4 rows in red
- Switch to white and work 4 rows
- Switch to blue and work 4 rows
- Continue alternating colors in the same sequence until the pot holder measures about 7 by 7 inches
- Half double crochet creates a dense, thick fabric well suited for heat protection
Heat Protection
- Work at least 2 layers thick for adequate heat protection
- Either crochet two separate panels and sew them together, or fold the piece in half and seam the edges
- Double layers significantly increase the heat resistance of the finished pot holder
Finishing
- Weave in all loose ends from every color switch thoroughly
- Fasten off securely and trim any remaining tails
- Optionally add a small chain loop at one corner for easy hanging storage
- Wash before first use to preshrink the cotton and remove any residue from the yarn
Add a loop at one corner for hanging.
22. Crochet Star-Spangled Throw Blanket
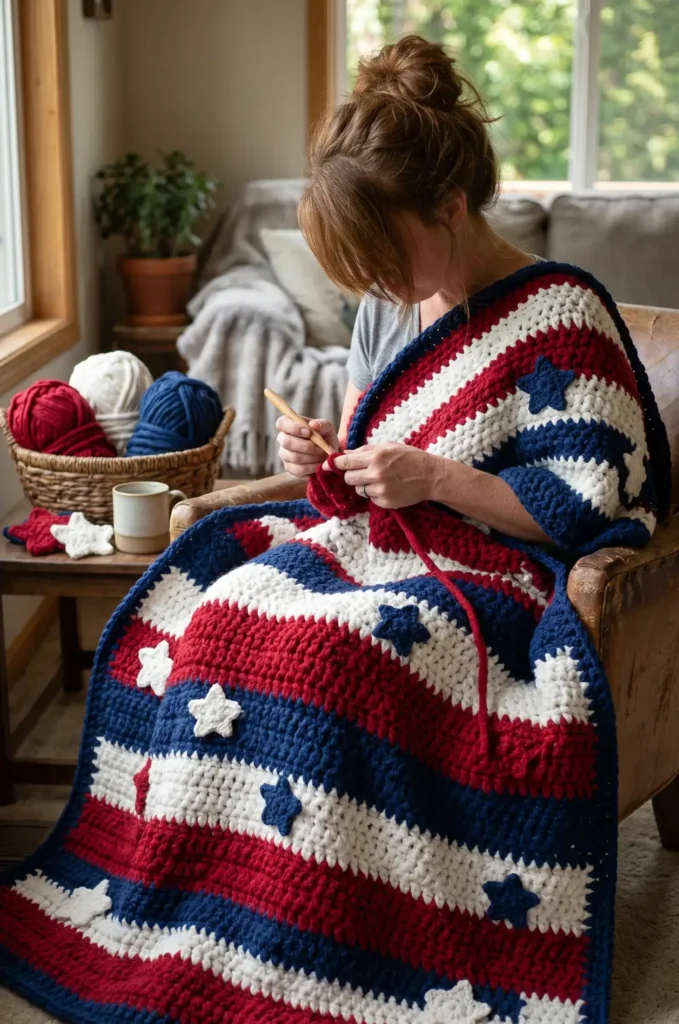
A bigger project but so worth it for cozy 4th of July evenings.
Setup
- Use bulky yarn and an 8.0mm hook
- Bulky yarn works up quickly and creates a thick, cozy blanket with good drape and warmth
Foundation
- Chain 100 to form the width of the blanket
- Count stitches carefully before starting the first row to ensure an even foundation
Stripe Pattern
- Work rows of double crochet in the following stripe sequence:
- 10 rows red
- 10 rows white
- 10 rows blue
- Alternate the sequence continuously until the blanket reaches your desired length
Tips
- Double crochet creates a looser, drapey fabric that works up faster than single crochet for large projects like blankets
- Carry unused yarn loosely up the side edge to minimize the number of loose ends between color switches
- Check your stitch count periodically to ensure no stitches are accidentally added or dropped
Finishing
- Fasten off and weave in all loose ends from every color switch thoroughly
- Block the finished blanket flat to even out the stripes and square up the edges
- Optionally add a border round of single crochet in red or blue to frame the blanket neatly
Scatter a few crocheted star appliques across the surface and sew them on at random for a starry night effect. Add a simple border in navy blue.
23. Easy Crochet Hair Bow in Patriotic Colors
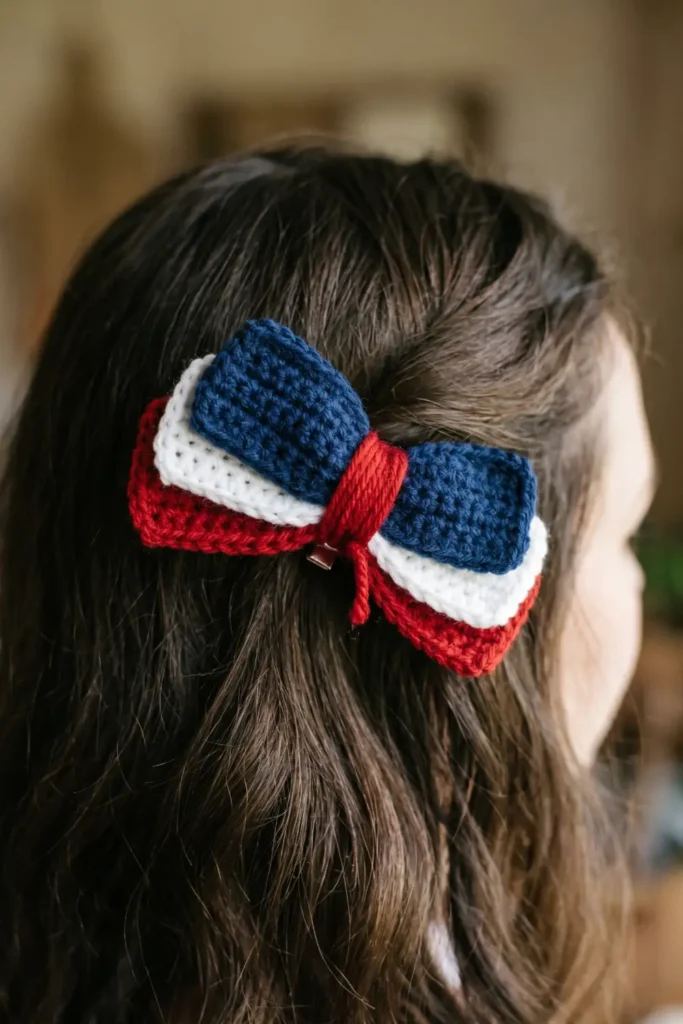
Hair bows are everywhere right now and these patriotic ones are so cute.
Setup
- Use red, white, and blue yarn separately for three individual rectangles
Rectangles (make 3)
- Chain 30 with red yarn
- Work rows of single crochet until the piece measures about 2 by 4 inches
- Fasten off and weave in ends
- Repeat the same process with white yarn
- Repeat again with blue yarn
Assembly
- Layer all three rectangles directly on top of each other
- Align the edges as evenly as possible before pinching
- Pinch the center of all three layers tightly together simultaneously
- Wrap yarn firmly around the pinched center several times to hold the bow shape
- Tie off securely and weave in the ends at the center wrap
Finishing
- Fluff and adjust the loops on each side to create an even, full bow shape
- Optionally add a small strip of matching yarn wrapped around the center for a neater finish
- Attach to a hair clip, headband, or pin backing as desired
Wrap a short piece of yarn around the center pinch point 10 times and tie it off. Attach to a hair clip or bobby pin.
24. Beginner-Friendly Crochet Picnic Basket Liner
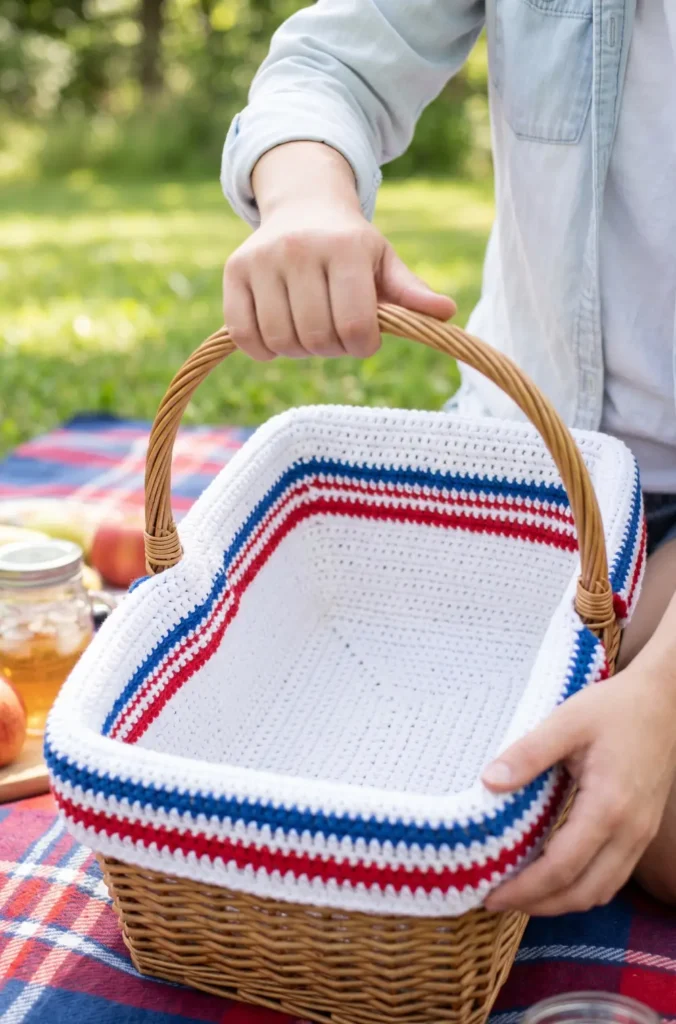
This project makes your picnic basket look extra charming.
Setup
- Measure the inside base dimensions and height of your basket before starting
- Use white cotton yarn and an appropriate hook size for a firm, structured fabric
Base Panel
- Crochet a flat rectangle to match the exact dimensions of the basket base
- Work in single crochet for a dense, even fabric that sits flat at the bottom
- Check the fit against the basket base periodically as you work and adjust as needed
Sides
- Work up the sides in rows to match the basket height
- Join at the corners of the base panel to begin working the side panels
- Keep tension firm and consistent so the liner holds its shape inside the basket
- Work each side panel separately and sew the corners together for a neat finish
Fit Check
- Place the liner inside the basket periodically to check the fit as you work
- Adjust stitch count or row height as needed for a snug, even fit
- The liner should sit smoothly against the basket walls without bunching or pulling
Finishing
- Fasten off and weave in all loose ends thoroughly
- Optionally add a round of single crochet along the top edge of the liner for a neat, finished rim
- Fold the top edge over the basket rim and tack in place with a few stitches if desired to keep the liner from shifting
Add red and blue stripes near the top edge. Fold over the top of the basket like a cuff for a really polished look.
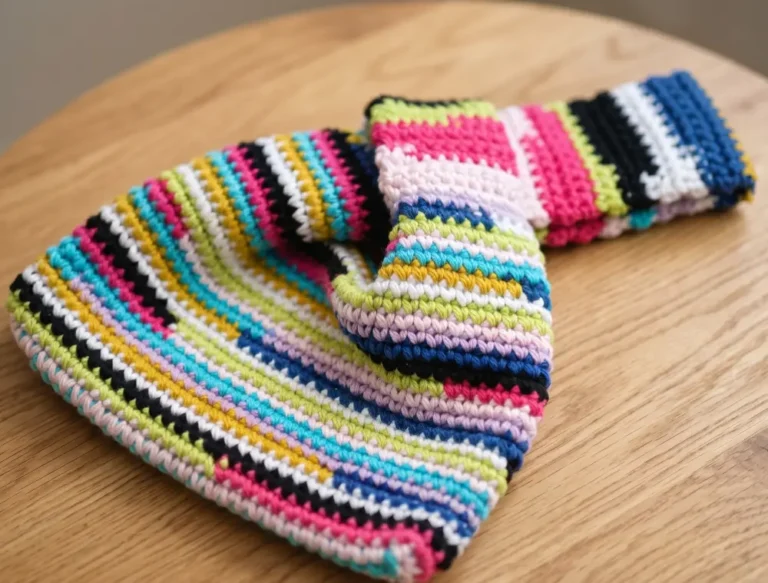
25. Easy Red, White & Blue Crochet Scarf
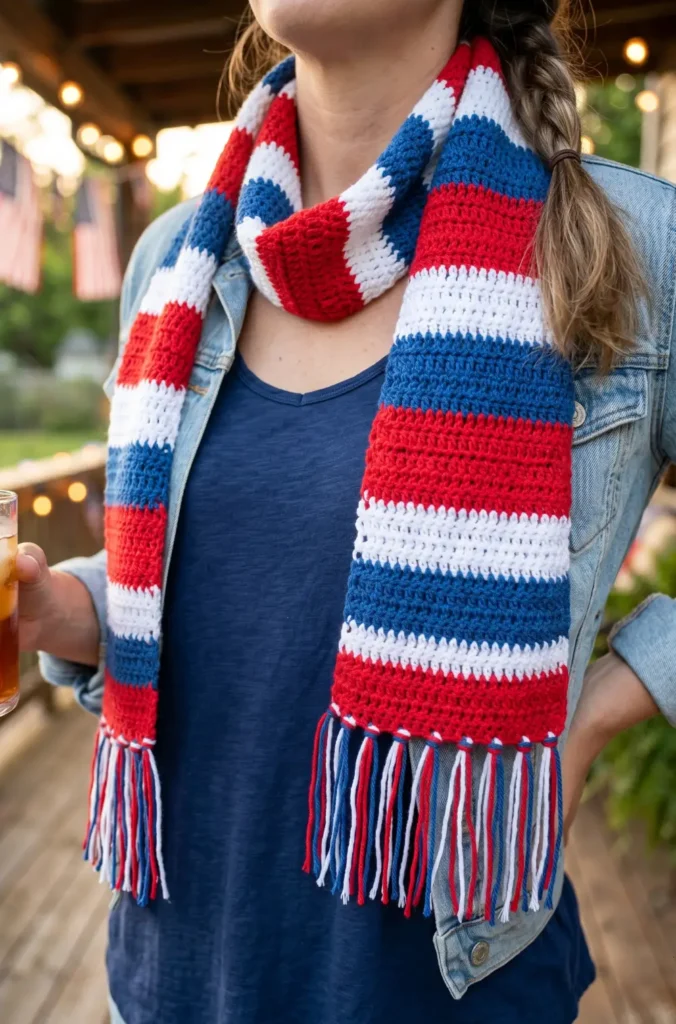
A lightweight summer scarf is actually something you can wear on cool July evenings.
Setup
- Use lightweight cotton yarn and an appropriate hook size for the yarn weight
- Cotton is breathable and comfortable against the skin, making it ideal for a scarf
Foundation
- Chain 20 to form the width of the scarf
- Keep the foundation chain loose to avoid a tight, puckered edge
Color Sequence
- Work rows of double crochet in the following sequence:
- 4 inches in red
- 4 inches in white
- 4 inches in blue
- Repeat the full color sequence continuously until the scarf measures about 60 inches long
- Double crochet creates a light, open fabric well suited for a decorative scarf
Tips
- Carry unused yarn loosely up the side edge to minimize loose ends between color switches
- Switch colors at the end of a row rather than mid-row for clean, straight color transitions
- Check the length periodically by laying the scarf flat to avoid stretching or bunching
Finishing
- Fasten off and weave in all loose ends from every color switch thoroughly
- Optionally add fringe at each short end by cutting lengths of yarn and attaching them through the edge stitches for a decorative finish
- Block the finished scarf flat to even out the stitches and straighten the edges
Finish each end with a simple fringe using all 3 colors. It’s lightweight enough to wear but warm enough for sitting outside after the sun goes down.
Frequently Asked Questions
What is the easiest 4th of July crochet project for an absolute beginner?
A coaster or a scrunchie. Both use basic single crochet and take under an hour to finish.
What type of yarn is best for July 4th crochet projects?
Cotton yarn is ideal for most projects. It’s durable, washable, and holds its shape well in warm weather.
What crochet hook size should a beginner start with?
A 5.0mm hook paired with worsted weight yarn is the most beginner-friendly combination.
Can I use any colors or should I stick to red, white, and blue?
Stick to red, white, and blue for the patriotic theme but feel free to swap shades. Navy and royal blue both work beautifully.
How long does a beginner crochet project take to complete?
Small projects like coasters or bookmarks take 30 to 60 minutes. Larger items like tote bags or blankets can take several hours or a few days.
Do I need to know many stitches to make these patterns?
Most of these patterns only use chain stitch, single crochet, and double crochet. Those three stitches will take you very far.
Where can I find free crochet patterns online?
Ravelry, Yarnspirations, and AllFreeCrochet are great resources with thousands of free patterns organized by skill level.
Is it cheaper to crochet your own decorations or buy them?
Usually cheaper to crochet, especially if you already have yarn on hand. A skein of yarn often costs less than a single store-bought decoration.
Can kids learn to crochet these patterns?
Yes, with adult supervision. Simple projects like coasters, bookmarks, and scrunchies are great for teaching kids the basics.
What do I do if I run out of yarn mid-project?
Join new yarn at the end of a row when possible. Make a simple knot, weave in both ends securely, and continue stitching.